Microsoft Entra
This guide illustrates how to configure IBM Application Gateway (IAG) as an OIDC relying party for Microsoft Entra ID.
This guide was written in October 2023, the steps below may change if a third-party provider modifies their administrative interfaces.
Pre-requisites
- Review the Third-Party Providers documentation for high-level information about using IAG with third-party identity providers.
- An active Microsoft Entra subscription. A Microsoft Entra ID Free tenant can be used.
Reference Resources
The following Microsoft documentation was used to prepare these configuration instructions:
Configuration
Microsoft Entra Configuration Steps
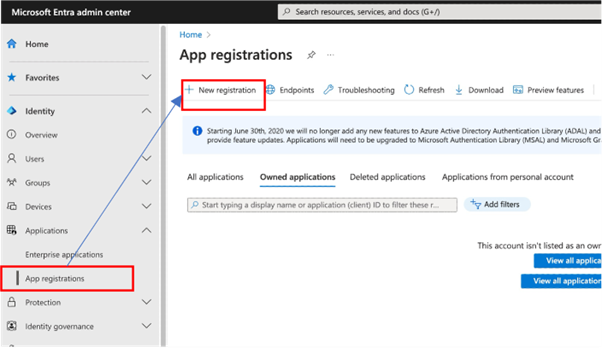
From the Entra ID administration console, browse to Applications > App Registrations and click New registration.
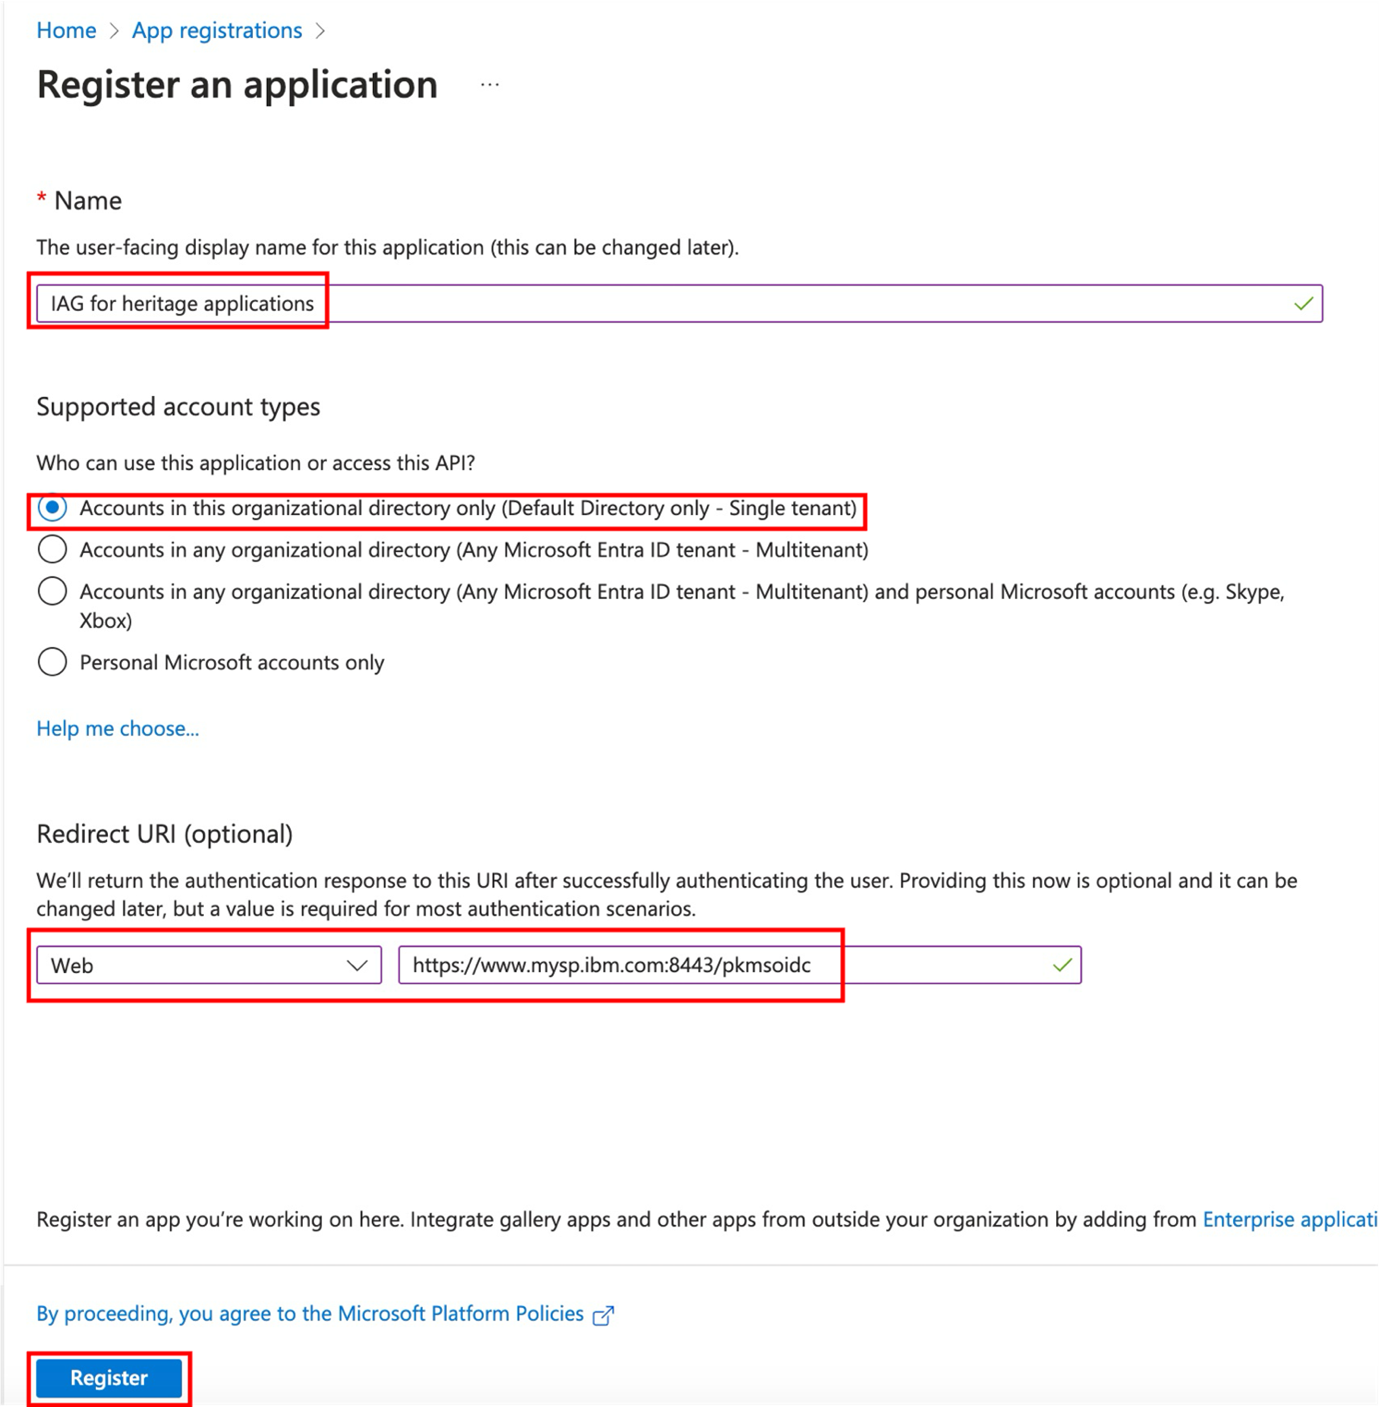
Complete the required Name, and Supported account types fields, and supply a Web type Redirect URI.
The Redirect URI is of the format https://<iag>/pkmsoidc. See Redirect URI for more details.
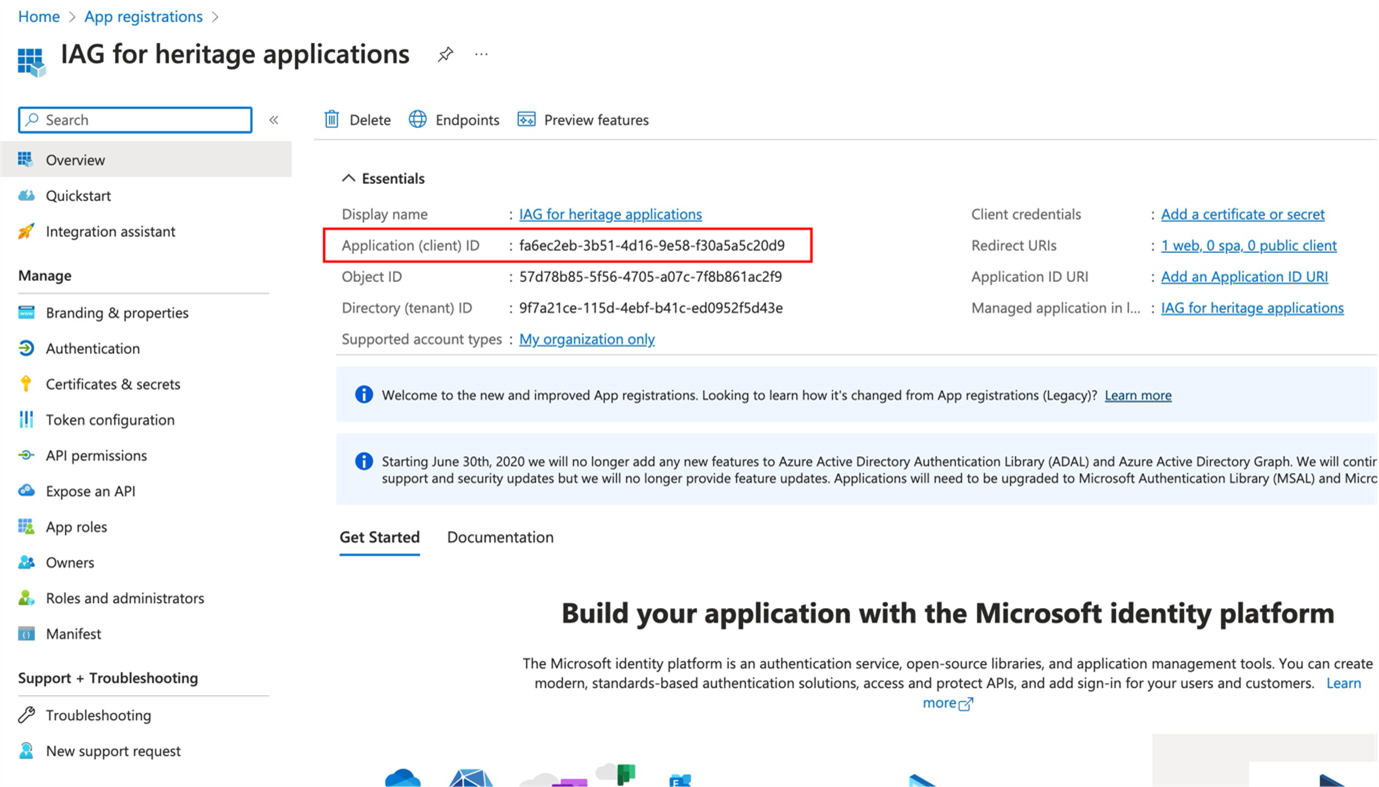
After the initial application definition is created, note the Application (client) ID field. In IAG, the Application (client) ID value is used in the client_id field.
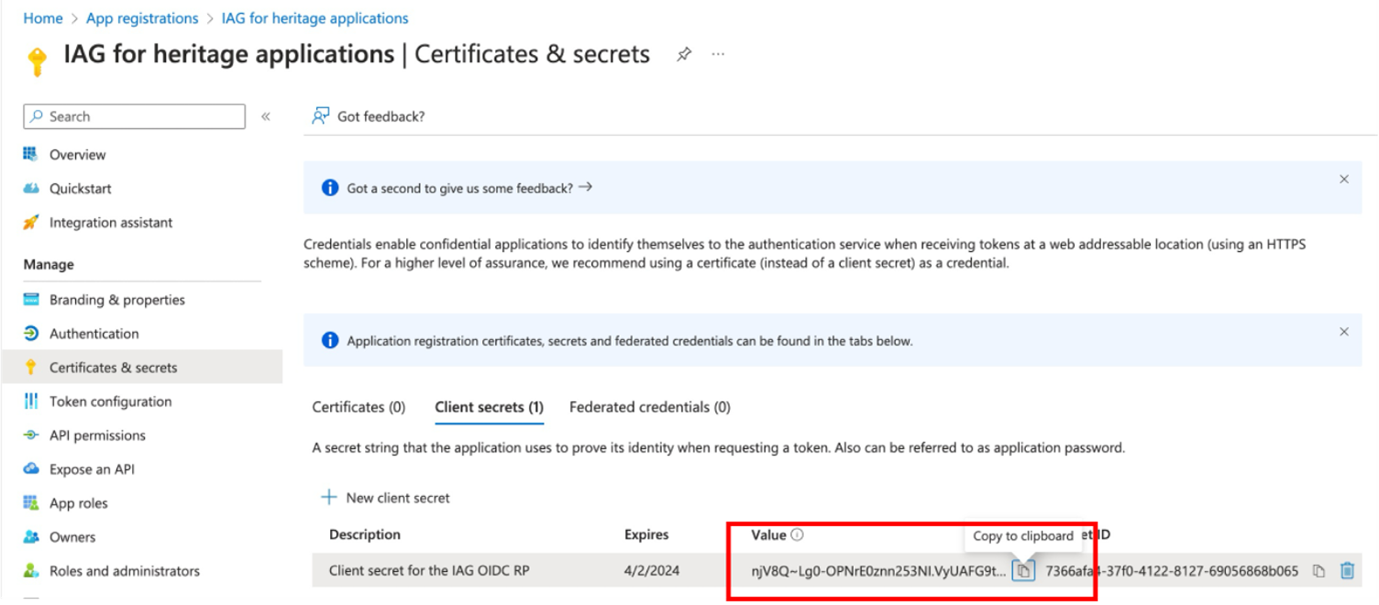
A client secret must be provisioned for the application. Note Microsoft Entra ID periodically expires client secrets, which must be considered in maintenance activities.
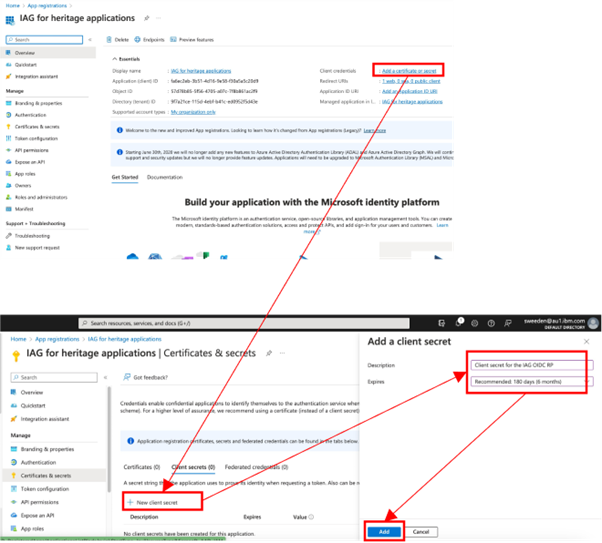
The client secret Value can now be retrieved. The generated client secret value in this example is njV8Q~Lg0-OPNrE0znn253NI.VyUAFG9t~ZV-cgL. In IAG, the client secret Value is used in the client_secret field.
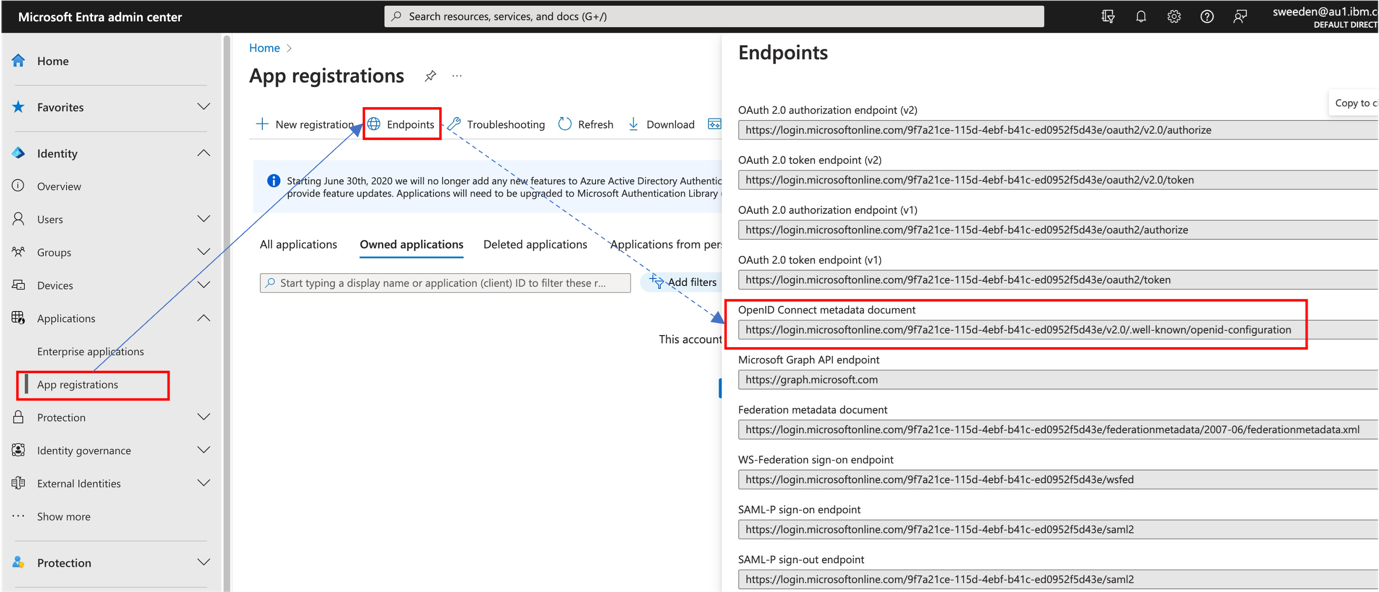
Find the OIDC metadata URL by browsing to Applications > App Registrations and selecting Endpoints. In the listed set of endpoints, locate the URL for the OpenID Connect metadata document. In IAG, this is the discovery_endpoint value.
IAG Configuration Steps
Using the value retrieved in the previous steps, complete the IAG configuration. The sample configuration contains enough information to allow IAG to perform single sign-on with Microsoft Entra ID.
identity:
  oidc:
    discovery_endpoint: "https://login.microsoftonline.com/9f7a21ce-115d-4ebf-b41c-ed0952f5d43e/v2.0/.well-known/openid-configuration"
    client_id:          "fa6ec2eb-3b51-4d16-9e58-f30a5a5c20d9"
    client_secret:      "njV8Q~Lg0-OPNrE0znn253NI.VyUAFG9t~ZV-cgL"
    scopes:
      - "profile"
      - "email"
Extra Configuration
Disabling user consent
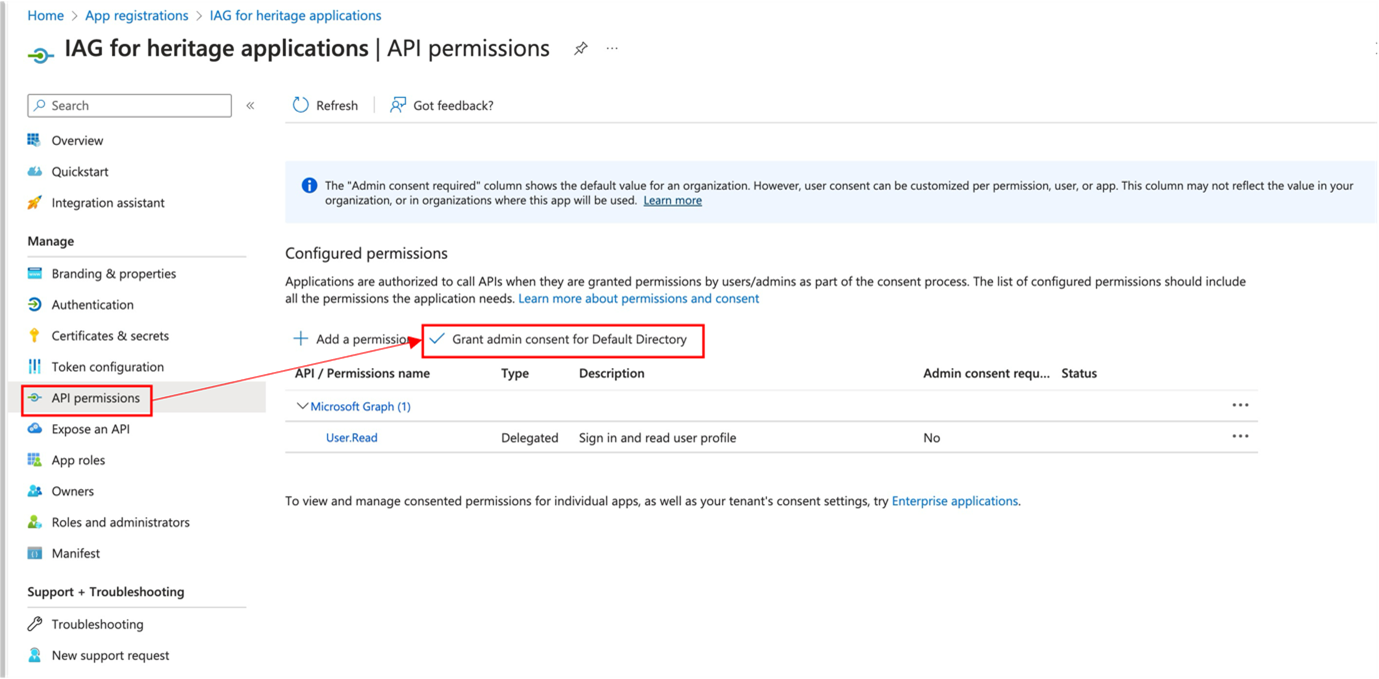
By default, Entra ID prompts users for consent to share single sign-on information between the IDP and the application the first time they sign in.
In scenarios where the owner of the IAG instance and application is also the owner of the IDP, the consent step can be superfluous.
Entra ID application configuration requires user consent by default, but consent can be granted at the administration level as an API permission.
Supplying extra user attributes in the id_token
A protected application often requires extra user attributes from the third-party identity provider. The user attributes need to be propagated to IAG as claims in the id_token.
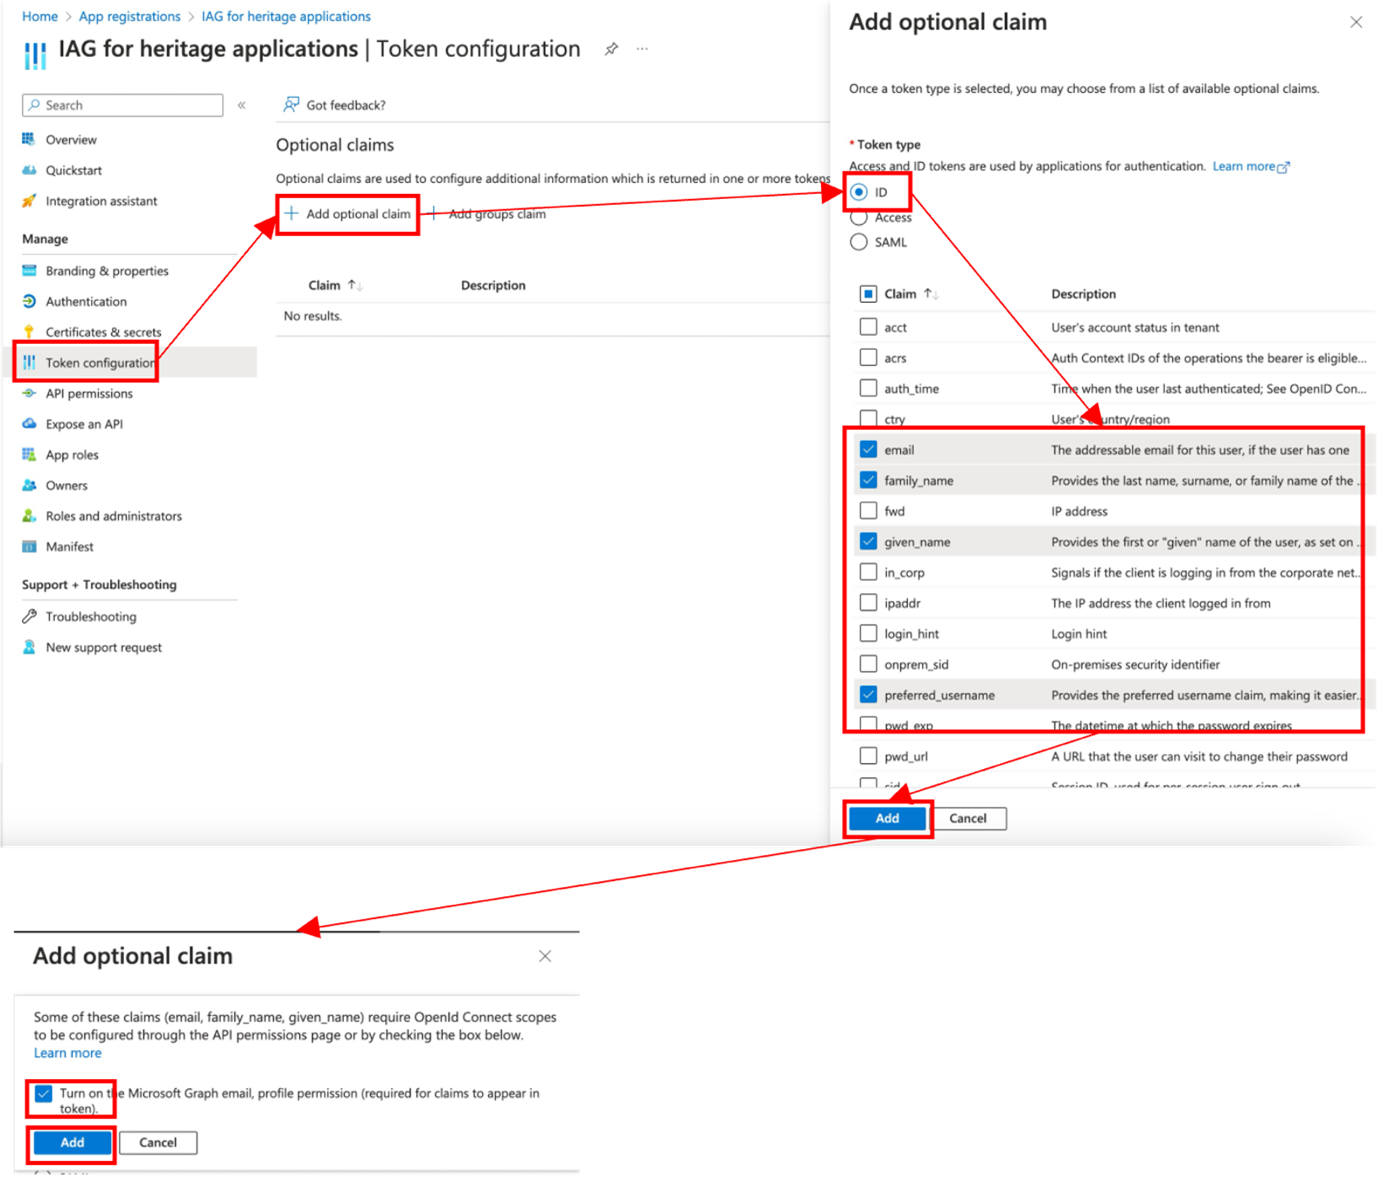
To configure extra attributes in Entra ID, select Token configuration and then click Add optional claim. In the Add optional claim window, set the Token type to ID, and then check the required Claim values.
The screenshot illustrates the process for adding extra claims, including email, which requires an extra API permission to be granted.
Front-channel logout URL
Entra ID can be configured with a logout URL for the application.
To configure this in Entra ID, select Authentication and enter the logout URL in the Front-channel logout URL field. The logout URL for IAG is of the format https://<iag>/pkmslogout.
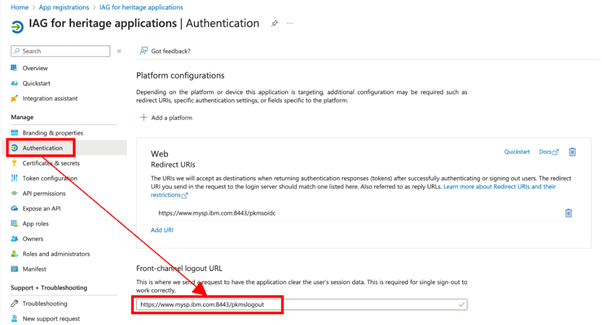
This URL is not related to the OpenID SLO profile, which is not supported by IAG.
Testing the Entra ID Integration
To test the configuration:
- Browse to the IAG credential viewer application. For more information, see Common IAG Configuration for information about this URL. In this example, the URL is
https://www.mysp.ibm.com:8443/ivcreds.

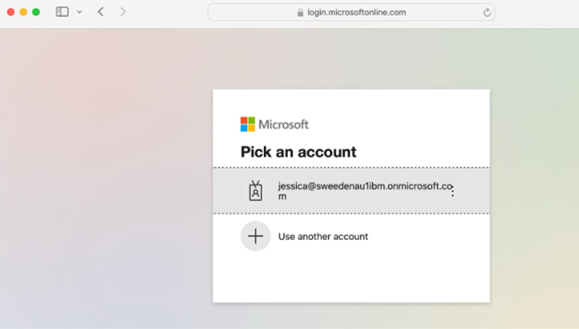
- The browser is redirected to Microsoft Entra ID for authentication. When the user consent step is not required (see Disabling user consent), the browser will be returned to the credential viewer application after authentication is completed.
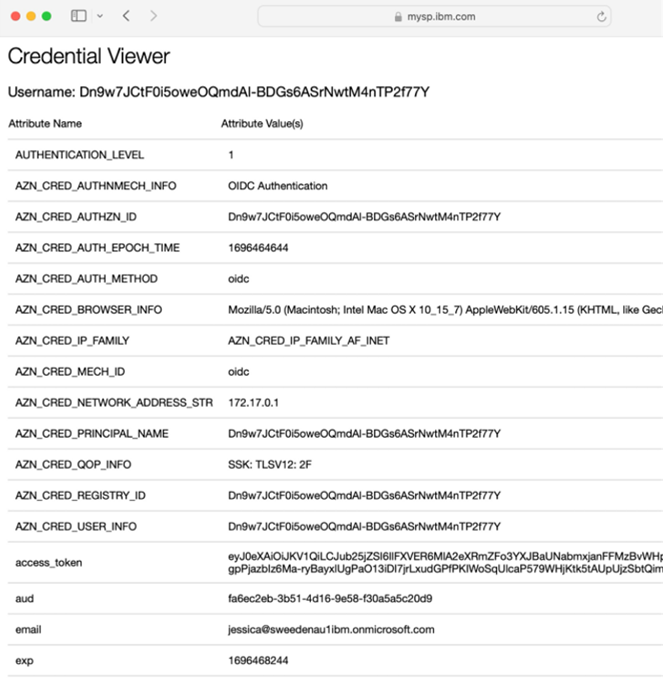
- The credential viewer application is displayed. Observe that the configured
id_tokenattributes (see Supplying extra user attributes in the id_token) are displayed.
Updated 3 months ago
