Okta
This guide illustrates how to configure IBM Application Gateway (IAG) as an OIDC relying party for Okta.
This guide was written in October 2023, the steps below may change if a third-party provider modifies their administrative interfaces.
Pre-requisites
- Review the Third-Party Providers documentation for high-level information about using IAG with third-party identity providers.
- An active Okta subscription. A free trial subscription can be used.
Reference Resources
The following Okta documentation was used to prepare these configuration instructions:
Configuration
Okta Configuration Steps
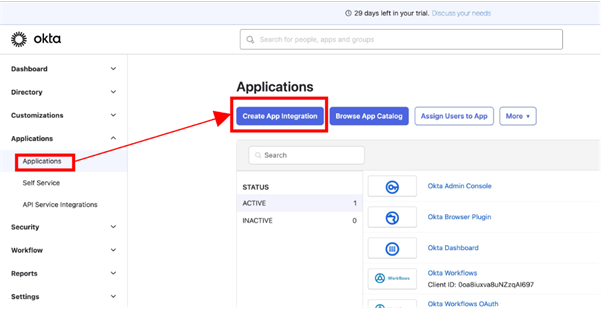
From your Okta administration console, browse to Applications > Applications, and click Create App Integration.
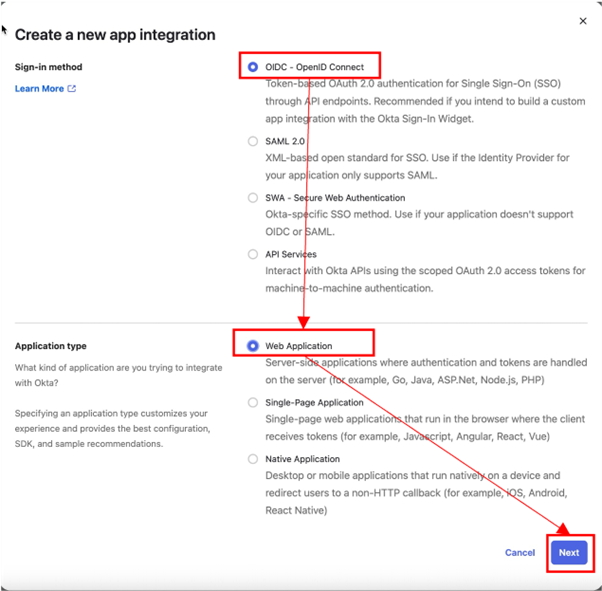
Select the OIDC - OpenID Connect for the Sign-in method, and Web Application for the Application Type. Click Next to continue.
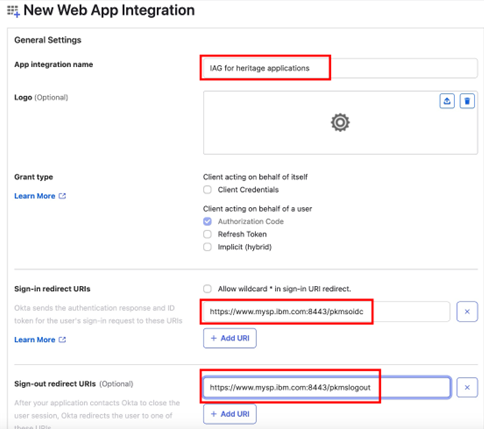
Complete the App integration name, Sign-in redirect URIs and Sign-out redirect URIs.
The Sign-in redirect URIs is of the format https://<iag>/pkmsoidc. See Redirect URI for more details.
The Sign-out redirect URIs is of the format https://<iag>/pkmslogout.
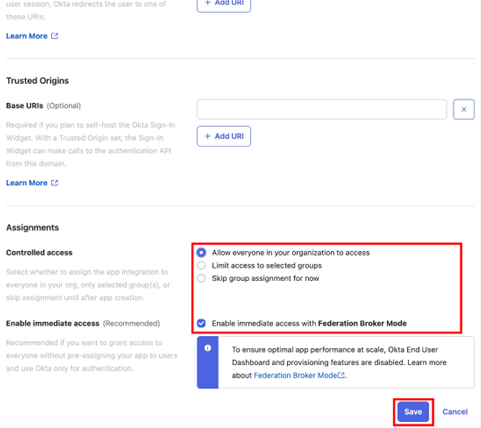
In this example scenario, the application is made immediately available to everyone. This can be customized for selective access based on the application and access policy requirements. To make the application available immediately, select Allow everyone in your organization to access for Controlled access, and check Enable immediate access with Federation Broker Mode.
Click Save to continue.
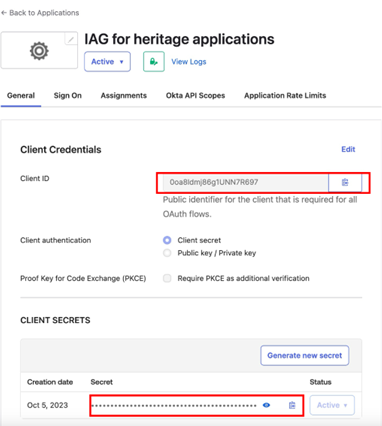
On the General tab, note the Client ID and Client Secret values.
In IAG, the Client ID is used in the client_id field, and the Client Secret is used in the client_secret field.
The generated Client ID and Client Secret values in this example are:
- client_id
0oa8ldmj86g1UNN7R6970 - client_secret
8ygoS3O5dkR9iw7ZQ4fgGITNQWo5AiFtWGFEaP06FAns4ku1G-qdoMzUDvzZseRb
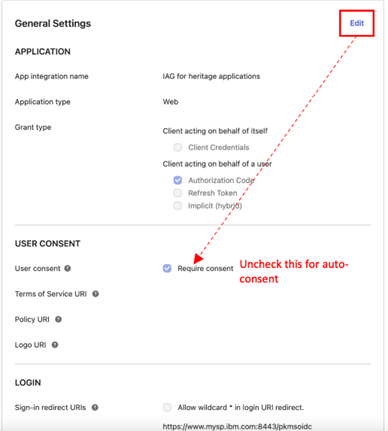
By default, Okta prompts users for consent to share single sign-on information between the IDP and the application the first time they sign in.
In scenarios where the owner of the IAG instance and application is also the owner of the IDP, the consent step can be superfluous.
To disable the consent step, browsing to the General Settings header and click Edit. Clear the Require consent checkbox and click Save.
The Okta OIDC metadata URL is documented in OpenID Connect and OAuth 2.0 API reference. The format of the OIDC metadata URL is https://<subscription hostname>/.well-known/openid-configuration.
In this example scenario, the complete OIDC metadata URL is https://trial-3008338-admin.okta.com/.well-known/openid-configuration.
IAG Configuration Steps
Using the values retrieved in the previous steps, complete the IAG configuration. The sample configuration contains enough information to allow IAG to perform single sign-on with Okta.
identity:
  oidc:
    discovery_endpoint: "https://trial-3008338-admin.okta.com/.well-known/openid-configuration"
    client_id:          "0oa8ldmj86g1UNN7R697"
    client_secret:      "8ygoS3O5dkR9iw7ZQ4fgGITNQWo5AiFtWGFEaP06FAns4ku1G-qdoMzUDvzZseRb"
    scopes:
      - "profile"
      - "email"
Testing the Okta Integration
To test the configuration:
- Browse to the IAG credential viewer application. For more information, see Common IAG Configuration for information about this URL. In this example, the URL is
https://www.mysp.ibm.com:8443/ivcreds.

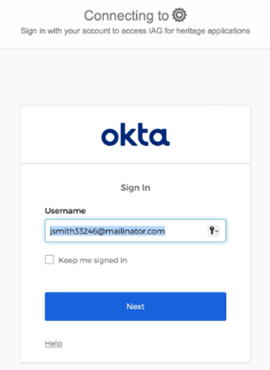
- The browser is redirected to Okta for authentication. The browser will be returned to the credential viewer application after authentication is completed.
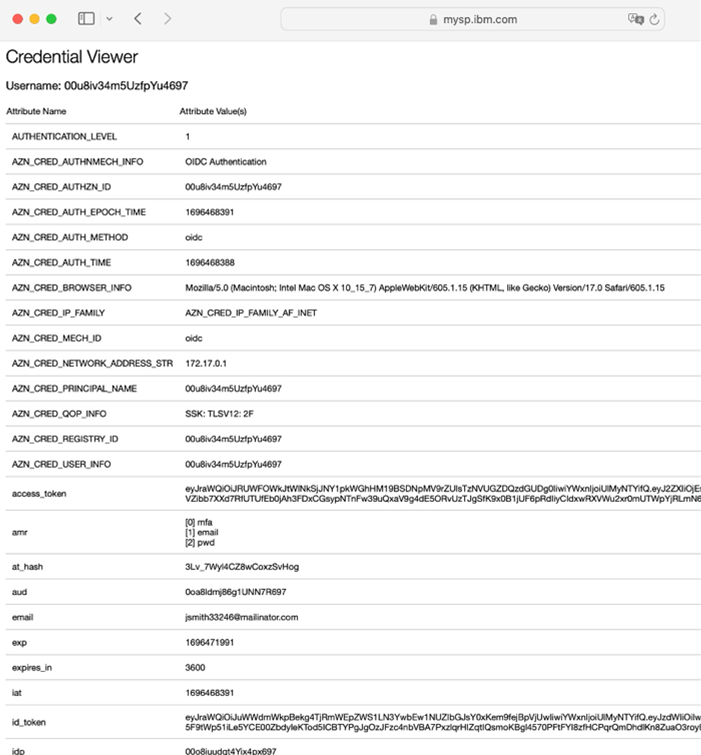
- The credential viewer application is displayed. Observe that the users email address and general profile attributes are displayed.
Updated 3 months ago
