Docker
This hello world guide explores the deployment of IBM Verify Identity Access OIDC Provider (IVIAOP) within Docker containers.
This tutorial details deployment of Verify Identity Access OIDC Provider using native Docker.
High Level Architecture
The high-level architecture for the environment described in this document may be summarized as follows:
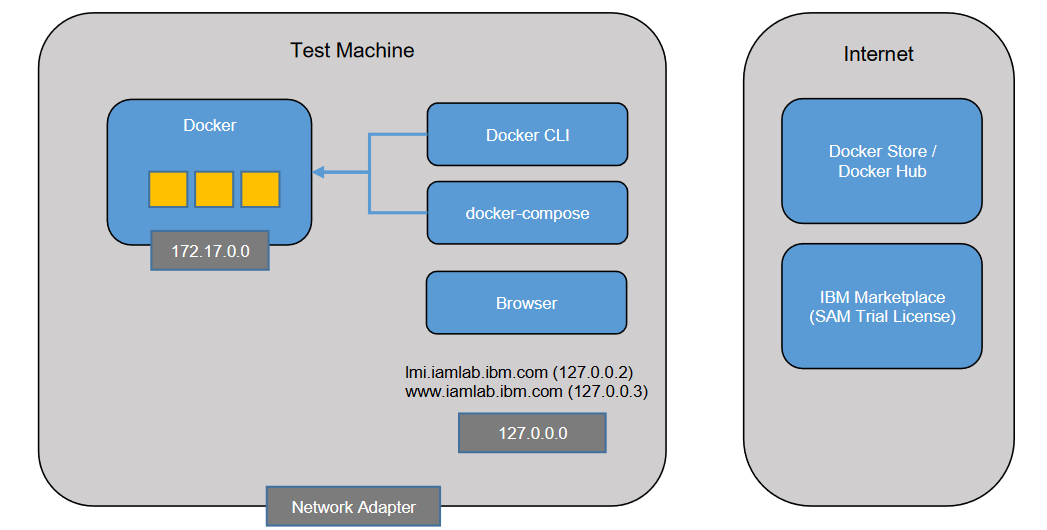
Deployment machine
The deployment machine is a physical or virtual machine which has the following components installed:
- Docker - This provides the container services used to explore native Docker installation of IVIAOP. It includes a command line tool (docker) for management.
- Browser - A browser is required for accessing the Verify Identity Access Reverse Proxy.
The deployment machine needs to have outbound connectivity to the Internet so that it can connect to IBM Cloud Container Registry.
IBM Cloud Container Registry
IBM Cloud Container Registry(ICR) is a repository of Docker images which can be used to create Docker containers. The official images for IBM Verify Identity Access are hosted on ICR. The as-is "Verify Identity Access ready" image PostgreSQL is also hosted here. Internet-connected Docker systems can automatically pull images from ICR as required.
- Verify Identity Access - icr.io/isva/verify-access:10.0.4.0_IF1
- Verify Identity Access WRP - icr.io/isva/verify-access-wrp:10.0.4.0_IF1
- Verify Identity Access Postgres - icr.io/isva/verify-access-postgresql:10.0.4.0_IF1
- Verify Identity Access OpenLDAP - icr.io/isva/verify-access-openldap:10.0.4.0_IF1
- Verify Identity Access OIDC Provider - icr.io/ivia/ivia-oidc-provider:25.10
See Software Downloads > Containers for more information.
Verify Identity Access Trial Center
In order to activate an IBM Verify Identity Access system, you will need a trial certificate. A certificate for a 90-day trial can be obtained via the Verify Identity Access Trial Center. You will need to register for an IBMid (if you don't already have one) to access this site. Link
Getting Started
Prerequisites
-
Follow the Security Learning Academy IBM Verify Identity Access Docker and Docker Compose deployment cookbook to configure IBM Verify Identity Access v10.0.4.0_IF1. Use the cookbook till Section 7.4 Test Configuration.
-
Set the environment variable IVIA_VERSION, LDAP_VERSION and DB_VERSION to 10.0.4.0_IF1.
Database update
-
Verify Identity Access OIDC Provider database schema is identical to Verify Identity Access expect for an additional table used for jti validation.
- Run the following command to add the additional table.
[demouser@centos ~]$ docker exec -ti postgresql bash
[postgresql ~]$ psql -d isva -U postgres
isva# CREATE TABLE IF NOT EXISTS OAUTH20_JTI (
    JWT_TYPE   INT          NOT NULL,
    JWT_ID     VARCHAR(200) NOT NULL,
    EXPIRED_AT BIGINT       NOT NULL,
    CONSTRAINT PK_JTIS PRIMARY KEY(JWT_TYPE, JWT_ID)
);

CREATE INDEX IF NOT EXISTS IX_JTIS_EXPIRED ON OAUTH20_JTI (EXPIRED_AT);
Test the Database
- Run the following command to add the additional table.

    ```shell
    [demouser@centos ~]$ docker exec -ti postgresql bash
    [postgresql ~]$ psql -d isva -U postgres
    isva# \dt;
        public | oauth20_dynamic_client         | table | postgres
        public | oauth20_token_cache            | table | postgres
        public | oauth20_token_extra_attribute  | table | postgres
        public | oauth20_jti                    | table | postgres
        public | oauth_authenticators           | table | postgres
        public | oauth_scope                    | table | postgres
        public | oauth_trusted_client           | table | postgres
    ```
Generate Certificate and Key Files
-
In your Docker environment you need keys and certificates to start up the IVIAOP containers. You can use the following openssl command to generate key and certificate files.
-
To generate RSA private key, you can use the following command:
[demouser@demovm ~]$ mkdir $HOME/git/isvaop-container-deployment
[demouser@demovm ~]$ export DOCKERKEYS=$HOME/git/isvaop-container-deployment/dockerkeys
[demouser@demovm ~]$ mkdir $DOCKERKEYS
[demouser@demovm ~]$ mkdir $DOCKERKEYS/server_keys
[demouser@demovm ~]$ mkdir $DOCKERKEYS/server_keys/personal
[demouser@demovm ~]$ mkdir $DOCKERKEYS/server_keys/signer
[demouser@demovm ~]$ openssl req -newkey rsa:2048 -subj "/CN=iamlab/O=ibm/C=us" -nodes -keyout $DOCKERKEYS/server_keys/personal/server_key.pem -x509 -days 365 -out $DOCKERKEYS/server_keys/signer/server_cert.pem
-
-
In IVIAOP containers you need keys to sign the id_token. You can use the following openssl to genrate key.
-
To generate RSA private key, you can use the following command:
[demouser@demovm ~]$ openssl genrsa -out rsakey.pem 2048 -
Create the keystore directory :
[demouser@demovm ~]$ mkdir isvaop_signing [demouser@demovm ~]$ cd isvaop_signing [demouser@demovm ~]$ mkdir personal [demouser@demovm ~]$ mkdir signer -
Copy the files into the path:
[demouser@demovm ~]$ cp rsakey.pem isvaop_signing/personal
-
Download the starter kit
-
IBM Verify Identity Access OIDC Provider (IVIAOP) uses a prescribed configuration directory structure that is loaded into /var/isvaop/config directory within the container filesystem.
-
The starter kit provides a boilerplate structure for the configuration. It can be downloaded from Github Releases of the resources repository.
Verify Identity Access OIDC Provider initial configuration
-
The IVIAOP configuration contains the following:
- A set of YAML files that contain configuration settings for the OIDC Provider, storage, attribute sources etc.
- Keystores and certificates
- JavaScript customization in the form of mapping rules and access policies
- Static OAuth and OIDC client configuration
-
All the YAML documents in the /var/isvaop/config directory are combined when the container starts. There are different ways to split the YAML documents and their references to folders. You can read more about configuration.
An example configuration is:
/var/isvaop/config
 |
 - provider.yml
 - storage.yml
 - rules.yml
 - clients.yml
 - keystore.yml
-
Create IVIAOP_Volume directory.
[demouser@demovm ~]$ mkdir IVIAOP_Volume -
Unzip the starer kit and copy the contents into the IVIAOP_Volume directory.
[demouser@demovm ~]$ unzip config_starter_kit.zip -d config_starter_kit [demouser@demovm ~]$ cp -r config_starter_kit/* IVIAOP_Volume -
Copy the server_keys into the IVIAOP_Volume/keystore directory.
[demouser@demovm ~]$ cp -r $DOCKERKEYS/server_keys IVIAOP_Volume/keystore -
Copy the isvaop_signing into the IVIAOP_Volume/keystore directory.
[demouser@demovm ~]$ mkdir ~/IVIAOP_Volume/keystore/isvaop_signing [demouser@demovm ~]$ cp https_keys/* ~/IVIAOP_Volume/keystore/isvaop_signing/ -
Copy the public certificates that will verify the Postgres Database container connection, into isvaop_signing/signer directory. If you are using the cookbook, the file should be git/container-deployment/local/dockerkeys/postgresql/postgres.crt .
[demouser@demovm ~]$ cp postgres.crt isvaop_signing/signer/ -
Update keystore.yml
    keystore:
      - name: server_keys
        type: pem
        certificate:
          - label: server_cert
            content: "@keystore/server_keys/signer/server_cert.pem"

        key:
          - label: server_key
            content: "@keystore/server_keys/personal/server_key.pem"
      - name: isvaop_signing
        type: pem
        key:
          - label: rsakey
            content: "@keystore/isvaop_signing/personal/rsakey.pem"
- Update rules.yml
    rules:
      mapping:
        - name: isvaop_pretoken
          rule_type: javascript
          content: |
            importClass(Packages.com.tivoli.am.fim.trustserver.sts.utilities.IDMappingExtUtils);
            importClass(Packages.com.tivoli.am.fim.trustserver.sts.utilities.OAuthMappingExtUtils);

            IDMappingExtUtils.traceString("Starting Pre Token JS");

            /**
            * Use this mapping rule to enrich the session:
            * - Resolve the claims requested for id_token (and userinfo)
            *   Populate resolved claims into 'idtokenData' context
            * - Adding extra claims for token introspection (and JWT access token)
            *   Populate the extra claims into 'tokenData' context
            *
            * User Metadata:
            * Depending on the flow, user metadata may come from 'iv-jwt' or populated in
            * ROPC javascript mapping rule or by CIBA endpoints / javascript mapping rule.
            * But all the user metadata collected will be made availabe in STSUU attribute container.
            *
            * Attribute Source:
            * The system will resolve any attribute source mappings prior to this mapping rule execution.
            * If the mapping should contain a value, it will be available in STSUU attribute container.
            *
            * Claims to be resolved:
            * The 'claims' context contains some helper method to retrieve id_token/userinfo
            * voluntary or essential claims that need to be resolved.
            */

            IDMappingExtUtils.traceString("STSUU content: " + stsuu.toString());

            var requestType = stsuu.getContextAttributes().getAttributeValueByName("request_type");
            var grant_type = stsuu.getContextAttributes().getAttributeValueByName("grant_type");

            for (const claim of claims.getAllClaims()) {

                IDMappingExtUtils.traceString("Resolving claim: " + claim);
                if (claim == "email_verified") {
                    idtokenData["email_verified"] = true;
                } else if (claim == "updated_at") {
                    idtokenData["updated_at"] = Date.now();
                } else {
                    /**
                    * Trying to resolve the requested claim using user metadata or attribute source mapping
                    * that is made available in STSUU attribute container
                    */
                    var value = stsuu.getAttributeContainer().getAttributeValueByName(claim);
                    if (value != null) {
                        idtokenData[claim] = value;
                    }
                }
            }

            /**
            * Example of adding 'acr' and 'amr' claim based on AUTHENTICATION_LEVEL attribute
            */
            var authLevel = stsuu.getAttributeValueByName("AUTHENTICATION_LEVEL");
            if (authLevel == null || authLevel == "1") {
                idtokenData.amr = "password";
                idtokenData.acr = "urn:ibm:basic";
            } else {
                idtokenData.amr = "mmfa";
                idtokenData.acr = "urn:ibm:mmfa";
            }

            if (requestType == "authorize") {
                /**
                * In OpenBanking requirement, the 'openbanking_intent_id' received in the 'claims'
                * need to appear in the id_token.
                */
                var intentId = claims.getIDTokenClaimValues("openbanking_intent_id");
                if (intentId != null && intentId != undefined) {
                    idtokenData.openbanking_intent_id = intentId[0];
                }

                /**
                * Example of extra validation that can be done in this mapping rule
                */
                var state = stsuu.getContextAttributes().getAttributeValueByName("state");
                if (state != null && state.length > 255) {
                    OAuthMappingExtUtils.throwSTSCustomUserMessageException("State is too long", 400, "invalid_request");
                }
            }

            /**
            * Example of enriching introspection result
            */
            tokenData.groups = ["support", "user"];
        - name: isvaop_posttoken
          rule_type: javascript
          content: |
            importClass(Packages.com.tivoli.am.fim.trustserver.sts.utilities.IDMappingExtUtils);
            importClass(Packages.com.tivoli.am.fim.fedmgr2.trust.util.LocalSTSClient);
            importClass(Packages.com.tivoli.am.fim.trustserver.sts.utilities.OAuthMappingExtUtils);

            IDMappingExtUtils.traceString("Starting Post Token JS");

            var requestType = stsuu.getContextAttributes().getAttributeValueByName("request_type");

            /**
            * Use this mapping rule to enrich the response.
            * In general there should not be a lot of customization here.
            * You can enrich the response parameter or header.
            * For example in FAPI there's requirement to output certain HTTP header received in the header.
            */

            var interactionID = stsuu.getContextAttributes().getAttributeValueByName("x-fapi-interaction-id");
            if (interactionID != null) {
                headersOverride["x-fapi-interaction-id"] = interactionID;
            }
-
Update the storage.yml.
[demouser@demovm ~]$ vi ~/IVIAOP_Volume/storage.yml# Copyright contributors to the IBM Verify Identity Access OIDC Provider Resources project runtime_db: hvdb # Configuration of runtime database. Points to the database server connection session_cache: type: db # Specifies the type of session cache: in-memory, redis, or db server_connections: - name: hvdb # Connection name type: postgresql # Connection type: `redis`, `ldap`, `postgresql`, `oracle`, `db2` database_name: isva # Specifies the database name. For database types only hosts: # List of host information (IP and port). - hostname: postgresql # Server's hostname. hostport: 5432 # Server's host port. credential: # Credential information to connect to the server. username: postgres # Specifies the username to access the server. password: Passw0rd # Specifies the password to access the server. It is recommended to obfuscate this. ssl: certificate: - '@keystore/isvaop_keys/signer/postgres.crt' disable_hostname_verification: true
Create the IVIAOP container
- Create the container using the following command.
[demouser@demovm ~]$ docker run --hostname isvaop-test --name isvaop-test \
  --publish 8436:8436 \
  --volume /home/IVIAOP_Volume:/var/isvaop/config \
  icr.io/ivia/ivia-oidc-provider:25.10
Test the configuration
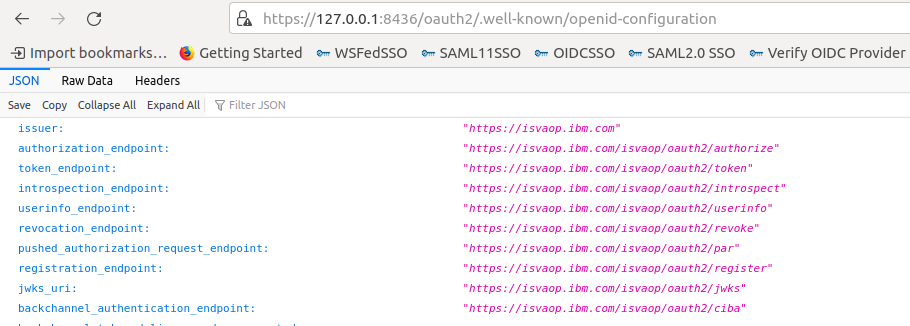
- Use a browser to access the .well-known/openid-configration endpoint.
https://127.0.0.1:8436/oauth2/.well-known/openid-configration
Configure Web reverse proxy to act as point of contact for IVIAOP
- Follow the steps to configure Web reverse proxy as the point of contact.
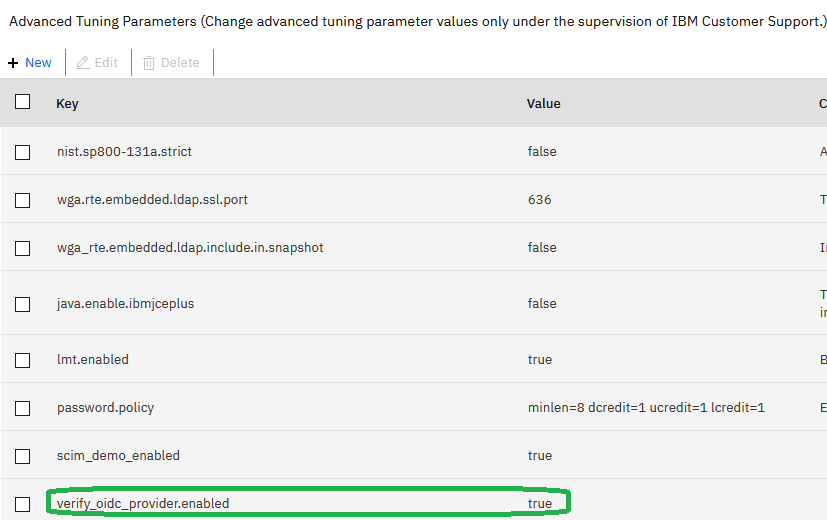
- Configure the advanced tuning parameter to enable the point-of-contact (POC) wizard for IVIAOP: Navigate to
System -> Advanced Tuning Parameter, and add a parameterverify_oidc_provider.enabledand set it totrue. Setting this parameter enables an additional API endpointoauth2_config. This API automates the process of setting up junctions, access control lists and other policies for the IVIAOP.
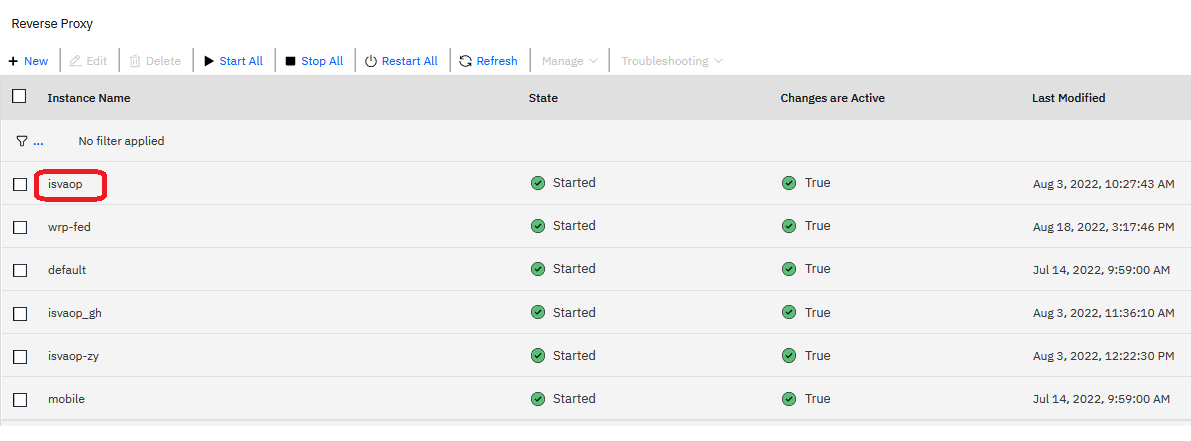
- Retrieve the reverse proxy name. This is referenced as
{rpID}in the steps below.
- Retrieve the admin user credentials for the Verify Identity Access Local Management Interface (LMI). This is referenced in the following steps as
{user}and{password} - Retrieve the IP address where the IVIAOP is running. Update the
{junction}in the payload below to a valid name that acts as a standard junction path. For example:/isvaop. Update the {lmi_user}:{lmi_password}. Also, setreuse_aclstotrueto ensure ACLs are not detached and deleted from existing endpoints.
curl --location --request POST 'https://lmi.iamlab.ibm.com/wga/reverseproxy/rp1/oauth2_config' \
  --user {lmi_user}:{lmi_password} \
  --header 'Content-Type: application/json' \
  --header 'Accept: application/json' \
  --data-raw '{
    "hostname":"isvaop-test",
    "port":"8436",
    "junction":"isvaop",
    "reuse_acls": true,
    "reuse_certs": true
}'
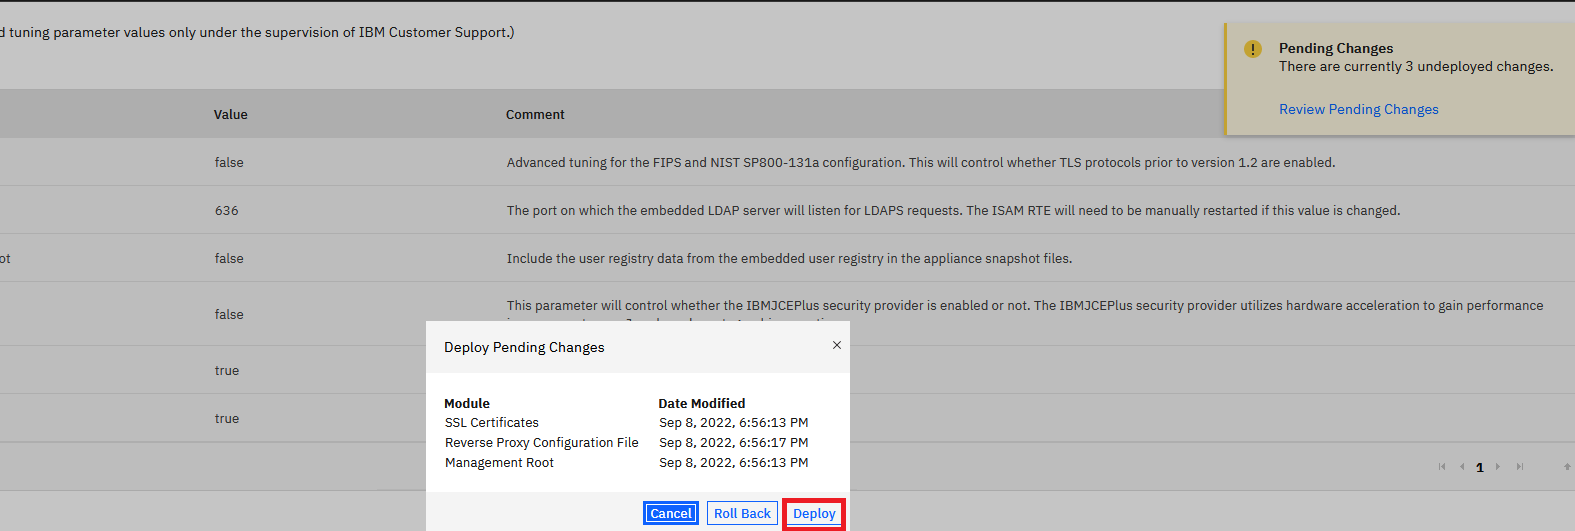
- Deploy pending changes and restart reverse proxy. In the case of a container deployment of Verify Identity Access, you will also need to publish the container configuration before restarting the Web Reverse Proxy container.
Update the provider.yml
- The base_url configuration in the provider.yml is based on the point of contact and junction configured in the previous step.
- Update the provider.yml base_url.
    # Copyright contributors to the IBM Verify Identity Access OIDC Provider Resources project
    version: 24.08
    server:
      ssl:
        key: ks:server_keys/server_key
        certificate: ks:server_keys/server_cert
      pages:
        type: zip
        content: "@templates.zip"
    definition:
      id: 1
      name: OIDC Definition
      grant_types:
        - authorization_code
        - urn:openid:params:grant-type:ciba
      base_url: https://www.acme.com/isvaop
      token_settings:
        issuer: https:///www.acme.com
        signing_alg: RS256
        signing_keystore: isvaop_signing
        signing_keylabel: rsakey
      features:
        consent_prompt: ALWAYS_PROMPT
    jwks:
      signing_keystore: isvaop_signing
- Restart the isvaop-test container
[demouser@demovm ~]$ docker restart isvaop-test
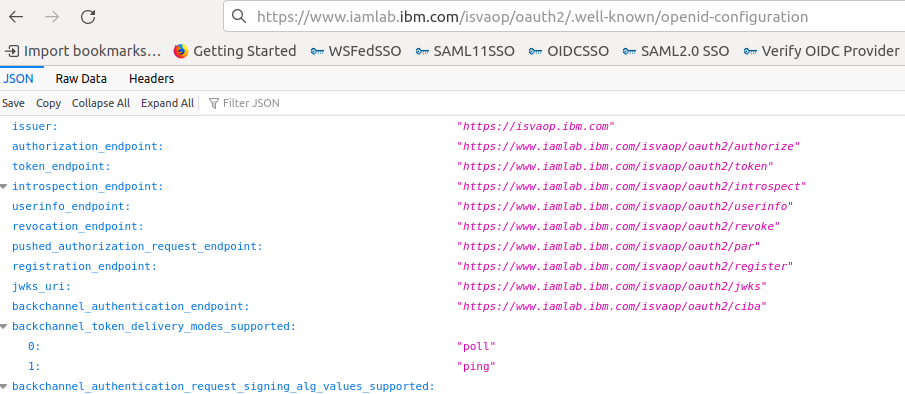
Test the configuration
- Use a browser to access the .well-known/openid-configration endpoint.
https://www.iamlab.ibm.com/isvaop/oauth2/.well-known/openid-configuration
Configure a static client
-
Static OAuth and OIDC clients are configured within the clients.yaml file.
-
Create a clients.yaml file.
[demouser@demovm ~]$ vi ~/IVIAOP_Volume/clients.yml -
Copy the following contents into a the file
clients.yml
    # Copyright contributors to the IBM Verify Identity Access OIDC Provider Resources project
    clients:
      - client_id: client_authcode
        client_secret: "ahwoaor82noawasg"
        client_name: "AuthorizationCode Client"
        enabled: true
        redirect_uris:
          - https://www.iamlab.ibm.com
        grant_types:
          - authorization_code
        response_types:
          - code
          - code token
        token_endpoint_auth_method: client_secret_post
        require_pkce: true
- Restart the isvaop-test container
[demouser@demovm ~]$ docker restart isvaop-test
Test Updated Configuration
- Open the browser to access
- Use a browser to trigger an authorization code flow. Since PKCE is enabled the code_challenge and code_challenge_method are sent in the request.
https://www.iamlab.ibm.com/isvaop/oauth2/authorize?client_id=client_authcode&response_type=code&redirect_uri=https://www.iamlab.ibm.com&scope=openid&&code_challenge=vXpDWQ0Ev8KgDEJB77ui741_iu218_mtk6rsSU0gU9E&code_challenge_method=S256
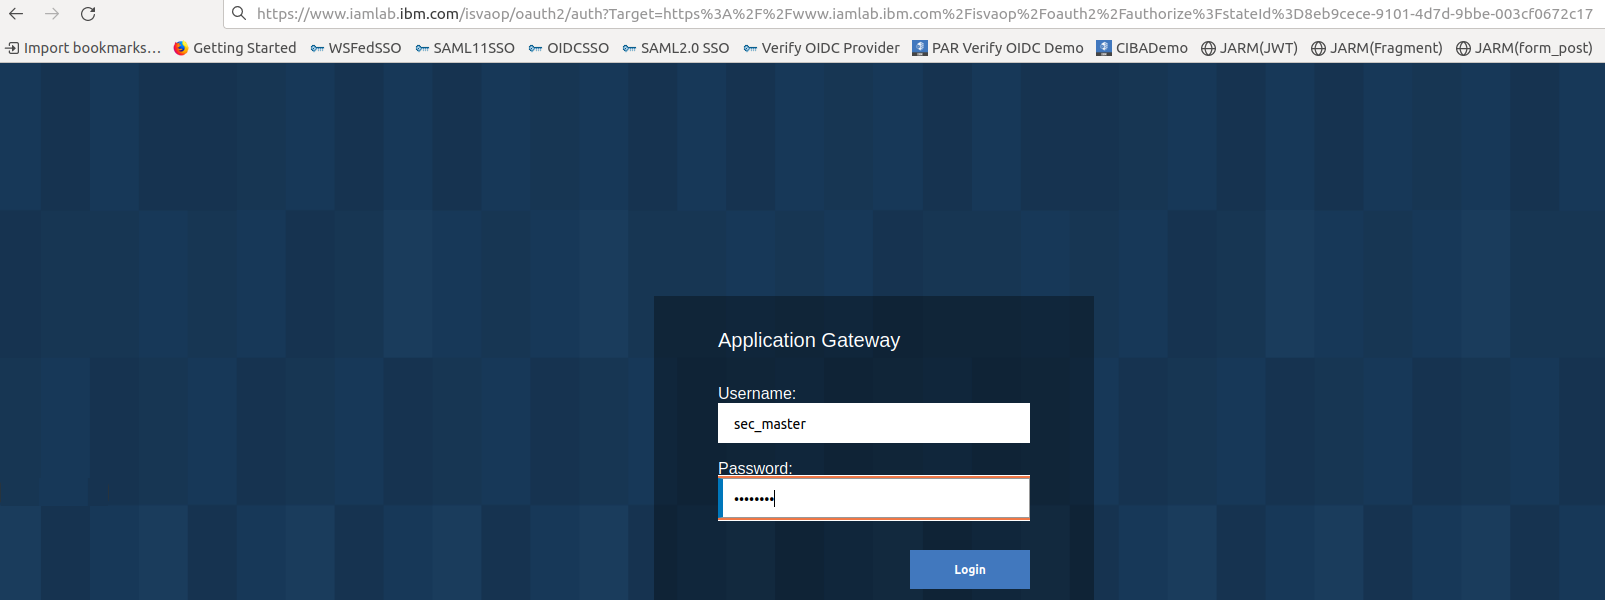
- Enter sec_master as the Username and Passw0rd as the Password. Click on Submit.
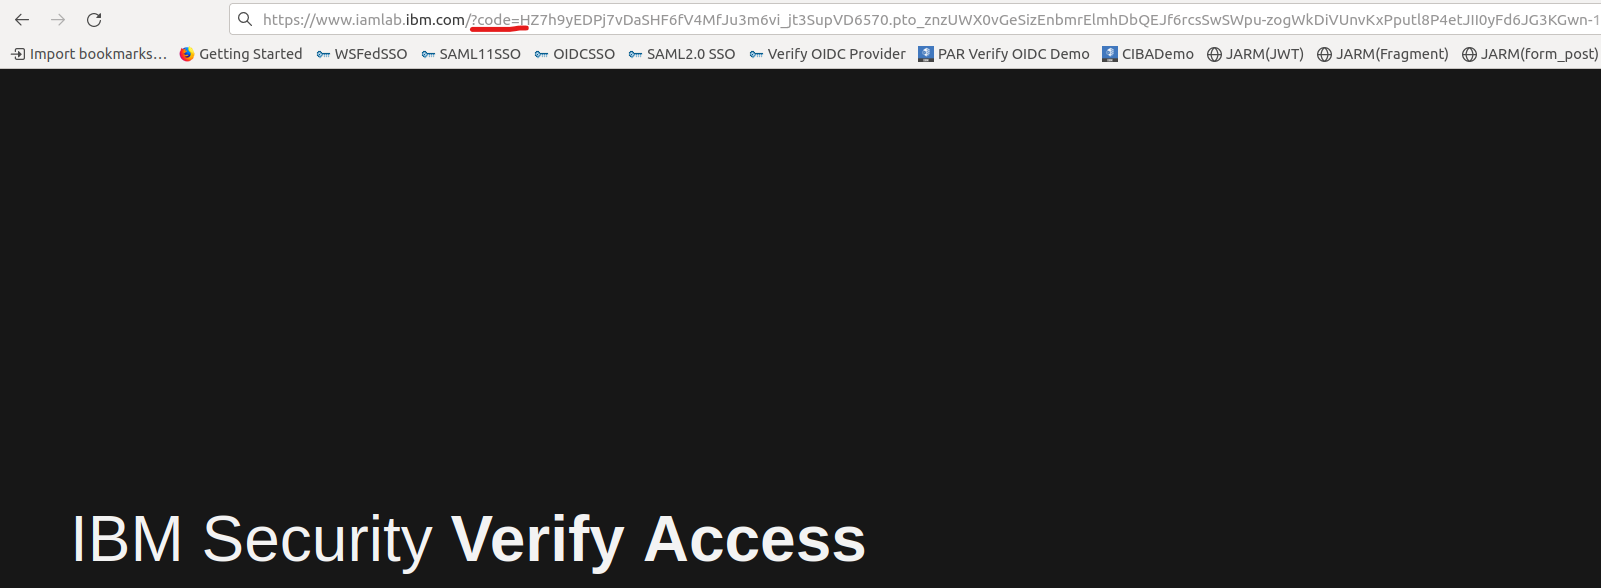
- Copy the authorization code from the browser.
- Exchange code for token. Using the cURL call. Replace the code value. Since PKCE is enforced the code_verifier needs to be sent
    curl --location --request POST 'https://www.iamlab.ibm.com/isvaop/oauth2/token' \
    --header 'Content-Type: application/x-www-form-urlencoded' \
    --data-urlencode 'scope=openid' \
    --data-urlencode 'grant_type=authorization_code' \
    --data-urlencode 'code=8DwMLLy8JvM1aFdeq2PxZCrhtkiV6laTlfuARc_EK3Y.6zpLc-tMlO20gRcR02FETQPewka3sMszZEYCAMMX8ExSRji-_ZxOr00d18pA6e7By69EPdsReDCqi8dliSkrUw' \
    --data-urlencode 'client_id=client_authcode' \
    --data-urlencode 'client_secret=ahwoaor82noawasg' \
    --data-urlencode 'redirect_uri=https://www.iamlab.ibm.com' \
    --data-urlencode 'code_verifier=rwv_TkCRcP1re0APTQRdHLwabrNZzFJVhfBiwbTpirWYpYFM3v36mXPMNv7rslDcxuvas8HtrFygxhCPF86ePFstyOsLnyhVel9xriqnnbK06jB7EqJj4QajeeI7sT5Y'
- Sample Response
    {
        "access_token": "EQ6pS5x9W2fNEg9FDiXPpR-LCX6zgpzXocvCobA_Gek.B1sSOHZGXvO_GhqXypYu4SKepAeRpA47Juy2YYdCafNxPPVIacYqEp9Ypp9QjJh5IZheGizNb8OWwK2gaYWg6w",
        "expires_in": 7199,
        "id_token": "eyJhbGciOiJSUzI1NiIsImtpZCI6Imh0dHBzZXJ2ZXJrZXkiLCJ0eXAiOiJKV1QifQ.eyJhY3IiOiJ1cm46aWJtOmJhc2ljIiwiYXRfaGFzaCI6InJFeDdPdTZyVHlzWm1LOVFTck0zNXciLCJhdWQiOlsiY2xpZW50X2F1dGhjb2RlIl0sImF1dGhfdGltZSI6MTY2Nzc4MDIwMSwiZXhwIjoxNjY3NzgzODAxLCJpYXQiOjE2Njc3ODAyMDEsImlzcyI6Imh0dHBzOi8vaXN2YW9wLmlibS5jb20iLCJqdGkiOiJiNjkxOTcyNC1kNTgyLTRkMjItOTZiMy1jMGY3Mjc5YjE1NmIiLCJyYXQiOjE2Njc3ODAxNzUsInN1YiI6InRlc3R1c2VyIn0.NrZ_aauVg8O-CskI5YFgs9PyjCSK9wo56lF-bV9mvhoQKrf-xqNVW7Mjvp7X5qWwe7Pog-AvjzJOeGn1iVt2TenGcLMSuPGe1ExJHFrAE4noMH5aETFG1Bt9tZU2GvbcJ5rPqoMH8Wxu1yHUiFFa0BefbNpHqZCUwpcPnwICaD7m7xis3IlKPp9JMt7NvVK-0GzeFvF1jo0Kvouqqy7OO8LsByk-RbzxzaS09eYeEa0lA0ZMCmcpUiURTFw6ctkWJt69OdQefHZKdyfm_pcUIQ0uuStDSWg5IUh1zWbOGSV-Zq1t7OcIJz2g1fHad5VfU6rWS4Bd8fef_Z7mXiZIgg",
        "scope": "openid",
        "token_type": "bearer"
    }
- Introspect the access_token
    curl --location --request POST 'https://www.iamlab.ibm.com/isvaop/oauth2/introspect' \
    --header 'Content-Type: application/x-www-form-urlencoded' \
    --data-urlencode 'token=EQ6pS5x9W2fNEg9FDiXPpR-LCX6zgpzXocvCobA_Gek.B1sSOHZGXvO_GhqXypYu4SKepAeRpA47Juy2YYdCafNxPPVIacYqEp9Ypp9QjJh5IZheGizNb8OWwK2gaYWg6w' \
    --data-urlencode 'client_id=client_authcode' \
    --data-urlencode 'client_secret=ahwoaor82noawasg'
Updated about 2 months ago
