On-board a native application
Introduction
This guide describes how to use the Verify administration UI to on-board a native application which will use Adaptive Access.
Pre-requisites
You must have a native web application access policy. This is required in order to create an application definition which is configured for policy-based authentication. See Adaptive Access Policy for Native applications.
Your must have a custom application definition for your application. The following minimum configuration is required in the Sign-On tab:
| Parameter | Value |
|---|---|
| Sign-on Method | OpenID Connect 1.0 |
| Grant types | Context-based authorization JWT Bearer |
| Access policies | Uncheck "Use Default Policy" Select a native custom application policy. |
| Apply access policy to API grant types | JWT Bearer Context-based authorization |
For more detailed information about each field, see Configuring single sign-on in the OpenID Connect provider.
Enable Adaptive Sign-on
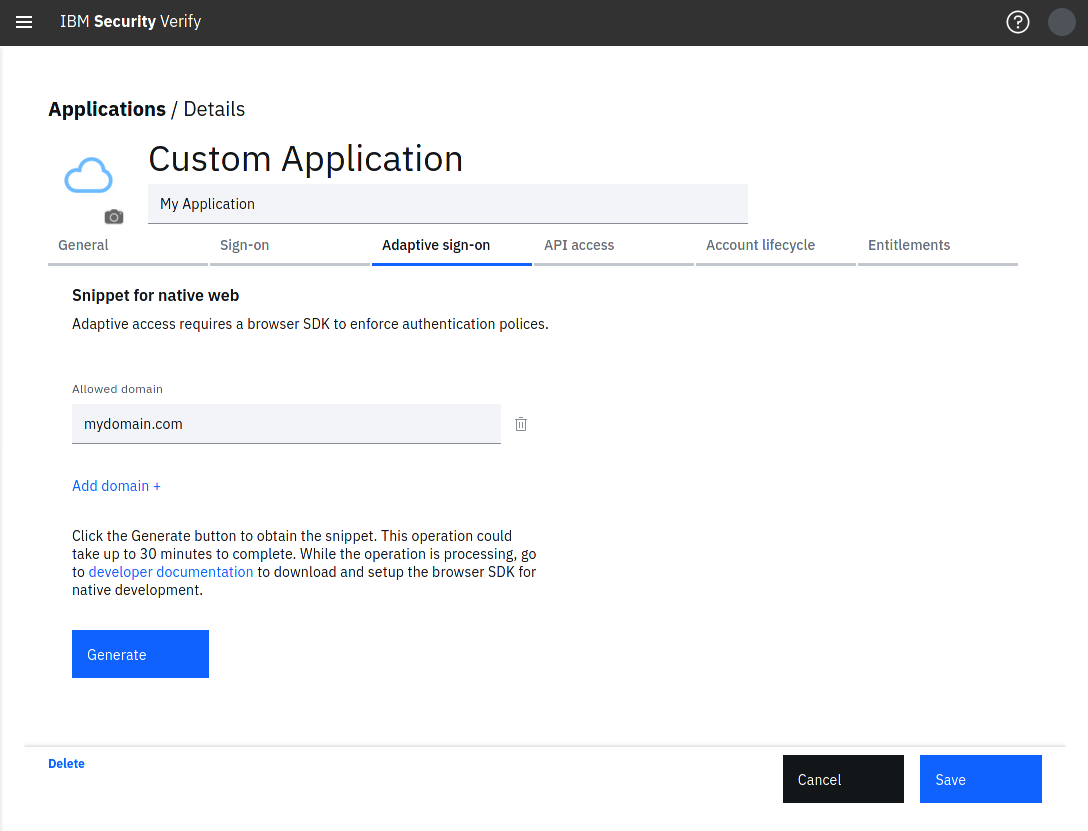
- Navigate to the Adaptive sign-on tab.
- Enter an Allowed domain. An allowed domain enables the Adaptive access session collection and detection for a given sub-domain. For example
sub.domain.com,*.domain.com. - Click Add domain + if you wish to add additional domains.
- Click Generate. This will take up to 30 minutes to complete.
Allowed domains are important
When using Adaptive access for native applications, Adaptive access will only run on webpages matching the allowed domains entered when on-boarding the application.
You can navigate away from Adaptive sign-on tab and check on the generate progress at a later stage.

Adaptive Sign-On
Updated over 2 years ago
Now that your application is on-boarded you can start instrumenting your application. The generated snippet host / snippet ID enables you to make calls to the adaptive web SDK.
