Protect Linux OS with MFA
Introduction
Protection for Unix based terminal sessions to secure shell (SSH) and other services can be quickly performed by introducing the IBM Verify Gateway for PAM. This authentication module runs locally on the Unix system and makes an outbound call to the IBM Verify APIs to obtain two-factor authentication methods to verify the user. Since PAM is customizable, you can easily add multi-factor to other services to step up authentication whenever necessary. This guide is designed to walk you through the basic setup for a CentOS system that uses a local system user. Ubuntu is supported

Pre-requisites
- Find a CentOS, RHEL, or Fedora machine for use in this walk-through (virtual machines will work fine)
- Download the latest IBM Verify Gateway for PAM modules onto the Linux system.
- Unzip the files into a new folder called
~/ibm - Create an API client and secret from your Verify portal using the method You will need the following permissions:
- Authenticate any user
- Manage second-factor authentication enrollment for all users
- Manage users and groups
- Read second-factor authentication enrollment for all users
- Read second-factor authentication method configuration
- Read users and groups
- Identify the username of the user and create matching user in Verify.
- To get the user information on your Linux system, run the
getent passwdcommand. - By default, the IBM Verify PAM module will use the username of the user, however additional configurations can be added to use the
gecosfield number as well as parse thegecosfield with specific separators.- Note: For this blog, we will be using local users in both the terminal and Verfy for simplicity. More advanced scenarios would use a central directory for users in both Verify and Linux.
- To get the user information on your Linux system, run the
Installation
Install the RPMs by running the following commands with sudo or as root. Depending on the version you download, the file names may differ.
Install the Authentication API module
[root@localhost ibm]# rpm -i ibm-auth-api-1.0-0.x86_64.rpm
Install the PAM Daemon
[root@localhost ibm]# rpm -i pam-ibm-auth-1.0-0.x86_64.rpm
Configure the JSON file
A JSON file has now been created for you, but you will need to edit this file. Because this file contains sensitive API key information, is is good to check the permissions of the file after the configuration has been completed. The JSON file is located at /etc/pam_ibm_auth.json. The contents of the file contain the client-id, client-secret, and the Verify tenant name (host). The Client ID and Client Secret are the keys you obtained from the API configuration in the Verify portal. The host name for your tenant is the subdomain of your tenant’s URL (e.g. tenant.verify.ibm.com -> sample)These are the only three things variables you are required to change first. However, it is a good idea to uncomment the trace logs for additional debugging. Any changes to this file after the daemon has started will require a restart of the service.
{
    "ibm-auth-api":{
    "client-id":"********-****-****-****-************",
    "client-secret":"**********",
    "protocol":"https",
    "host":"****.verify.ibm.com",
    "port":"443",
    "authd-port":12,
  	"max-handles":"16"
},
"ibm-authd":{
    /* "trace-file":"/tmp/ibm_authd.log" */
    },
"pam":{
    /* "trace-file":"/tmp/pam_ibm_auth.log" */
    }
}
Enable and Start the Auth Daemon
If the OS uses systemd for services, then a “ibm_authd_64” service is set up, but not configured to run as the /etc/pam_ibm_auth.json file. It must be configured before it is able to run. After the setup of the pam_ibm_auth.json file, use the commands:
[root@localhost ibm]# systemctl enable ibm_authd_64
[root@localhost ibm]# systemctl start ibm_authd_64
Be ware of SELinux
SELinux can prevent programs that use the PAM module from connecting to CIV or to
ibm_authd. If you’re facing connectivity issues, use the sealert tool to investigate whether SELinux is denying access. I have disabled SELinux for this blog, but for production systems, it is good to apply security whitelists to the Verify domains as well as the ibm_authd service.
Setup PAM for SSH Multi-Factor
To use IBM Verify with SSH, you must edit the PAM configuration for sshd.
- Copy the Password Auth File
1. The file /etc/pam.d/sshd controls the SSH authentication. However, it uses a common include file for the authentication, /etc/pam.d/password-auth. Run the following command:
cp /etc/pam.d/password-auth /etc/pam.d/civ-password-auth - Edit the new civ-password-auth File
- Using your favorite editor, make the following changes to the /etc/pam.d/civ-password-auth file.
# Before:
auth sufficient pam_unix.so nullok try_first_pass

# After:
auth requisite pam_unix.so nullok try_first_pass
auth sufficient pam_ibm_auth.so auth_method=choice-then-otp transients_in_choice
Note: In PAM, changing the pam_unix.so to be “requisite” means that in order for pam_ibm_auth.so to be invoked, this must first succeed.
If you see a message like “No second factor authentication enrollments are available.” when trying to authenticate then you can either include transients_in_choice and add_devices_to_choice or if you don’t care about enrollments of the user, then use accept_on_missing_auth_method.
Helpful configurations
Use the user’s profile email address and phone number
auth sufficient pam_ibm_auth.so auth_method=choice-then-otp transients_in_choice
To use the gecos field and transient profile information:
auth sufficient pam_ibm_auth.so auth_method=choice-then-otp transients_in_choice gecos_field=1
Example user entry:
jessica:*:1002:1002:jessica:/home/jessica:/bin/bash
To use a specific attribute from the gecos field given a separator:
Given a user entry such as jessica:*:1002:1002:jessica|bretton|jessica|[email protected]:/home/jessica:/bin/bash
We can use the following:
auth sufficient pam_ibm_auth.so auth_method=choice-then-otp gecos_field=3 gecos_separator=|
Append a domain to a username:
auth sufficient pam_ibm_auth.so auth_method=choice-then-otp [email protected]
Note: If using a 3rd Party Identity Provider, you should also append the realm to the username. For example, if the realm of the 3rd party Identity Provider such as Verify Access or ADFS, you will want to ensure that your append attribute matches the following naming convention: append=@domain@realm (e.g. [email protected]@realm)
To use allow for IBM Verify push device registrations in choice
auth sufficient pam_ibm_auth.so auth_method=choice-then-otp transients_in_choice add_devices_to_choice
Change secure shell (SSH) PAM to use IBM Verify
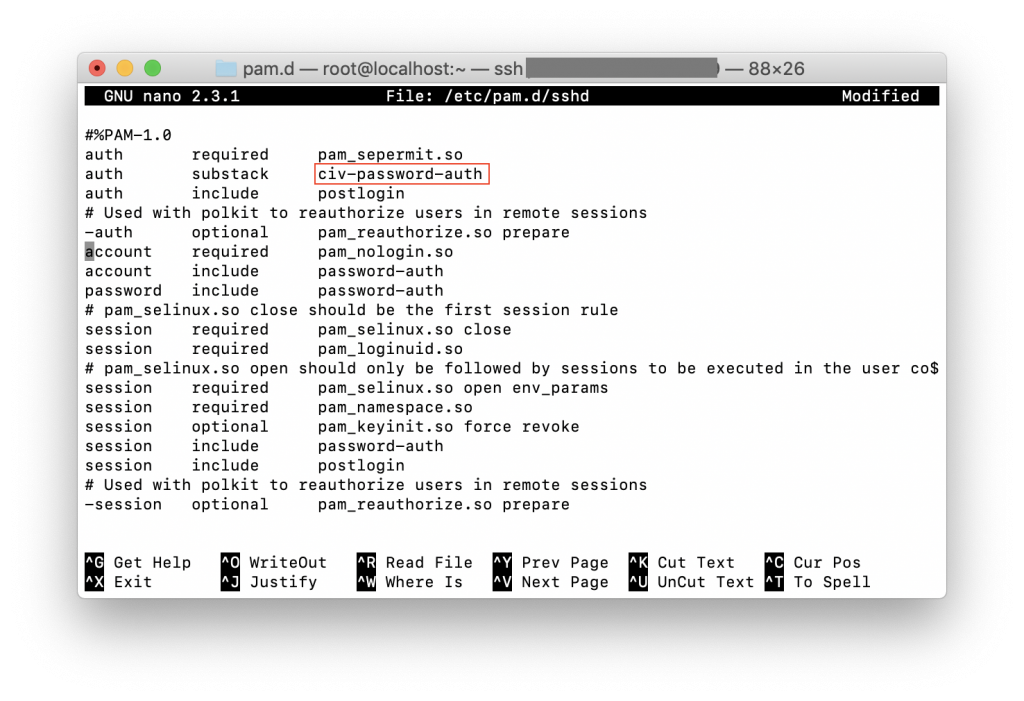
In the file /etc/pam.d/sshd, in the auth stanza only, replace password-auth with civ-password-auth.

Test the Configuration
Back in the terminal window, perform a localhost SSH connection using the following command:
ssh testuser@localhost
You should first be prompted for your local password to the system, then a call will be made to Verify to obtain the 2FA enrollments for the user.
[root@localhost ~]# ssh testuser@localhost
Password:
1) 15125551012
2) [email protected]
? 2

Enter OTP ####-######

[testuser@localhost ~]$
Additional steps
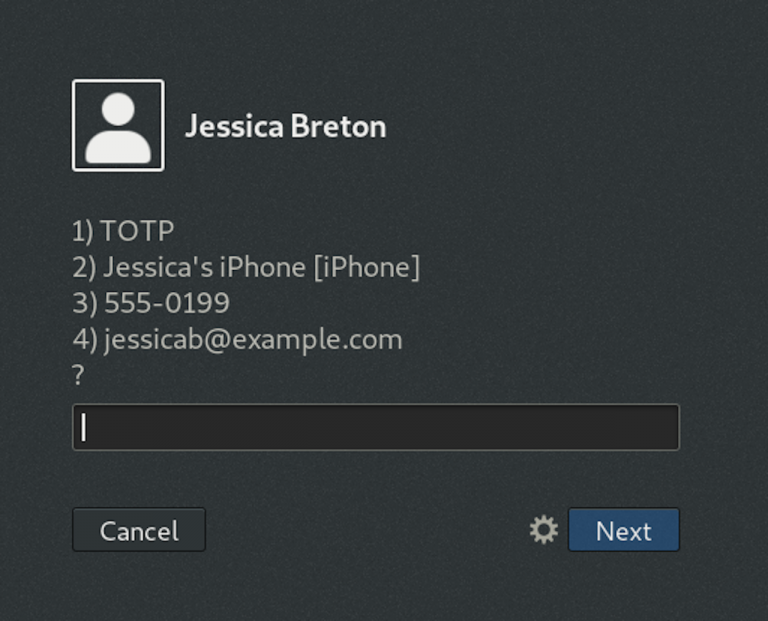
Whether you want to layer in LDAP for two-factor or add conditional access to the PAM substacks, the IBM Verify PAM can be easily configured and applied to your Unix systems to protect them from remote access with 2FA and Push Verification with IBM Verify application. You can also expand this to perform 2FA on GUI based authentications as well depending on your configuration of Linux. Full documentation can be found here for the IBM Verify PAM service.
Updated 7 months ago
