Active Directory as an identity source
Introduction
To minimize disruption when deploying IBM Verify for your workforce, you may want users to authenticate to IBM Verify using their existing enterprise credentials. In many cases this means using a username and password that is stored, on-premises, in Microsoft Active Directory.
This guide details the steps required to allow your IBM Verify tenant to authenticate users against an on-premises Active Directory.
Pre-requisites
The configuration described in this guide requires the deployment of one or more instances of the IBM Verify Bridge in your environment. This can run as either a Service on a Windows Server machine or as a container on any Linux server.
Each instance of the Verify Bridge must have outbound connectivity to an Active Directory domain controller and must have outbound internet connectivity to Verify's cloud instance. No inbound connections are required.
Gathering Information
The following will be needed in order to complete this guide:
| Item | Example Value/Format |
|---|---|
| LDAP URIs for one or more Active Directory domain controllers that will be used for authentication. | ldaps://dc1.example.comldaps://dc2.example.comNote: If your Active Directory not configured for secure communication, use ldap:// instead. |
| CA certificate that validates the server certificates presented by Domain Controllers on LDAPS connections. | Base64-encoded certificate file. This has format-----BEGIN CERTIFICATE-----...-----END CERTIFICATION----- |
| Distinguished Name (DN) of an Active Directory account with read permissions. No special permissions required. | cn=bridge,cn=users,dc=example,dc=com |
| Password for the Active Directory account above. | – |
| Branch in Active Directory where users are stored. Used as LDAP Base. | cn=users,dc=example,dc=com |
| Unique Active Directory attribute that end users will use as their username. | Usually samAccountName (username) or userPrincipalName ([email protected]) |
| List of user attributes that you want to make available to IBM Verify. | cn, sn, mail, telephone, memberOf |
Server certificates for Domain Controller LDAP connections are only generated if certificate services are enabled in the domain. If certificate services are not enabled, Domain Controllers may appear to be listening on LDAPS port (636) but connections will fail. In this case, use LDAP (ldap://) and change the port to 389. Disable SSL verification on the Verify configuration if using this option.
Create an Identity Agent configuration
Most of the configuration for the IBM Verify Bridge is created in the Admin UI of your IBM Verify tenant. The configuration is created as an Identity Agent configuration. This configuration is read by the Bridge service when it starts.
The creation of an Identity Agent configuration for the Verify Bridge is documented in the Knowledge Center here.
Connection Settings
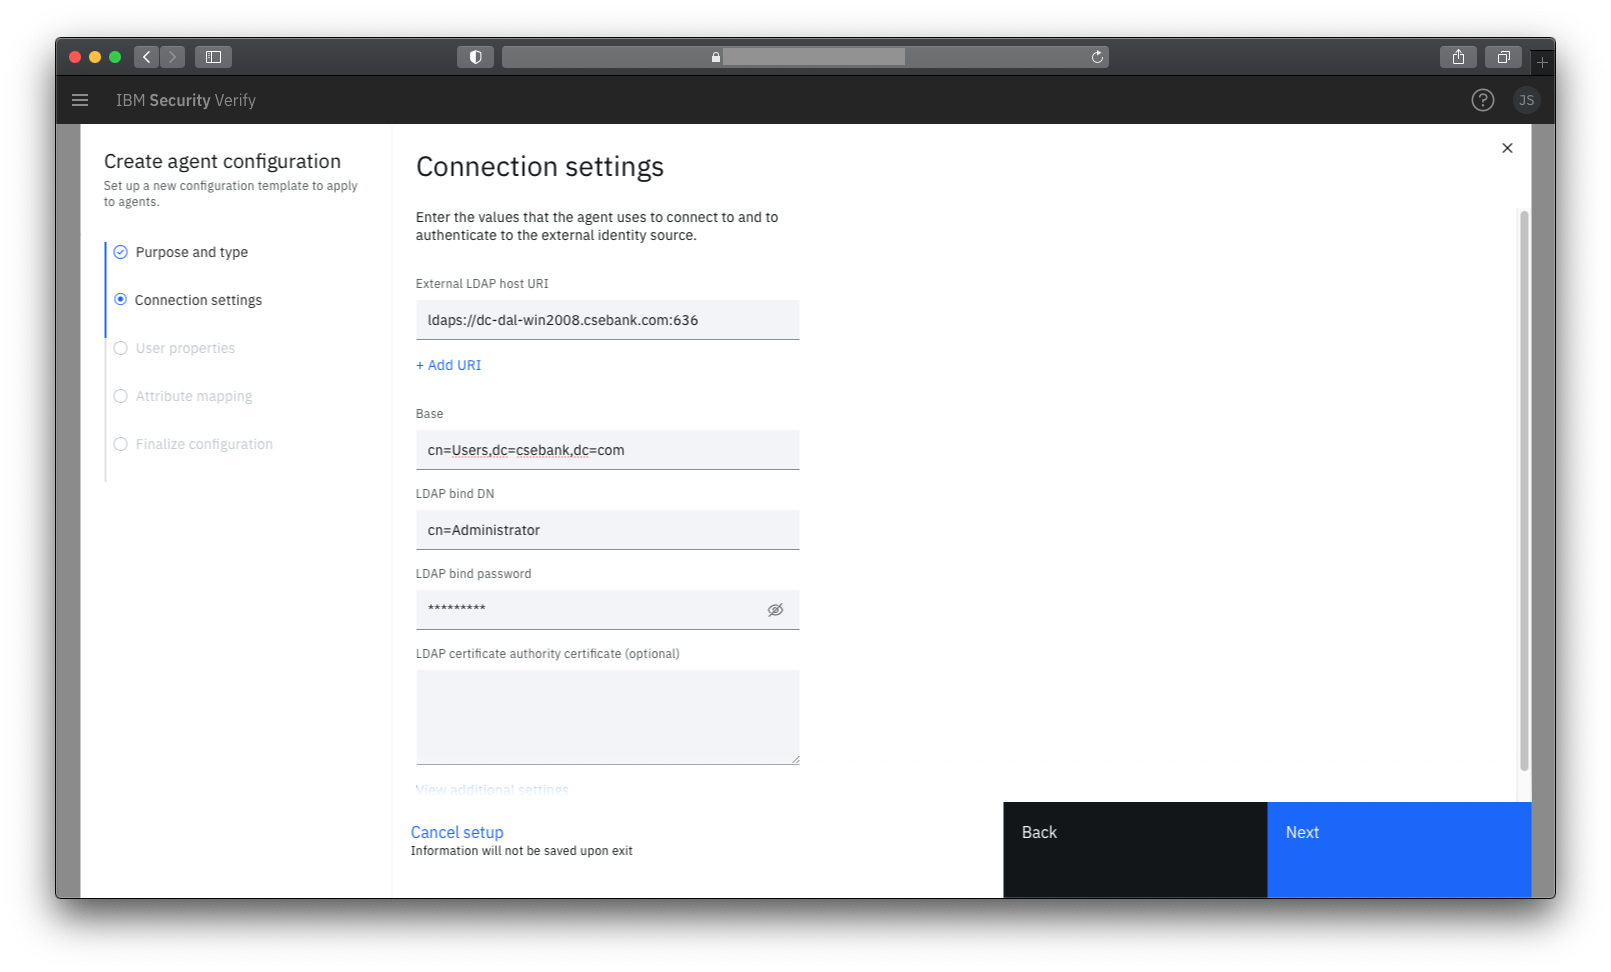
It is recommended to use a secure (ldaps) connection. You can specify multiple URIs for load balancing and high availability.
When defining the user search base, you can specify the directory root or limit to a branch of the directory. Only a single base can be specified.
It's important to remember that the IBM Verify bridge component will be running within your environment so the host names given for domain controllers can be internal host names.
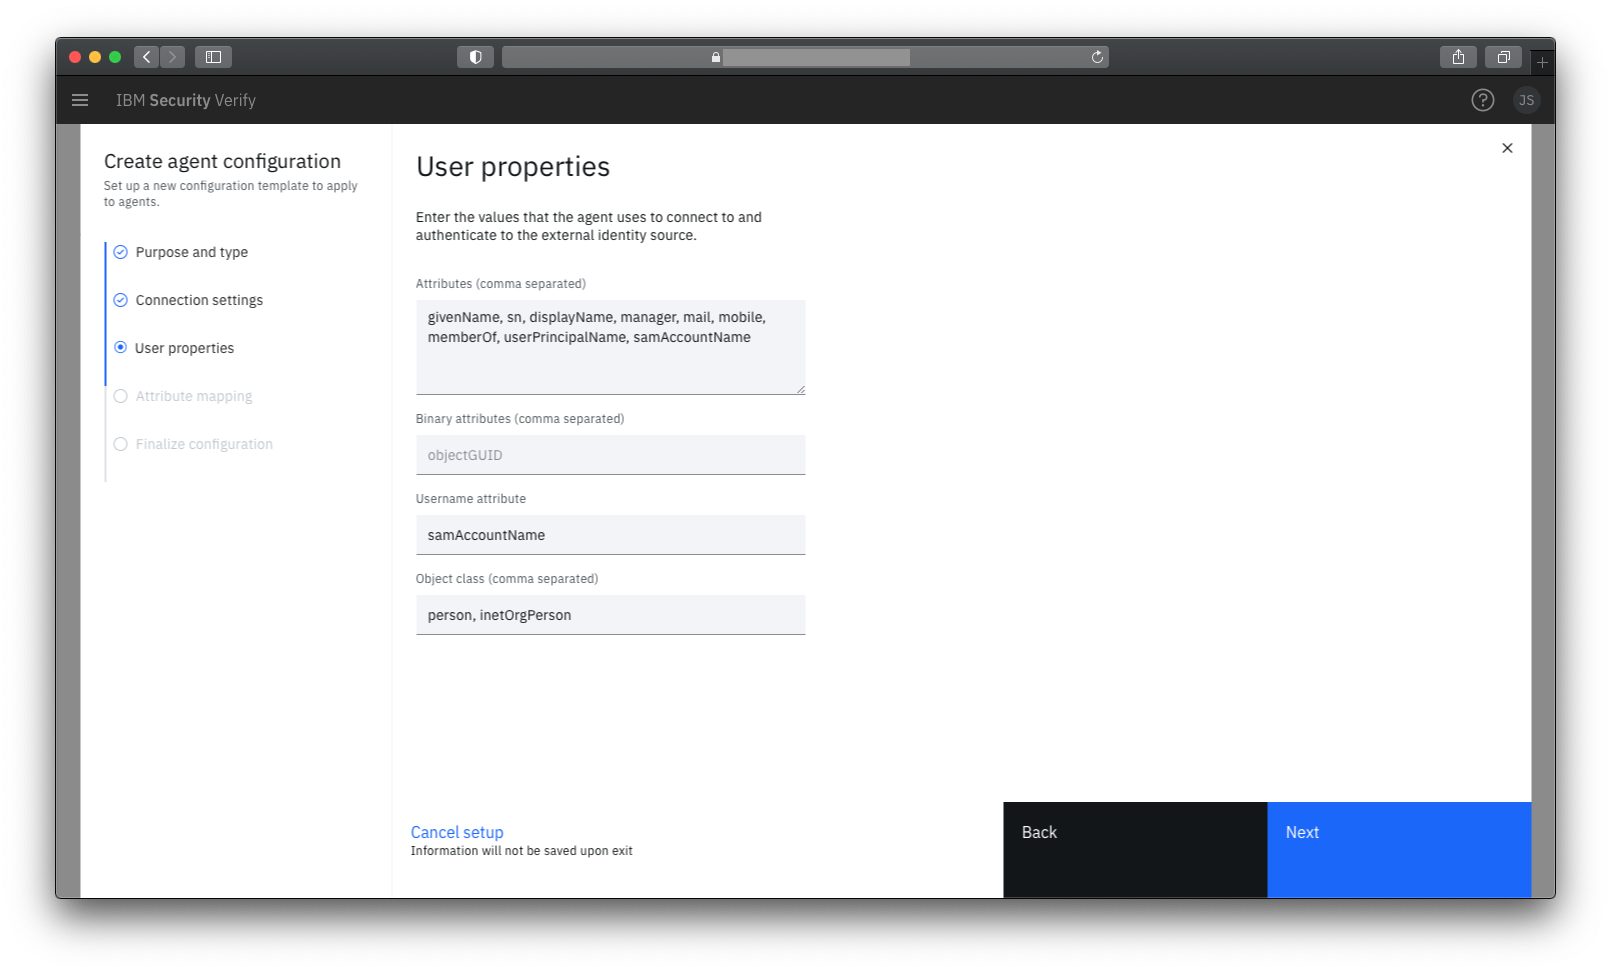
User properties
The default values provided on this panel are good defaults for Active Directory.
If you plan to provide Single Sign-On to Microsoft Office365 then it is likely you will need the objectGUID binary attribute (which is used to link users in Azure with users in on-premises Active Directory).
Exploring Active Directory attributes
If you want to see the attribute names (and values) for attributes in your Active Directory, you can do this in Active Directory Users and Computers by enabling Advanced Features under View menu. This causes a new Attribute Editor tab to shown when you open user properties.
Attribute Mapping
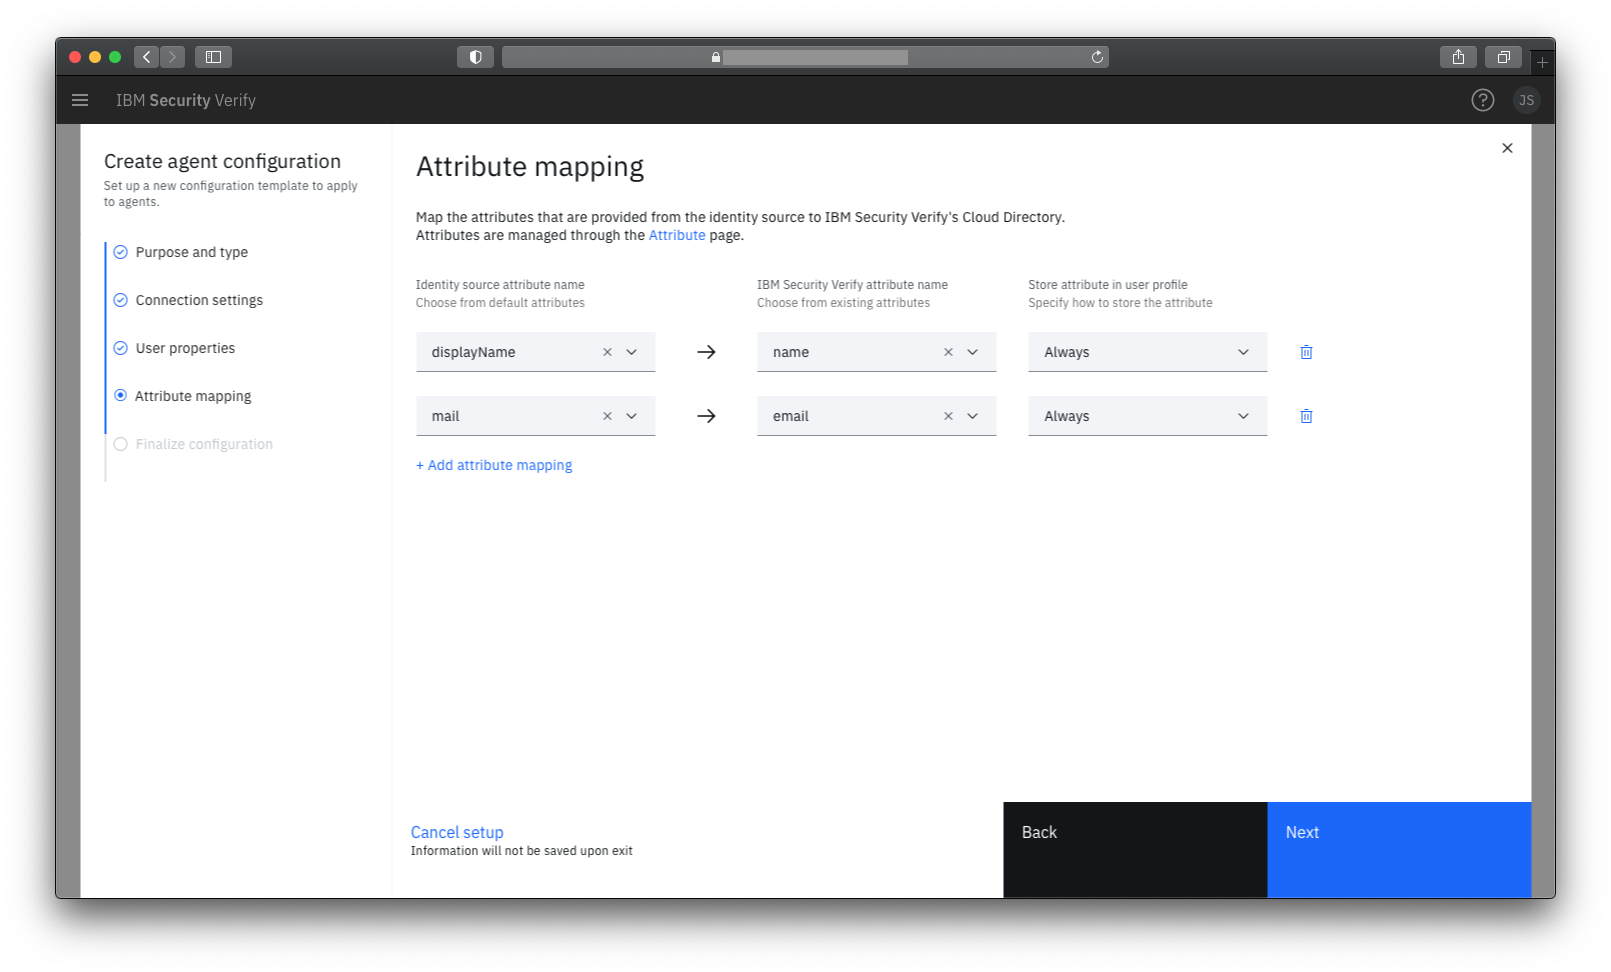
An attribute mapping entry links a source attribute from Active Directory with a target user attribute in IBM Verify.
When a user authenticates via the bridge, the values of the source attribute from Active Directory will override the values of the target attribute in IBM Verify for the current session.
It is also possible to specify that the values read from Active Directory should be stored in the user's Cloud Directory entry in IBM Verify - overwriting any existing values. This can be done either on first access only - or every time a user authenticates.
Finalize Configuration
The agent name is the administrative name for the configuration; it is not seen by end users.
The display name is the name associated with the identity source created for this bridge that will be shown to end users if they need to choose how to authenticate.
The realm name is a suffix added to users that authenticate using this bridge to make them unique in the Cloud Directory. This may be seen by send users when they view their own profile.
Retrieve API Credentials
After you save the Identity Agent definition, you will be shown a Connection details page which shows the Client ID and Client secret that have been generated for your bridge. You will need these during installation of the Verify Bridge service.
Install the IBM Verify Bridge
Option 1: Windows Service
Download the installer for the IBM Verify Bridge from the IBM Security App Exchange.
Use the installer to install the IBM Verify Bridge. During installation, a Windows Service (IBM Verify Bridge) is created.
After installation completes you will be asked for the URL of your IBM Verify tenant and for the Client ID and Client secret from the Identity Agent definition. These are used to populate the configuration file for the service. You can also optionally enable tracing (which is useful for debugging issues).
Assuming you provide the information requested, the Windows Service will be set to start automatically and will be started. The bridge is now ready for use.
Option 2: Container Installation
Follow the deployment instructions on Docker Hub to deploy the container. When creating the docker-compose file, replace the URL, Client ID and Client secret with the values from the Identity Agent definition. You can also optionally enable tracing (which is useful for debugging issues).
Installing multiple bridges
You can create a cluster of bridges by installing the bridge on multiple machines and specifying the same URI, Client ID, and Client secret on each one. Each bridge will register with the Verify tenant and be available to service authentication transactions.
Validate Configuration
Trace file
Assuming you enabled tracing during installation, the trace file for the Verify Bridge can be used to validate correct startup of the bridge.
For the Windows Service, the default location for the trace log is C:\Program Files\IBM\BridgeAgent\bridge_agent.log.
For a container installation, the trace can be viewed by viewing the container log.
If you view the trace you should see content like this when the bridge starts:
...
2021-01-12 14:50:37.155:httpmod.go:618: getBearerToken(): expiresAt=2021-01-12 16:50:36.7057442 +0000 GMT m=+7200.071289101 getNewTokenAt=2021-01-12 16:44:36.7057442 +0000 GMT m=+6840.071289101 EX
...
2021-01-12 14:50:37.155:opprocmod.go:363: run(): Waiting for operations
2021-01-12 14:50:37.155:main.go:307: run(): NewConfig event received
...
2021-01-12 14:50:37.462:main.go:332: run(): NewConfig event processing done
2021-01-12 14:50:37.462:opprocmod.go:363: run(): Waiting for operations
...
2021-01-12 14:50:37.511:ldapauth.go:1193: getLDAPType(): type=Active Directory
2021-01-12 14:50:37.511:ldapauth.go:1206: getLDAPType(): autoset group membership attr = memberOf
2021-01-12 14:50:37.511:ldapauth.go:237: setLdapState(OK)
Admin UI
In the Admin UI, under Identity Agents, you should see an active agent listed for your bridge definition. This shows that your service has successfully registered with your tenant:
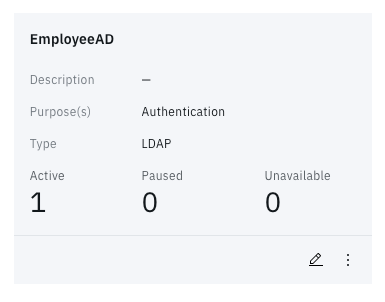
Identity Agent status tile
Test
To test the bridge end to end, attempt to authenticate to your IBM Verify tenant using a username and password from your Active Directory.
On the default login page, click Sign in another way and select the identity source associated with your bridge from the drop-down list.
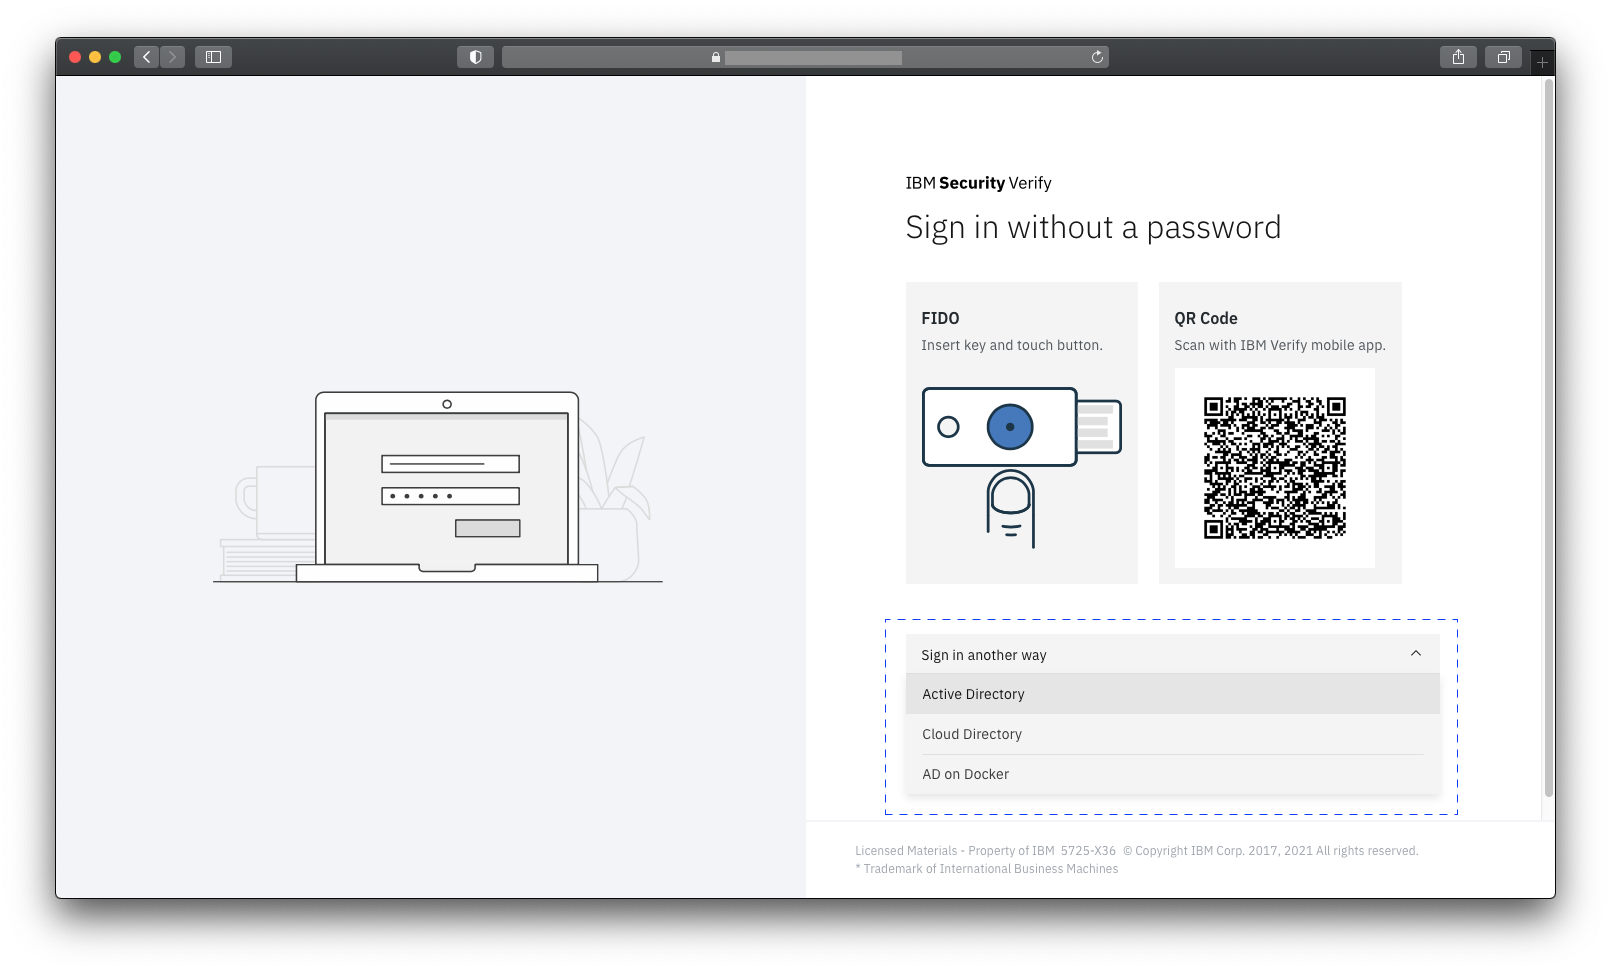
Enter the username and password of a user from Active Directory. If everything is working the user should be successfully logged in.
If the authentication fails, check the trace file of the bridge service for debug information.
Jon Harry, IBM Security
Updated 7 months ago
