Identity source routing
Routing to specific identity source for authentication
It is not uncommon to configure different identity sources in IBM Verify for different personas. For example, consumers may authenticate with social identity providers, like Google and Facebook, and employees may authenticate with the native Cloud Directory or with a connection to a directory or a federated identity provider. In a B2B ecosystem, partner organizations may bring their own employee identity sources as federations to be configured on the tenant. Given the plethora of options available, the user is currently expected to pick the identity source of choice in the default authentication experience.
This article seeks to offer a method of choosing the identity source through rules configured in a flow that are executed server-side. The user simply begins with providing their username.
Overview of the flow
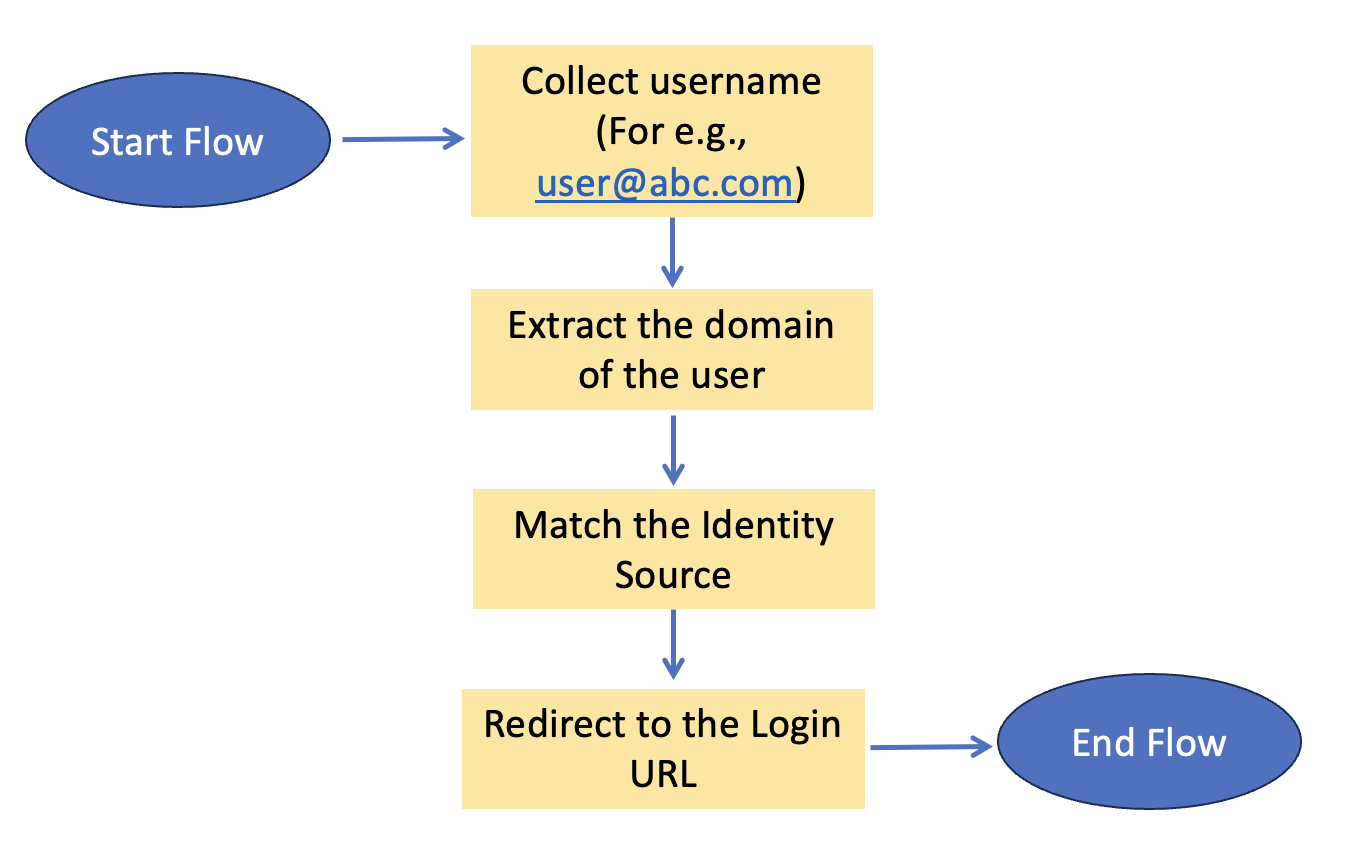
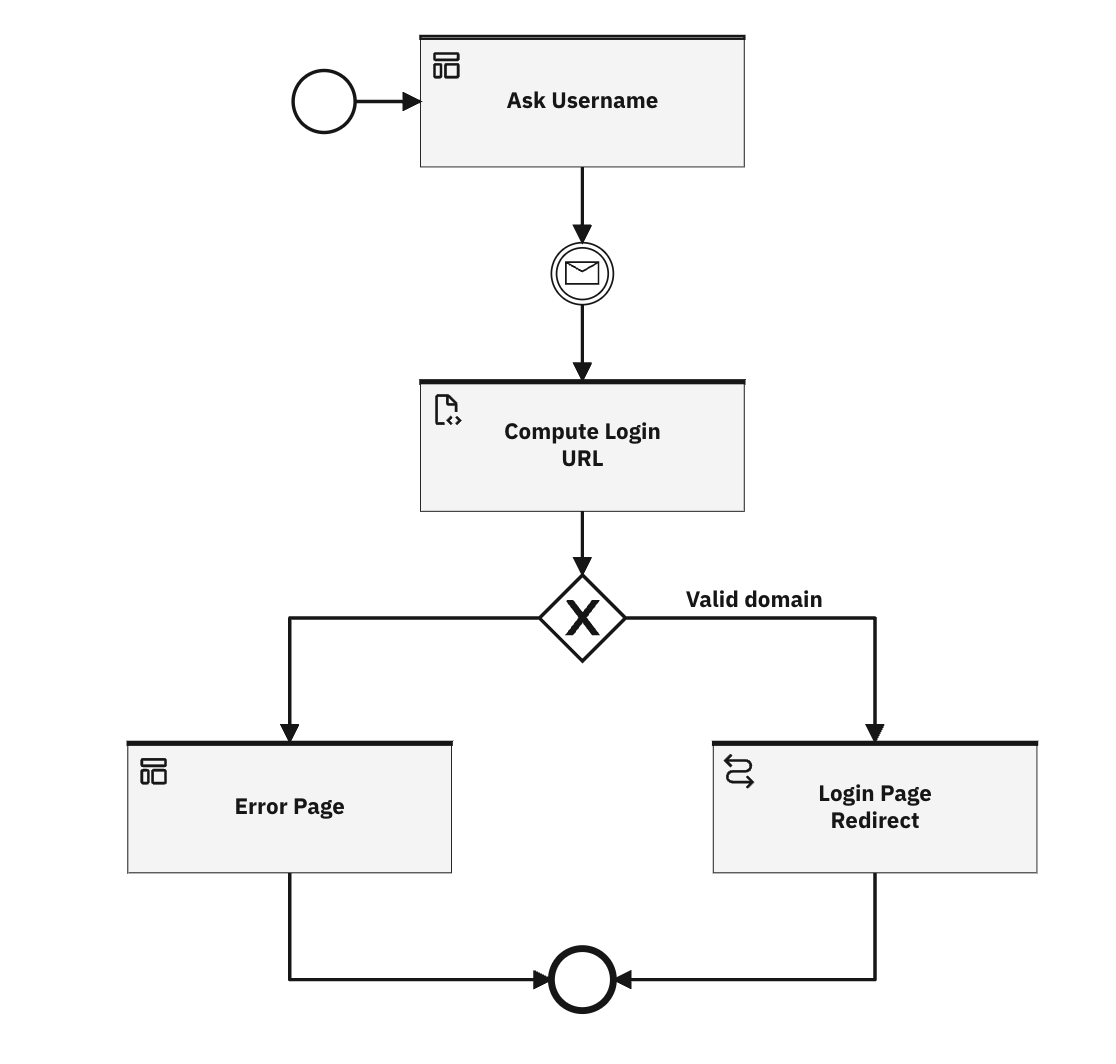
The flow starts with asking the user for the username. This is a simple custom page. Once the username is submitted, the system executes a set of rules to determine the identity source that should be used to authenticate. The user is then directed to login with that identity source.
Resources
This article makes use of importable file resources that can be found in the identity_source_routing subdirectory of the verify-saas-resources GitHub repository.
For more information on the GitHub repository that contains supporting resources for example flows, please see the Associated Assets section of the Flow Designer overview page.
Prerequisites
Please review and understand the hello world example, including how to obtain flow and page asset resources for configuring the example flows. Refer to the parent page for details on hello world example.
Installation and configuration
Custom branding theme
This flow presents custom pages and so, a theme needs to be created to prevent affecting the flows using the default theme. There are two customized files:
- custom_page1.html: This requests for the username.
- custom_page2.html: This shows an error in the event that the flow fails.
Login to the IBM Verify admin console and follow the steps as below.
-
On the left-hand side menu, select User experience and click on Branding.
-
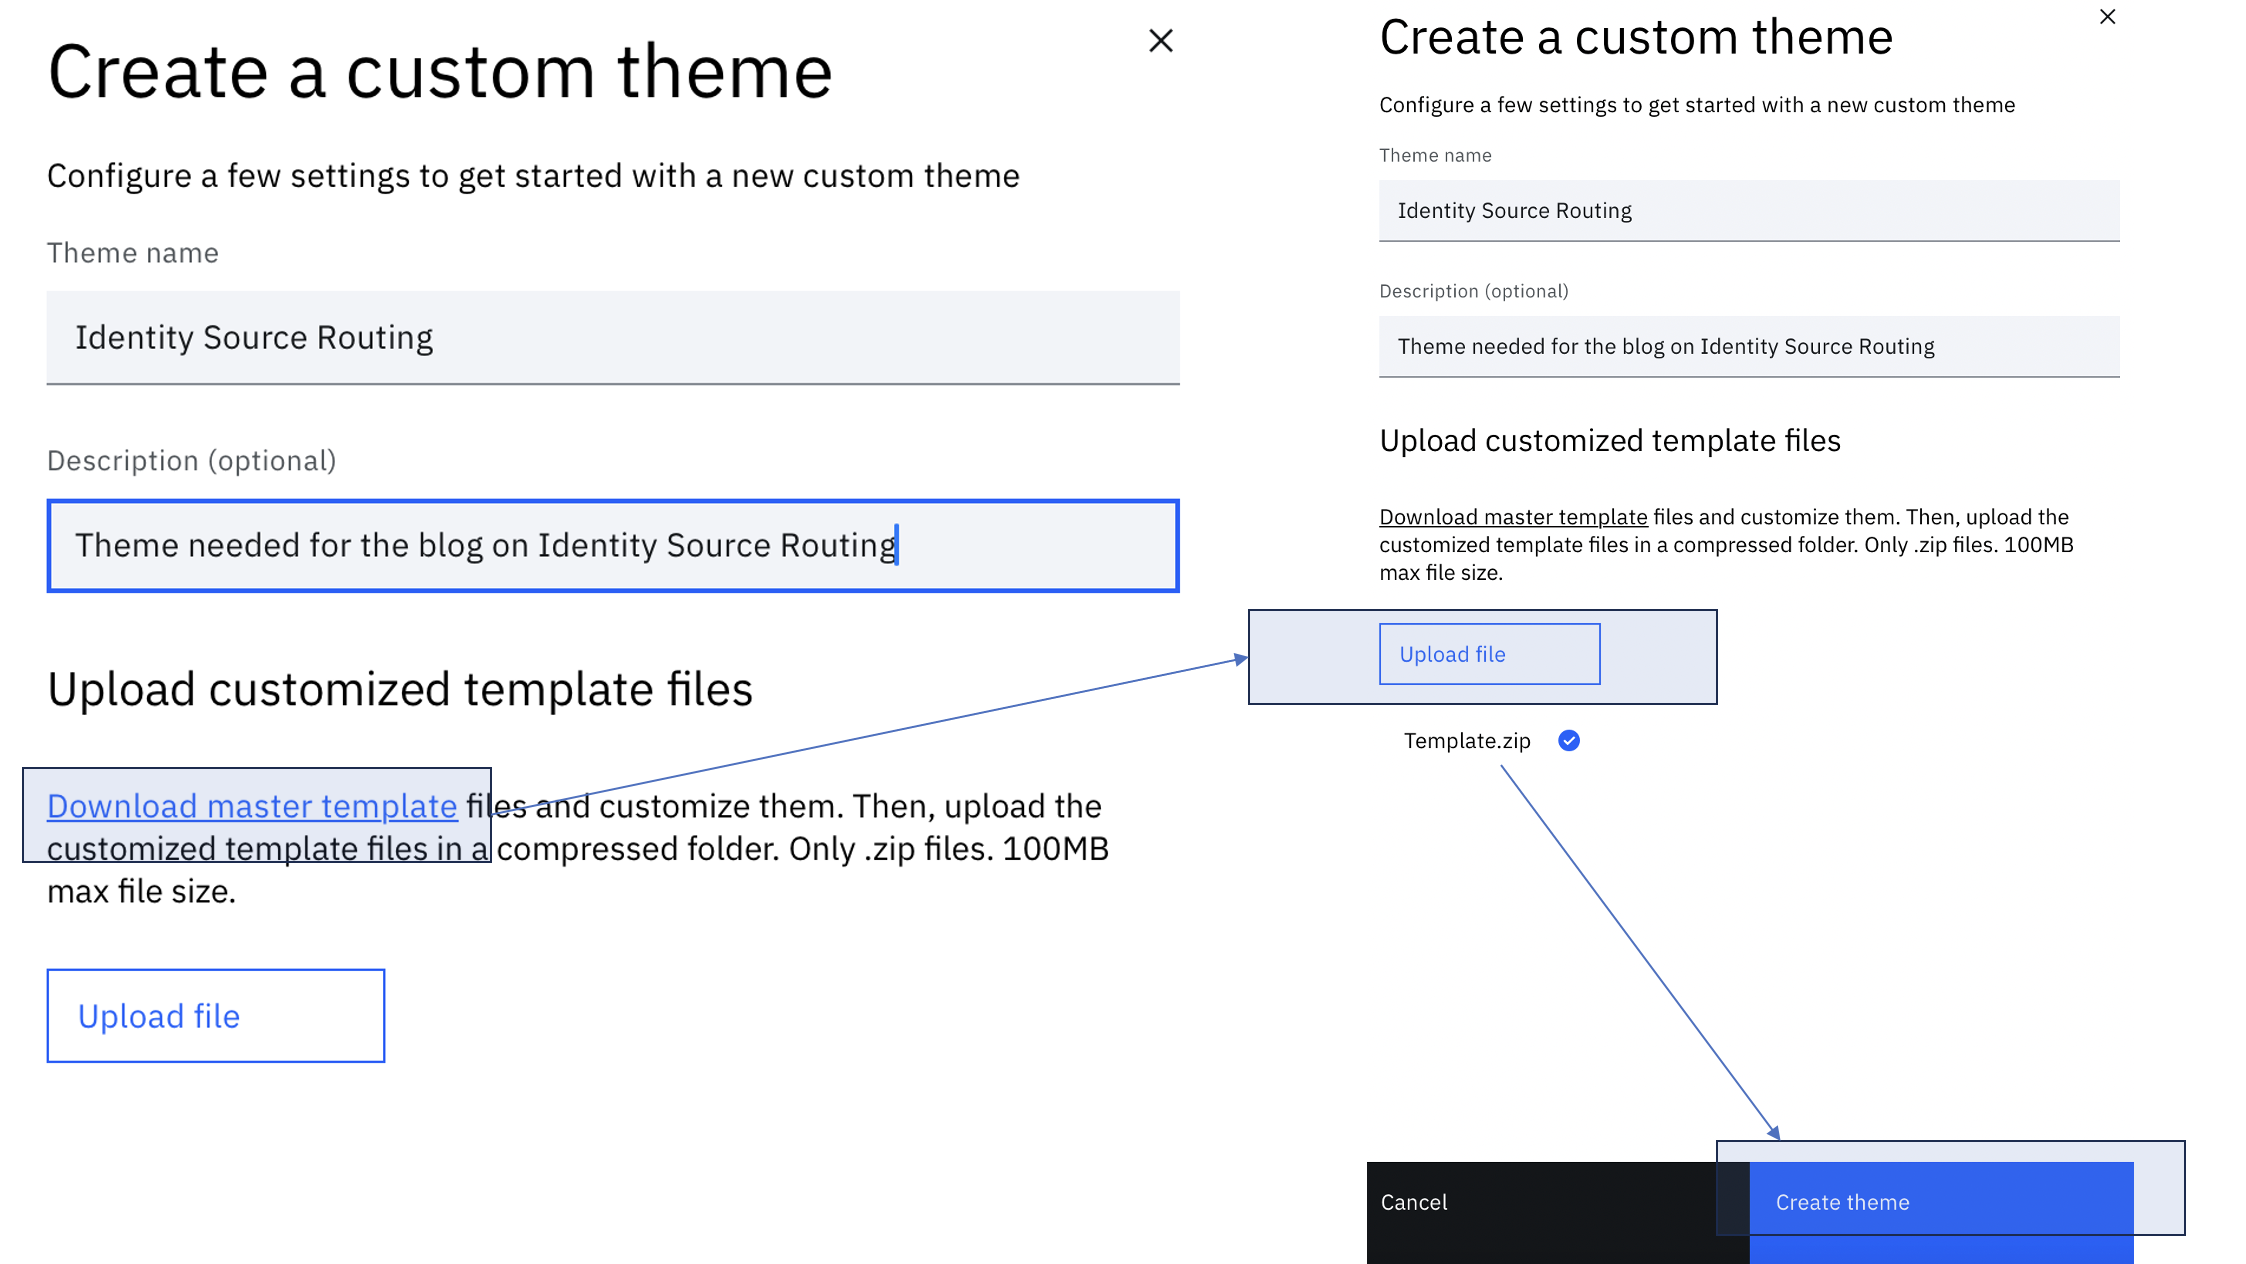
Create a new branding theme called Identity Source Routing. Follow the steps mentioned here for the same.
-
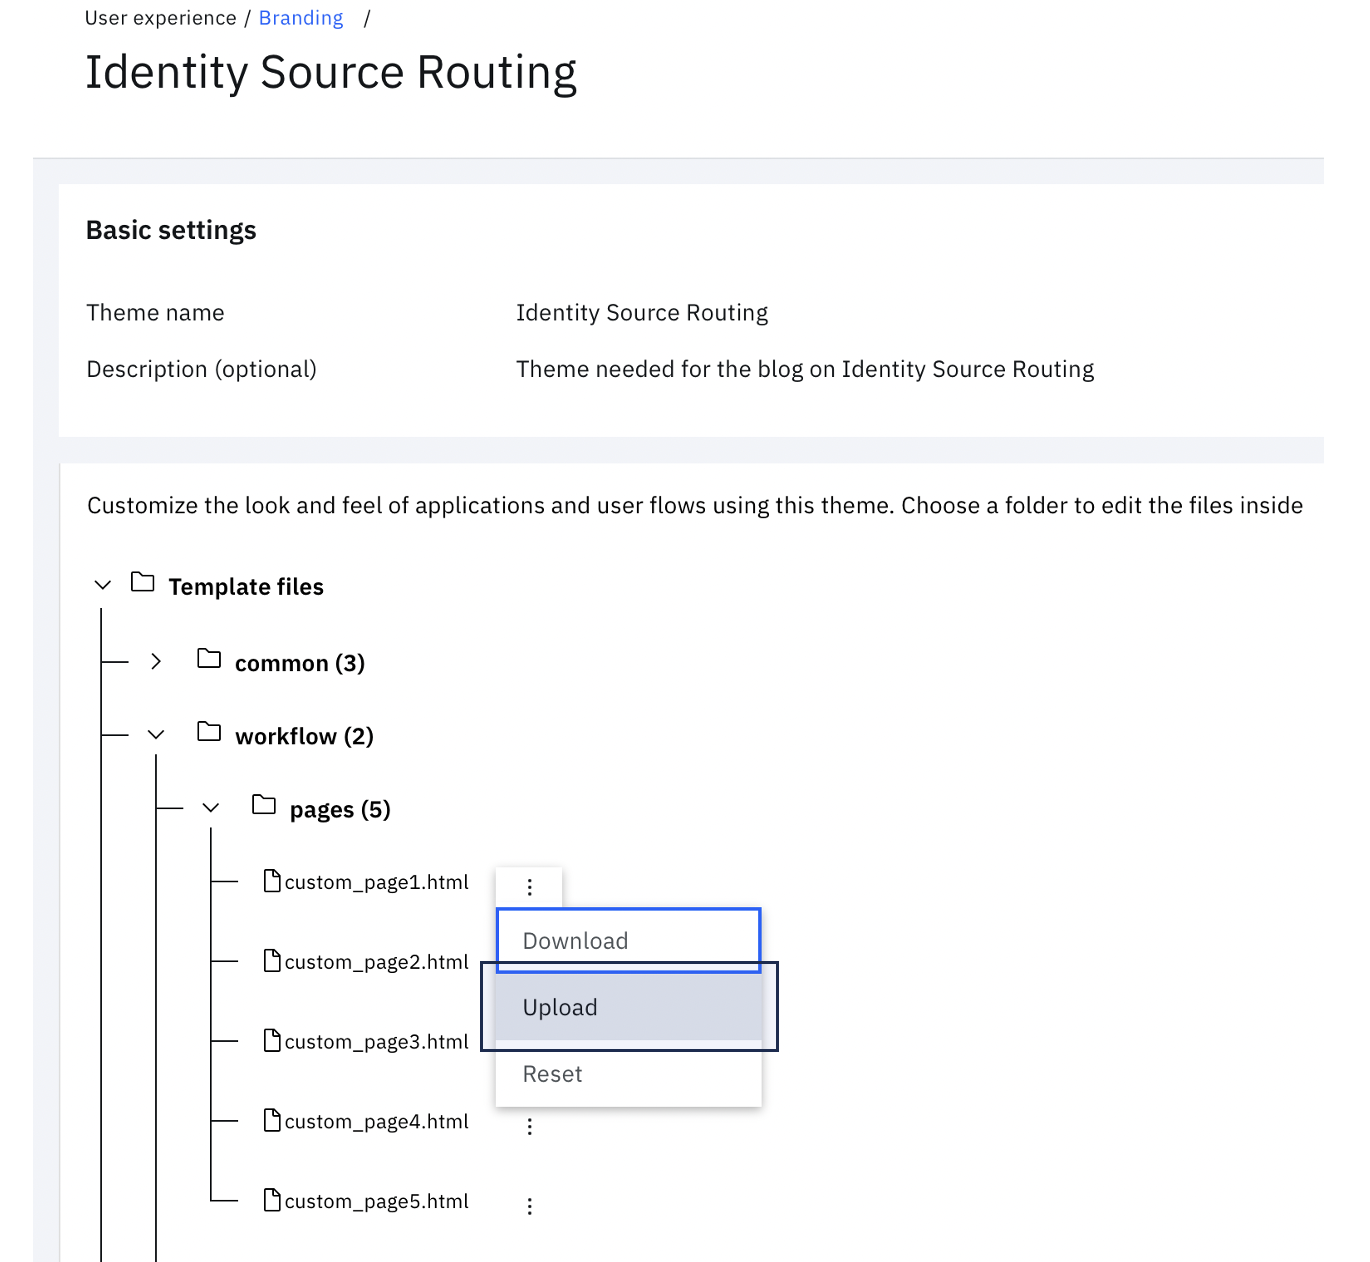
Click on the theme tile to view the file tree
-
Expand workflow > pages and click on the three vertical dots next to custom_page1.html. Click Upload.
-
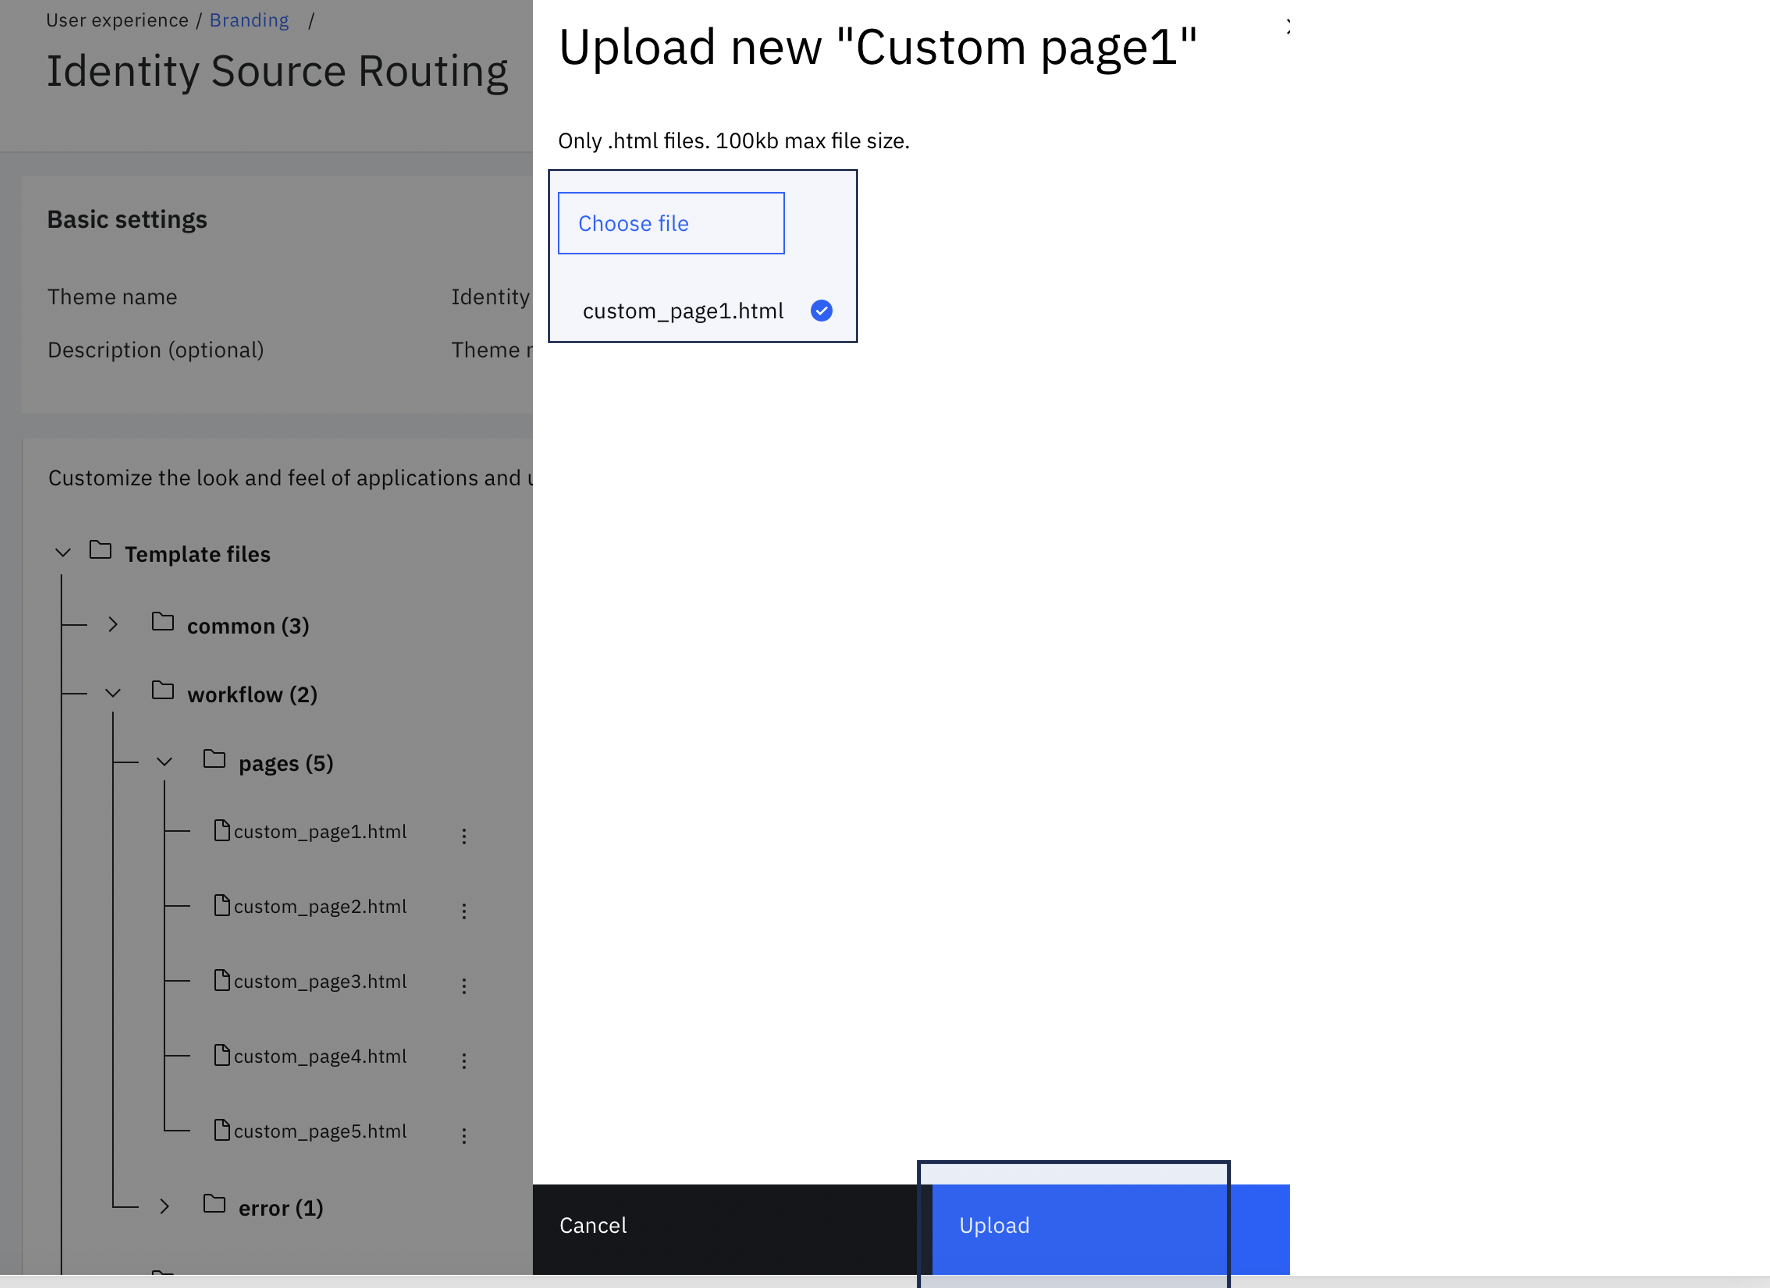
Choose $GIT_REPO/flows/identity_source_routing/pages/templates/workflow/default/custom_page1.html from the local folder. Then click Upload.
-
Similar to the earlier step, under workflow > pages, click on the three vertical dots next to custom_page2.html. Click Upload.
-
Choose $GIT_REPO/flows/identity_source_routing/pages/templates/workflow/default/custom_page2.html from the local folder. Then click Upload.
Import the workflow
-
To import the model, login to your Verify Tenant as the administrator and switch to the admin interface.
-
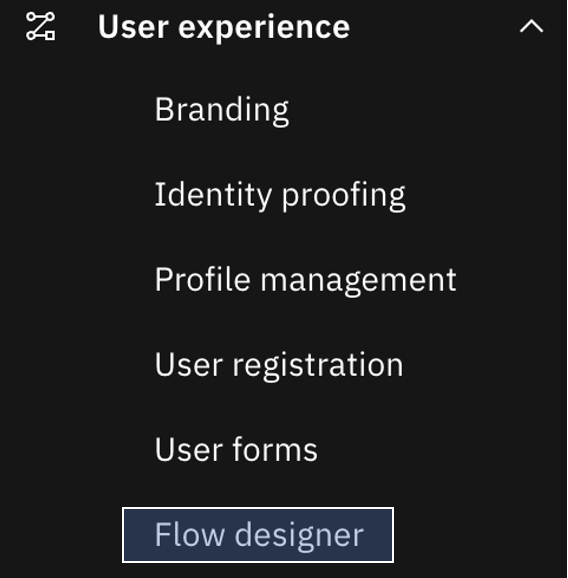
Navigate to the Flow designer.
-
Click on the Import icon next to the Create flow button.

-
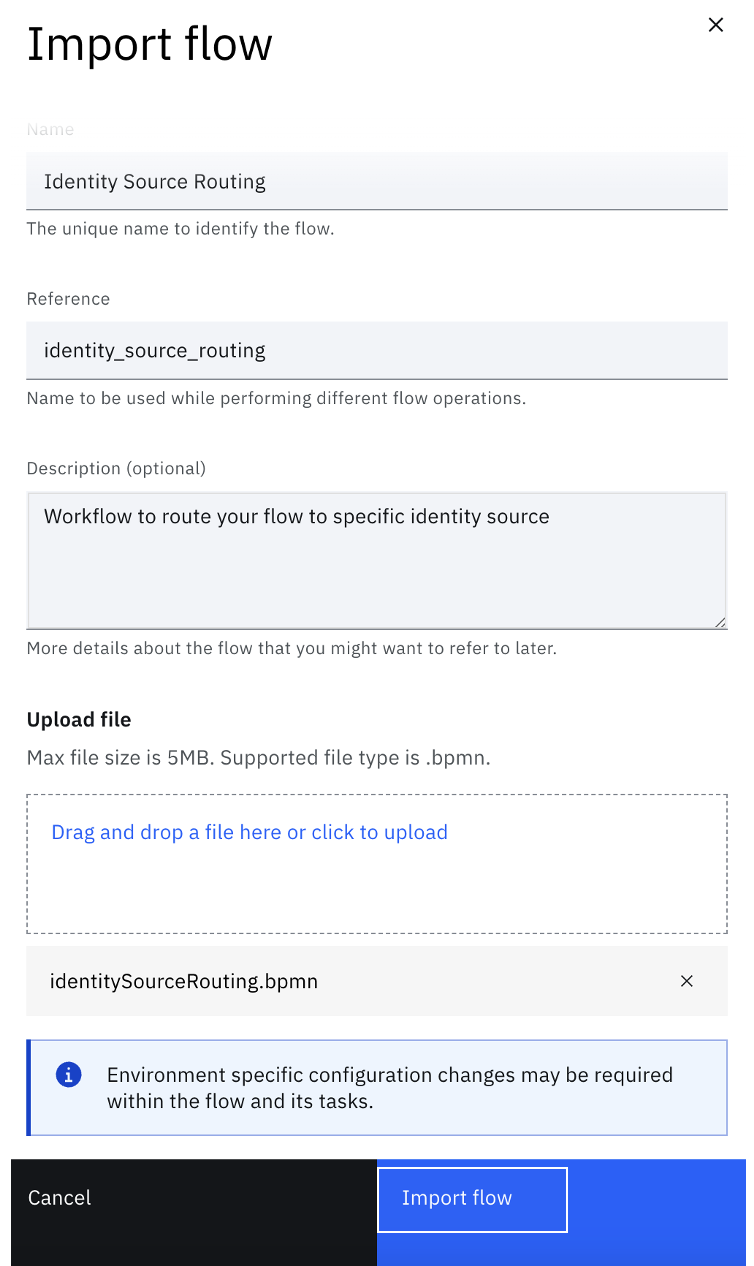
Fill in the details and upload the file located at "$GIT_REPO/flows/identity_source_routing/identitySourceRouting.bpmn".
-
Once imported, the flow will show up as follows in the Flow designer.
-
Click on Save changes to save the workflow in Draft mode.
-
Once all changes are made, Publish the workflow.
Running the flow
Once published, launch the flow using the Execution URL.
-
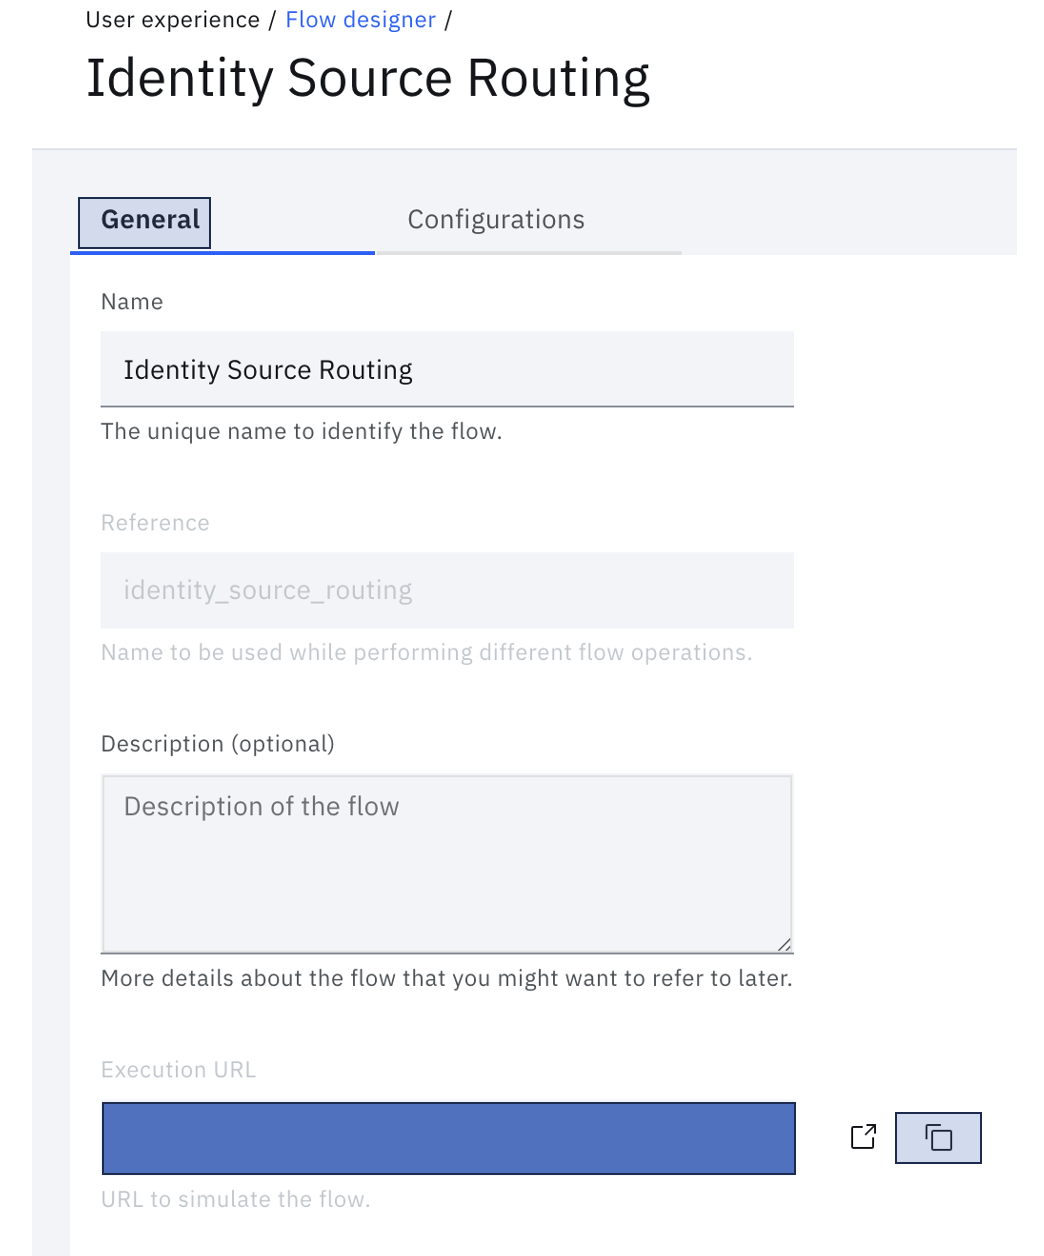
In the flow General tab, copy the Execution URL.
-
Open a browser window and go to this execution URL and complete the flow as directed.
Note
Typically, this would be launched as part of user authentication. You may do so by customizing the "combined_login_selection.html" page template in your theme. It is recommended, however, to run the end-to-end flow using the execution URL before enabling it for all users.
Running the flow with a specific theme
To launch the published flow with a specific theme, pass the themeId as a query parameter into the Execution URL. For example:
https://.verify.ibm.com/flows/?reference=identity_source_routing&themeId=69eaf7a4-xxxx-xxxx-xxxx-20f892876d2f.
The theme ID value can be obtained by using one of the two methods.
- Refer to the Themes API.
- Alternatively, visit the Branding section in the Admin User Interface and click on the theme of interest. When you select the theme, you can see the specific theme ID in the URL. For example: For URL "https://mytenant.verify.ibm.com/ui/admin/branding/69eaf7a4-xxxx-xxxx-xxxx-20f892876d2f", the theme ID is
69eaf7a4-xxxx-xxxx-xxxx-20f892876d2f.
If no themeId is passed to the Execution URL, it will executed with the default theme. However, in this flow, if you want to render a specific theme to a specific page, the configuration of that page can be updated as follows:
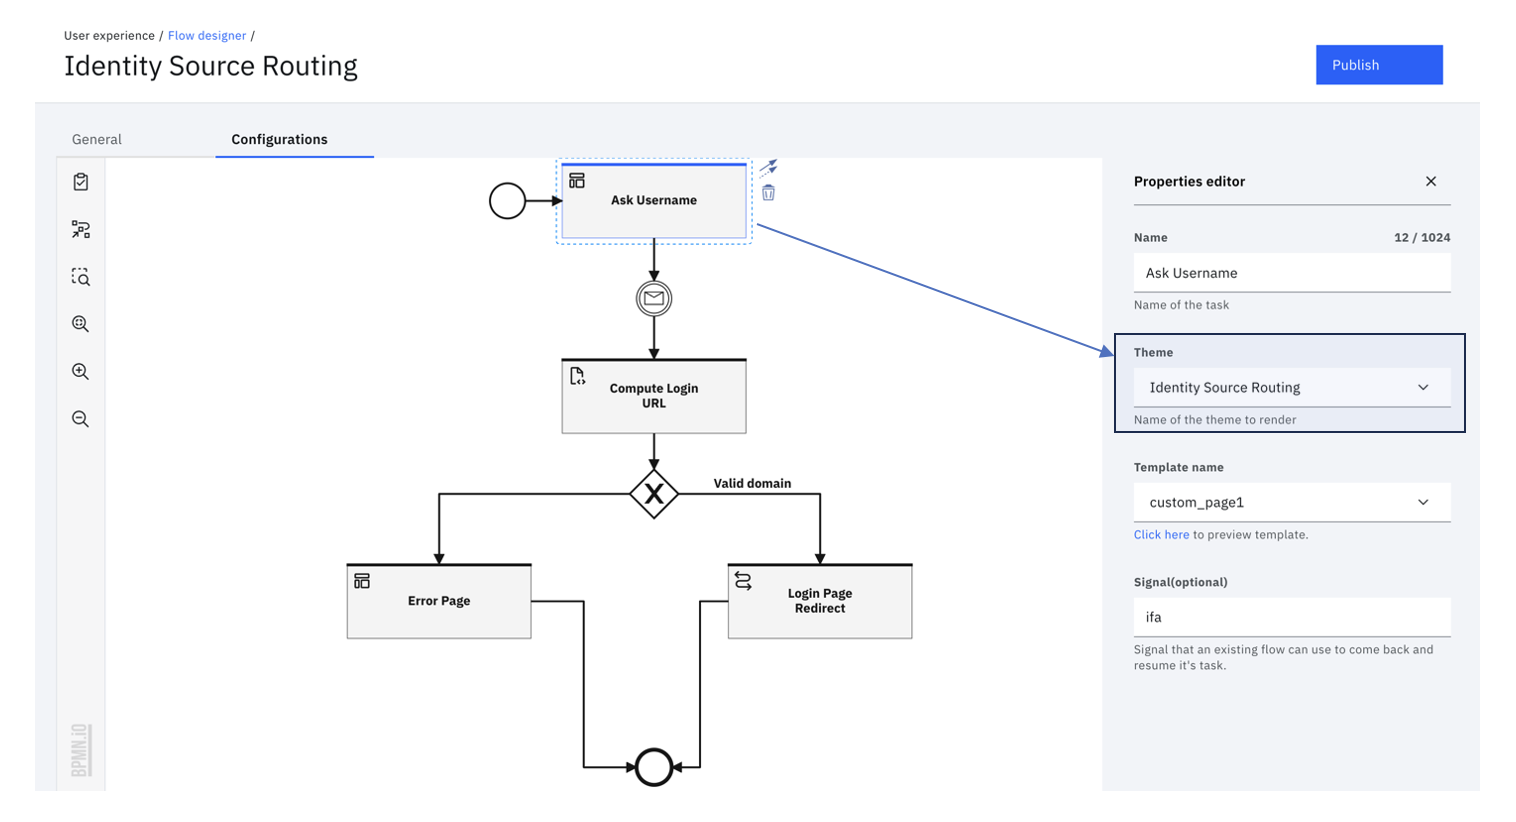
In this specific example, the custom theme that was created above, i.e. Identity Source Routing is applied to the Page Ask username.
Unpacking the flow
This is an optional section and dives into the details of the workflow. This elaborates on the purpose of each step in the flow.
Ask username
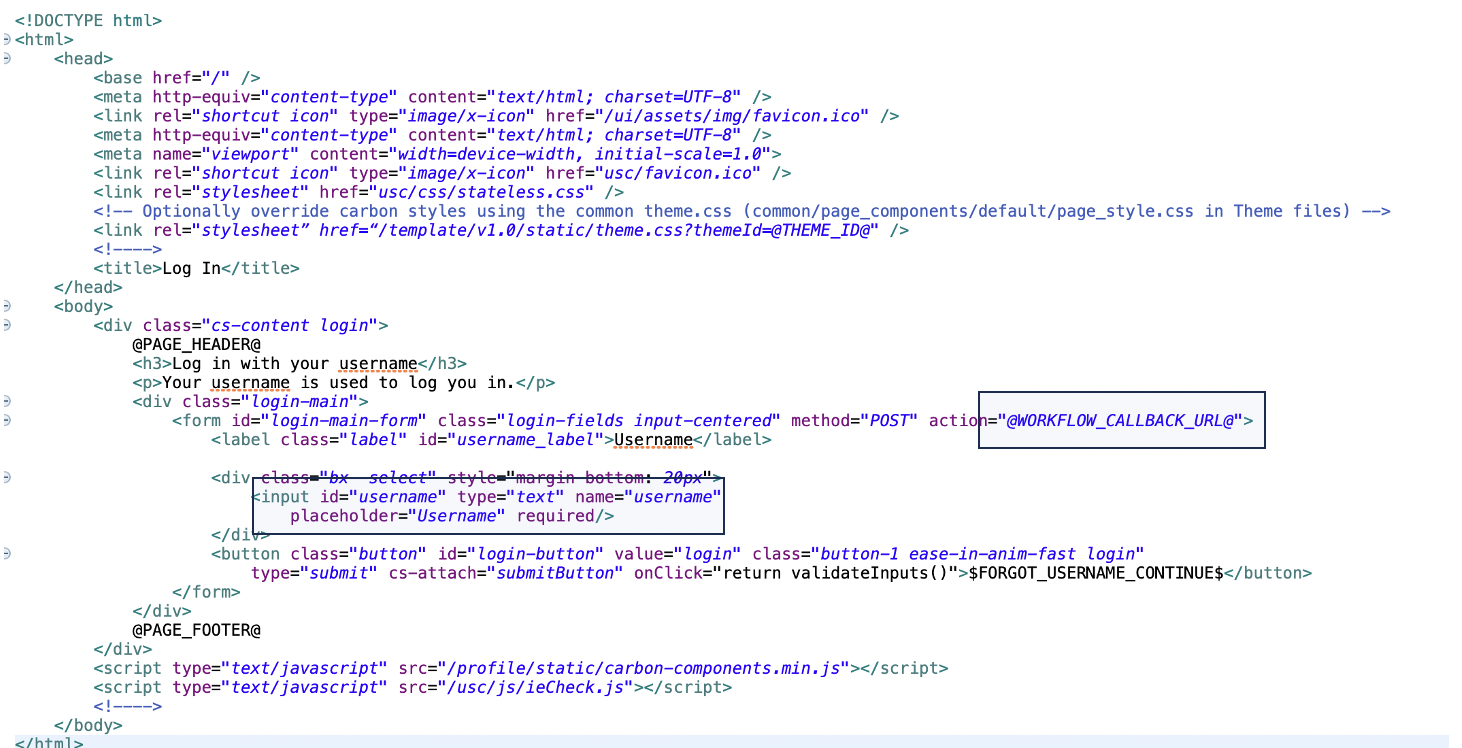
This task presents the custom page that shows the username field. The HTML name attribute is set to username. Any submitted parameters are stored in the flow context. Thus, when the HTML FORM is submitted, the flow context is updated with username as the property name and the value provided by the user.
The HTML FORM action URL leads back to the workflow referenced by the @WORKFLOW_CALLBACK_URL@ macro in the page template.
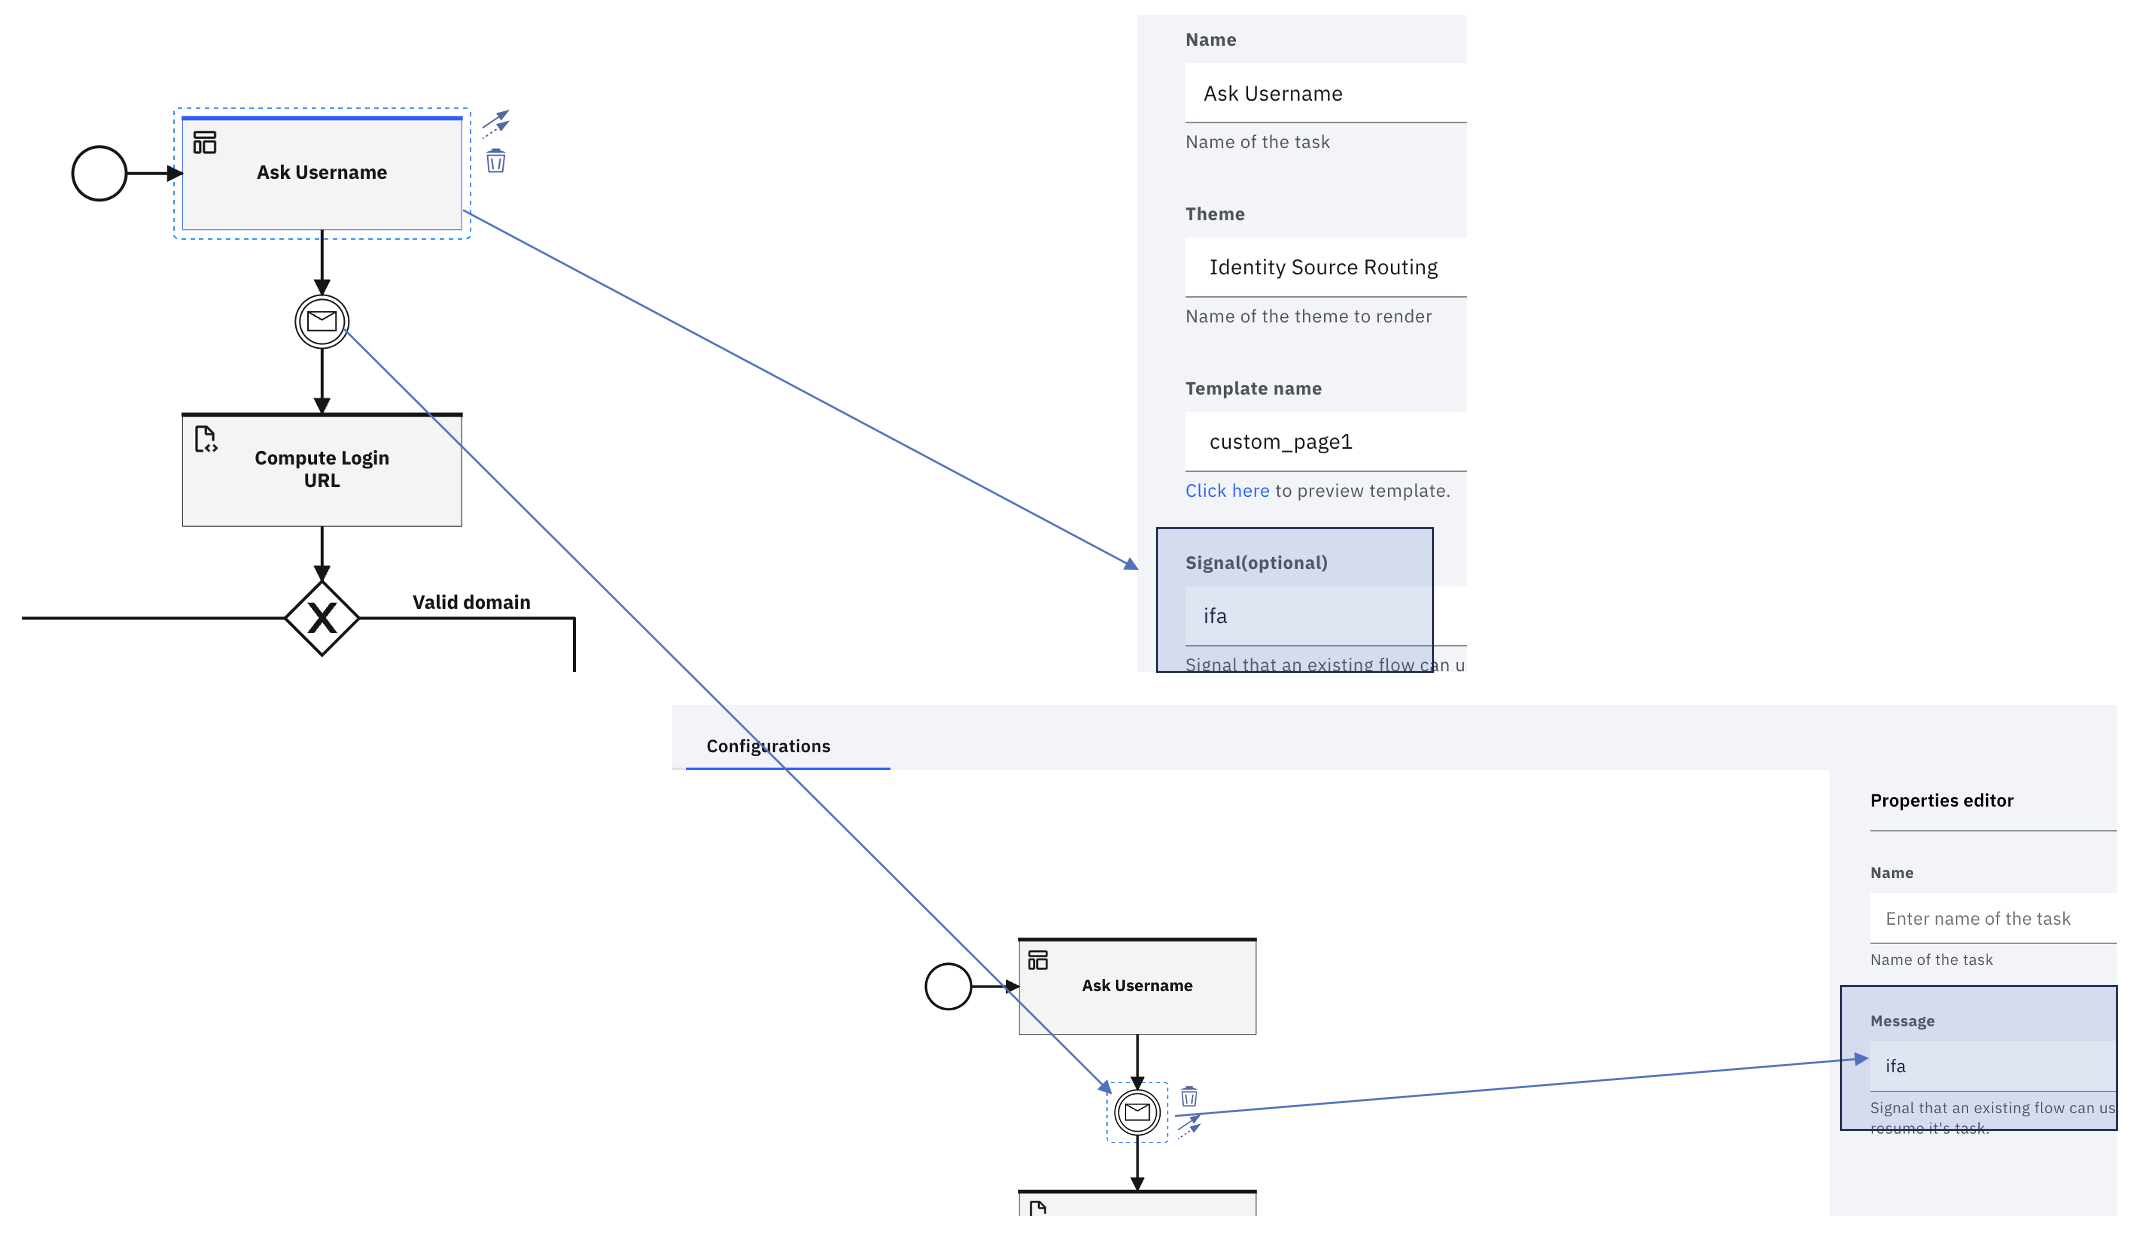
The "Signal" input parameter pairs with the "Message event" that follows in the flow. This value binds the event of FORM submission with the point where the workflow should resume.
Read more about the Page task here.
Compute Login URL
This task is the heart of the current article, since this is where the business logic lies. In the sample model, we are using the Function task to compute the Identity Source corresponding to the given user. The script can be modified to reflect the desired rules. Here, the username is expected to be in the email format and the allowed domains are mapped to an identity source realm.
statements:
    # This is the map of email domain to identity source realm
    - context: >
        idsMap := {
            "gmail.com": "www.google.com",
            "in.ibm.com": "www.ibm.com",
            "default": "cloudIdentityRealm"
        }
    # Extract the realm. If no valid realm is available, use "invalid"
    - context: "tokens := ctx.username.split('@')"
    - context: "domain := context.tokens.size() > 1 ? context.tokens[1] : 'default'"
    - context: "realm := context.idsMap.exists(x, x == context.domain) ? context.idsMap[context.domain] : 'invalid'"
    # If the realm is not invalid, redirect to the login flow. This takes advantage of the "realm_hint"
    # parameter accepted by the Verify /login endpoint that instructs the backend to route to the appropriate
    # identity provider.
    - if:
        match: context.realm != "invalid"
        block:
        - return: >
        {
            'loginUrl': 'https://' + ctx.__tenantid + '/idaas/mtfim/sps/idaas/login?runtime=true&login_hint=' + ctx.username + '&realm_hint=' + context.realm
        }
    else:
        - return: >
        {
            'loginUrl': 'invalid'
        }
Login Page Redirect
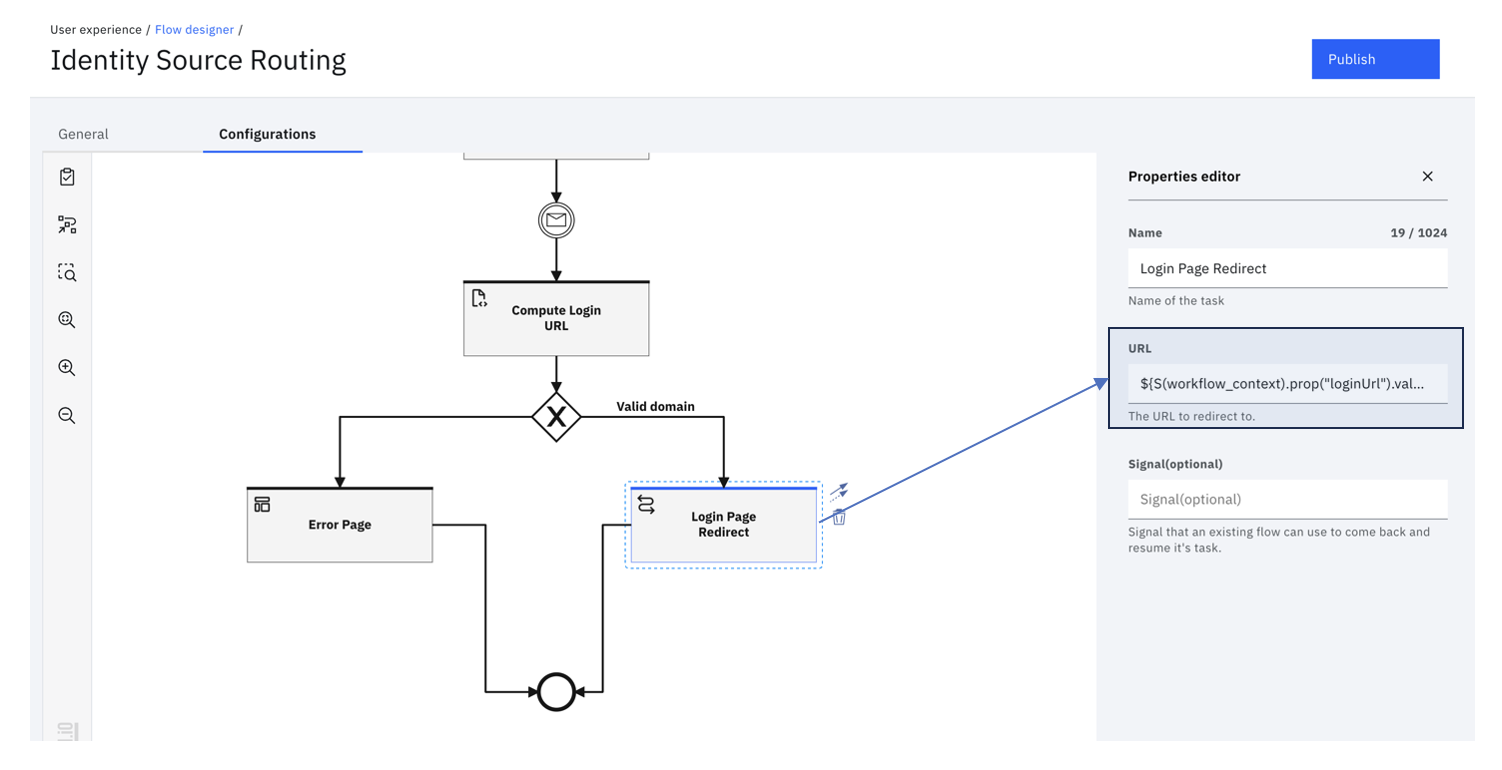
This task is purely a redirect task and it could be used to do a browser redirect to the URL configured in the task.
The output from the Compute Login URL is available as loginUrl property. This property is referenced in the "URL" property using the unified expression language.
Error handling
In the event of an invalid domain, the flow uses a conditional gateway to direct the user to a custom error page.
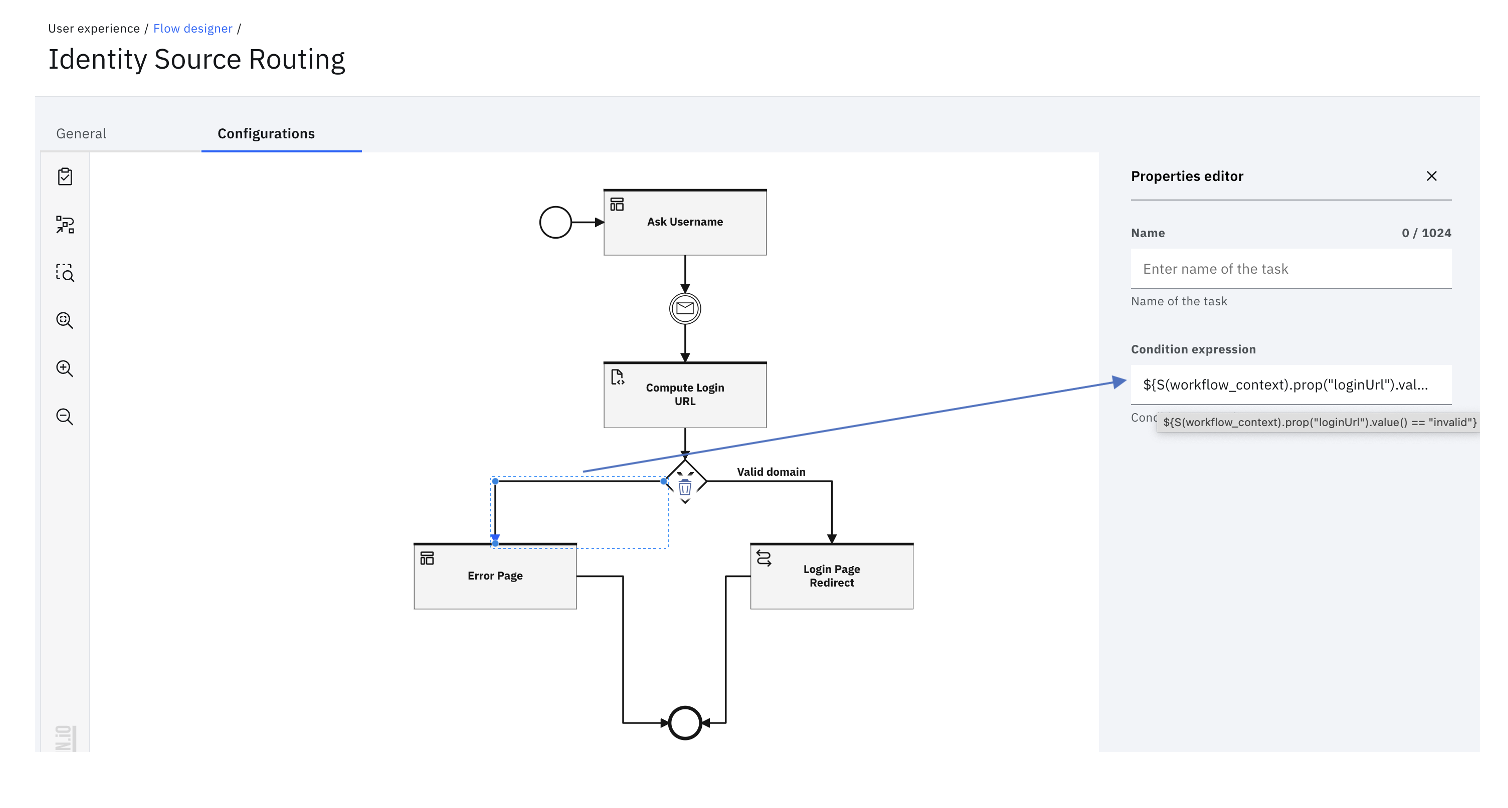
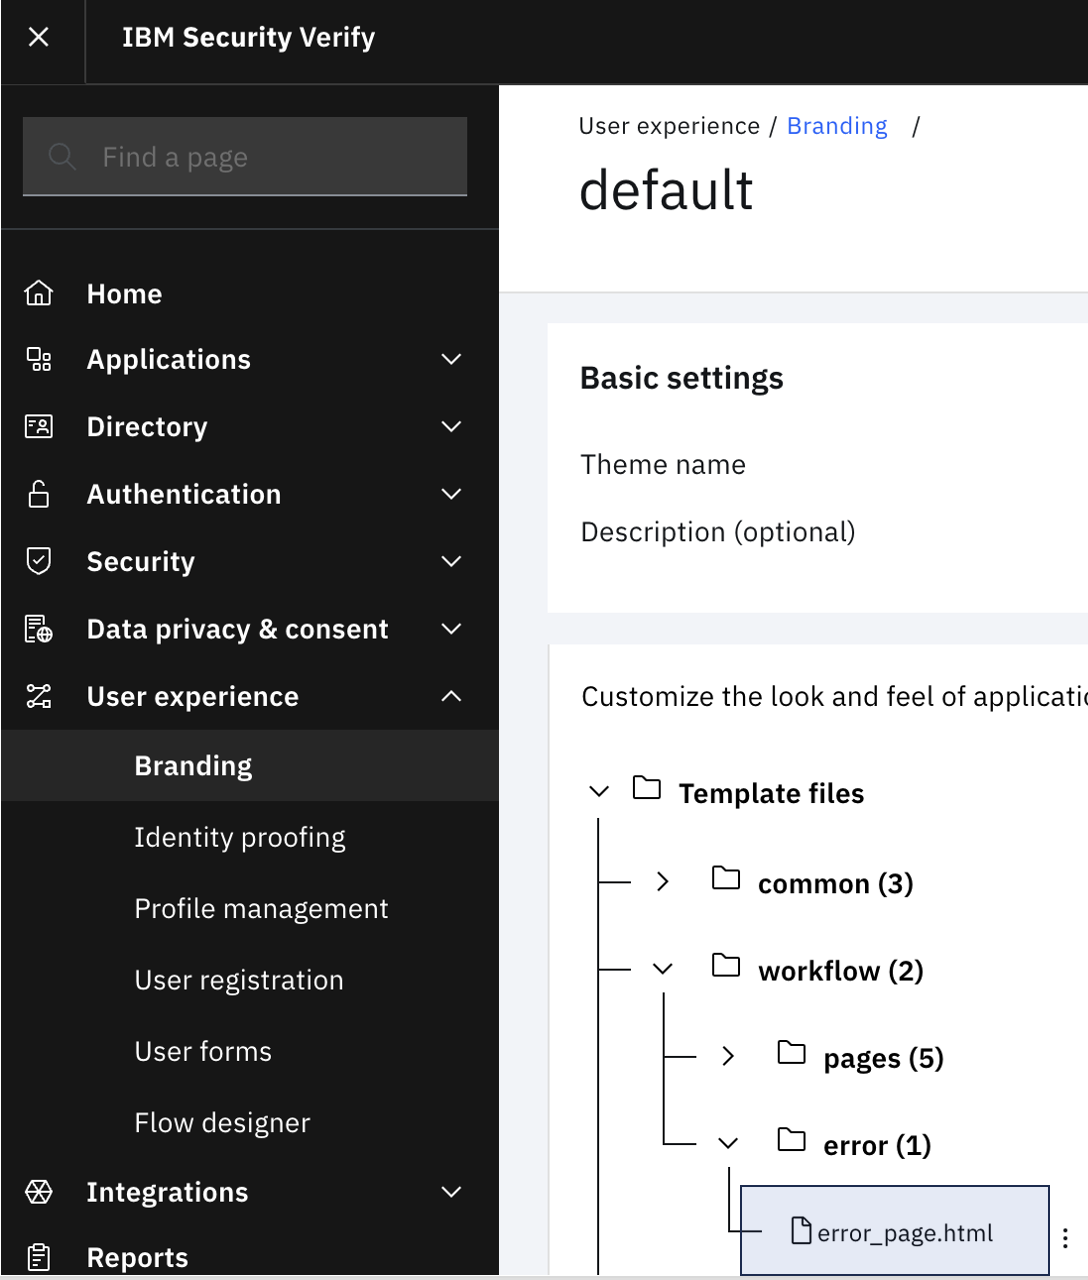
In the event of a system error, the flow will be directed to the error page. This can be customized in the theme.
The wrap
This flow introduces a method to execute server-side rules to choose an identity source for authentication. While it can be used as-is with minimal customizations, you may introduce other capabilities, such as adding passkey autocomplete to this flow.
Ramakrishna J Gorthi and Pradip Jadav, IBM Security
Updated 6 months ago
