LDAP provisioning
Introduction
This document provides instructions for configuring IBM® Verify User Lifecycle Management for an on-premises LDAP directory.
There are multiple components are required to be in place in order to manage provisioning with LDAP, such as:
- Security Directory Server (SDI) along with RMI Dispatcher
- Onprem components such as Identity Brokerage, Postgres database and Verify agent (to be installed as containers)
- LDAP Adapter profile for Identity Brokerage
- Configure Identity agent in IBM Verify
Refer to the on-premise provisioning in order to install various pre-requisite components
Configure LDAP application for Provisioning
After the pre-requisites are in place, next step is to create LDAP application in IBM Verify
Create LDAP application
• Login to IBM® Verify as tenant admin (Scott)
• Navigate to Applications page, click the Add application button

• On the Select Application Type dialog, enter LDAP into the search box
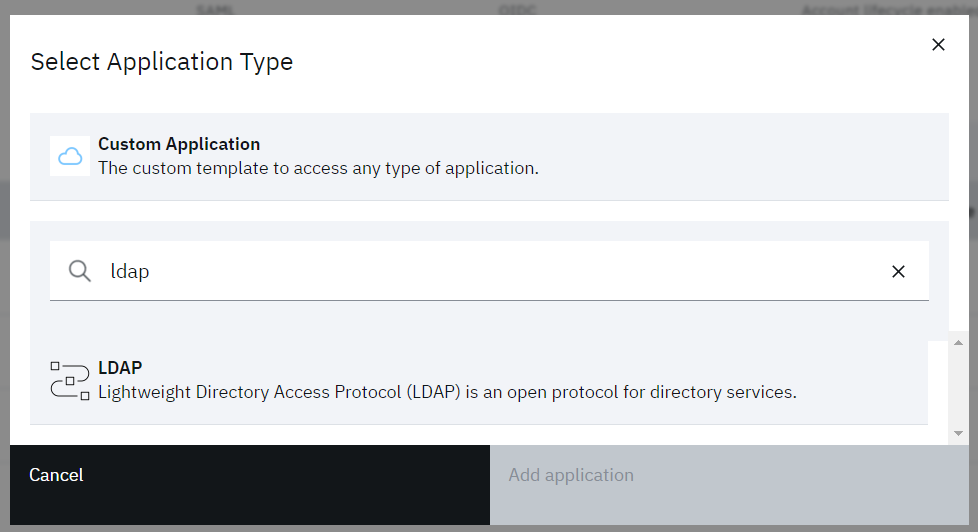
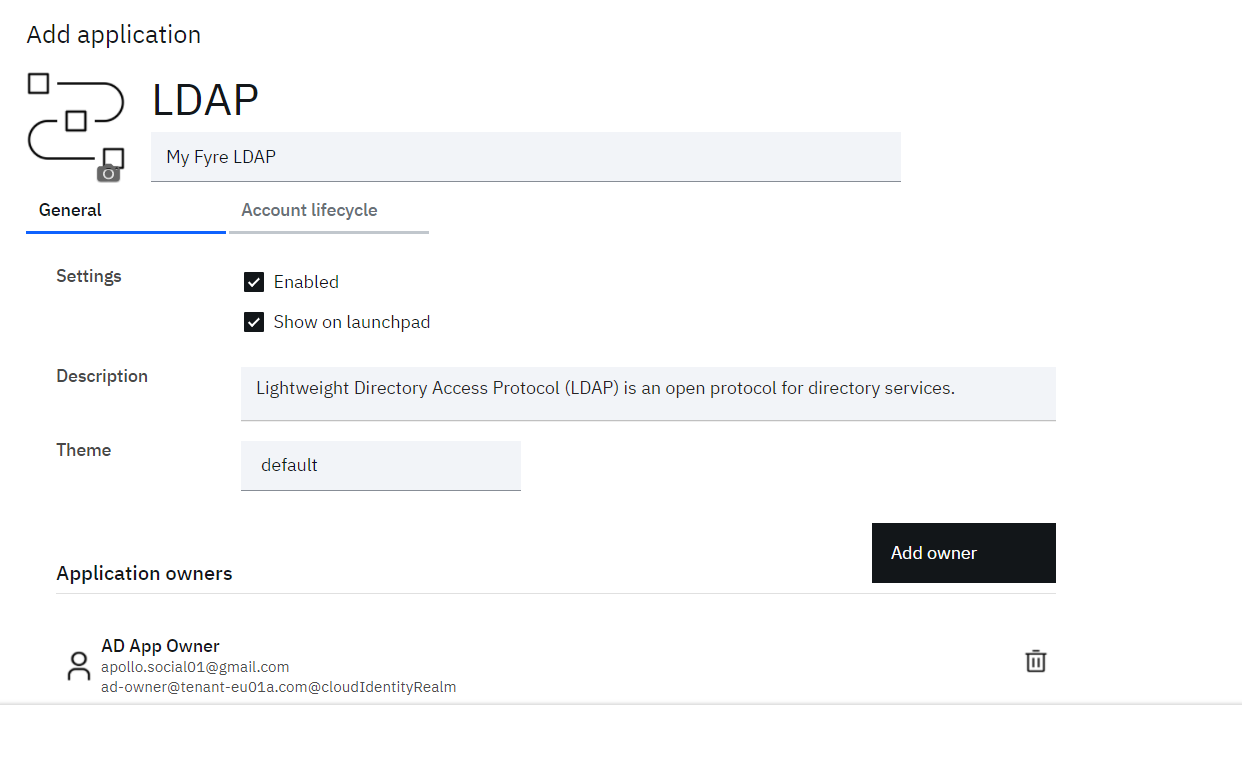
• When the LDAP application is displayed, select it then click the Add application button
• Optional: Update the Name of Application and if required click Add owner to assign owner for the application
Define Account lifecycle
• Click on Account lifecycle tab
• Enable Provisioning and Deprovisioning for accounts
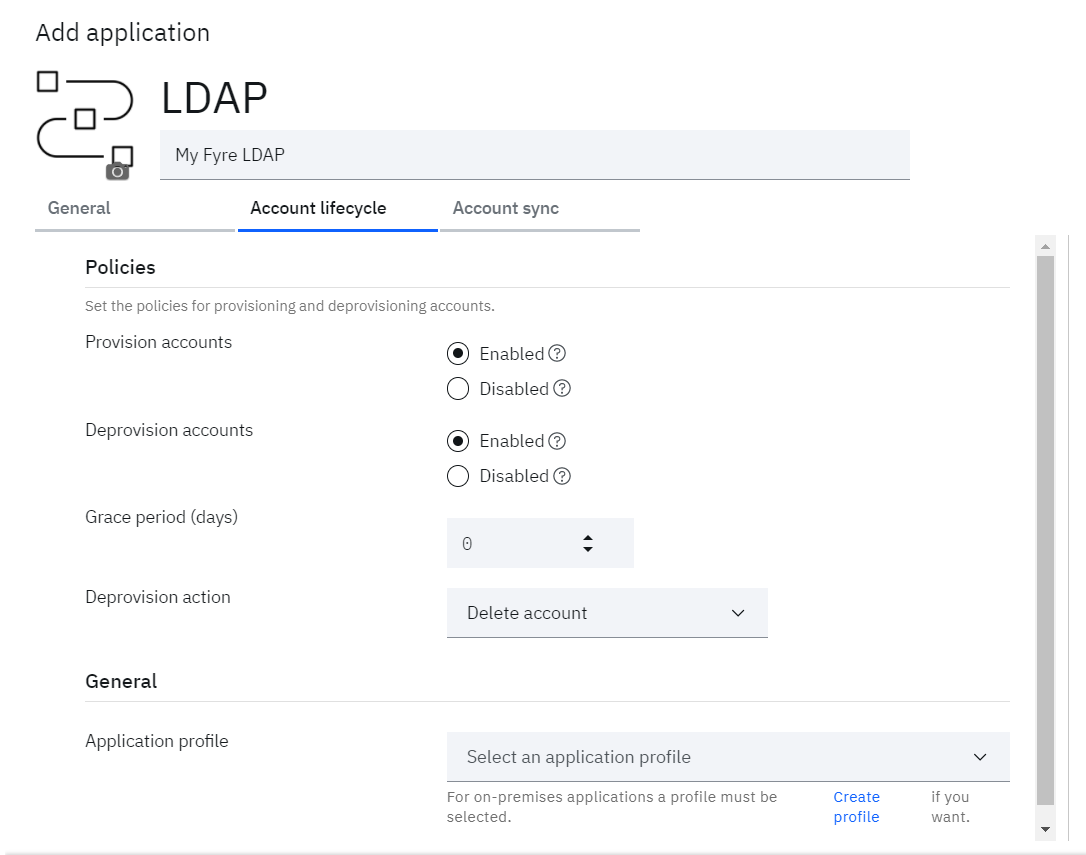
• Click Create profile if Application profile is not created before
o Provide Profile name
o Select the Provisioning identity agent that is used to discover the profile from the on-premises Identity Brokerage.
o Select the Identity adapter profile from the dropdown
Load LDAP Profile
The profile will be discovered only if required profile has been loaded successfully in identity-brokerage container
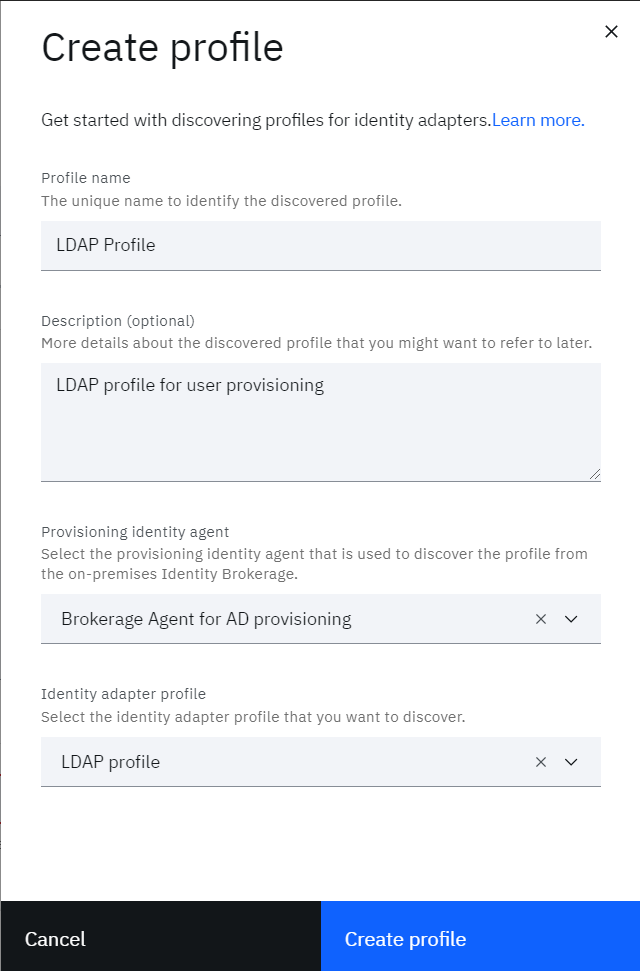
• Click on Create profile
• Now provide the details for:
o Tivoli Directory Integrator location: Location of RMI Dispatcher
o URL: Ldap server with port
o Administrator name: name to connect to LDAP (ex: cn=root)
o Directory server name: Provider for Directory server either IBM, Oracle etc
o User base DN: Base DN for users (ex: ou=Users,ou=mycompany,CN=IBMPOLICIES)
o User RDN Attribute: Either UID or CN
o Group base DN: Base DN for groups (ex: ou=Groups,ou=mycompany,CN=IBMPOLICIES)
o Group RDN attribute: Either UID or CN
o Initial group member: Some user which is going to be part of group (ex: uid=TIM Adapter)
o Password: Password of Administrator
o Identity agent: Select agent from the dropdown
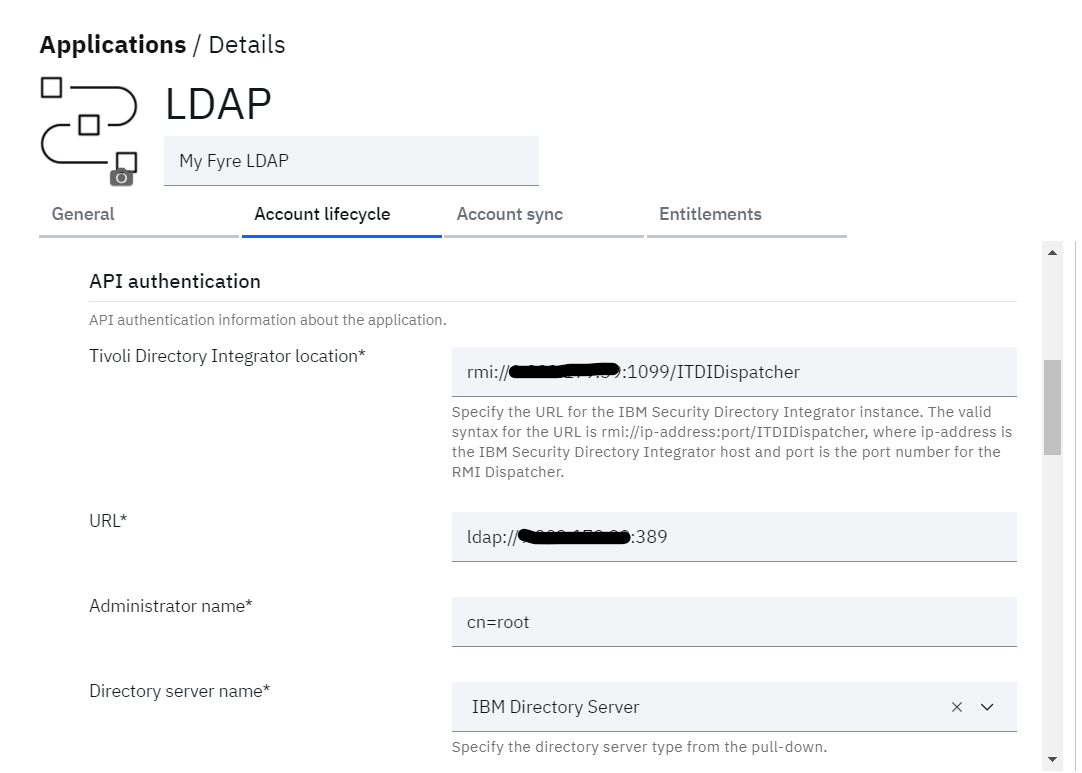
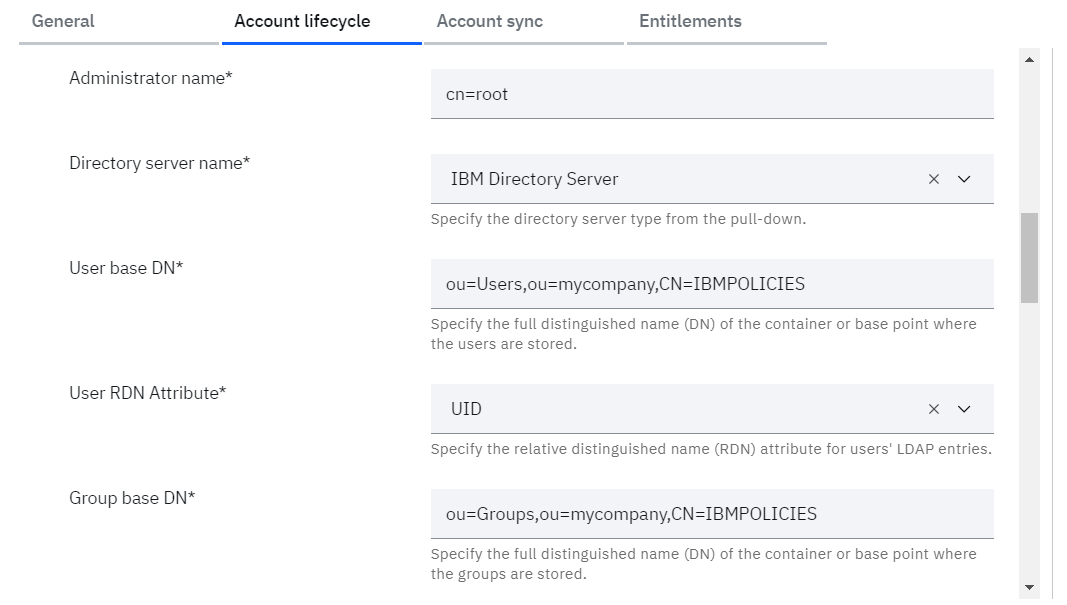
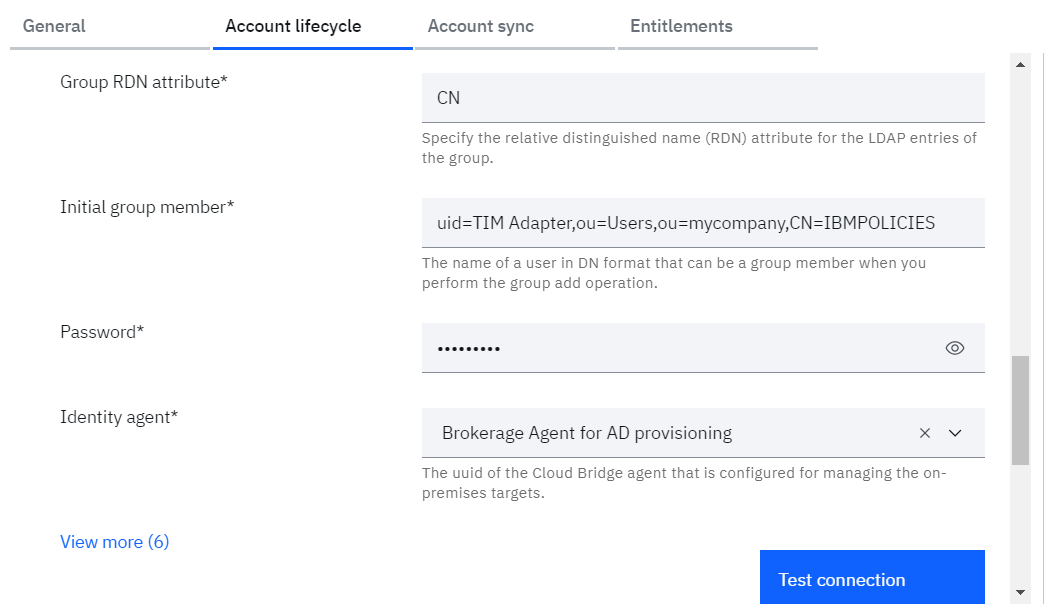
• Click on Test connection to validate the configuration
• If all configuration is correct, connection will be shown as successful
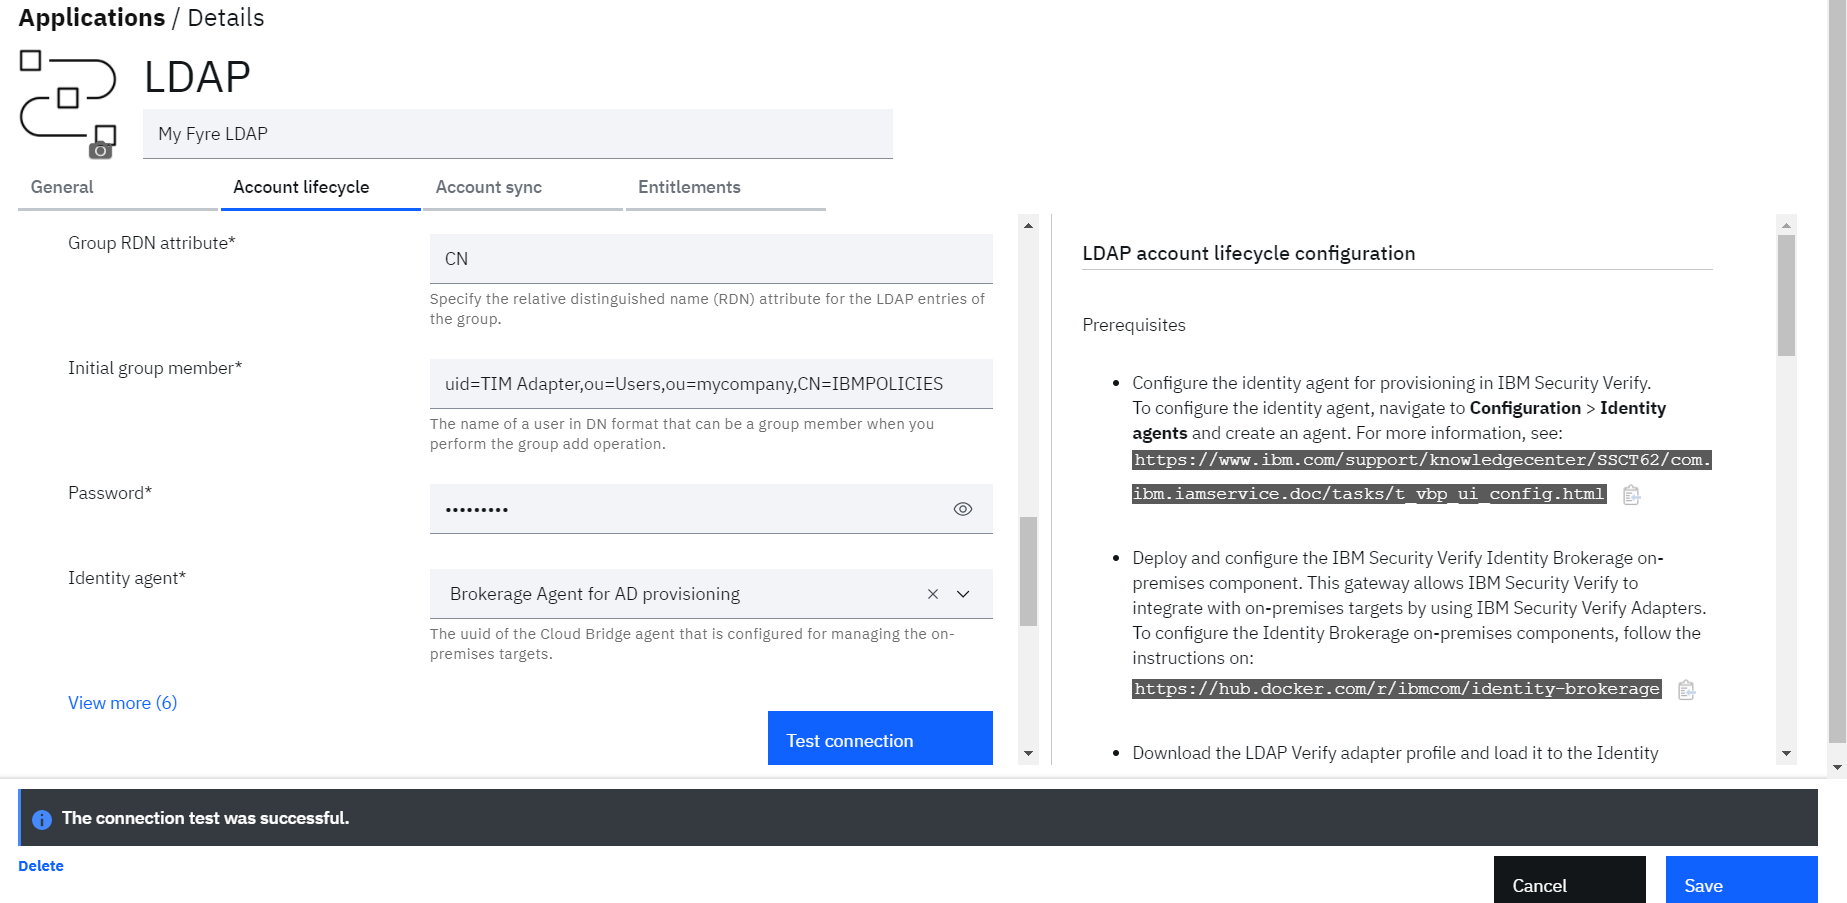
• Click Save to save the application
• Scroll down to the Attribute Mappings section and set the following:
o preferred_username = uid
o uid = eruid
o name = cn
o family_name = sn
o email = mail
o employee_id = employeeNumber
o (others can be left as is)
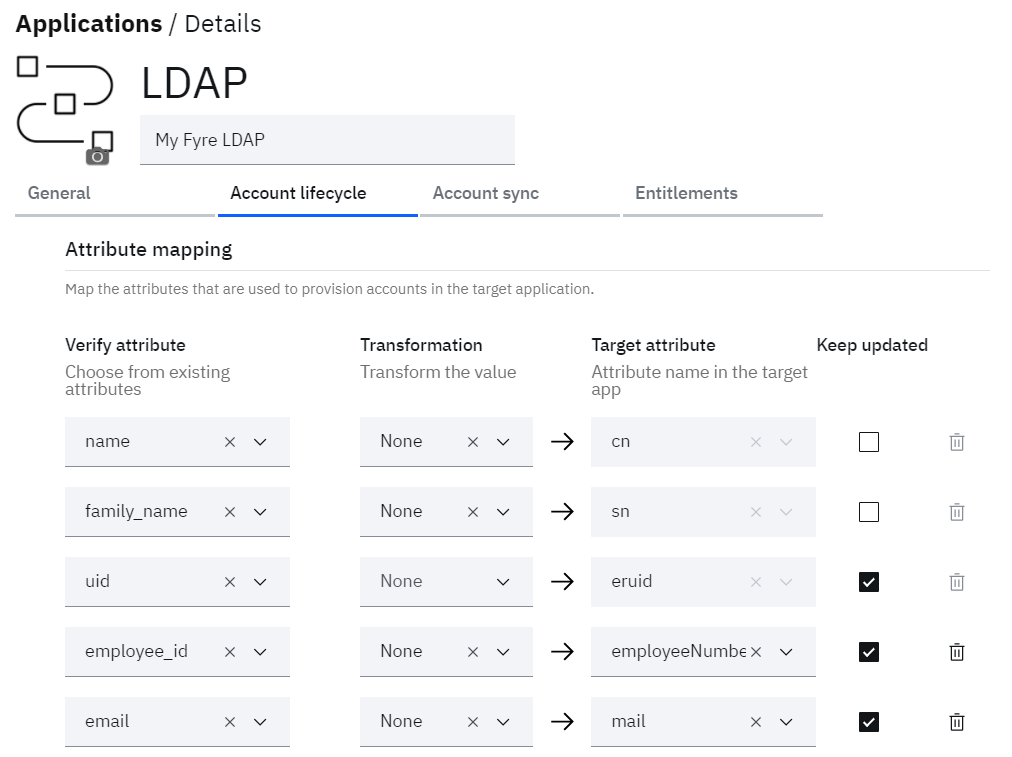
• Click the Save button
Define adoption policy for account synchronization
As the LDAP connection is successfully tested, lets define the adoption policy in order to synchronize the accounts with IBM® Verify. In order to define the adoption policy, click on Account sync tab from the details of LDAP application.
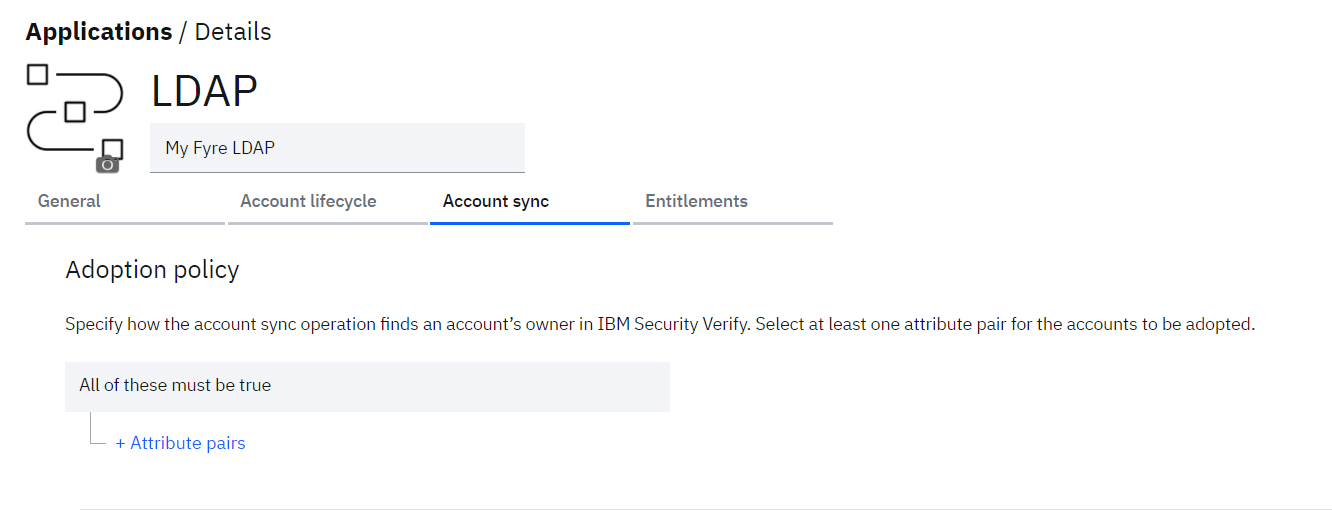
• Click on + Attribute pairs to add the attribute rule to be used to match the users from LDAP with the existing users in Verify.
Define the rules as:
o employeeNumber = employee_id
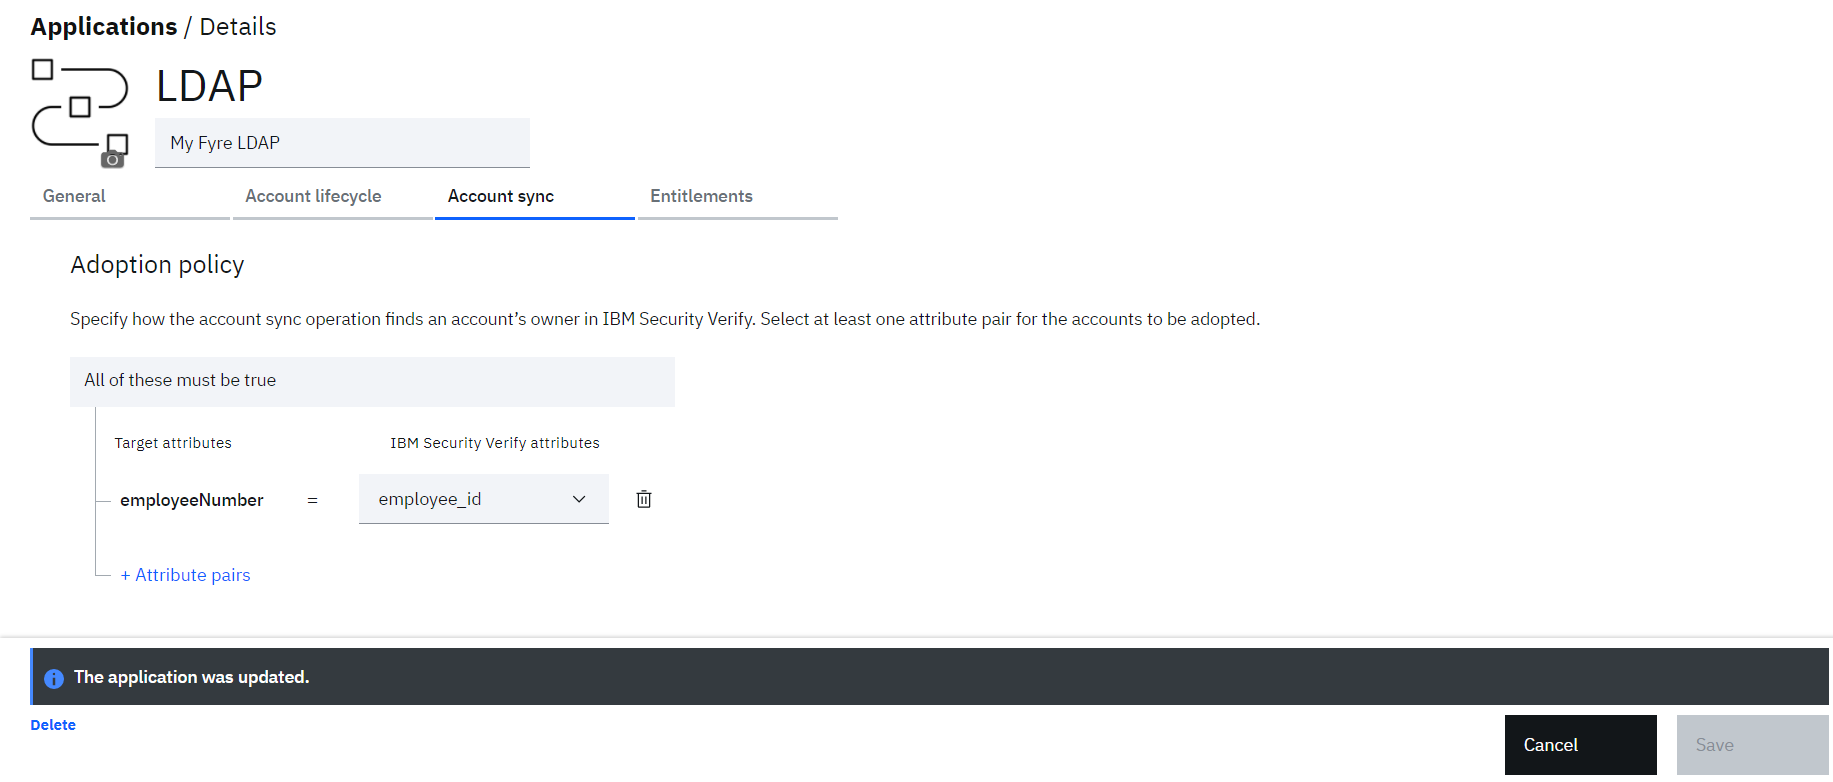
• Click the Save button
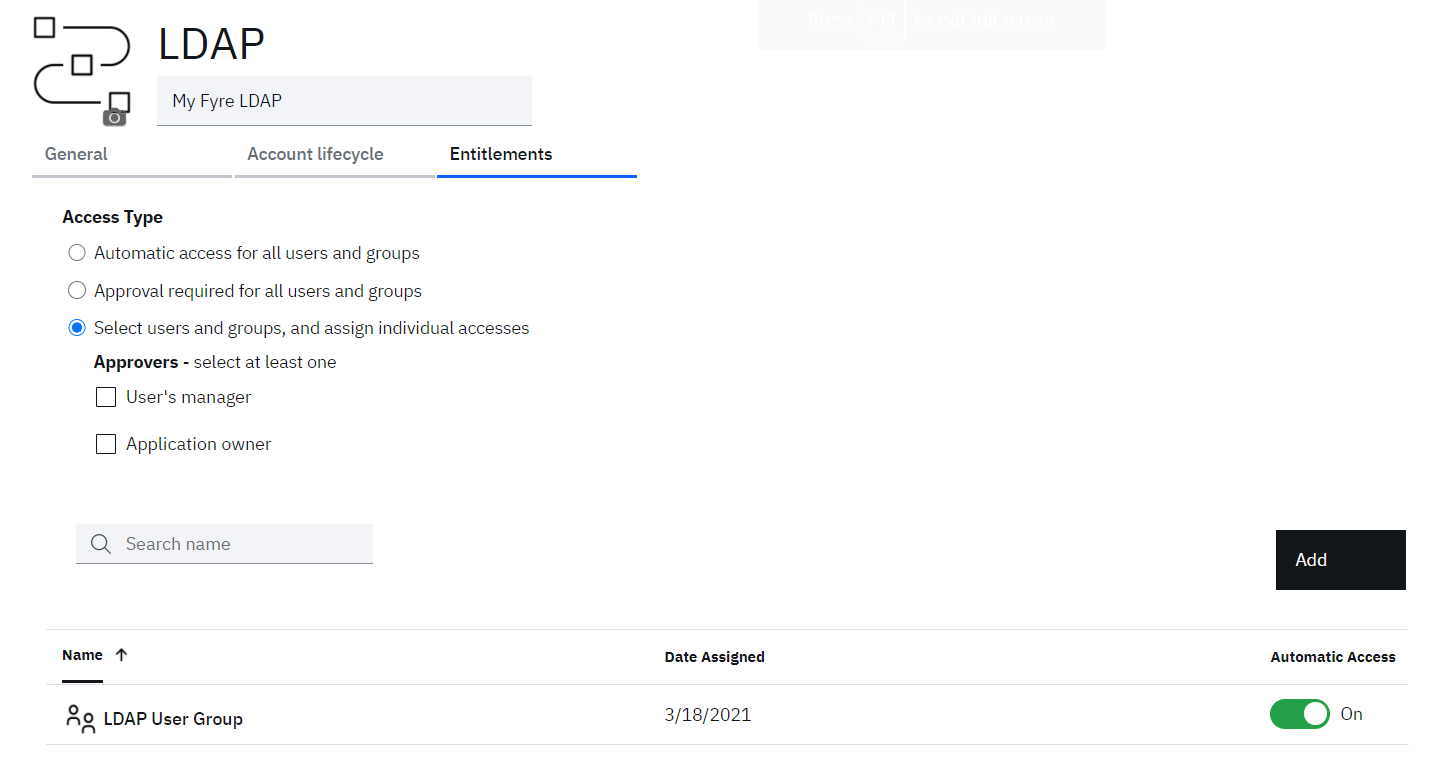
Define entitlements for application
Now, define the entitlement for users / groups who should get access to this application.
When you saved application above, a new tab (Entitlements) gets exposed.
• On the Entitlements make sure that Select users and groups, and assign individual accesses option is selected
• Click the Add button
• On the Select User/Group dialog, search for, select and Add “LDAP User Group” (This group must have been already created by admin)
• Click the OK to close the dialog
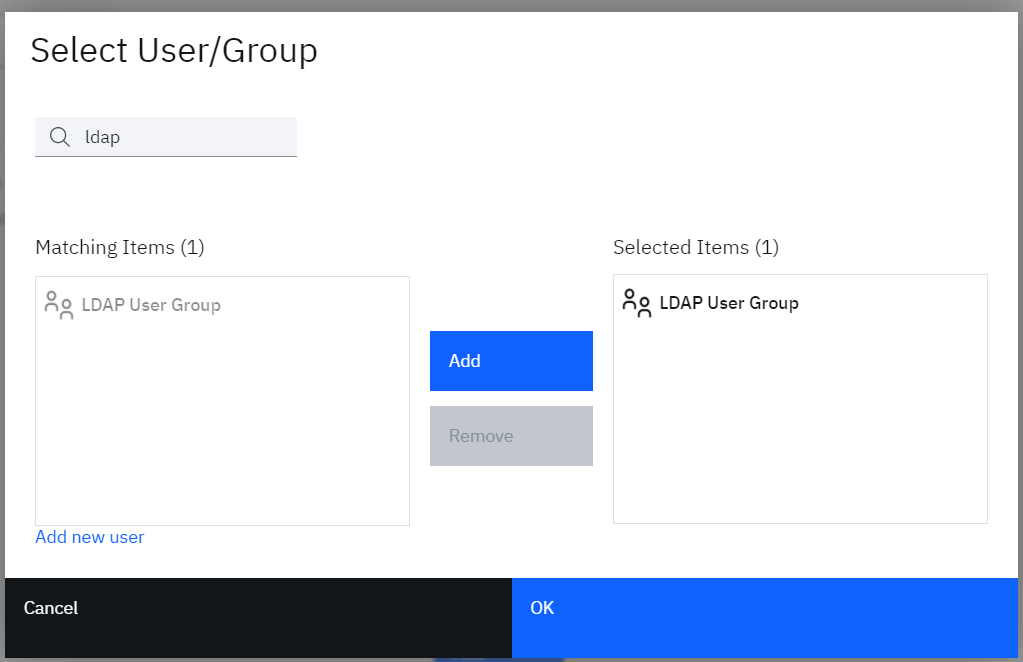
• Click the Save button to save application changes
LDAP Provisioning Use Cases
After the LDAP application is successfully configured as mentioned in above section, tenant admin can synchronize the LDAP account data with IBM Verify.
Account Synchronization with LDAP
• Login to IBM Verify as tenant admin (Scott)
• From the admin console navigate to Applications
• Select Accounts from the three dot action menu against the LDAP application

• Click Start account synchronization

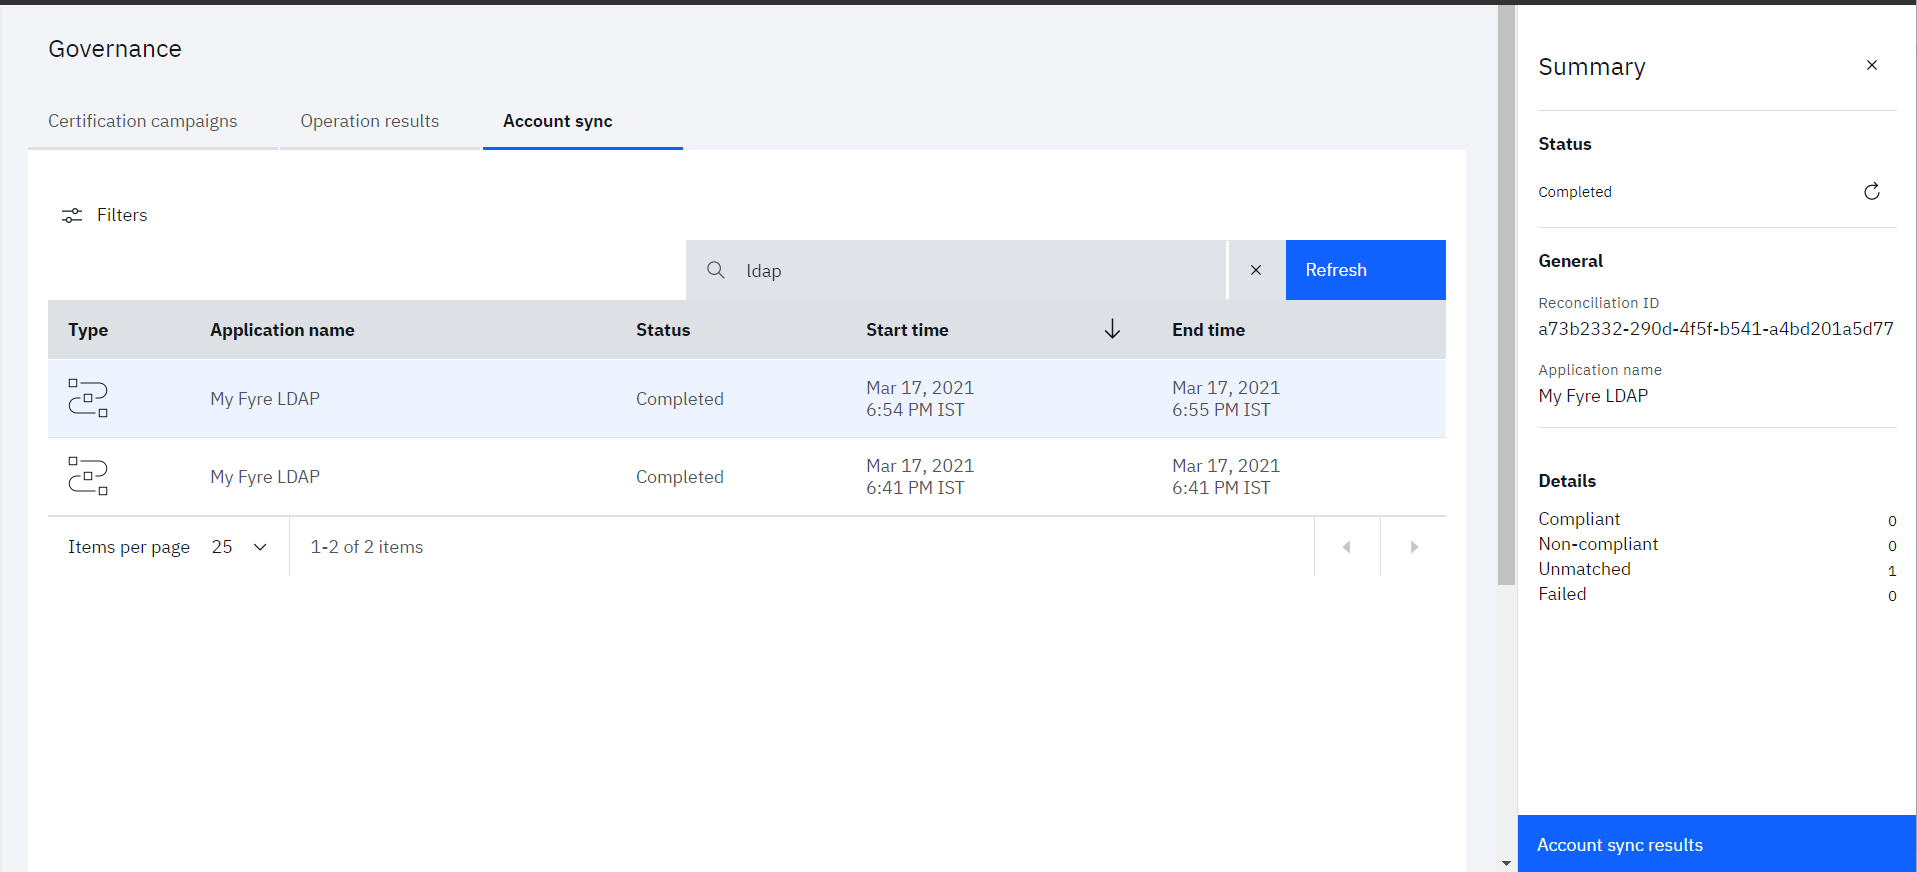
• In order to monitor the account synchronization, navigate to the Governance menu and Click on Account sync tab

• Click on the row for which details need to see seen. The account sync details will get open in right pane, which provides the summary of various accounts fetched from the LDAP
Account sync rule
The accounts will be matched on the basis on the attributes mapping defined in Adoption policy of Application. So, admin need to be careful while defining the attribute mapping.
New User Provisioning to LDAP
First, let’s create a new user in IBM Verify and make sure he / she can log in.
Create New User
• Log to IBM® Verify tenant as your administrative user (Scott)
• Go to Users & groups
• Click the Add user button
• Create a user. You can create any user you like (as long as it doesn’t clash with existing ones).
For example:
o Identity Source = Cloud Directory
o User name = ldapuser01
o Given name = User01
o Surname = LDAP
o Email = a valid real email address
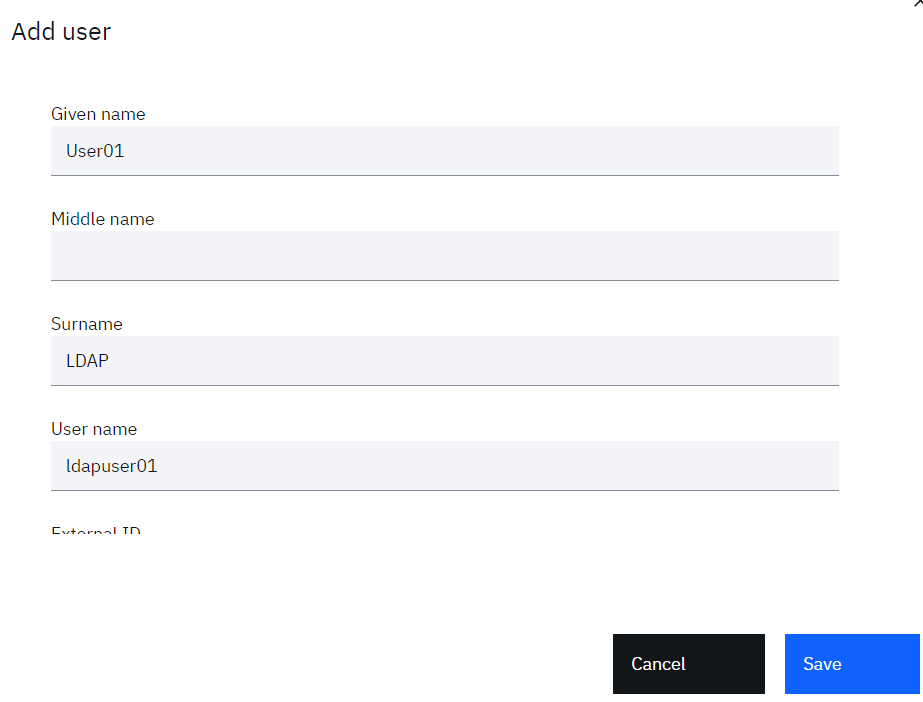
• Click the Save button to create the user

The user should get created and listed in the users table.
Test the New User Can Login
New user will get the initial password via e-mail. Go to your email client of newly created user and look for an email indicating a user has been created
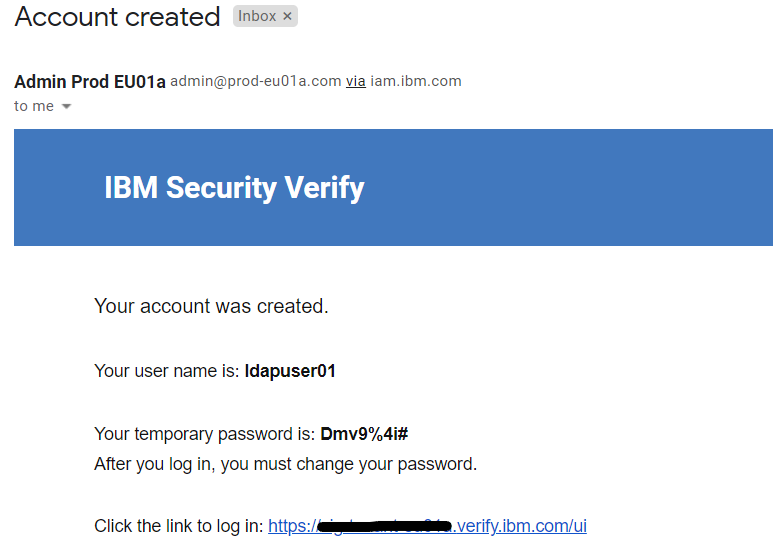
• Open a new browser session, copy the link from the email and log in with the username and password from the email
• When prompted enter a New password and Confirm password and click the Change Password button
• Validate that user is able to access the Verify launchpad

Provisioning Use Case
We have entitled the LDAP User Group group with “Automatic access” for the LDAP application. Now in order to provision new LDAP account for newly created user, lets make the new user as a member of LDAP User Group group. This will trigger the automatic provisioning for the LDAP account.
Add User to Group
Return to the IBM® Verify admin interface as the admin user (Scott) – you should still have the window open from before steps
• Access the Users & groups section and click on the Groups tab
• Hover over the “LDAP User Group” group and click the Edit icon

• Click the Add button beside Group Members
• Search for name of new user which will get listed in the Search results
• Select the listed user and click Select, this will move the user to Selected users & groups
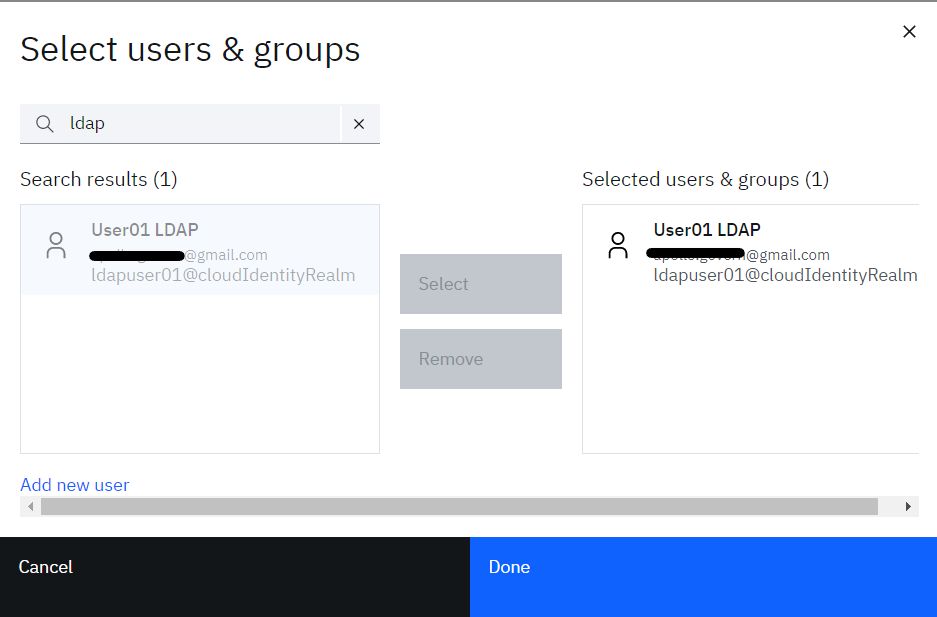
• Click the Done button to add them, then Save on the Edit Group dialog
• Go back to the Users tab, hover over your new user and click the User Details icon on the right
• Confirm the new user is in the LDAP User Group group

Check User has been provisioned to LDAP
As the user has been added to LDAP User Group group, automatic LDAP user provisioning gets triggered by IBM Verify at the backend. The user provisioning task can be monitored by the admin (Scott)
• Navigate to Governance > Operation results tab

Also validate the new user provisioning by connecting to LDAP server using any client
• Search for the users in the User base DN
• Look for newly provisioned user

Validate the user details such as:
- New user is listed in LDAP and the username is correct
- Other user attributes are created as per attribute mapping rules
Debug user provisioning error
If the user does not exist, you should check the Application lifecycle settings. If you had a successful test connection, then the problem is probably in the attribute mapping. If you don’t see the correct Profile you may have incorrectly collected and stored the profile ID.
De-Provisioning Use Case
Lets do the reverse operation to test de-provisioning user from LDAP
Remove User from Sales Group
• Return to the IBM® Verify admin interface using admin user (Scott)
• Go to Users & groups and click Groups tab
• Edit the LDAP User Group group
• Select newly added user and click the Remove button
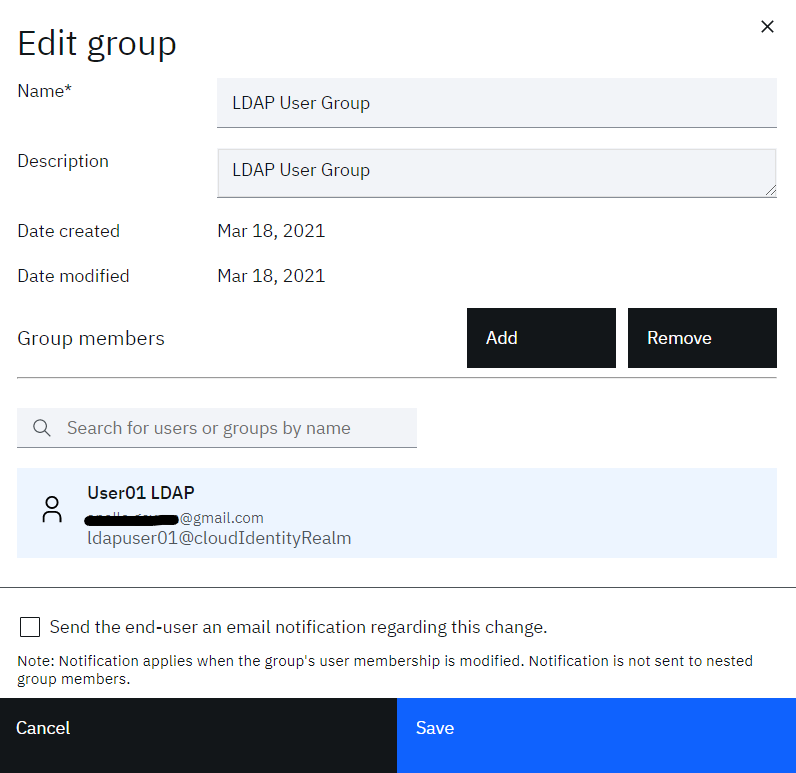
• Click the Save button
• As before, check details of user in the Users tab. There should not be any groups listed in Groups section
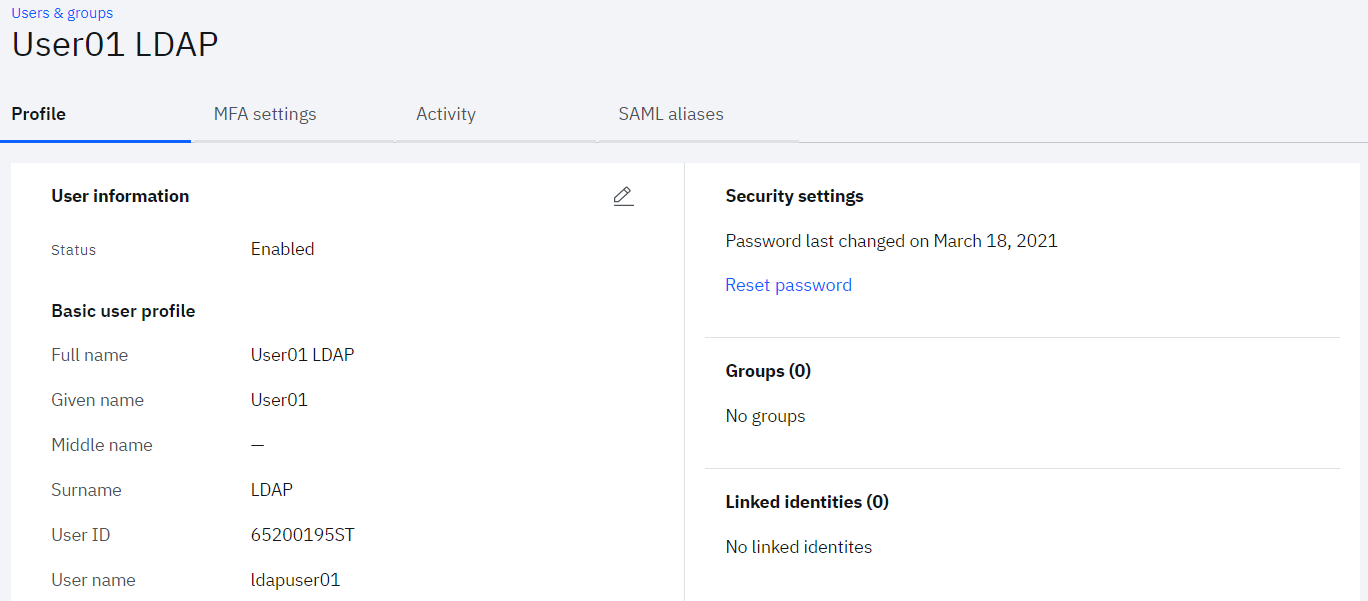
Check the User has been removed from LDAP
• Return to the LDAP client and refresh the data
• Check that new user has been removed from the User base DN in LDAP
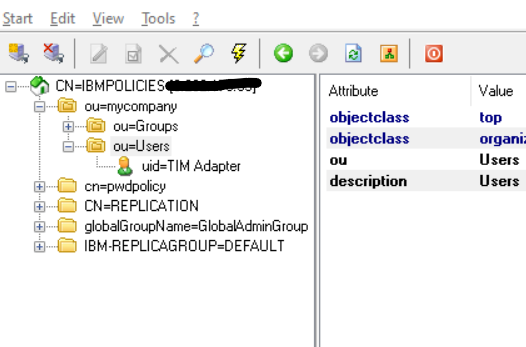
The user de-provisioning task can be monitored by the admin (Scott)
• Navigate to Governance > Operation results tab

Nilesh Atal, IBM Security
Updated 7 months ago
