Using the Developer Portal
Introduction
IBM Verify includes a built-in developer portal which allows you, as an authorized developer in the tenant, to register your applications for OAuth 2.0 and OpenID Connect integration.
This article describes how to access the developer portal, how to register a new application, and how to manage an existing application.
Pre-requisites
Your IBM Verify tenant must have been configured with the developer portal application. This needs to be done by a tenant administrator. This process is described in the Add developer portal config guide.
Your account in IBM Verify must be a member of the developer group. A tenant administrator can add your account to this group.
Access the developer portal
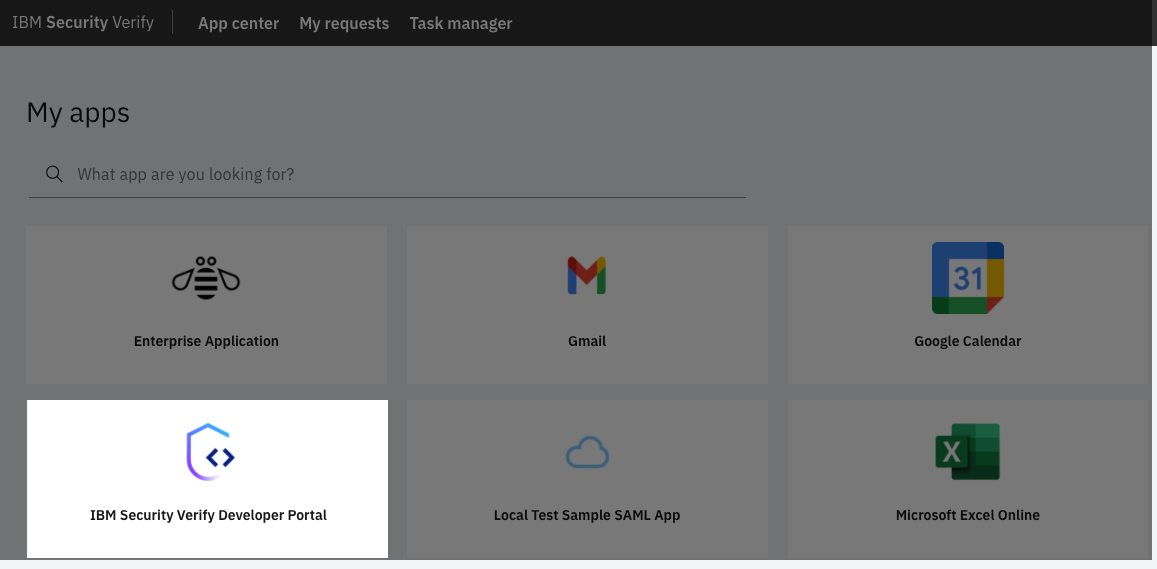
Access the end user launchpad of your IBM Verify tenant and look for the developer portal tile. This should be visible to you once you are member of the developers group:

Developer portal tile on the end user launchpad
Click the tile to launch the developer portal.
Add a new application
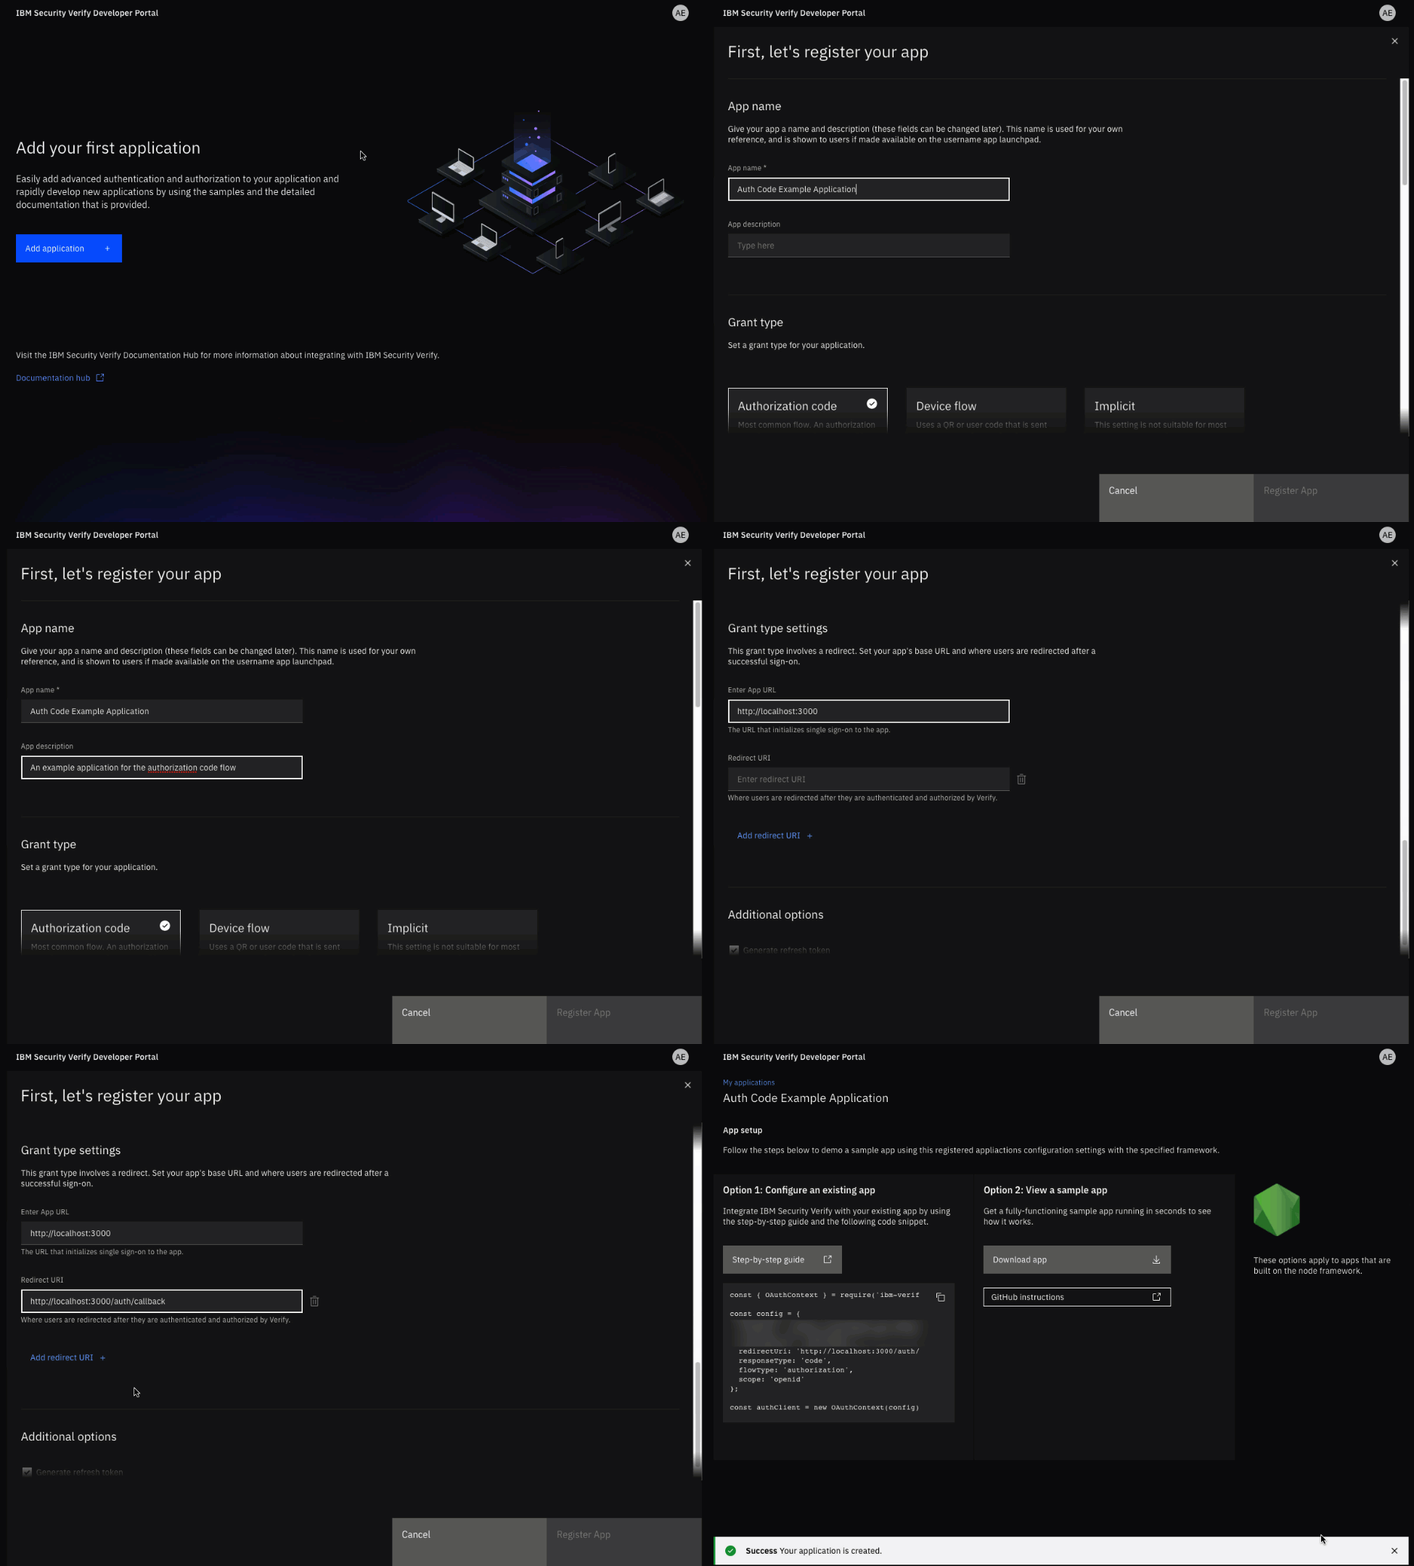
When you first access the developer portal you have no applications registered. To register your first application, click on the Add application + button.
Give your application a name. This name will be shown when your application is displayed in the end user launchpad. You can also provide a short description if you like.
Select the grant type for the application.
Available grant types
The available grant types are determined by the tenant administrator when they set up the developer portal. If the grant type you need isn't shown, you'll have to ask an administrator to update the developer portal settings.
If shown, enter a value for the App URL. This is the URL that users will be directed to if they chose the application from the end user launchpad.
If shown, enter a value for the Redirect URI. This is required for the authorization code and implicit grant types and is the URL that IBM Verify will redirect the browser to after authentication is complete.
Click Register app to complete the registration.

Register an application
View code snippets and a sample application
Once your application has been registered, you have the option to access code snippets and a sample application that are relevant to the grant type you selected for the application. To access these, select the tile for the language/framework you want to see.
Code snippets
The code snippet shows how to initialise the Verify SDK and is pre-filled with your tenant id and with the client_id and client_secret for the application registration you just completed. There is also a link to a step-by-step guide for how to use the SDK within your own application code.
Sample application
There's a link to download a ZIP file containing a sample application. This ZIP file contains an environment file which has been populated with your tenant id and the client_id and client_secret for the application registration you just completed.
There's also a link to the GitHub repository for the sample application which includes instructions on installing and running the sample application.
You can return to this page later by selecting the App setup option on the My applications page.
Retrieve client id and client secret
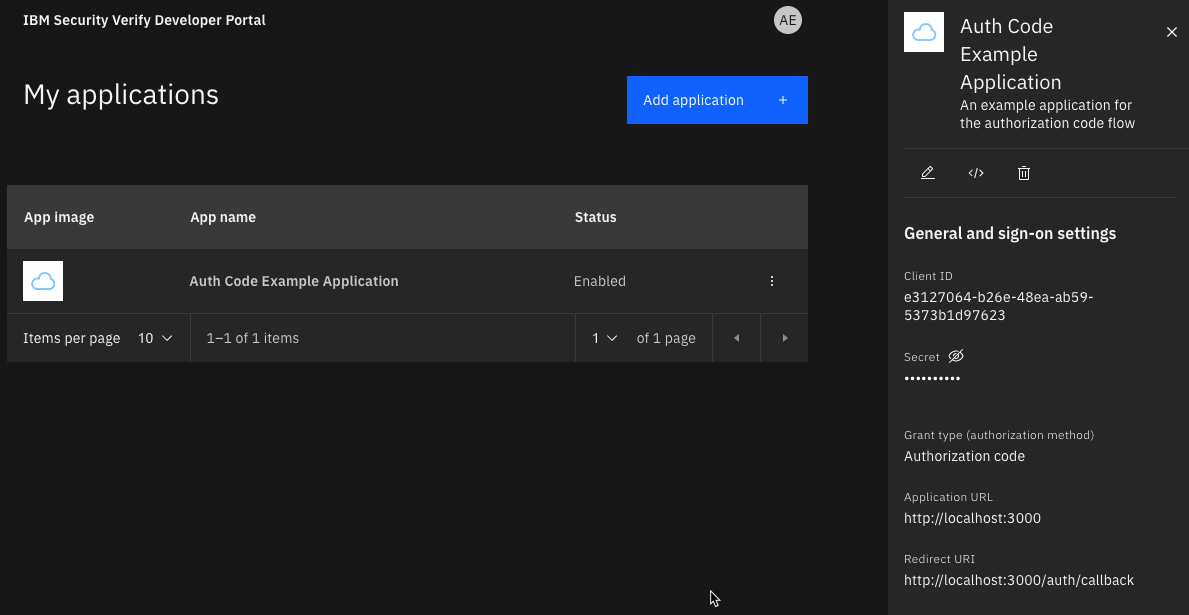
To obtain the client id and client secret that have been created for your new application, select it on the My applications screen. This will display the application properties on the right of the screen:

Application properties
You can cut-and-paste the Client ID and Secret from this page.
Modifying application configuration
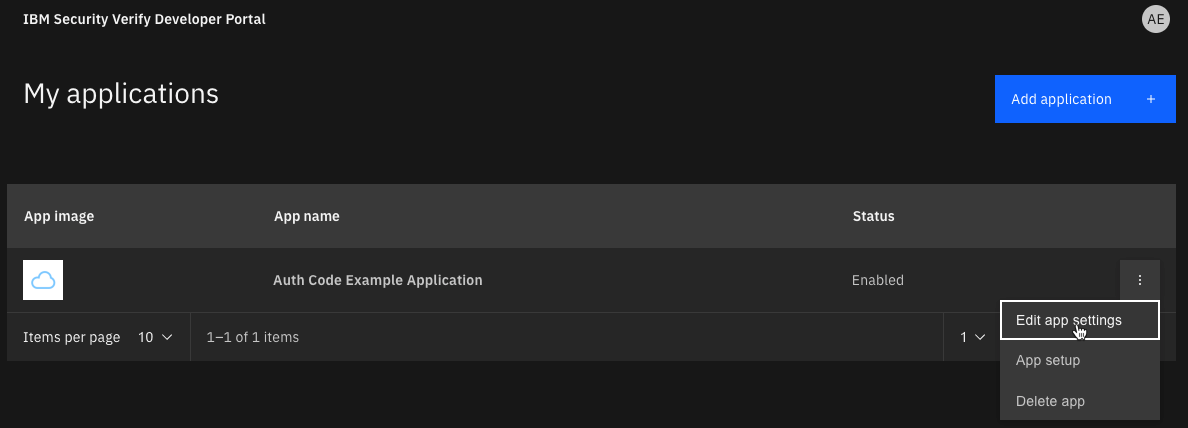
Once you have applications registered via the developer portal, you will see them listed when you access the developer portal:

Application list in developer portal
When you click the dots at the end of the row, you will see the Edit app settings option which you can select to modify the application settings. This will open a full configuration page. In addition to updating the protocol settings here, you can also provide a custom image for the application that will be used on the end user launchpad.
Updated 6 months ago
