Device authorization sample
Introduction
If you're writing an application that will run on an IOT device that has limited ability to accept user input (a smart TV for example), you may want to use the OAuth 2.0 Device Authorization flow in order to allow users to register the IOT device via another channel where input is easier (a laptop or mobile device for example).
To help you with this, we've provided a sample application which uses the openid-connect library so you can see how it works.
In this guide you'll learn how to configure a sample application from the developer portal.
Prerequisites
You need to have registered an application using the Developer Portal in your IBM Verify tenant. See Using the Developer Portal for details. During registration, pick Device Flow as the grant type.
You need to have node.js installed on the system where you will run the sample application. Download node.js.
You need to have a browser installed on the system where you will run the sample application.
Download the sample application
-
Access the Developer Portal of your IBM Verify tenant. Usually you will find this as a tile in the end user launchpad.
-
From the My applications page, select your application and then click the App setup link that appears at the top of the details sidebar.
-
Select the node.js tile.
-
Select the Download app button. This will download a ZIP file containing the sample application.
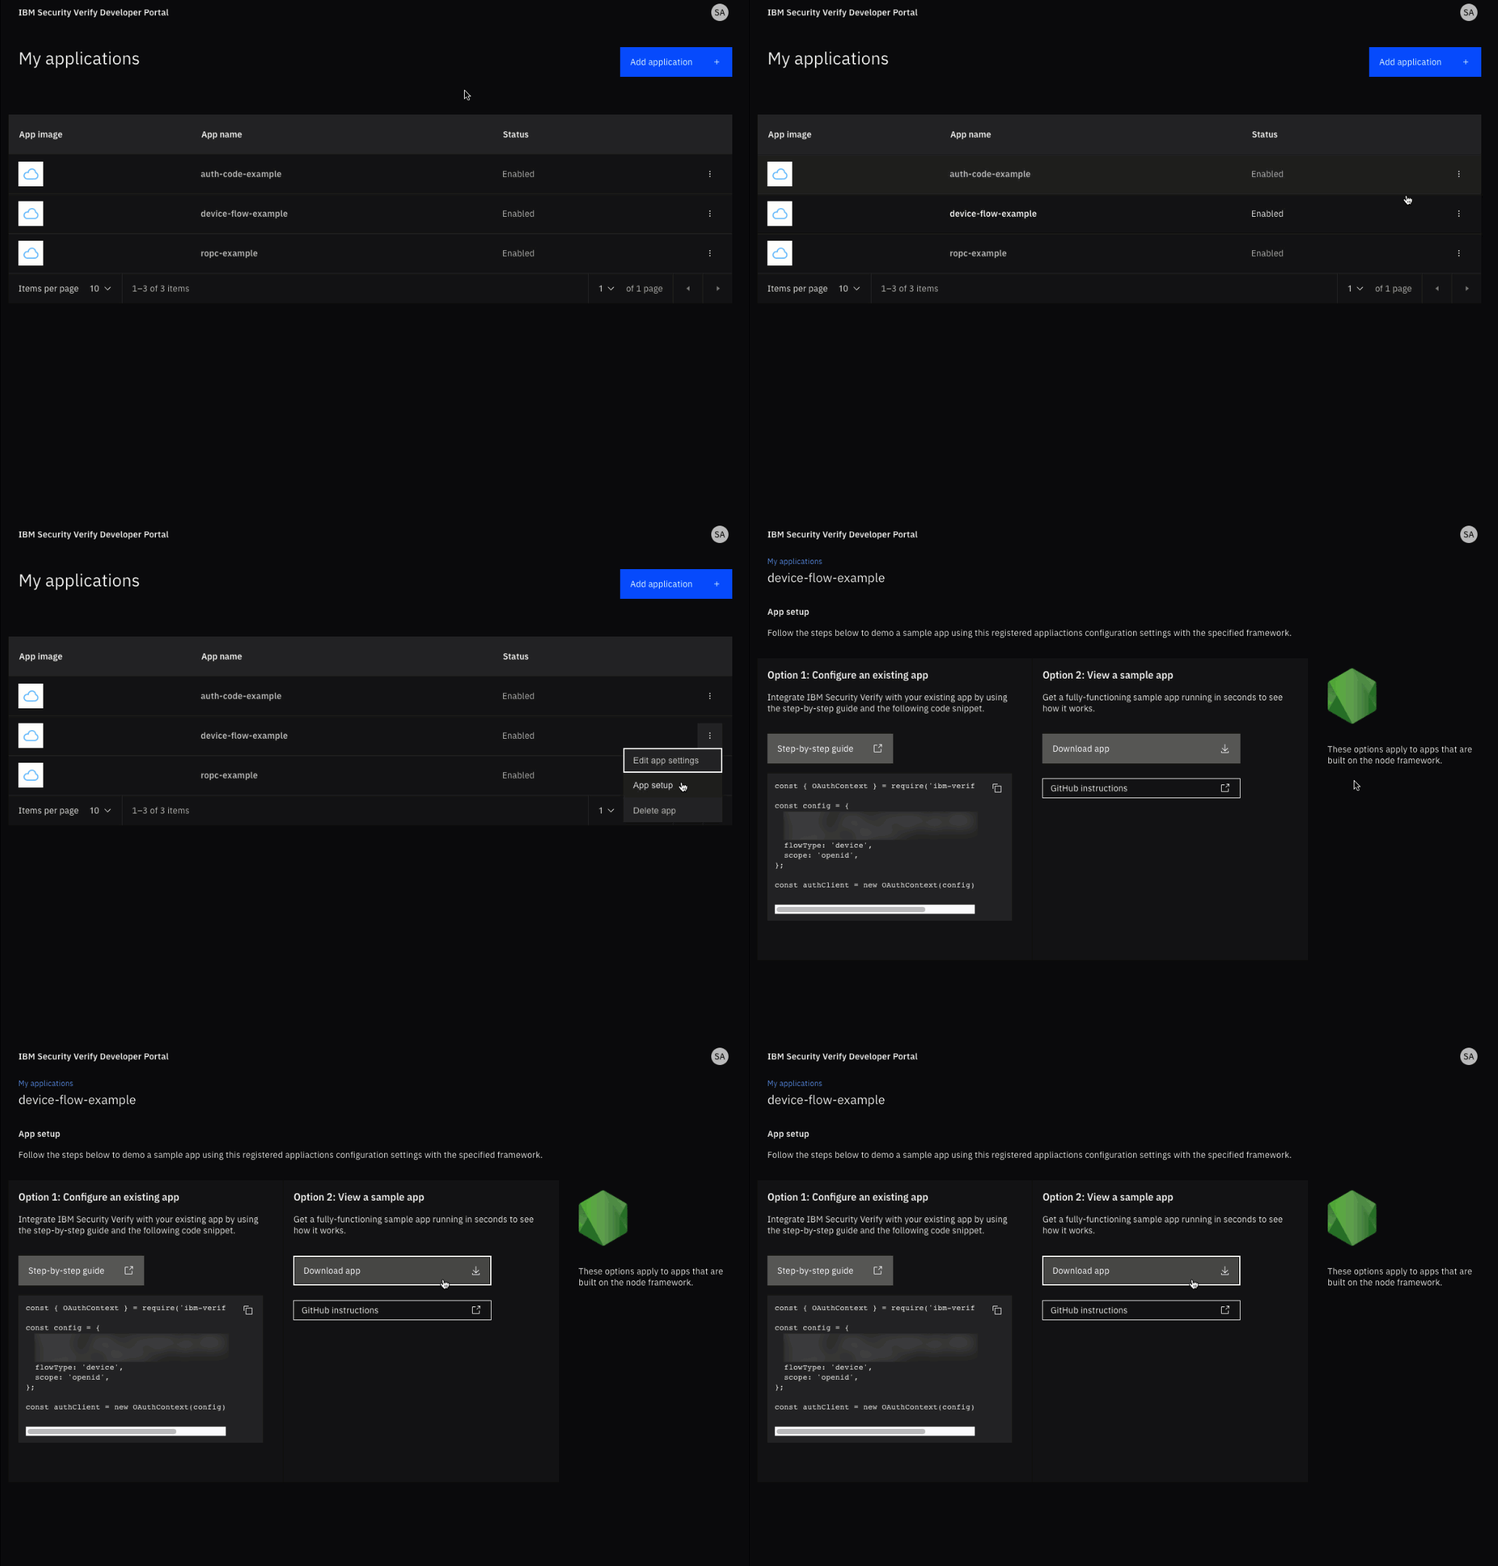
Download sample application
- Extract the ZIP file to the location where you will run the sample application.
- Copy the generated snippet from the developer portal UI.
- Create a .env file in the root of your project, paste the snippet provided and then save.
Install modules
In the directory that was created when you extracted the ZIP file, run the following command to install the node modules required by the sample application:
npm install
added 262 packages, and audited 263 packages in 2s

found 0 vulnerabilities
Start the sample application
In the directory that was created when you extracted the ZIP file, run the following command to start the sample application:
npm run start
> [email protected] start
> node server.js

Server is running on http://localhost:3000
The application is now running on IP address 127.0.0.1 (localhost) on port 3000.
Test device authorization flow
To test the device authorization flow you need two separate browsers:
- The first browser, which represents the IOT device, must be running on the same system where you have started the sample application.
- The second browser, which represents a normal browser, could be a browser on a mobile device, a browser on a different computer or, if you have no other option, a second browser window on your test system.
Initiate the flow at the IOT device
Using the browser that represents the IOT device, navigate to http://localhost:3000.
You should see the following page:
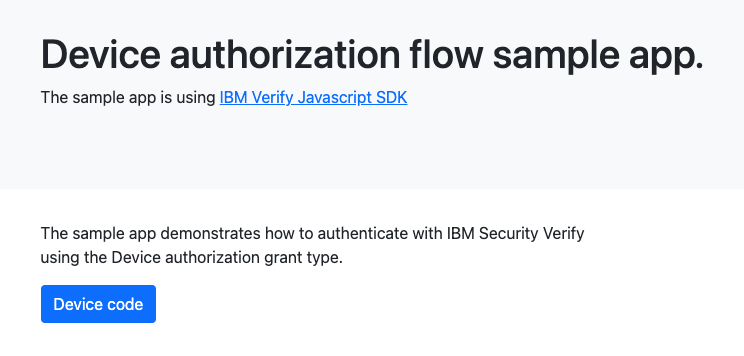
Device application homepage
Click the Authorize link to initiate the Device Authorization grant type flow.
At this point, IBM Verify generates a device_code and a user_code. The device code is held within the application but the user code is displayed to the user (either directly on in a QR Code) so that they can use it to authorize the device session.
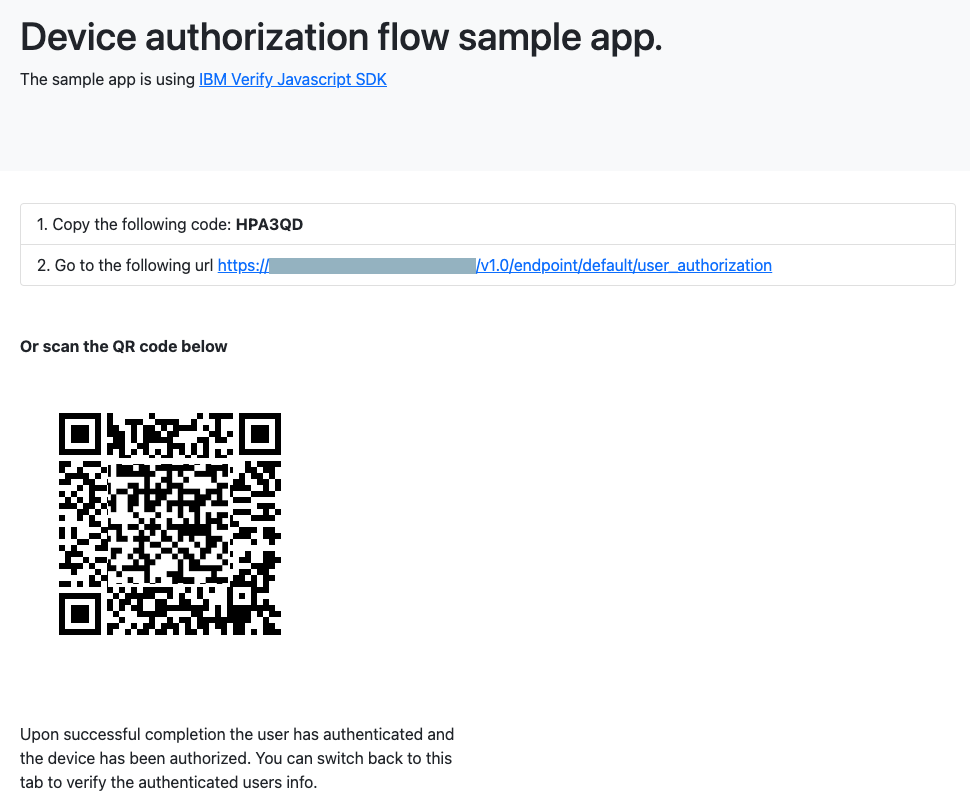
Device displays user code
Initiate user authorization
You now have two choices:
Option 1: Scan QR Code
If you have a mobile device with a camera, you can scan the QR Code shown by the device. This is the easiest way to initiate the user part of the flow.
The URL in the QR Code has the format:
https://yourtenantid.verify.ibm.com/v1.0/endpoint/default/user_authorization?user_code=<code>
As you can see, the URL has the user code embedded in it so the user doesn't have to manually enter it.
Option 2: Use the URL and code
If you can't scan the QR code, you can manually navigate to the URL shown by the device using a browser on another system. In a real system this (static) URL could be redirected from a shorter URL to make it easier for user to enter.
On the page that is shown when you navigate to the URL, enter the code from the device page and click Submit.
Authenticate to IBM Verify
User authorization requires the user to authenticate. The login page of your IBM Verify tenant is shown in the browser where you have initiated user authorization.
Login to your IBM Verify tenant. You can use any authentication method available.
User authorization completes
Once authentication is complete, and any required user consent is completed, the authenticated user identity is associated with the device session. The user code is the index to the device session that allows this to happen. The browser where you just performed user authorization displays the following message to indicate success:
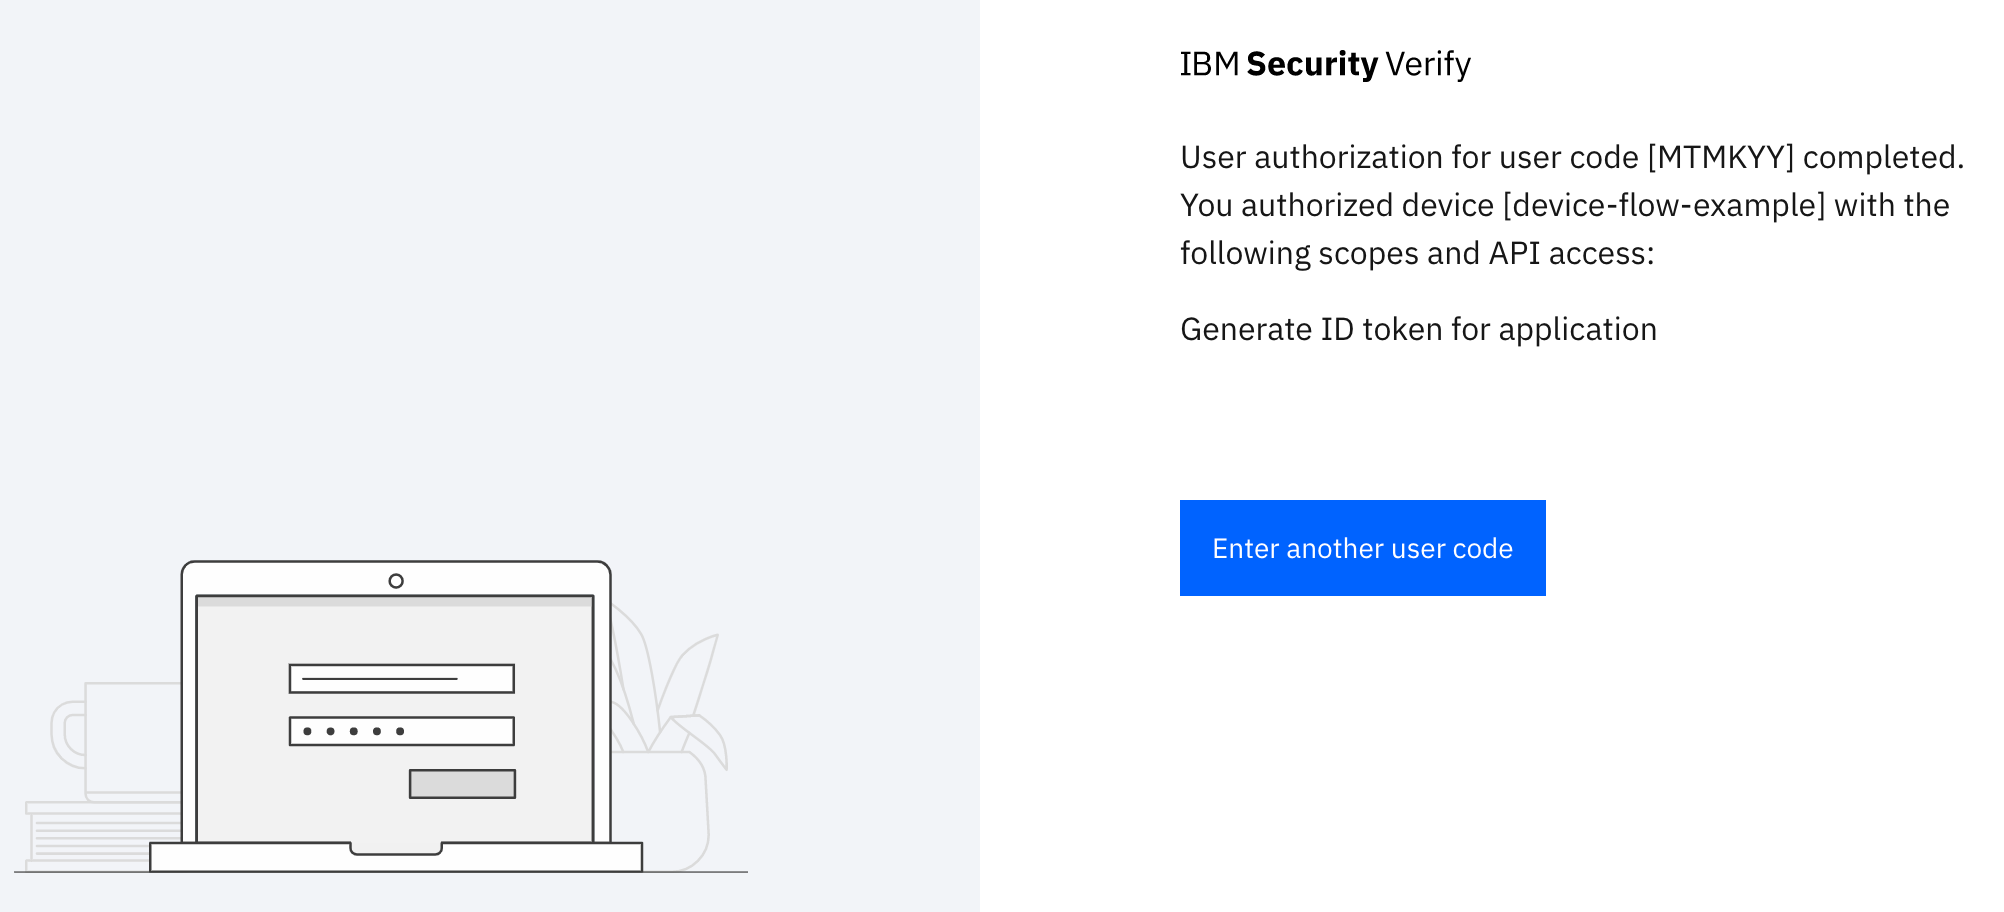
User authorization success message
IOT device receives tokens
All the time you have been completing the user authorization steps, the IOT device has been polling the IBM Verify token endpoint with token requests. It sends the device_code in these requests.
As soon as user authorization completes, the next poll to the token endpoint will return the tokens associated with the user that performed the authorization. In the browser session representing the IOT device you will see the following page indicating successful completion of the device authorization flow:
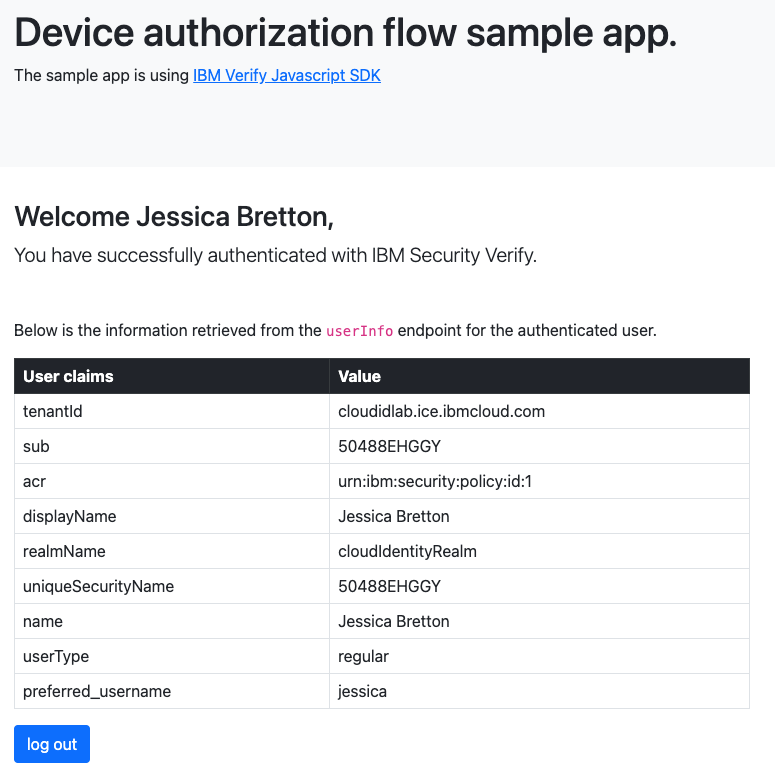
Flow completion message
The IOT device now has the tokens it needs to identify the user and/or call APIs on their behalf.
Available attributes
The attributes that are shared from your IBM Verify tenant to the application are controlled by the requested OpenID Connect scopes and by the configuration of the Developer Portal (which is set by your tenant administrator).
If you want to receive additional information, try adding additional scopes to the .env file of the sample application:
SCOPE=openid profile email phone
Updated 7 months ago
