Splunk cloud integration guide
Splunk Cloud integration guide
Splunk is a security information and event management (SIEM) product that is able to ingest events from multiple sources and provide real-time operational intelligence.
This guide can be used to send real-time identity and threat/anomaly events to Splunk Cloud. The technology used in this guide is a push-based event notification Web Hook.
Creating a Splunk Cloud Trial Account
This guide requires a Splunk Cloud account. If you have an account, skip this section.
-
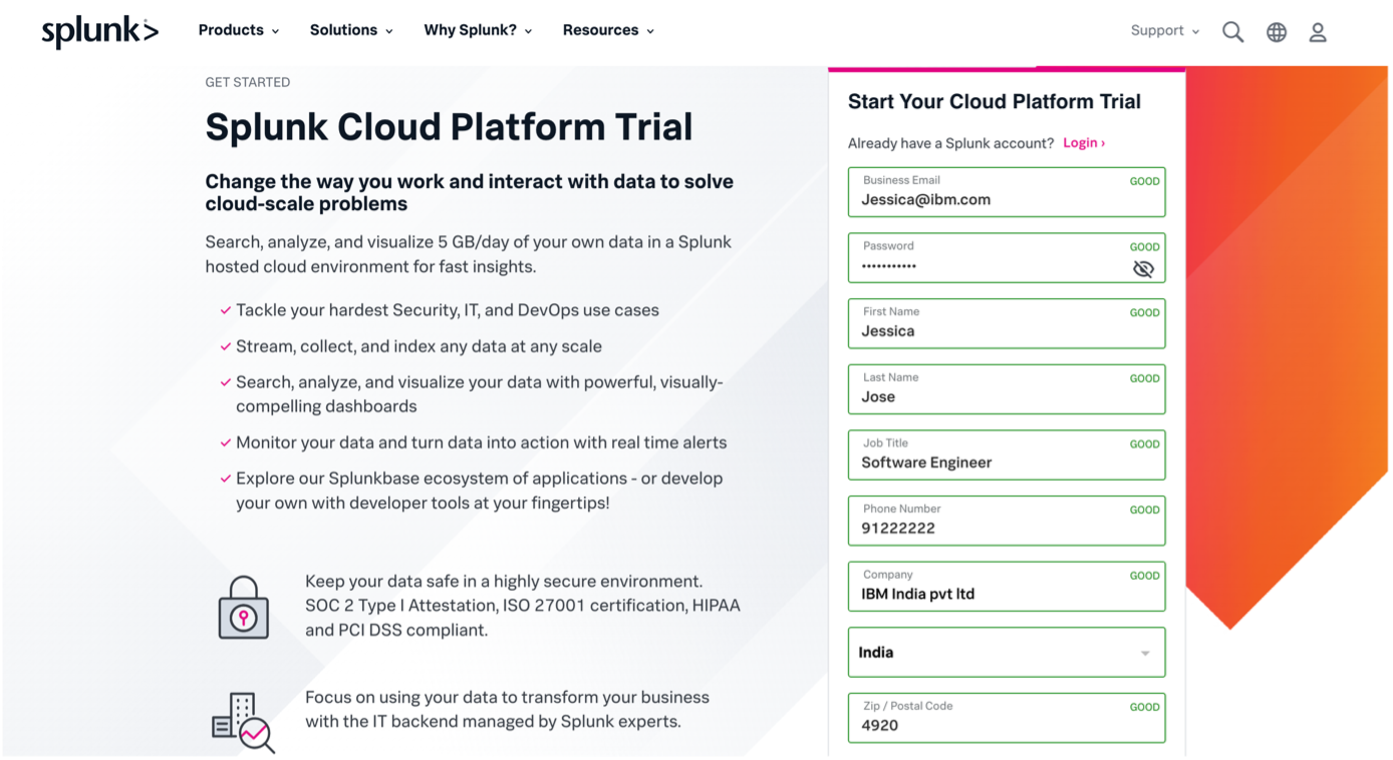
-
You will receive an email containing the Splunk Cloud platform URL, username and a temporary password. Login with your username and password on the Splunk Cloud Platform URL and provide a new password when prompted.
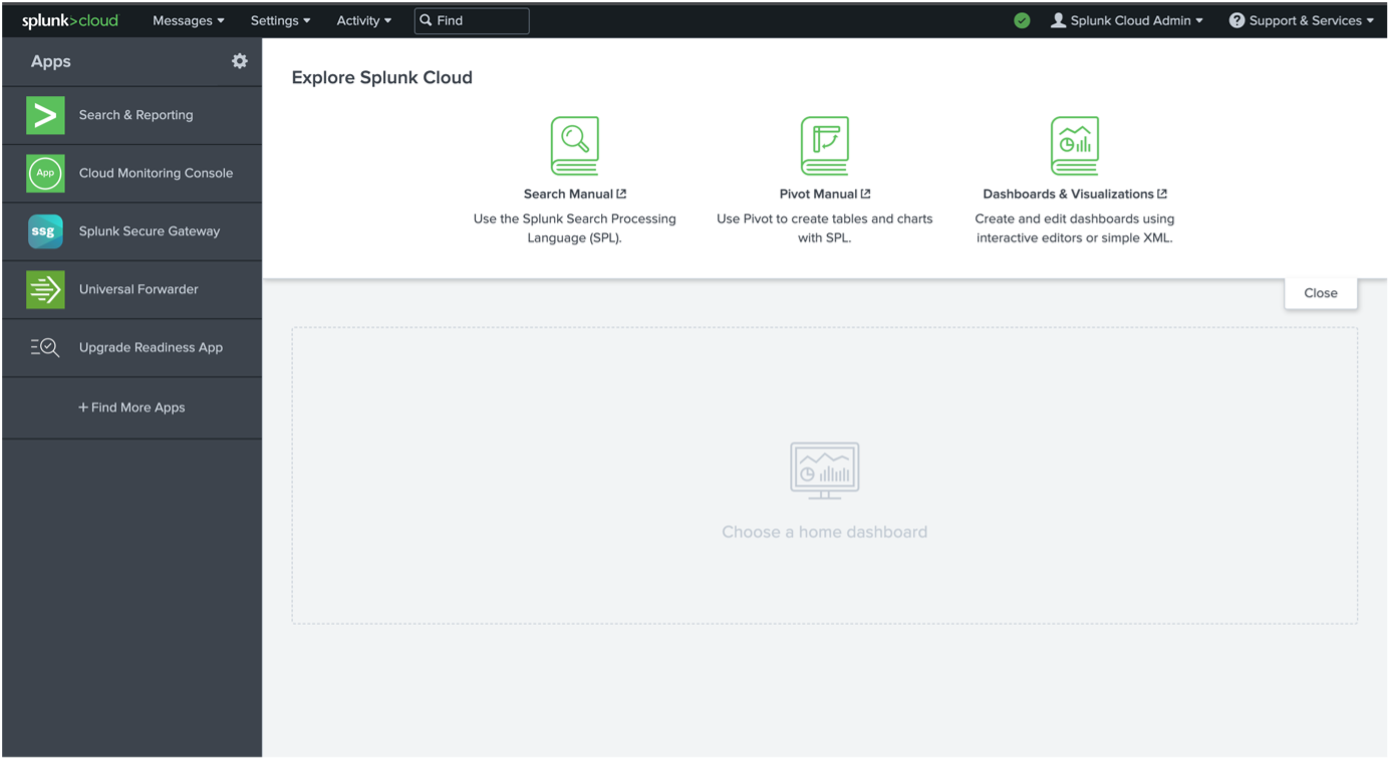
Note
Trials are more limited, as expected, and the user experience may differ on Splunk. Also, you may need to include a proxy for trial endpoints. This is covered in the section below.
Configuring Splunk
-
Login with your Splunk Cloud account using your admin credentials.
-
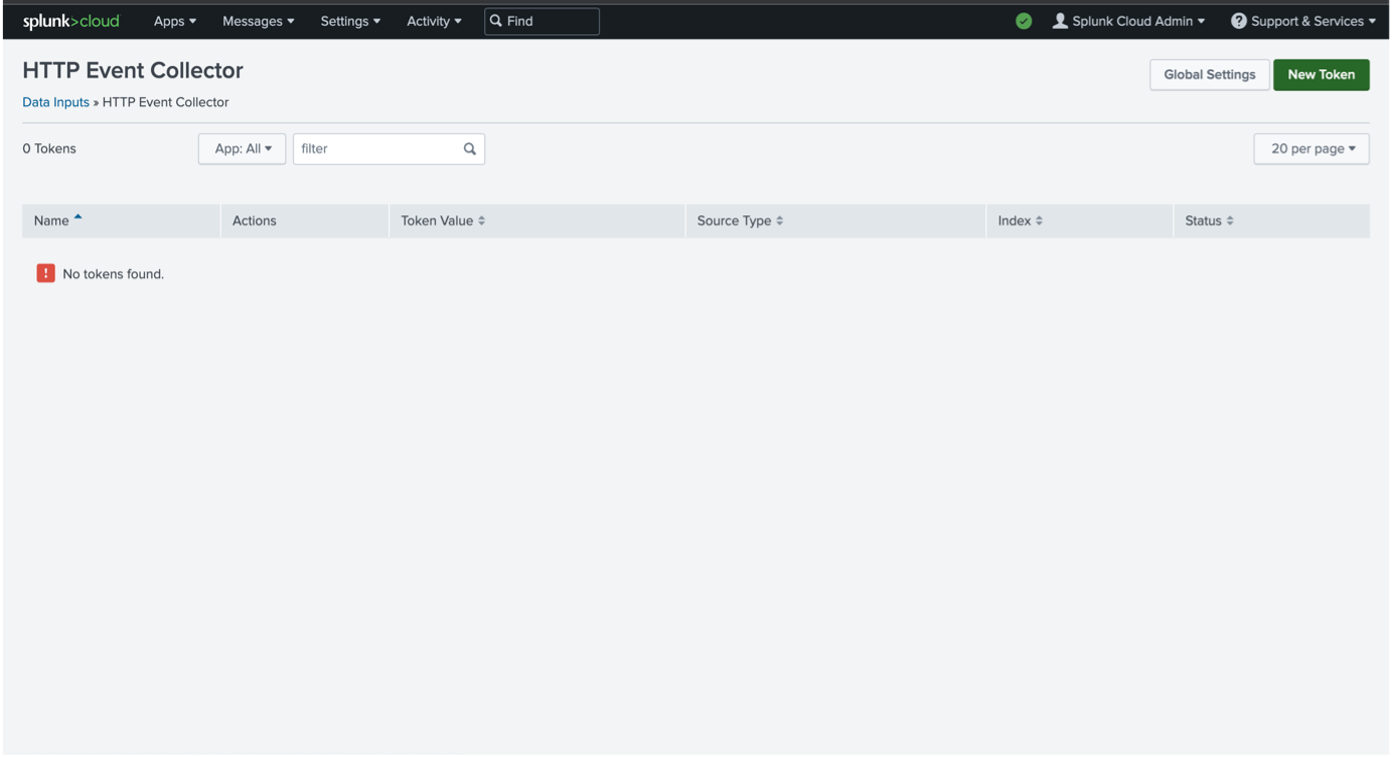
Go to "Settings" -> "Data inputs".
-
Select the "HTTP Event Collector". Create a new token by clicking on "New Token".
-
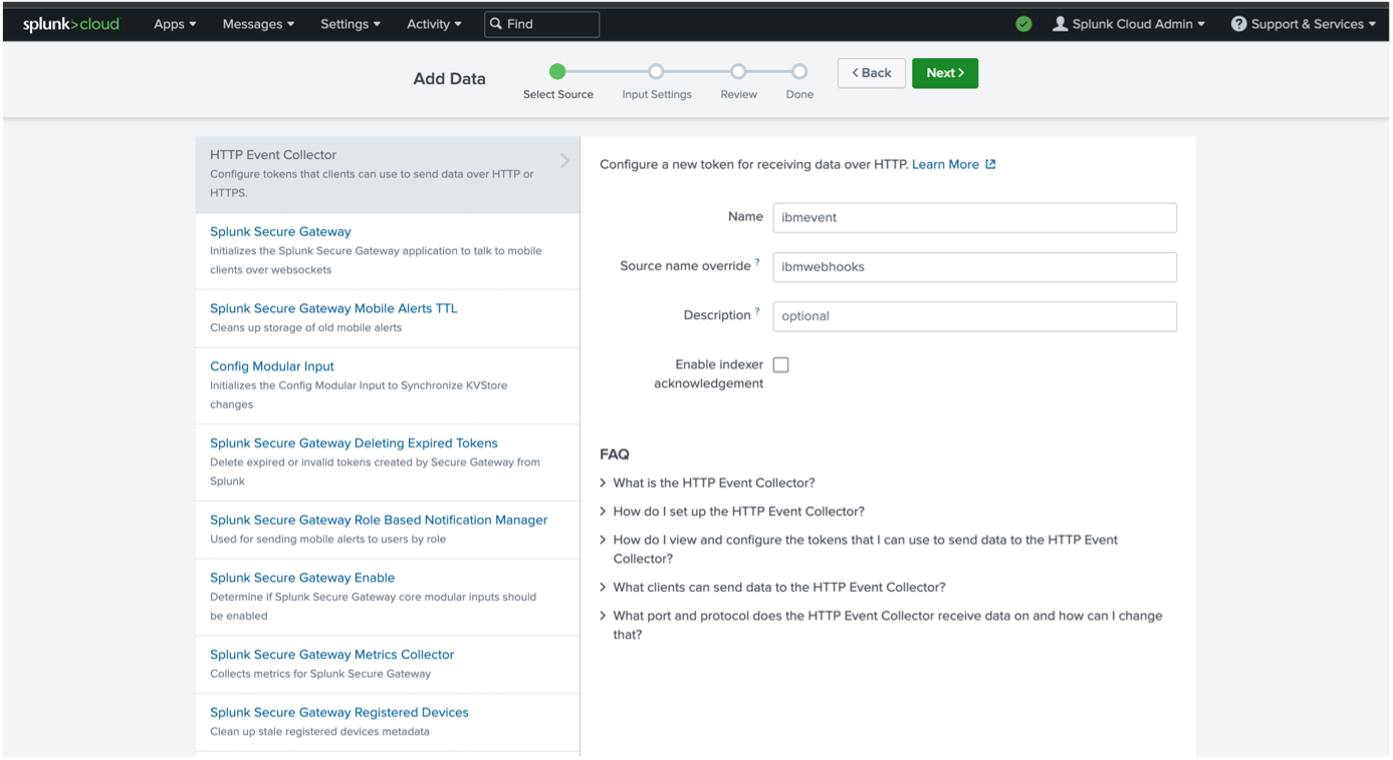
Provide the new token name and source name override, and click on "Next".
-
Under "Input Settings", click on the "Select" tab, then choose
_jsonas the source type. Specify "Search and Reporting" for "App Context". Choose the appropriate index or create a new index.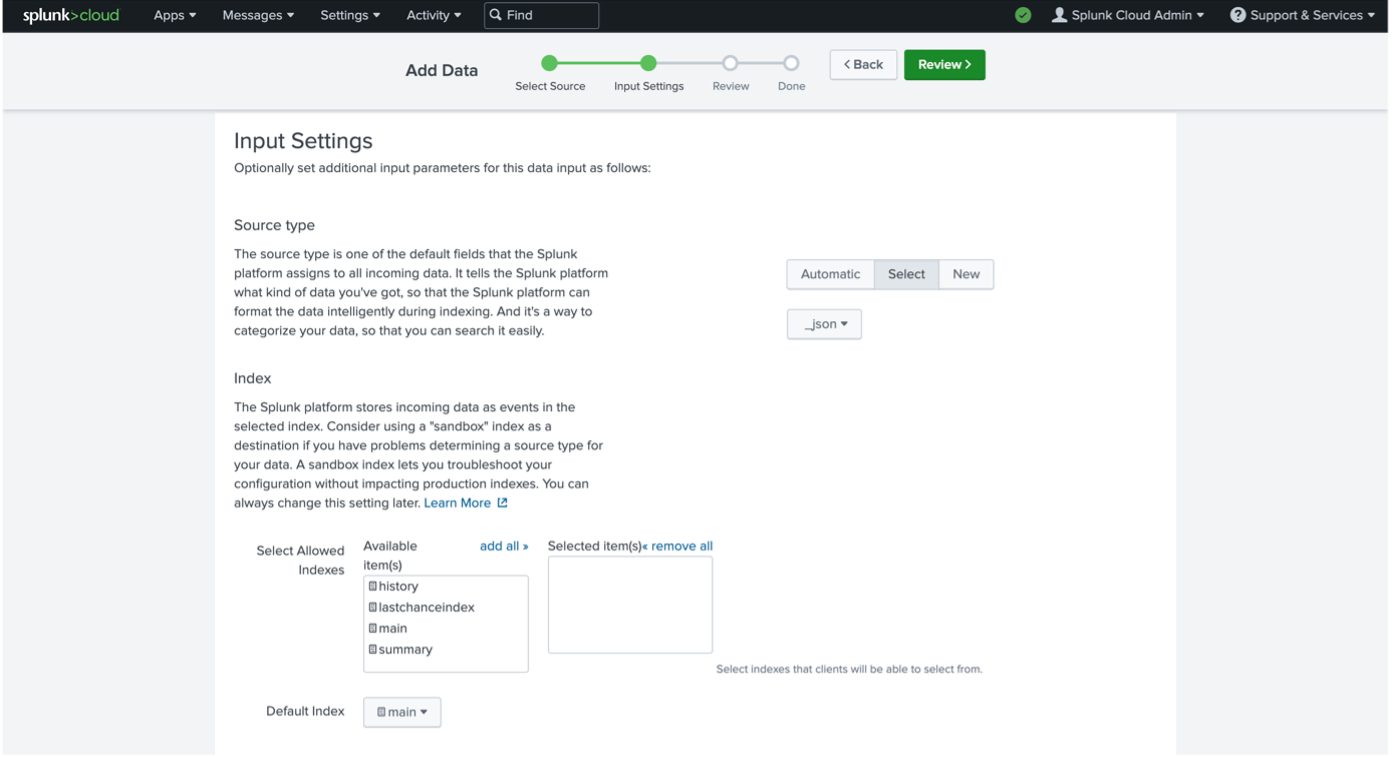
-
Click on "Review" and then "Submit". Copy the token value, you will need to configure this on the Verify admin console.
-
Navigate back to "Settings" -> "Data Inputs" -> "HTTP Event Collector"
-
Select "Global Settings". Specify the default source type of
_json. Port "8088" is the default. You can specify a default index if needed.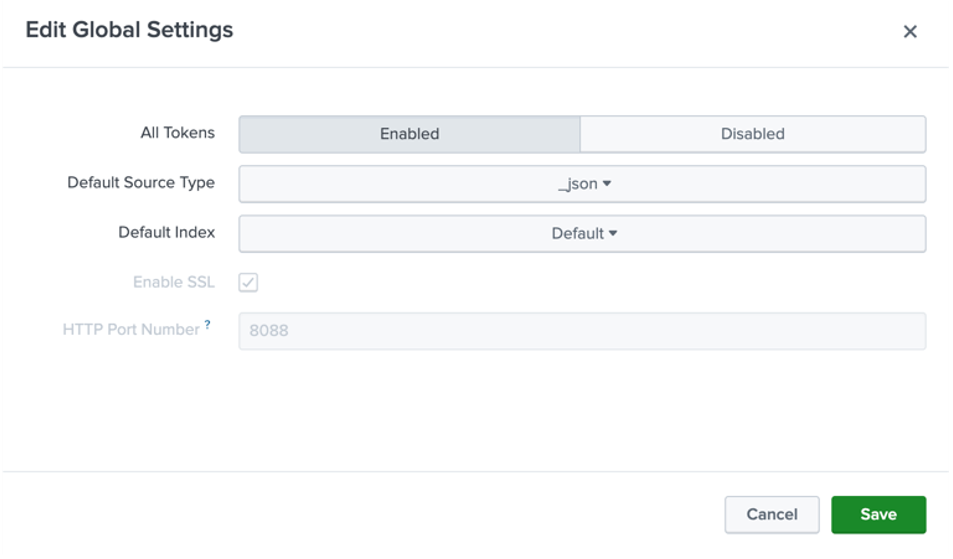
-
You have now configured the HTTP event collector.
-
You can test the HTTP event collector (HEC) using a curl request as below. The URL used below will be used in the next section when configuring the webhook.
curl -k https://yourdomain.splunkcloud.com:8088/services/collector \ -H 'Authorization: Splunk <hec_token>' \ -d '{"event":"hello world", "sourcetype": "manual"}' -
In the navigation bar, under "Apps", click on "Search and reporting".
-
Search for
source="ibmwebhooks". You should see the newly created event.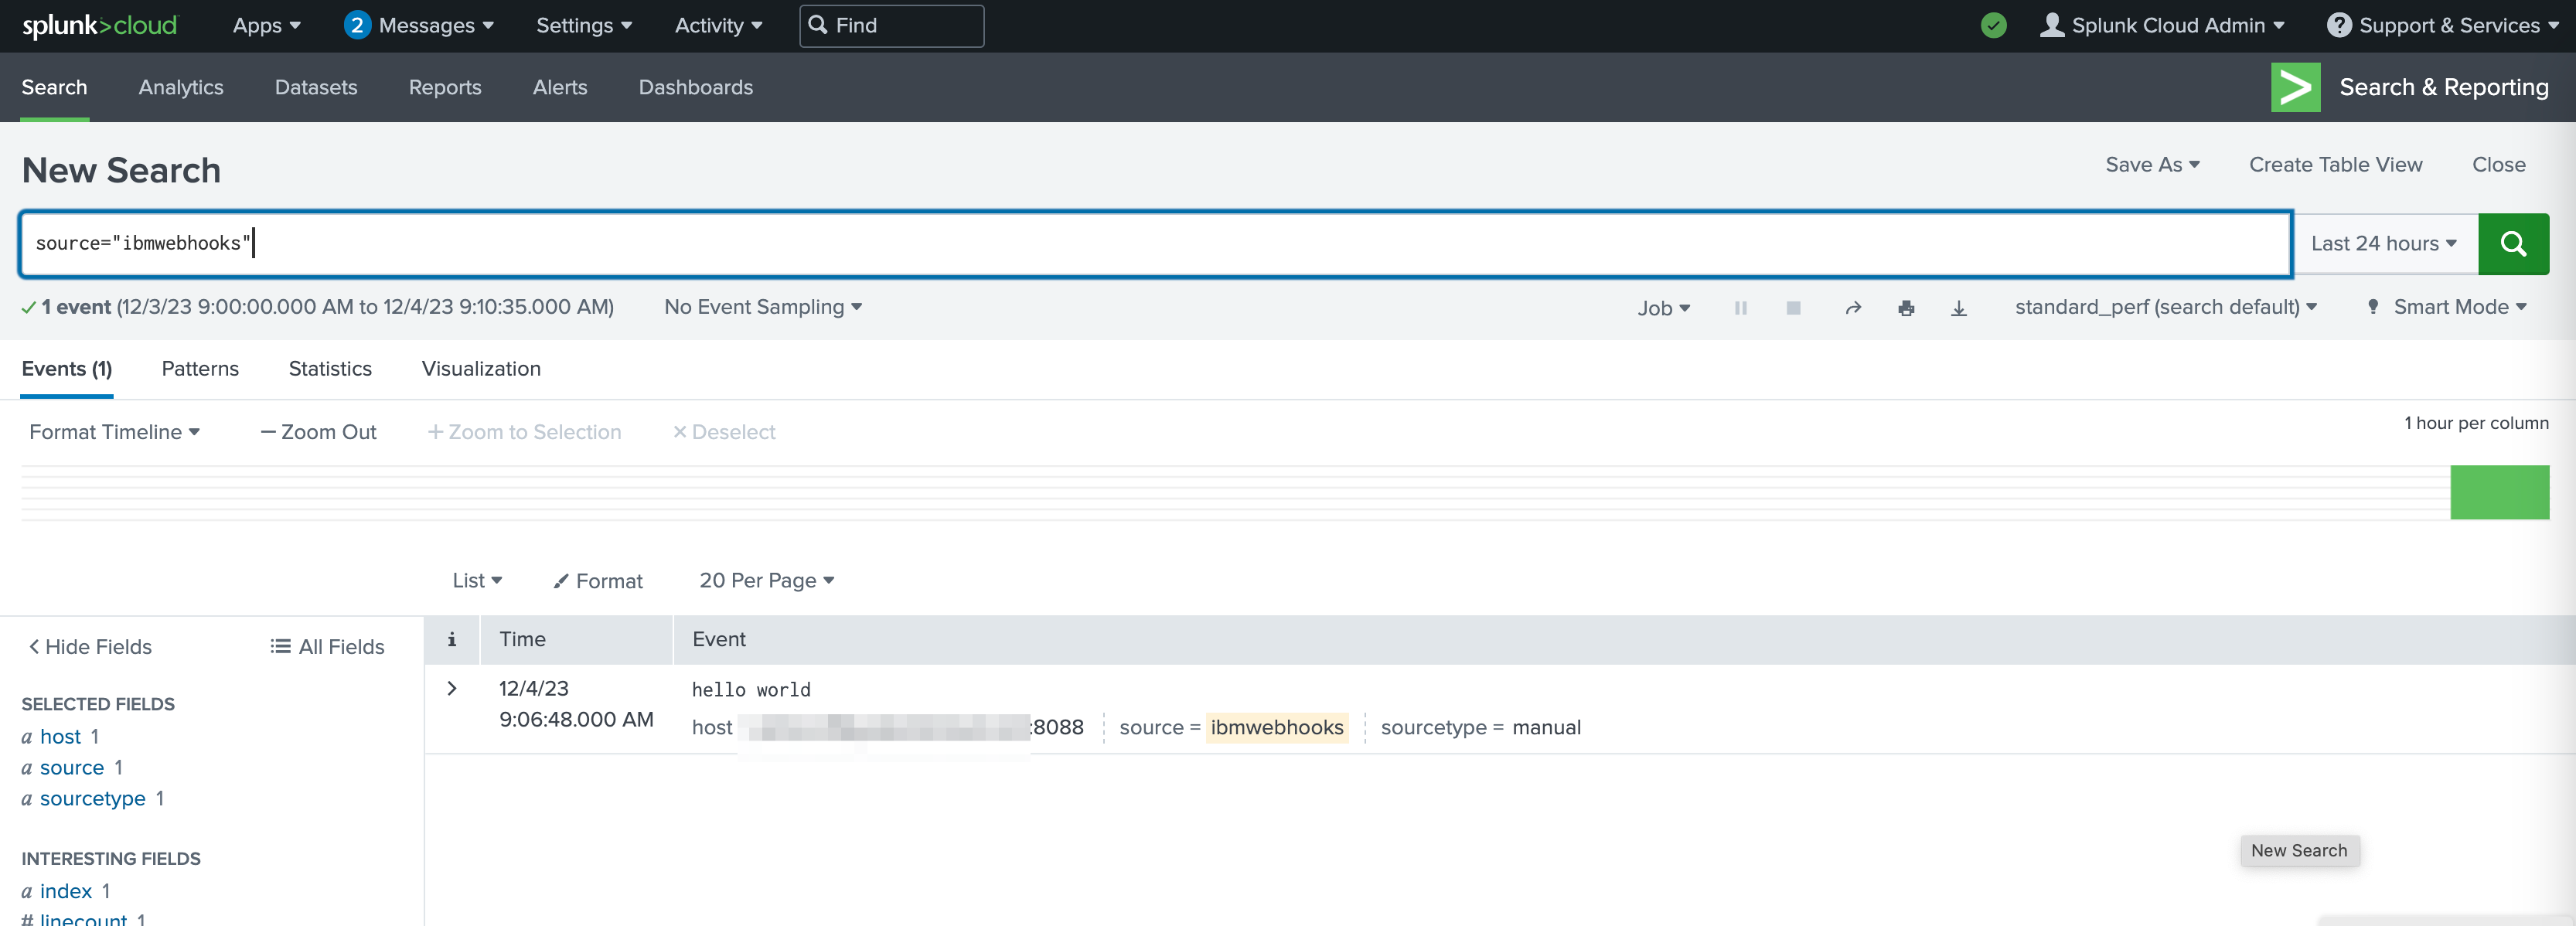
For Splunk trials: Set up a proxy
Verify notification webhooks require the endpoint to have a valid certificate. Splunk Cloud trials do not use certificates with the hostname in the subject or in the subject alternative names.
You can use IBM Application Gateway or any other reverse proxy for this purpose. A sample resource_server configuration for IBM Application Gateway is as below.
resource_servers:
  - path: /splunk
    transparent_path: false
    connection_type: ssl
    identity_headers:
      encoding: utf8_uri
      basic_auth: ignore
      ip_address: true
    servers:
      - host: yourinstance.splunkcloud.com
        port: 8088
        ssl:
          certificate:
            - "B64:LS0tLS1CRUdJTiBDRVJUSUZJQ0FURS0tLS0tCk1JSURNakNDQWhvQ0NRRHVnalhCOTBFRENEQU5CZ2txaGtpRzl3MEJBUXNGQURCL01Rc3dDUVlEVlFRR0V3SlYKVXpFTE1Ba0dBMVVFQ0F3Q1EwRXhGakFVQmdOVkJBY01EVk5oYmlCR2NtRnVZMmx6WTI4eER6QU5CZ05WQkFvTQpCbE53YkhWdWF6RVhNQlVHQTFVRUF3d09VM0JzZFc1clEyOXRiVzl1UTBFeElUQWZCZ2txaGtpRzl3MEJDUUVXCkVuTjFjSEJ2Y25SQWMzQnNkVzVyTG1OdmJUQWVGdzB5TXpFeU1ERXhNakkzTkRsYUZ3MHlOakV4TXpBeE1qSTMKTkRsYU1EY3hJREFlQmdOVkJBTU1GMU53YkhWdWExTmxjblpsY2tSbFptRjFiSFJEWlhKME1STXdFUVlEVlFRSwpEQXBUY0d4MWJtdFZjMlZ5TUlJQklqQU5CZ2txaGtpRzl3MEJBUUVGQUFPQ0FROEFNSUlCQ2dLQ0FRRUFtM1E4CmVFbnFMeUFValVvcUlPUGgwaysvWEY5NjhtOEp3bTVNTDlEZU1UMGo0K1VwMHZ6VWtmUFJQMkZ4Sm5nM2kxRGUKTG9NOWtTZERkKytKWUJLSHR0ZDJJampRbjBtcFNGOVFmUU5DUEJRWVM2bnNrOVU4NjJOdnozYUQ4blVHeVBiMwpMaVkvMFh3YzhVNVpoTlk4MUhzc3p3bWlIRnpJdEkwVUZJRnF1dzFrL3V5bmdxdzRVU3ZFZHJ5bHhwemVpNWt6CjdqdjI2MzBhUVNtMEVOTGhsUmhLc24xNTJhK0Q5U2lmUk42b0VBcU15Mzk0WXVMZ0IydXkyOFYxa0d2RURpdEIKcXMvaWxBQ2U5Ui9sbjF3SURsYTg0QWZaV05MRGV0QmU1TXA2UmVoNWRhMHRCUGV3bGUwK3FDdTJIcjJIemtzRwoxUThTVm9UN0hqaDJuOTFaZXdJREFRQUJNQTBHQ1NxR1NJYjNEUUVCQ3dVQUE0SUJBUUJRMTJMY3Q4VUNLVVQ1CmFGTTdQV1RTdWR5eFpWNHZldFBjdjd2Yk51UzlVTVk1bTNyUE44WUxBQnBkT0ZKZVUvbVJTZzBBd2VlVDc5dFMKU2FQK2trbG1DbWVBMHF1eEt6amhPWHE1ZGV6cWFvNnVxU1ZxQ0IxY3FzbktpK2VZYmZRR2xac3ltaFNDUmFBcgpVQ2VHd2NHWUovcTVlZWoySWtnRGIrdWkyWjNDT3RsRUhYUnZJSnlTKzMrMjdnVFA2L2pFdnRuckxlZmtsekxECk9xZlAzRWdxYUNFbVVNQ2dsNWxVenNtTlI4cktSeEFLSjZpZlpTek5NRUlVbzRESXU2aENOOVFjbS9zQVRJUFYKRDM1M29RWHBQUFRCWDVlRVlmSUZRY2JGdkt1ako3RXI3TEZDL1Izd1pYN1FLNXExRkhLZzd0QUFXSHh3bWhGWgo2Ky9nazJGZgotLS0tLUVORCBDRVJUSUZJQ0FURS0tLS0t"
            - "B64:LS0tLS1CRUdJTiBDRVJUSUZJQ0FURS0tLS0tCk1JSURlakNDQW1JQ0NRQ05IQk44dGovRnd6QU5CZ2txaGtpRzl3MEJBUXNGQURCL01Rc3dDUVlEVlFRR0V3SlYKVXpFTE1Ba0dBMVVFQ0F3Q1EwRXhGakFVQmdOVkJBY01EVk5oYmlCR2NtRnVZMmx6WTI4eER6QU5CZ05WQkFvTQpCbE53YkhWdWF6RVhNQlVHQTFVRUF3d09VM0JzZFc1clEyOXRiVzl1UTBFeElUQWZCZ2txaGtpRzl3MEJDUUVXCkVuTjFjSEJ2Y25SQWMzQnNkVzVyTG1OdmJUQWVGdzB4TnpBeE16QXlNREkyTlRSYUZ3MHlOekF4TWpneU1ESTIKTlRSYU1IOHhDekFKQmdOVkJBWVRBbFZUTVFzd0NRWURWUVFJREFKRFFURVdNQlFHQTFVRUJ3d05VMkZ1SUVaeQpZVzVqYVhOamJ6RVBNQTBHQTFVRUNnd0dVM0JzZFc1ck1SY3dGUVlEVlFRRERBNVRjR3gxYm10RGIyMXRiMjVEClFURWhNQjhHQ1NxR1NJYjNEUUVKQVJZU2MzVndjRzl5ZEVCemNHeDFibXN1WTI5dE1JSUJJakFOQmdrcWhraUcKOXcwQkFRRUZBQU9DQVE4QU1JSUJDZ0tDQVFFQXpCOWx0VkVHazczUXZQbHhYdEEwcU1XL1NMRFFsUU1GSi9DLwp0WFJWSmRRc21jVzRXc2FFVHRlZVdaaDhBZ296TzFMcU9hM0k2VW1yV0xjdjRMbVVBaC9UM2laV1h6SExJcUZOCldMU1ZVKzJnMFhrbjQzeFNnUUVQU3ZFSzFOcVpSWnYxU1d2eDMrb0dIZ3UwM0FacnFUajBIeUx1anFVREFSRlgKc1J2QlBXL1ZmRGtvbUhqOWI4SXVLM3FPVXdRdElPVXIrb0t4MXRNMUo3Vk5ONU5mbEx3OU5kSHRsZmJsdzBZcwo1eEk1UXh1M3JjQ3hrS1F1d3o5S1JlNGlpak9JUk1BS1gyOHBiYWt4VTlOazM4QWMzUE5hZGdJazBzN1I4MjlrCjk4MHNxR1drZDA2K0MxN094Z2pwUWJ2TE9SMjBGdG1ReWJ0dFVzWEdSN0JwMDdZU3R3SURBUUFCTUEwR0NTcUcKU0liM0RRRUJDd1VBQTRJQkFRQ3hoUWQ2S1hQMlZ6SzJjd0FxZEs3NGJHd2w1V252c3lxZFBXa2RBTmlLa3NyNApaeWJKWk5mZGZSc28zZkEyb0sxUjhpNUNhOExLM1YvVXVBc1h2RzYvaWtKdFdzSjlqZitlWUxvdThsUzZOVkpPCnhETi9neFBjSHJoVG9HcWkxd2ZQd0RRck5Wb2ZaY3VRTmtsY2RnWjErWFZ1b3RmVENPWEhyUm9ObVpYK0hna1kKZ0V0UEcrcjFWd1NGb3dmWXF5RlhRNUNVZVJhM0pCNy9PYkYxNVdmR1VZcGxiZDN3UXovTTNQTE5LTHZ6NWExegpMTU5YRHdONVB2eWIyZXB5TzhMUEp1NGRHVEI0ak9HcFlMVWpHMVVVcUpvOU9hNkQ5OXJ2NnNJZCs4cWpFUnRsClpaYzFvYUMwUEtTekJtcStUcGJSMjdCOFpyYTNncG9BK2dhdmRSWmoKLS0tLS1FTkQgQ0VSVElGSUNBVEUtLS0tLQ=="
Configuring Verify
-
Log into the Verify admin console (https://yourtenant.verify.ibm.com/ui/admin).
-
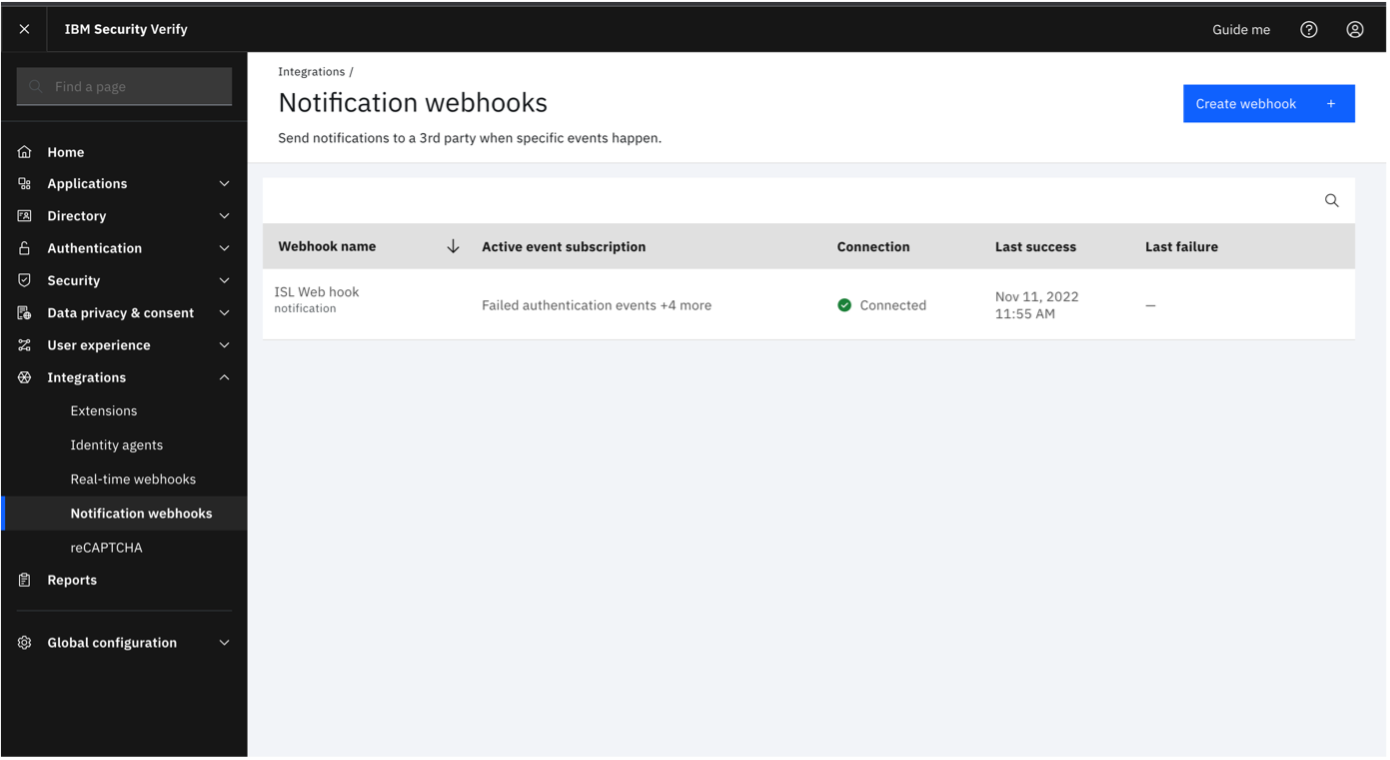
Navigate to "Integrations" -> "Notification webhooks".
-
Click on "Create webhook".
-
Specify all the compulsory fields to create a notification webhook.
- Specify a unique webhook name.
- In the URL field, enter the Splunk URL. This usually follows the patternhttps://yourdomain.splunkcloud.com:8088/services/collector. If you are using a proxy, use the proxy hostname and path.
- Choose "Header" as the "Authentication type".
- Enter "Authorization" as header name and specify the value asSplunk <token>. The Splunk token was generated in the previous section on Splunk Cloud.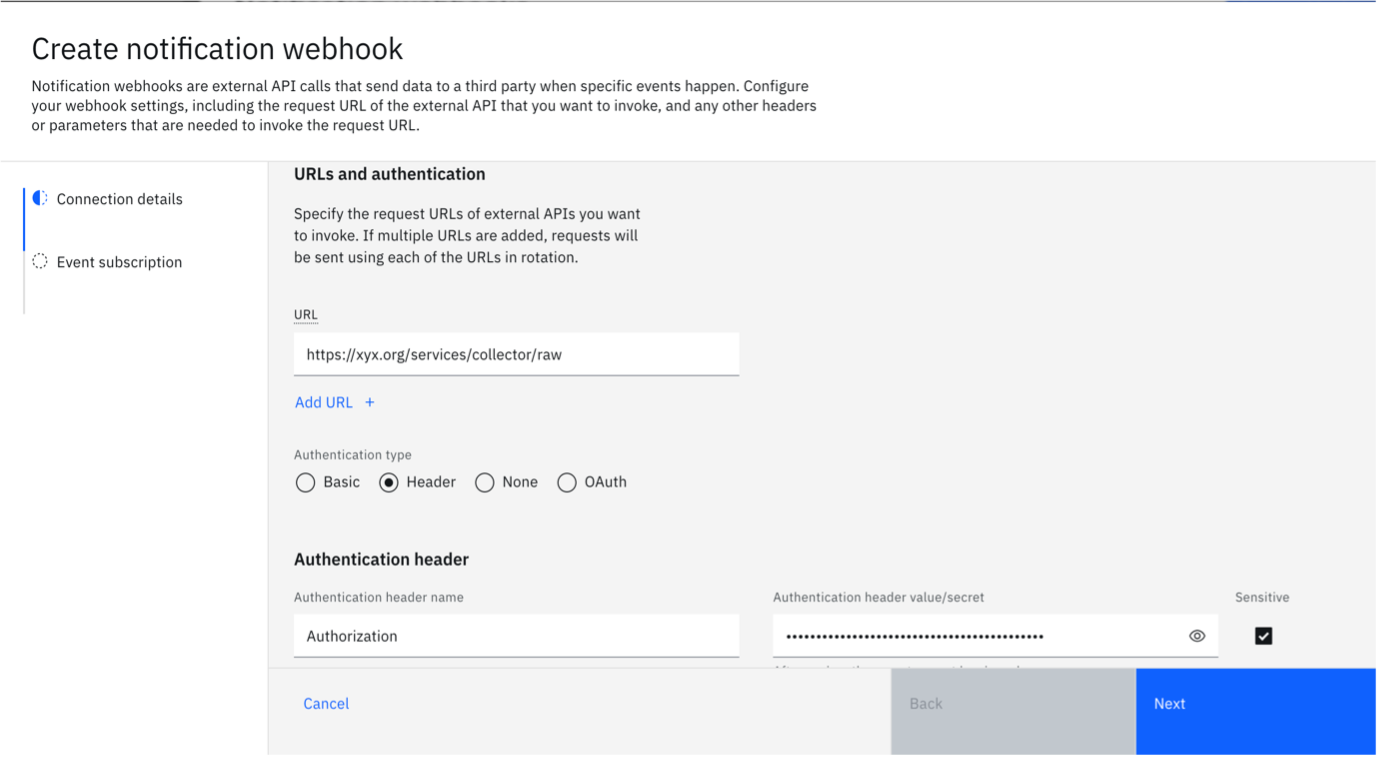
-
Then click on "Next".
-
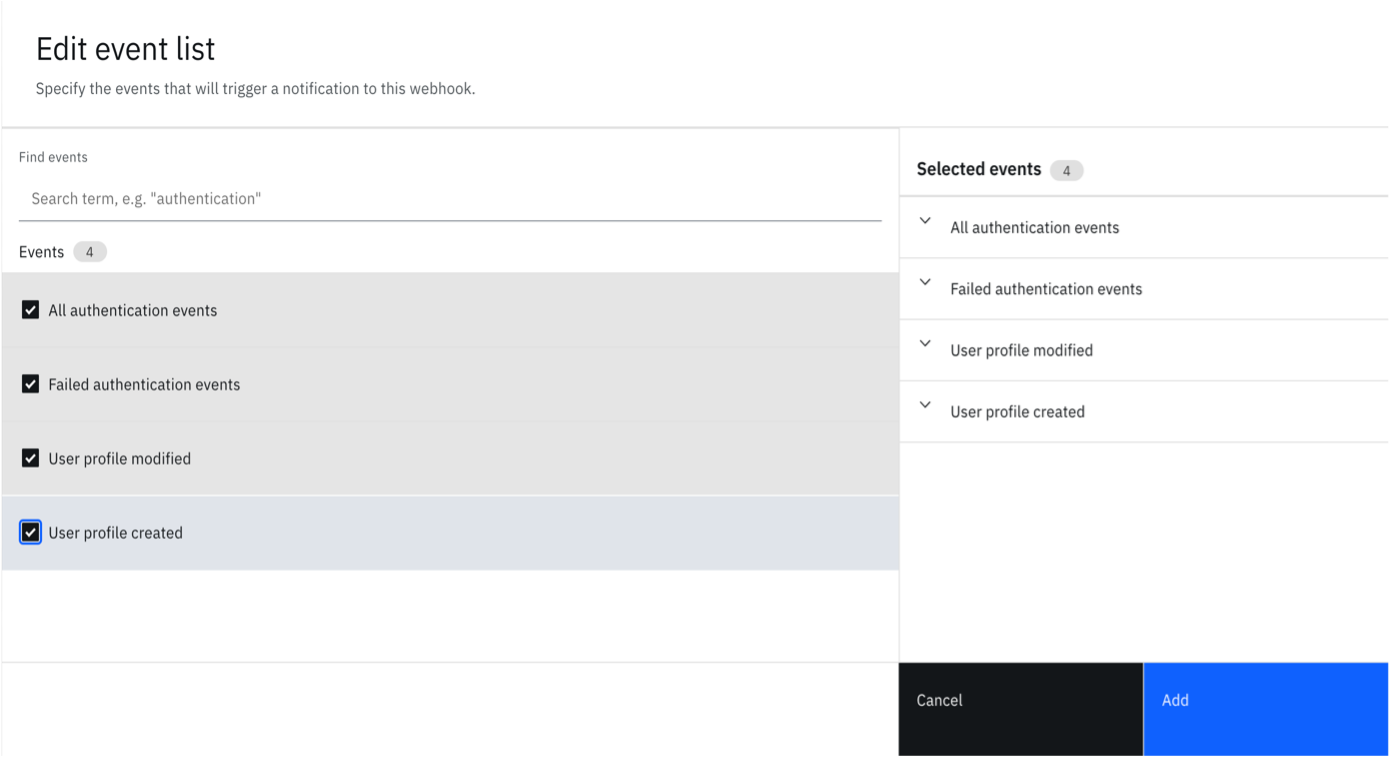
Now configure the events depending on your need. You can set some predefined events by clicking on "Add predefined events" section.
-
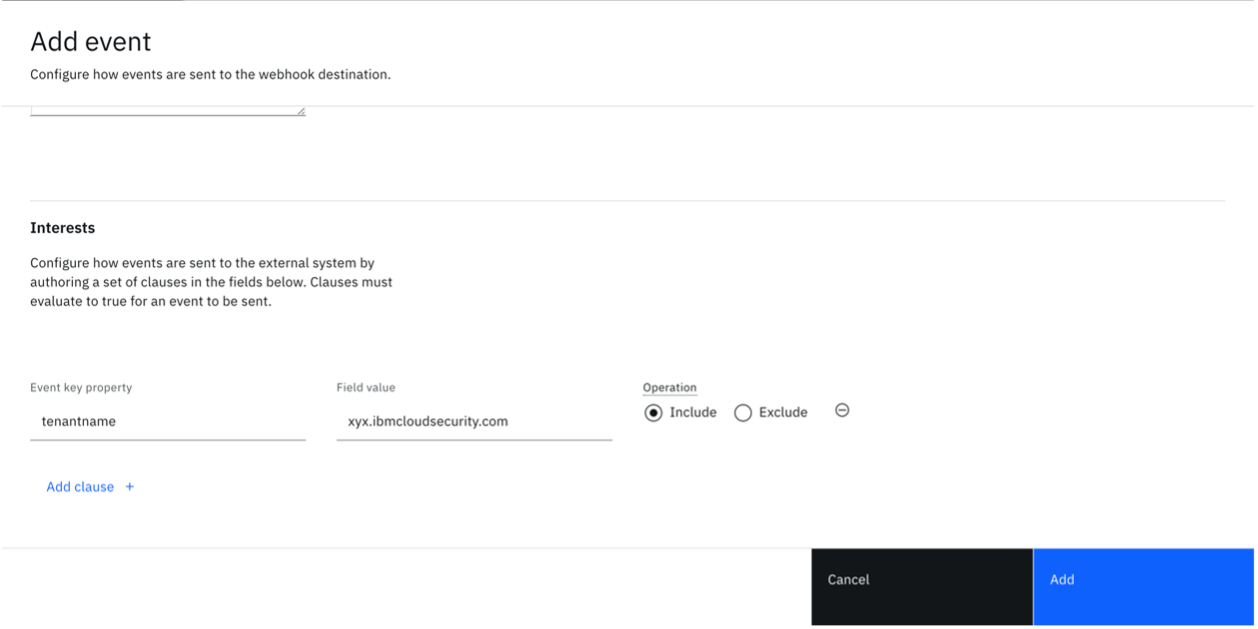
Consult the event payloads to craft a custom condition. The example here shows you how to send all tenant events to the SIEM tool.
-
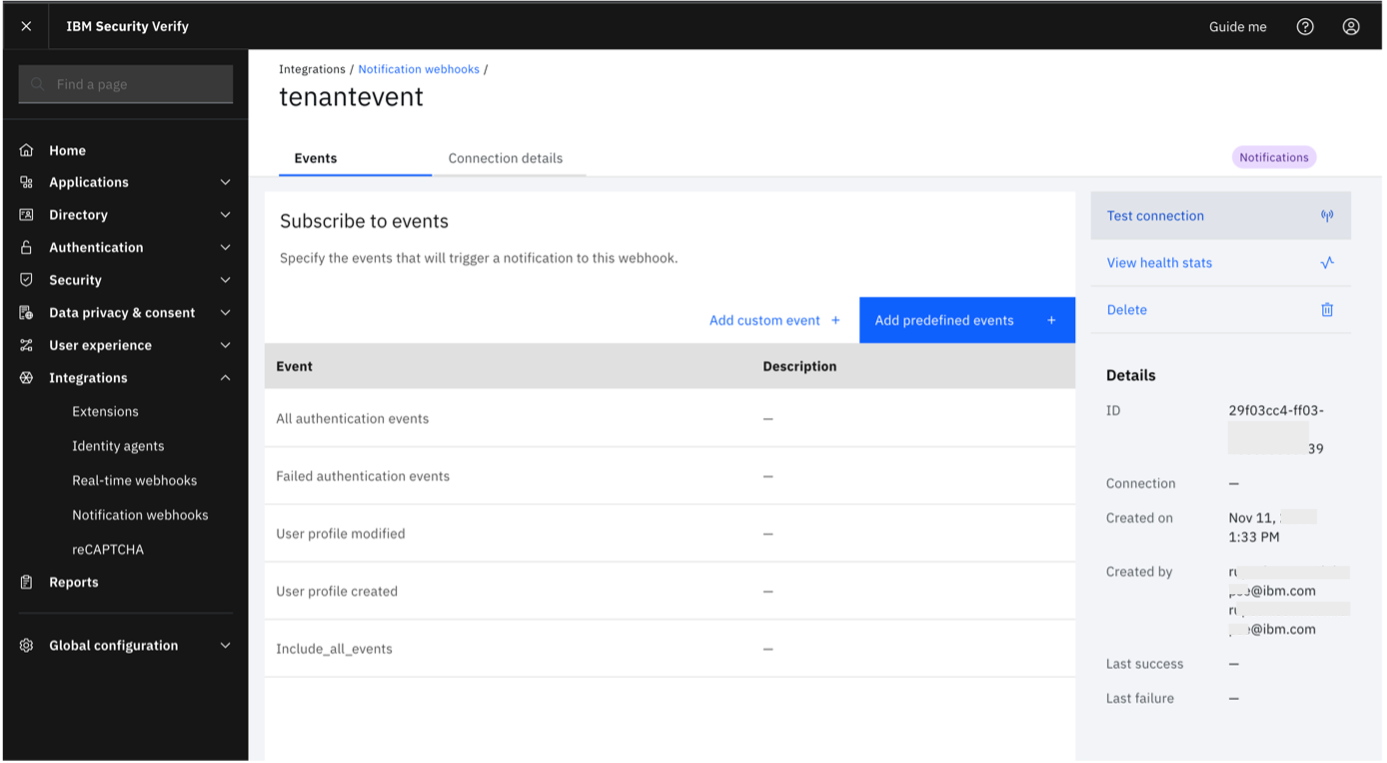
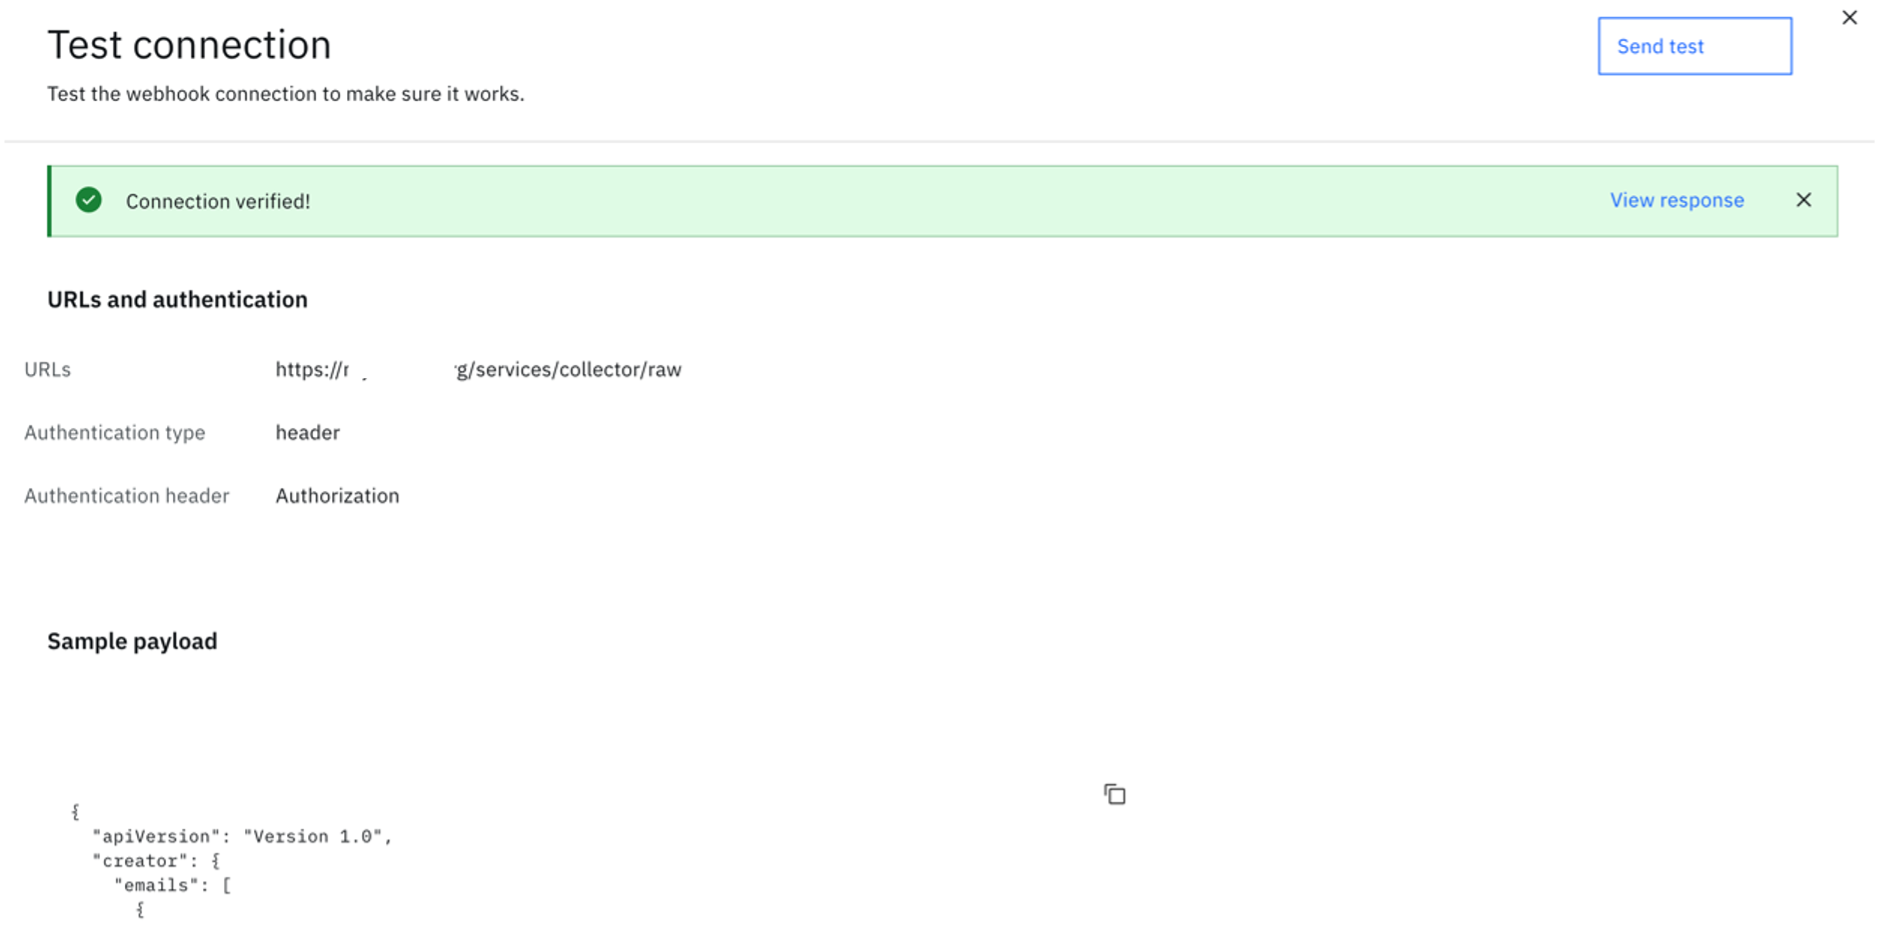
Edit the notification webhook you just created. Click on "Test Connection".
-
Click "Send Test". If the connection is successful, you will see the success message.
Note
Events synced to Splunk will only include the ones created after the integration has been configured. If there is an interest in historical events, you may make use of the Events API. However, the mechanism to add these events into Splunk will require a custom integration that is not covered in this guide.
Validating events received on Splunk Cloud
-
Re-login to your Splunk Cloud account and go to "Search and Reporting" section.
-
In the search field, use an appropriate criteria. Alternatively, use
**to see all the logs.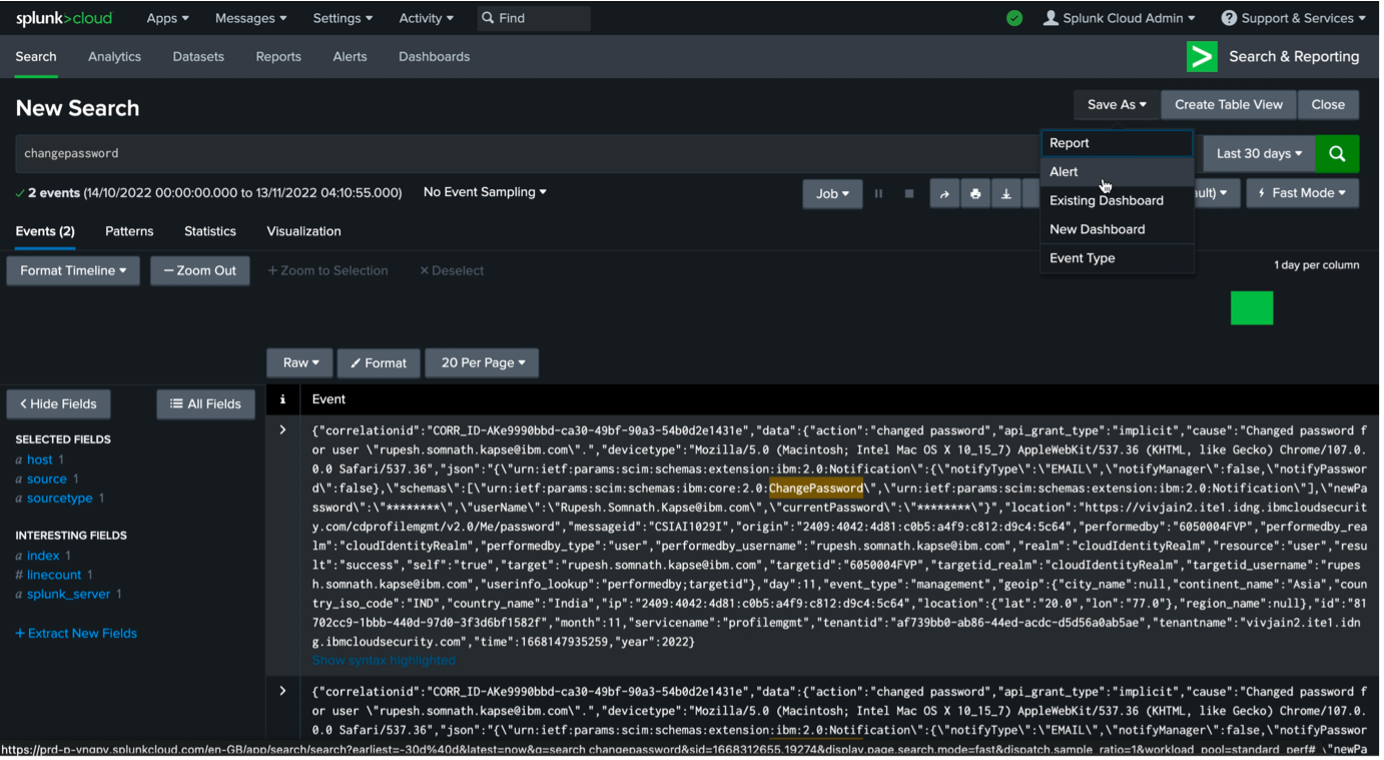
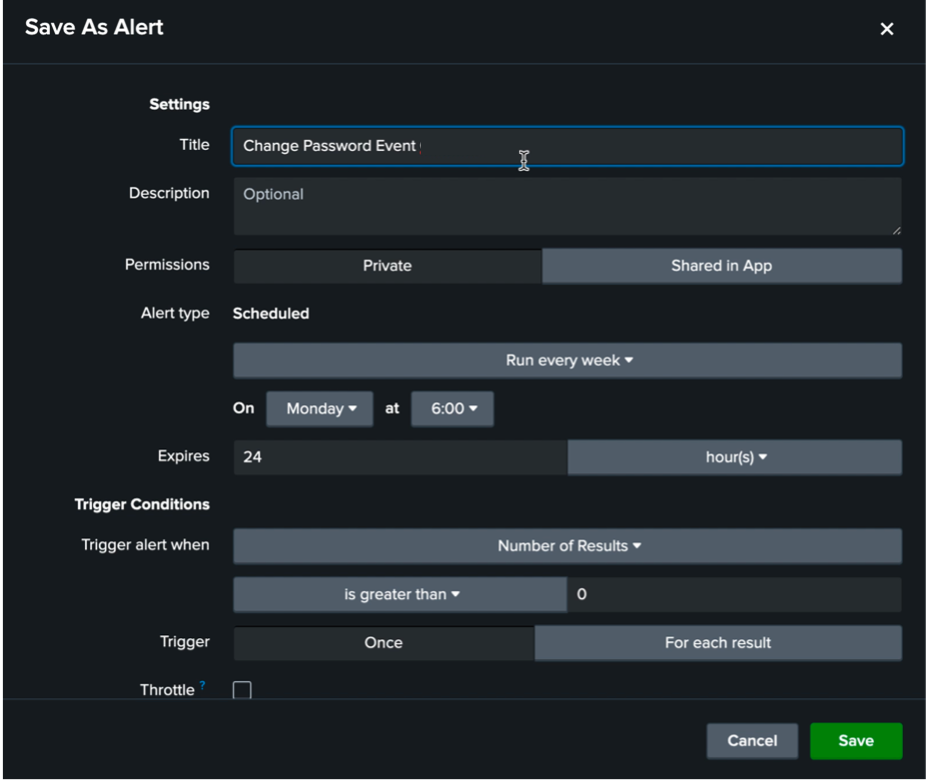
The steps below are optional and are meant to be a guide for you to add alerts from Splunk, if needed.
-
Save the search criteria and any alerts and triggers, as desired.
-
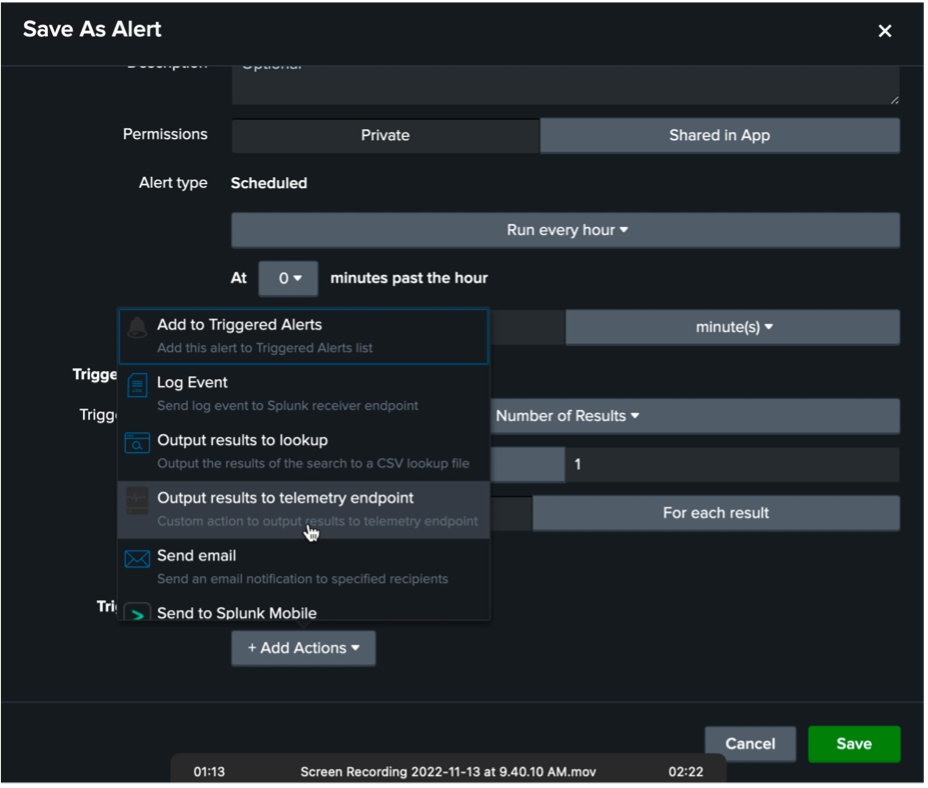
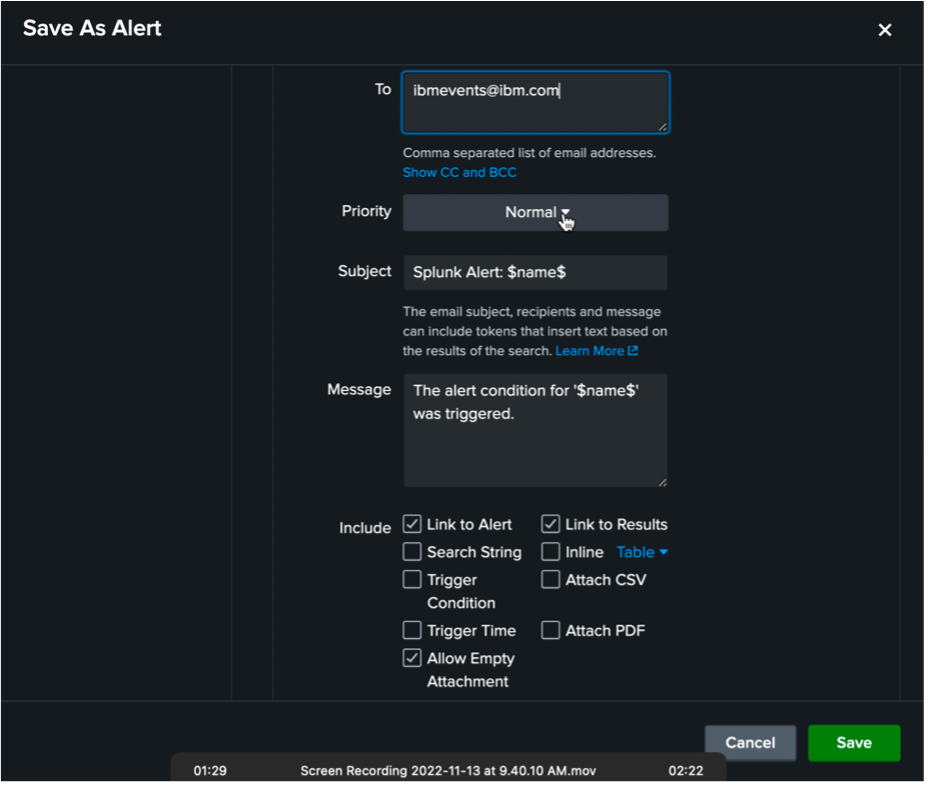
Select actions you would like to take.
-
Set the contact information and then click on "Save".
-
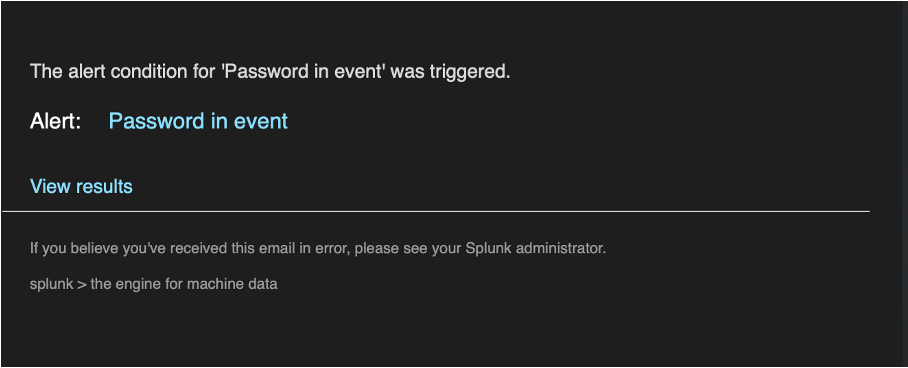
Now, when the selected events are received on Splunk, the email notification is sent.
Updated about 2 years ago
