Managing custom schema
SaaS provisioning - Managing custom attributes
Introduction
IBM Verify helps to manage user accounts on the target applications. Administrator can configure provisioning and de-provisioning of user accounts.
The list of supported applications which supports account lifecycle is found at Knowledge center
The target application may have custom attributes defined in user profile. IBM Verify supports managing such attributes using application profiles and custom attributes.
The list of application and their supported schemas are available at Custom schema support for applications
Following steps needs to be performed in order to manage custom attributes:
- Gather information for custom attributes on target application
- Create application profile with custom attributes
- Create custom user profile attributes (Optional)
- Configure application to use custom application profile
- Execute account synchronization to pull data
Gather information for custom attributes on target application
IBM® Verify requires the details of custom attributes from the target application so that it can be mapped with appropriate profile attribute in Verify.
Administrator needs to collect the API names of custom attributes. Each target application has different process to define custom attributes. Refer to individual target application documentation for details.
For Salesforce application attribute details can be gathered by:
- Login to Salesforce as administrator
- Navigate to Setup > Object manager > User > Fields & Relationships
- Click on name of any custom attribute and get the detail of API Name
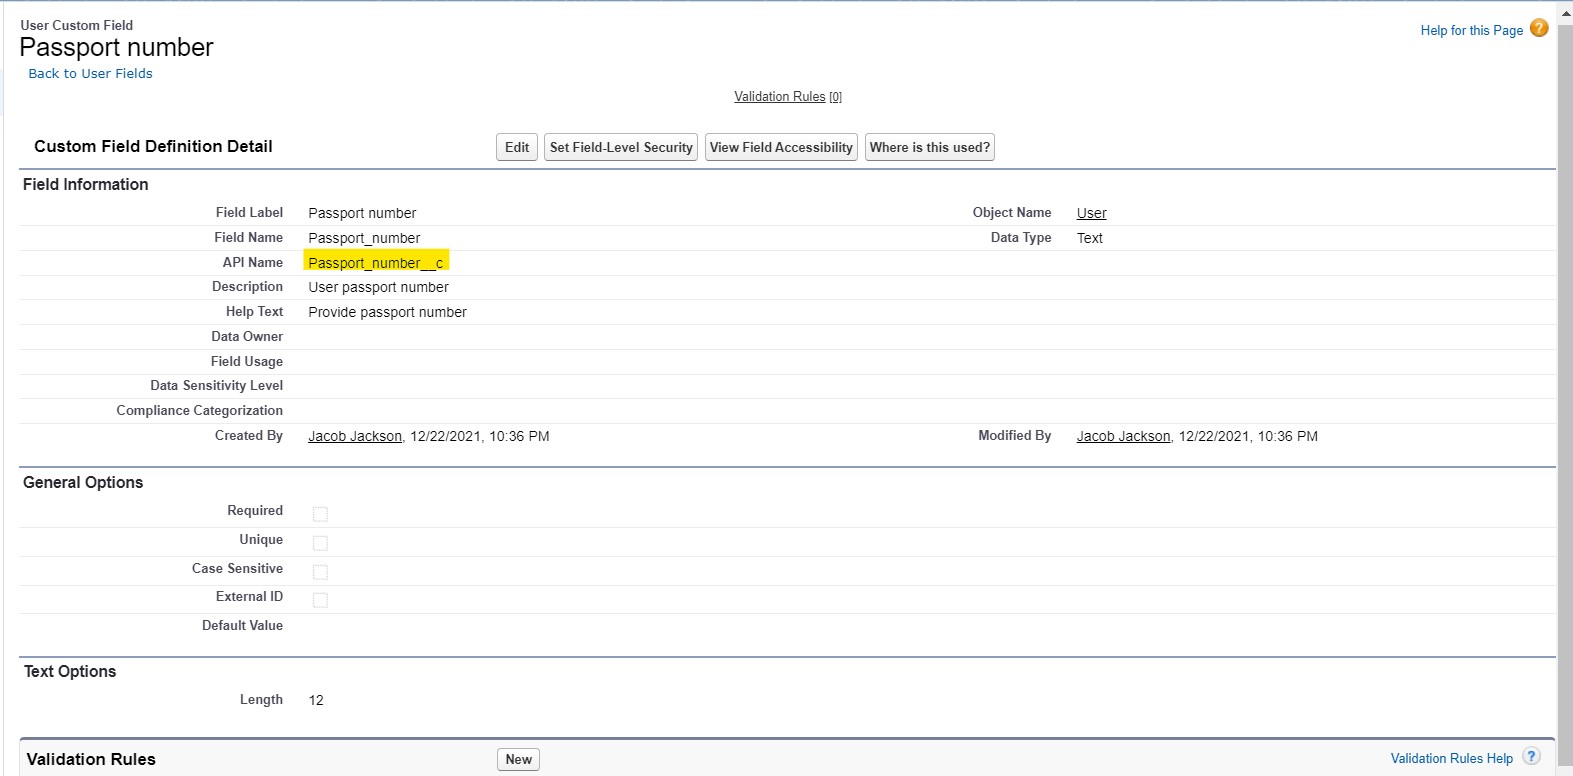
- Collect the names of different attributes which need to be managed via Verify
Create application profile attributes
Create an application profile which has details of custom attributes available at target application
- Login to IBM® Verify as tenant admin (Scott)
- Navigate to Applications > Application profile
- Click Create profile
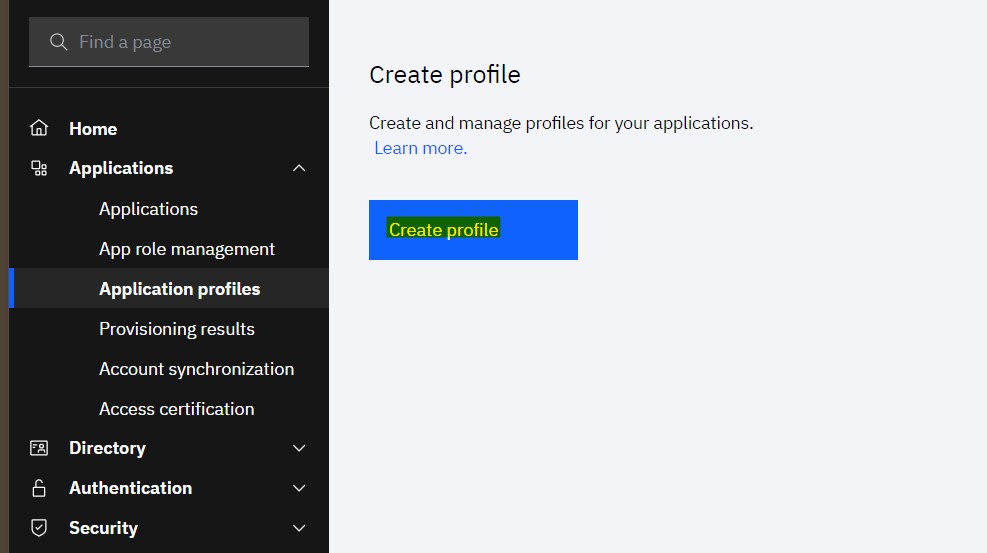
- Select Profile Type as Custom attributes
- Provide Profile name and select Application target endpoint from dropdown
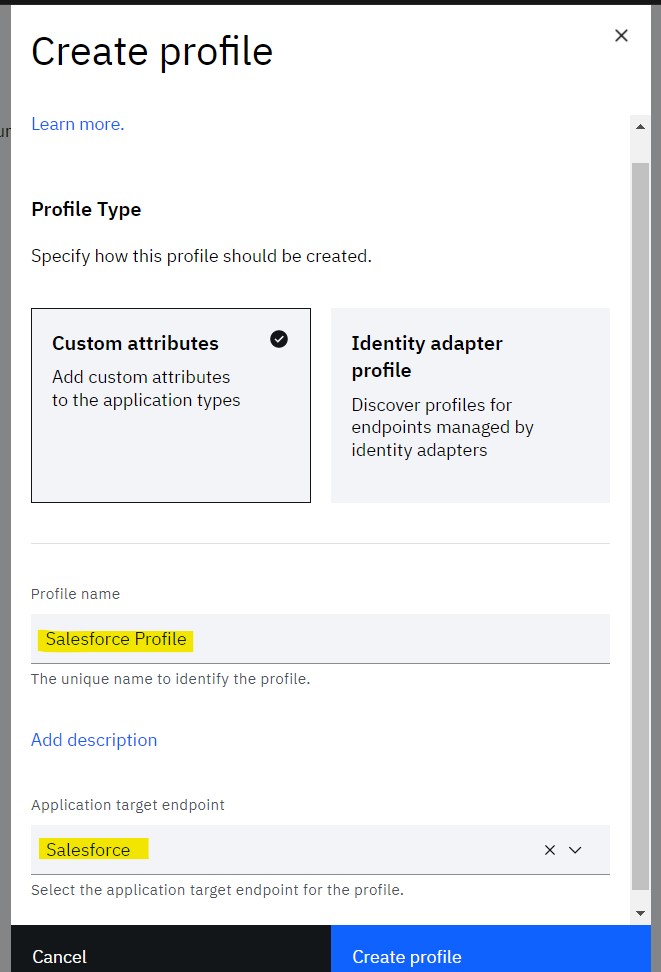
- Click Create profile
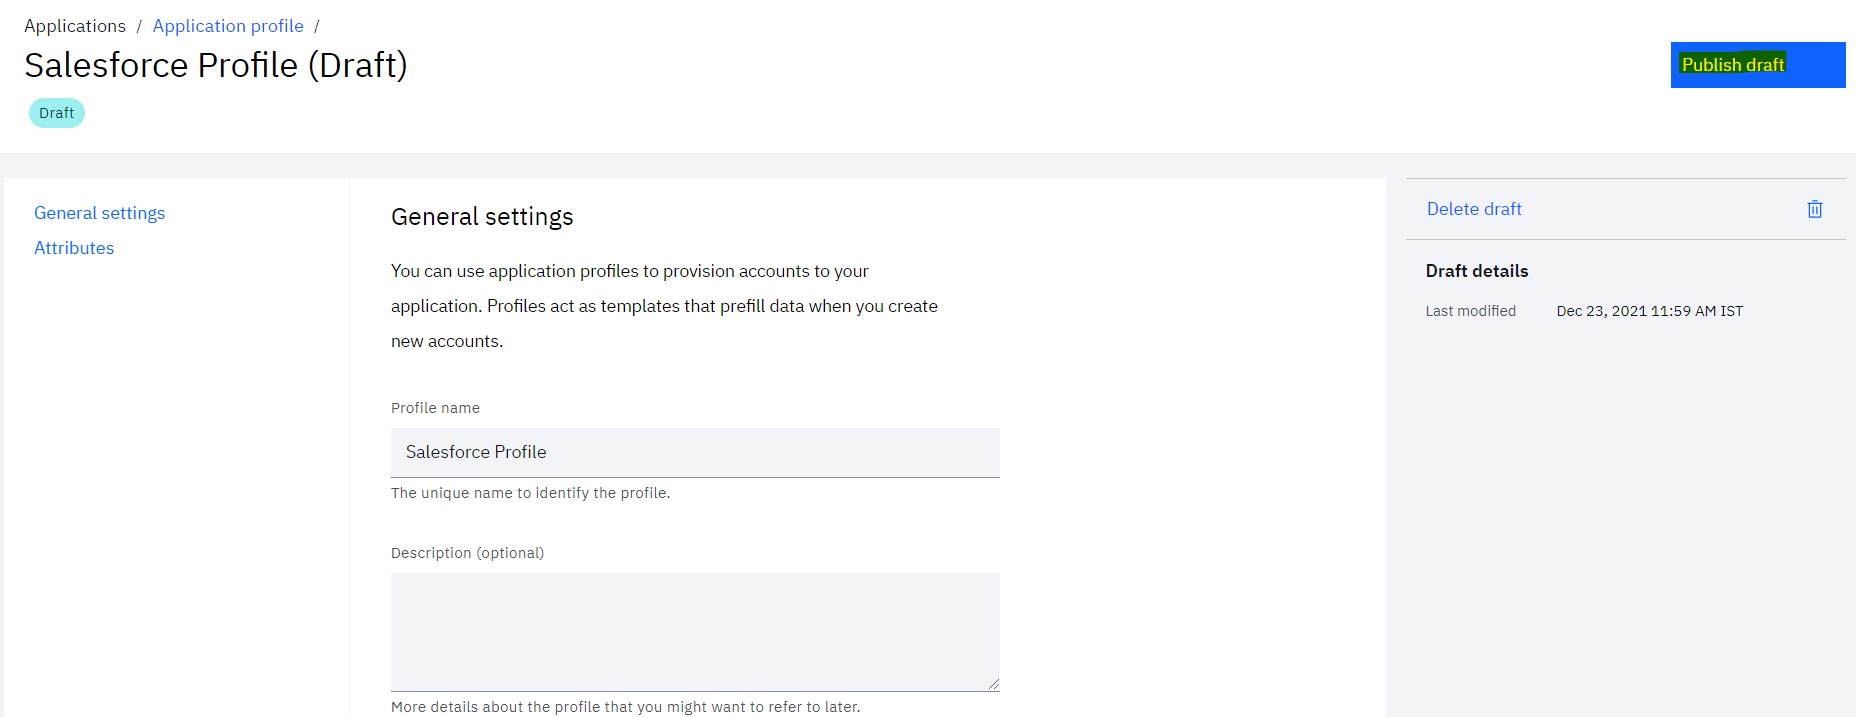
- A draft profile will get created where you can add custom attributes
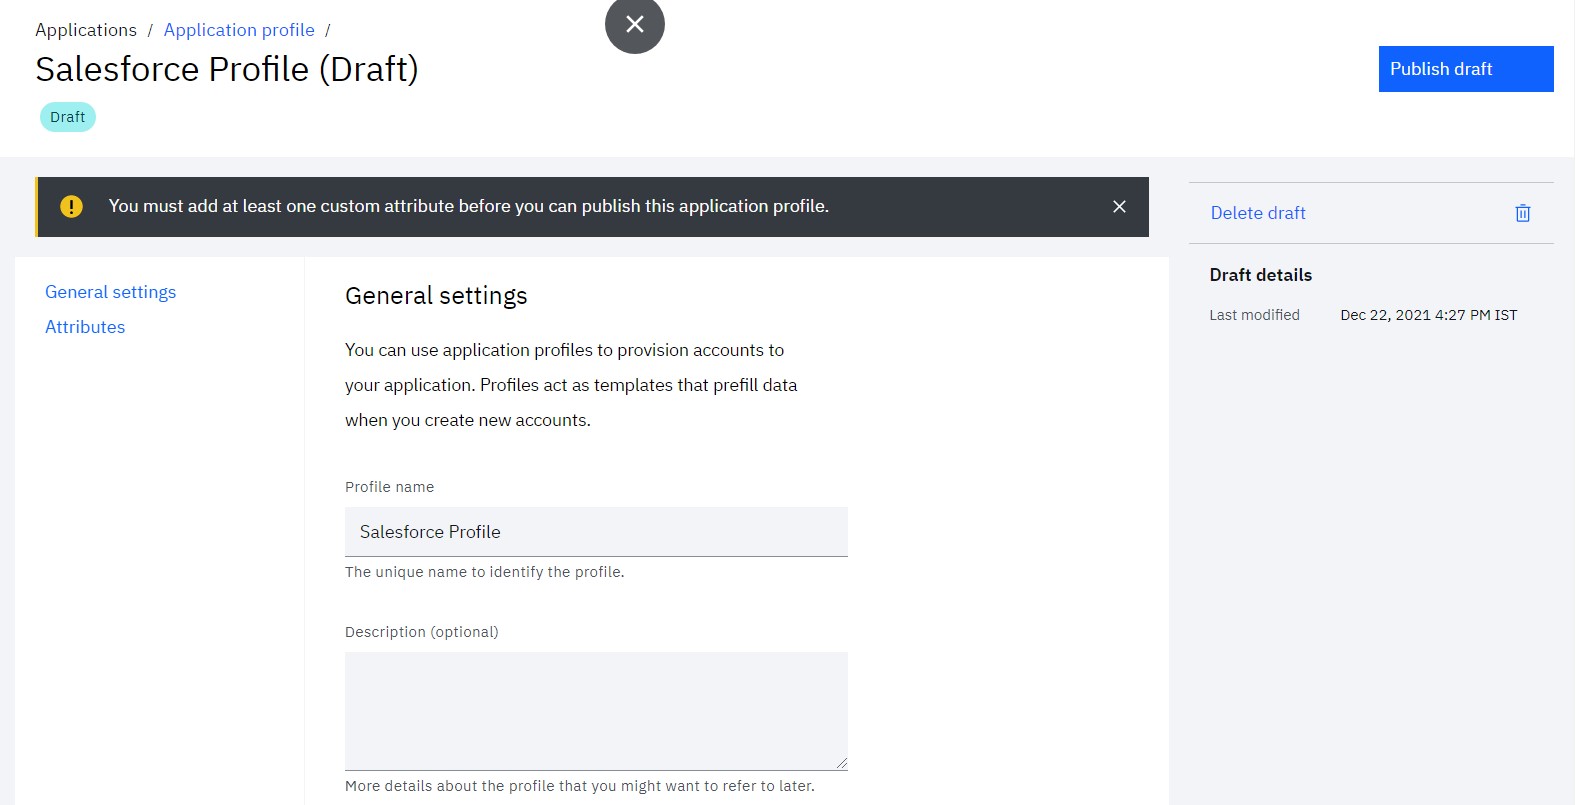
- Now, Scott can select already available custom attributes OR new custom attributes can be added
- Scroll to Attributes section and click Add attribute
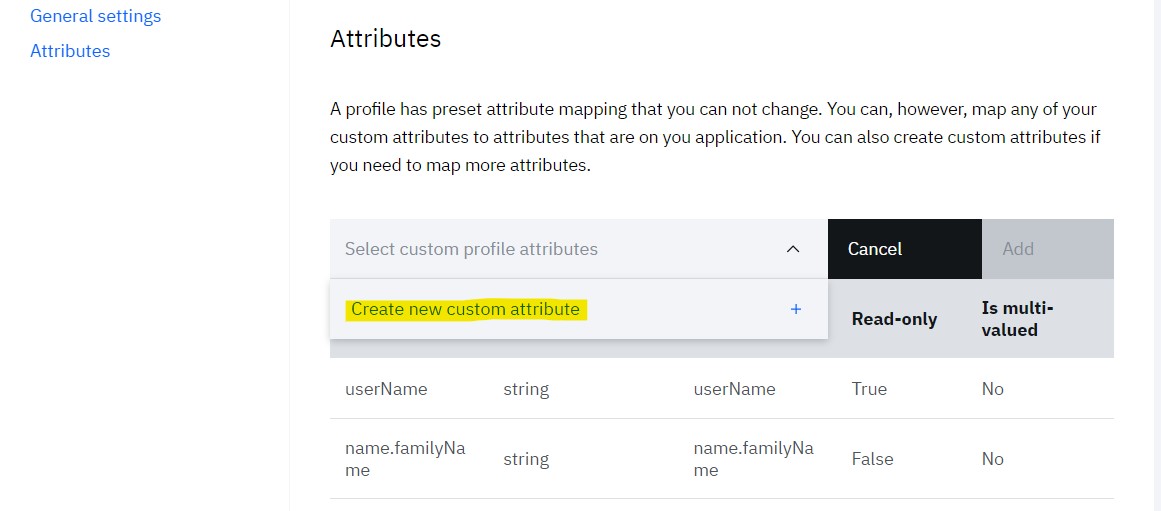
- Select custom profile attributes dropdown will provide already available custom attributes and Create new custom attribute option to create a new one
- Click Create new custom attribute option to create a new one
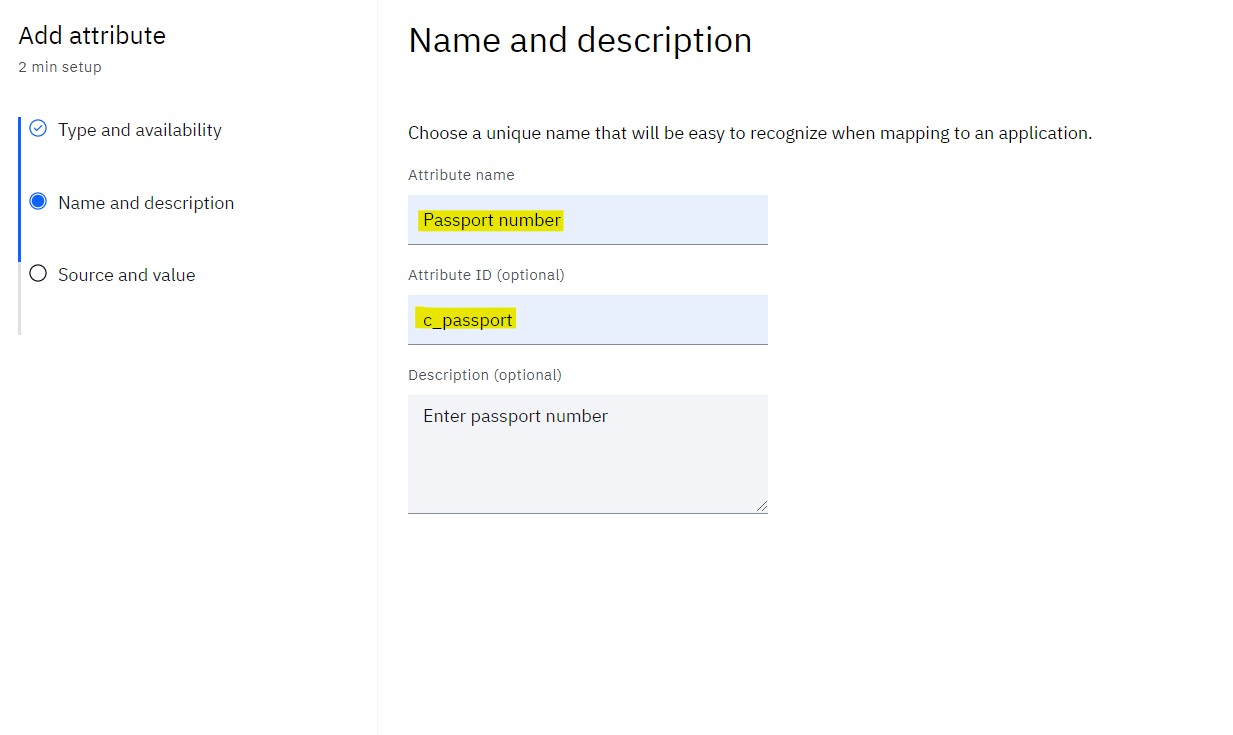
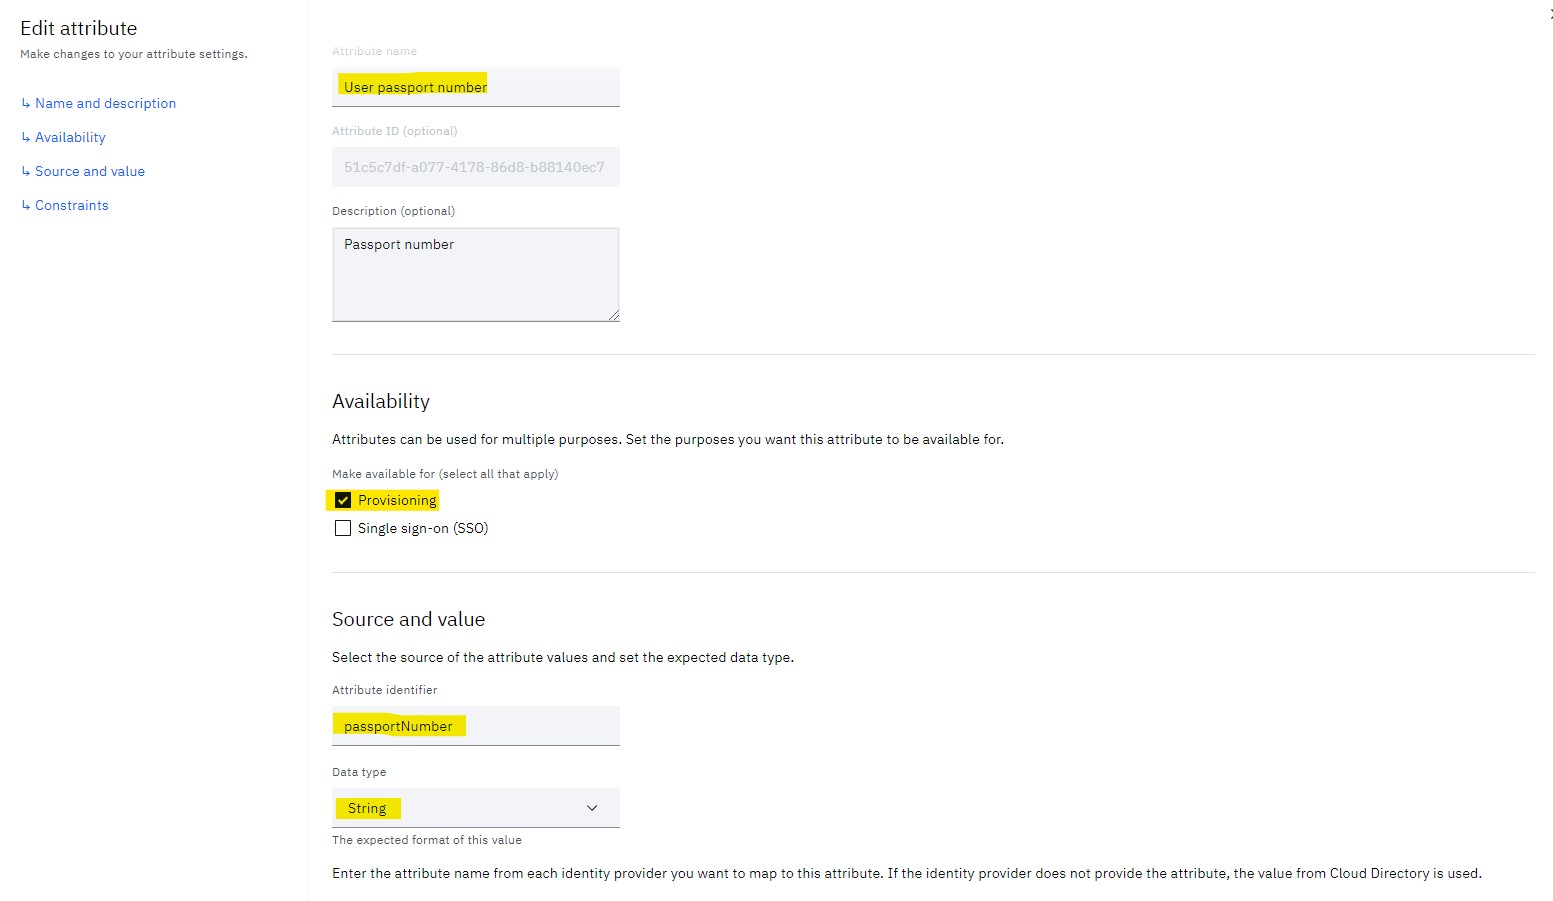
- Provide Attribute name, Attribute ID (optional) and Description (optional)
- Provide Attribute identifier and Data type
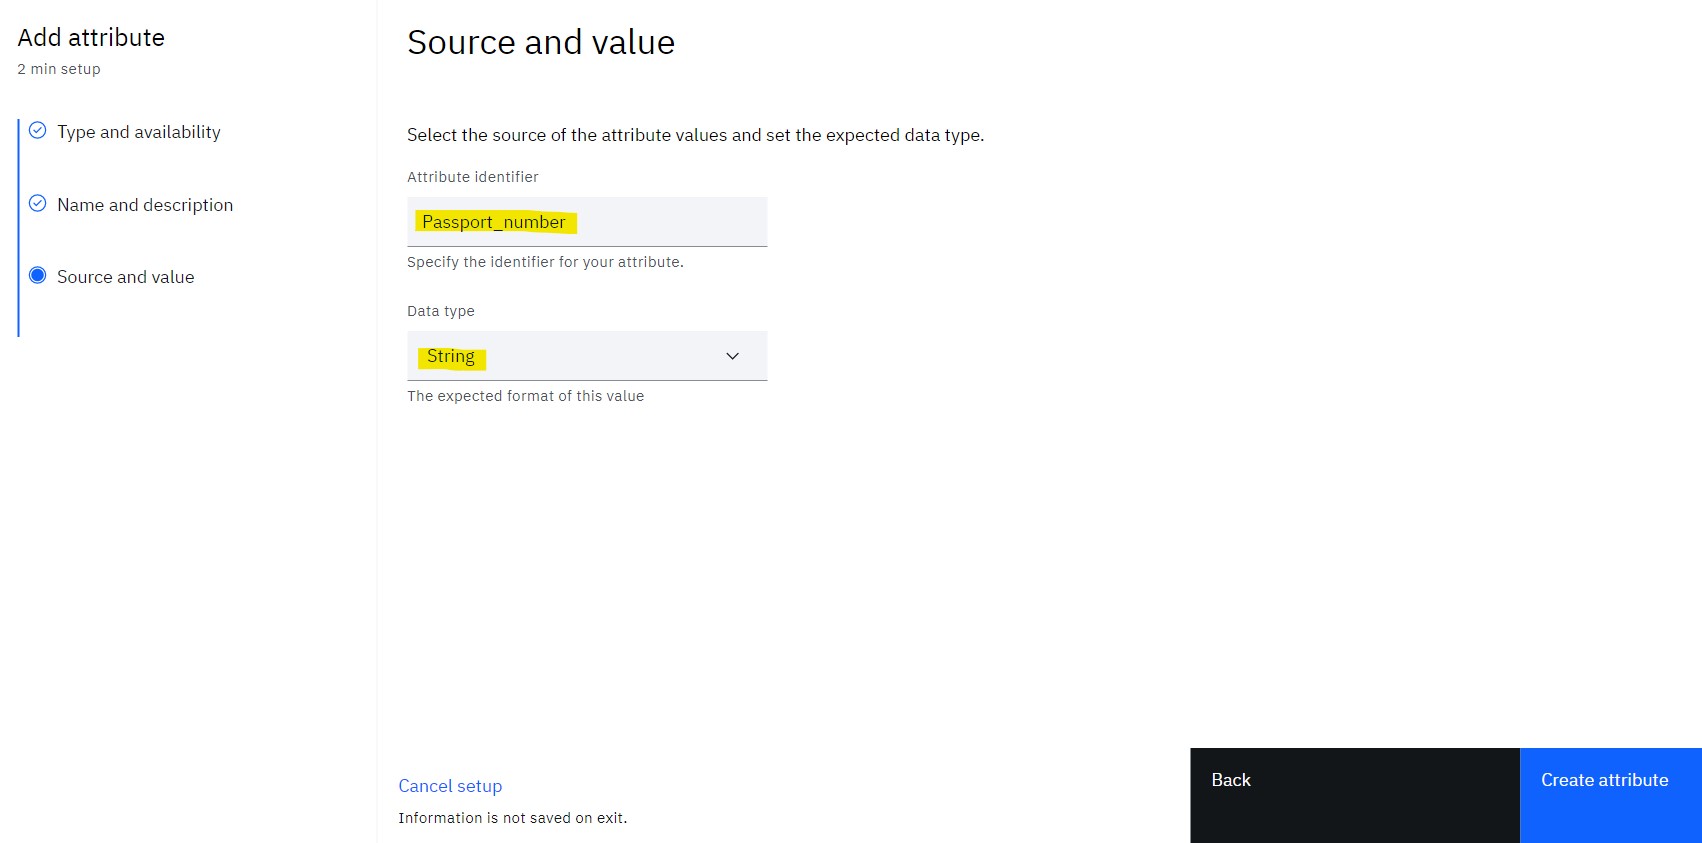
- Click Create attribute
- New attribute will get added to the table
- IMPORTANT Update the Target attribute value for newly added attribute. This value must match with the API name of attribute in target application
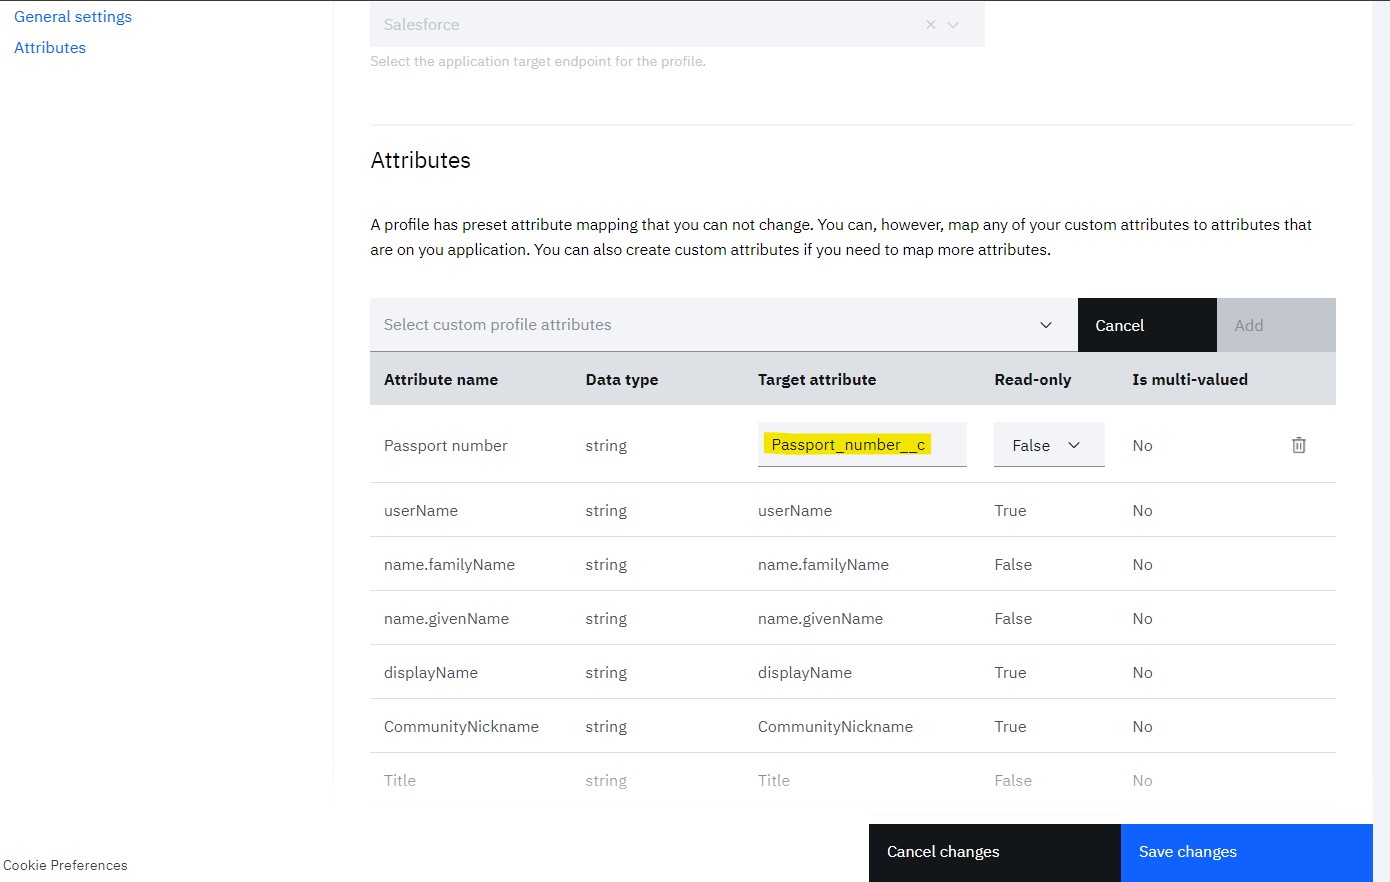
- Click Save changes to save the profile
- Repeat above steps to add multiple custom attributes
- Once all attributes are added, Scott needs to Publish draft so that its available to the application
Create custom user profile attributes (Optional)
IBM® Verify provides various out-of-box user profile attributes. It may not be sufficient to map target custom attributes with out-of-box profile attributes. In such scenario, Verify administrator may create additional profile attributes.
Details can be found at Managing attributes section of knowledge center
If required create the custom attributes which can be mapped with target application's custom attribute.
For this article lets use a custom attribute as below:
Configure application to use custom application profile
Target application need to be configured in Verify. Scott can create a new application OR update the existing one.
Knowledge center has details for Managing application
- Login to IBM® Verify as tenant admin (Scott)
- Navigate to Applications
- Create a new application OR edit the existing application
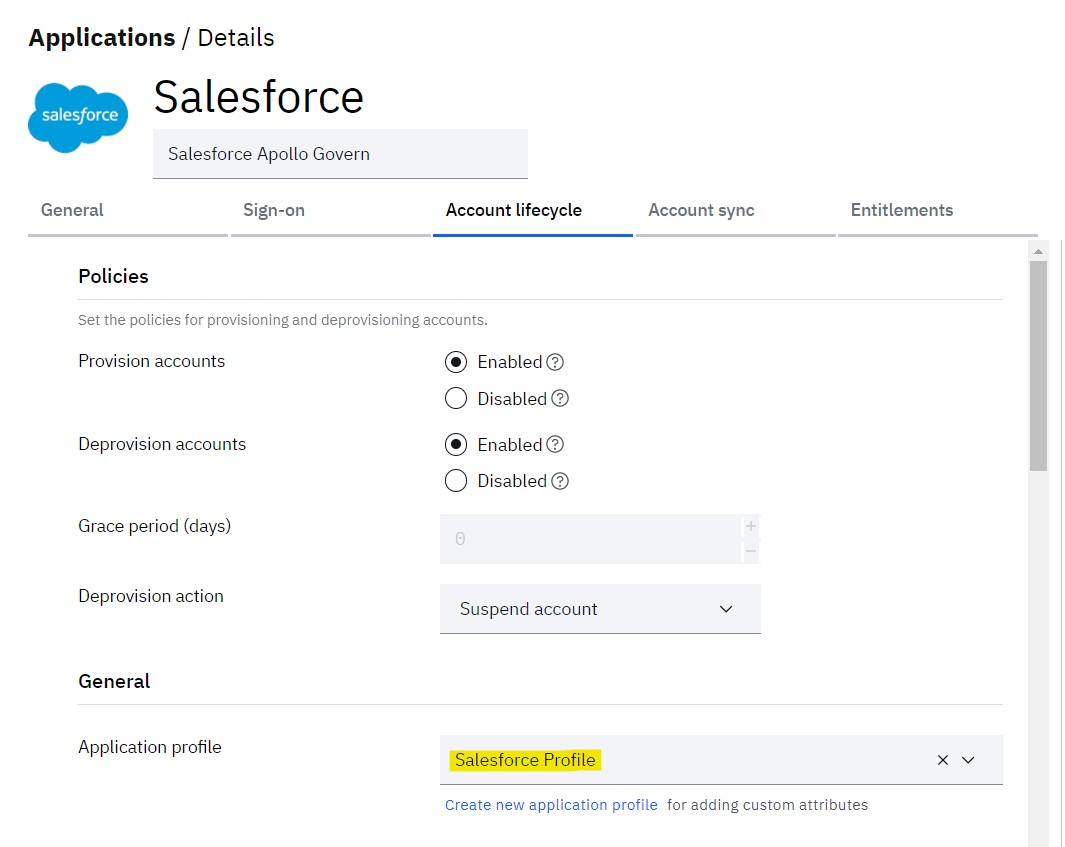
- Click on Account lifecycle tab
- In General section, select the published application profile
- Save the changes
- Scroll below to Attribute mapping section
- Click View more if required
- Click Add attribute
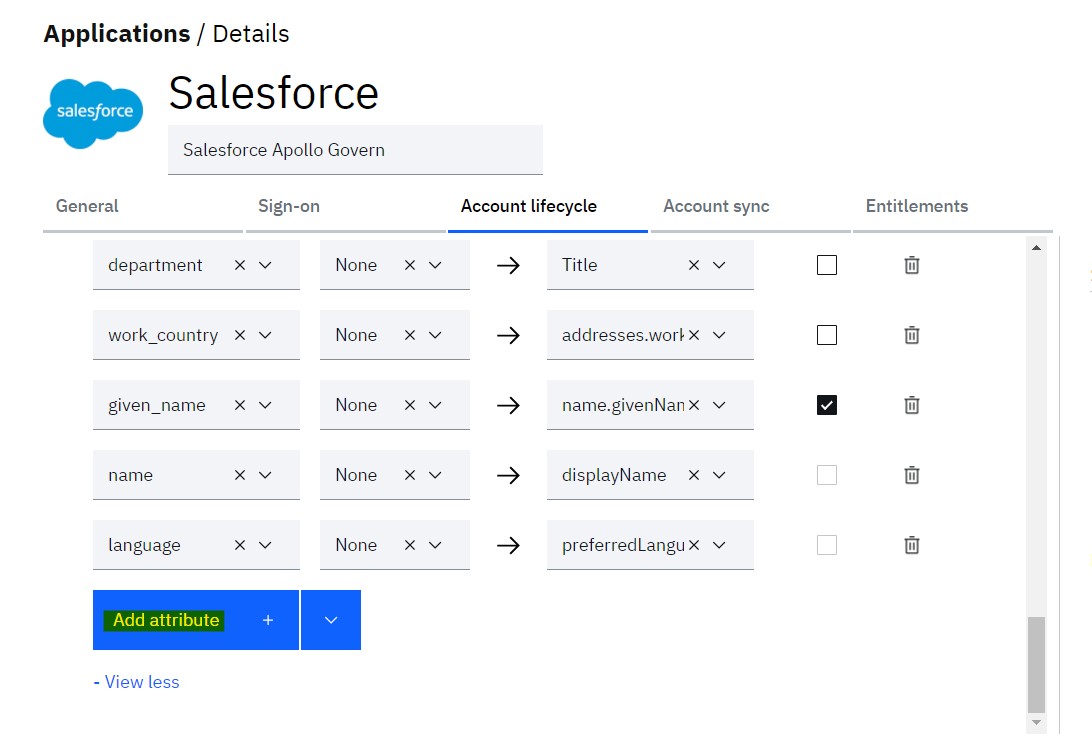
- Select Target attribute which was added in application profile
- Select Verify attribute (either out-of-box OR custom profile attribute)
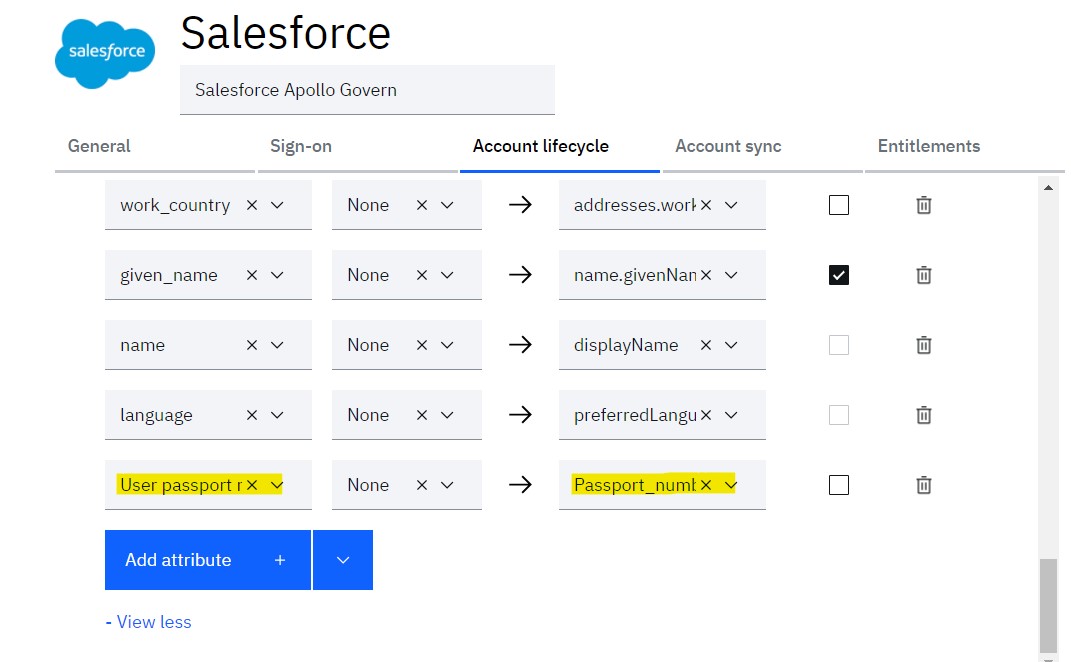
- Save the changes
- Navigate to Account sync tab
- In Reverse attribute mapping section click Add attribute
- Select **Target attribute which was added in application profile
- Select Verify attribute (either out-of-box OR custom profile attribute)

- Save the changes
Execute account synchronization to pull data
After the Salesforce® application is successfully configured, tenant admin can synchronize the salesforce account data with IBM® Verify.
-
Login to IBM® Verify as tenant admin (Scott)
-
From the admin console navigate to Applications
-
Select Accounts from the three dot action menu against the Salesforce application
-
Click Start account synchronization
-
Wait for successful completion of account synchronization
-
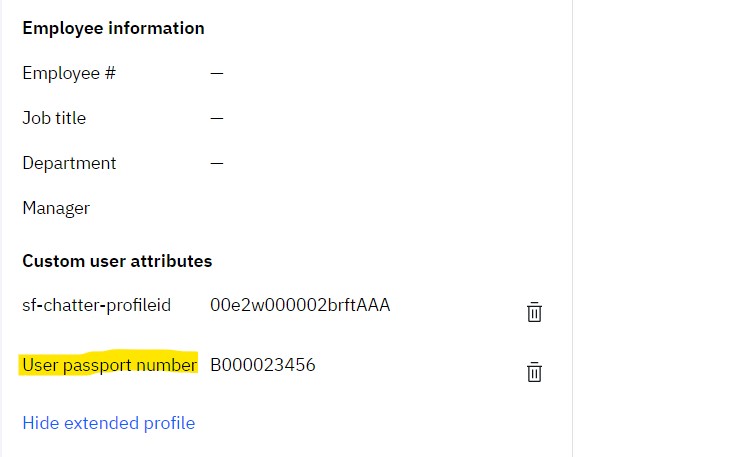
Validate that custom attributes are pulled in Verify after the account synchronization from user profile data
Updated 6 months ago
