Threat events 3rd Party Integration
Threat events 3rd Party Integration
Introduction:
IBM Verify offers comprehensive Identity Threat Detection and Remediation (ITDR) capabilities that can identify anomalous login behaviors and threat patterns that indicate attacks to generate threat events. The Admin can review these threat events in threat reports. Also, the Admin can configure rules for proactive remediation actions to remediate suspicious traffic, such as blocking traffic from IPs that are flagged as suspicious in critical alerts. This document talks about the integration of threat events to external tools such as SIEM through notification webhooks. With these notification webhooks, the admin can define multiple webhooks for different tools. Each webhook can have multiple clauses to filter the events.
As an example, Slack was used as an external tool to showcase how to configure notification webhooks to send the threat events to external tools. Similarly, these notification webhooks can be used for integration with PagerDuty or other external tools.
Configure Notification Webhooks:
- Log in to your tenant with admin privileges.
- Go to your profile and “switch to admin”.
- Go to Integrations -> Notification Webhooks and click
Create Webhookto create a notification webhook.
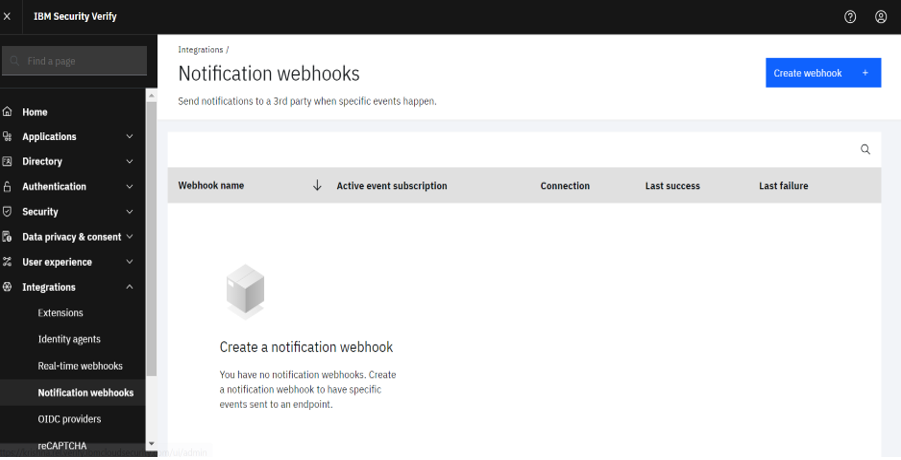
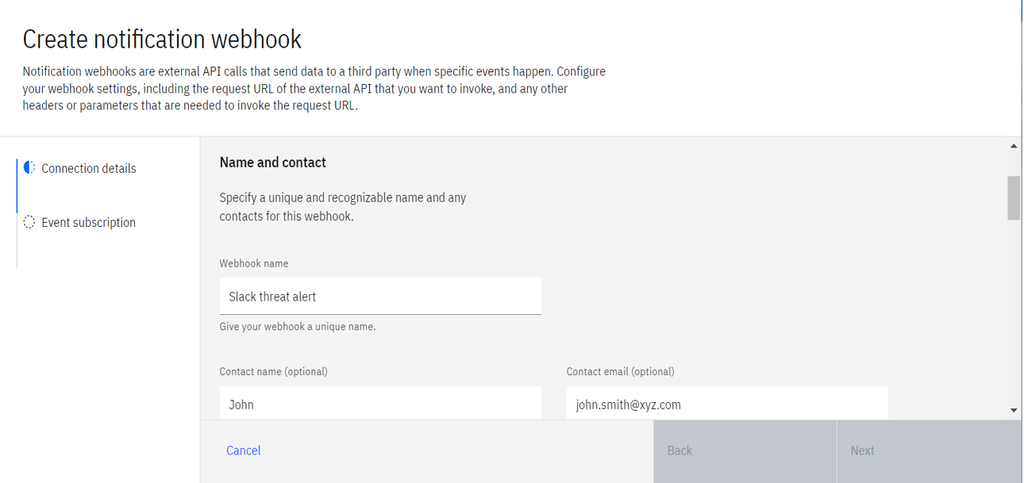
- Provide a name for the notification webhook and contact details. The following example shows Slack integration through notification webhooks by using cloud functions.
- Provide the external endpoint that receives the threat event. Provide the cloud functions endpoint that receives the threat event as payload. The cloud function contains code to process threat events into the required format for Slack and to send the Slack alert.
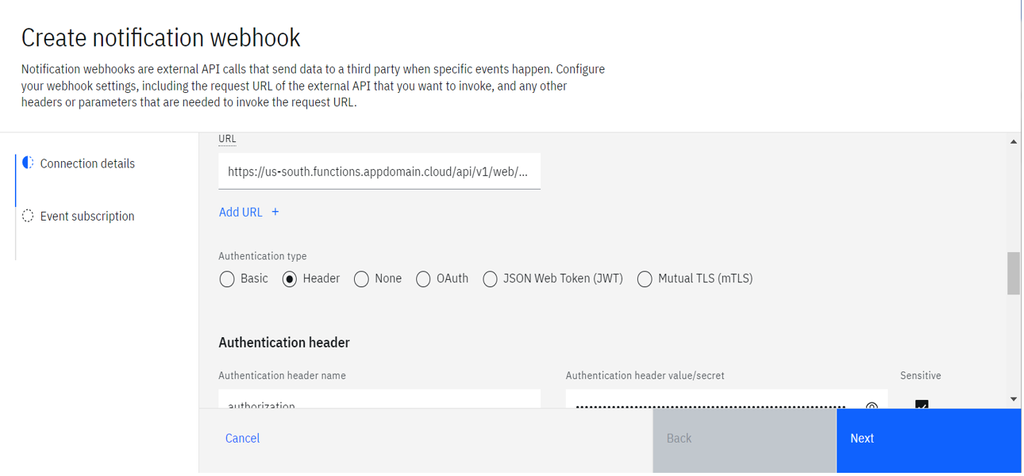
- Choose the authentication type compatible with your external endpoint and provide the details.
- Add the required headers under the custom headers section.
- Dead letters can be enabled to retry sending the threat event if the external endpoint is not started.
- Click
Next. - Some predefined events can be enabled directly for notification.
- To send threat events, Click
Add custom event.
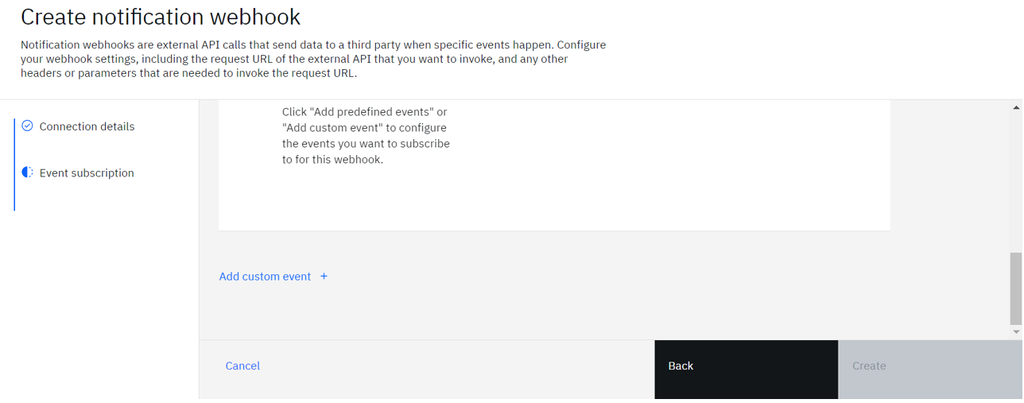
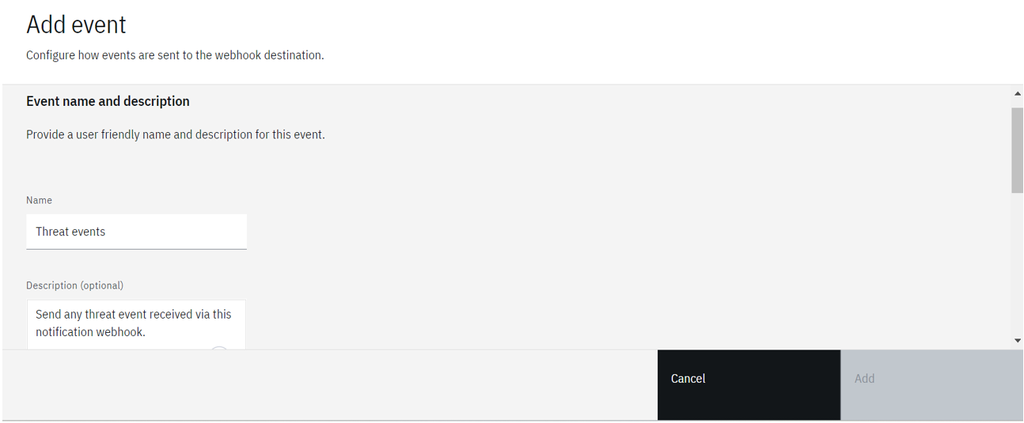
- Provide a name and description for the event.
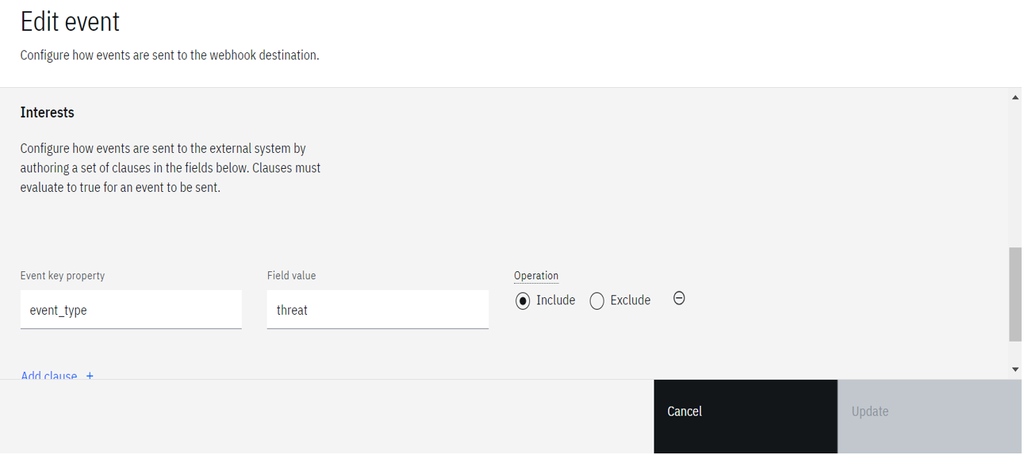
- Under Interests, provide the
Event key property = event_typeandField value = threatto get all threat events through notifications.
- Specific threat events can be filtered by adding more clauses.
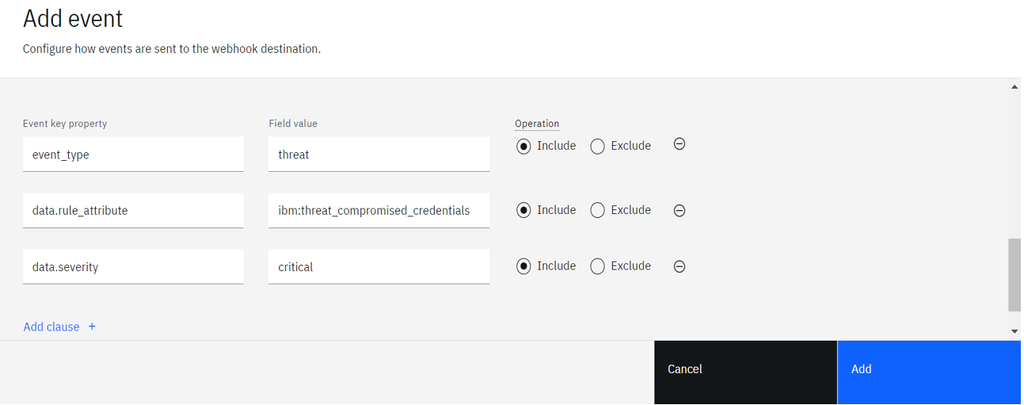
- Click
Addto create a filter for notification webhook.
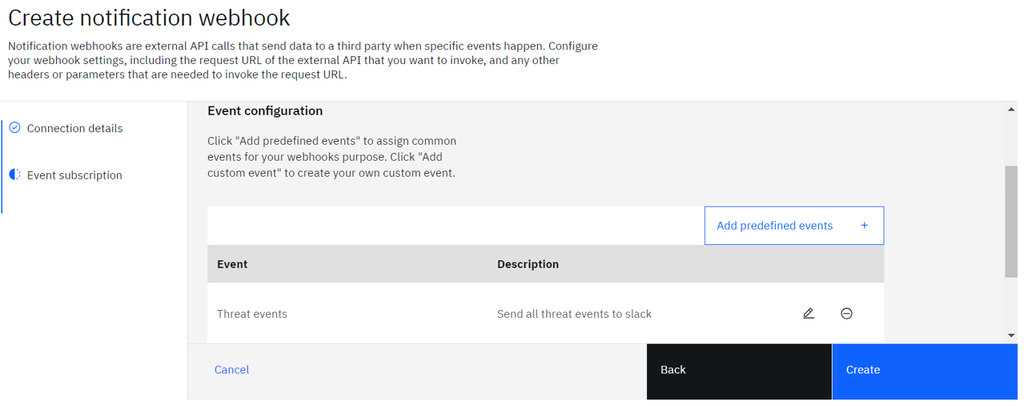
- More events can be added to the same webhook by adding multiple custom events.
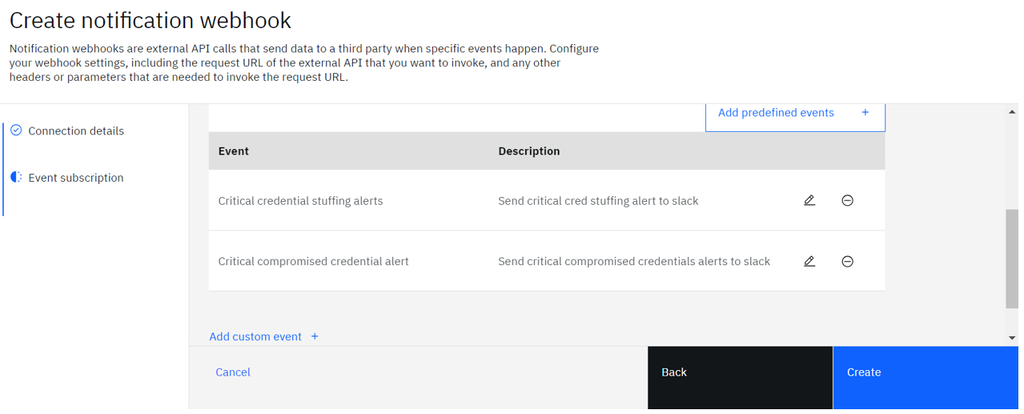
- Click “Create” to create the notification webhook.
- At the upper right, you can find the option to test the connection to an external endpoint.
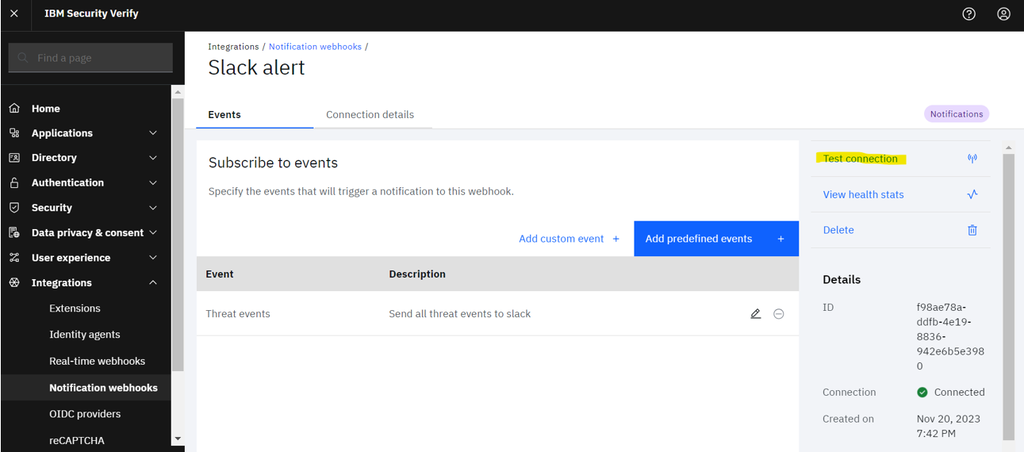
- Press
Send Testto verify the connection to the external endpoint.
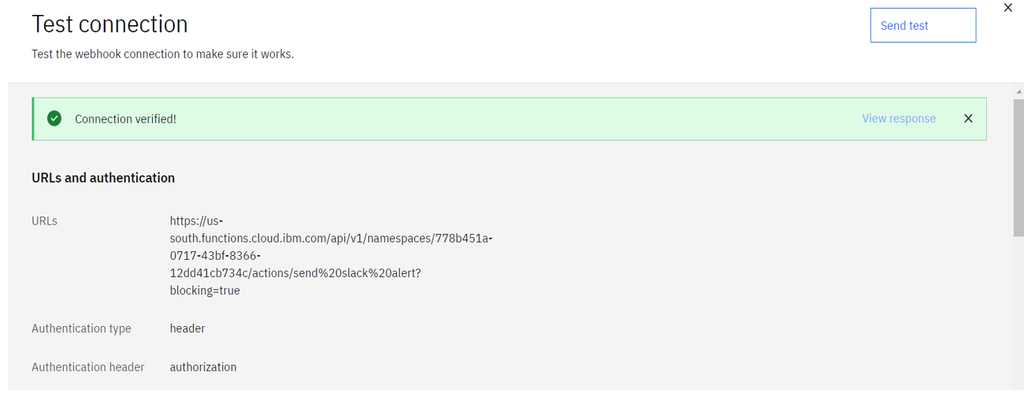
The webhook creation is successful.
Creation of cloud function:
- The cloud functions can be created from (https://cloud.ibm.com/functions/).
- Log in to the IBM cloud or the preceding link by using your IBM cloud credentials.
- To find cloud functions from the IBM cloud homepage, search
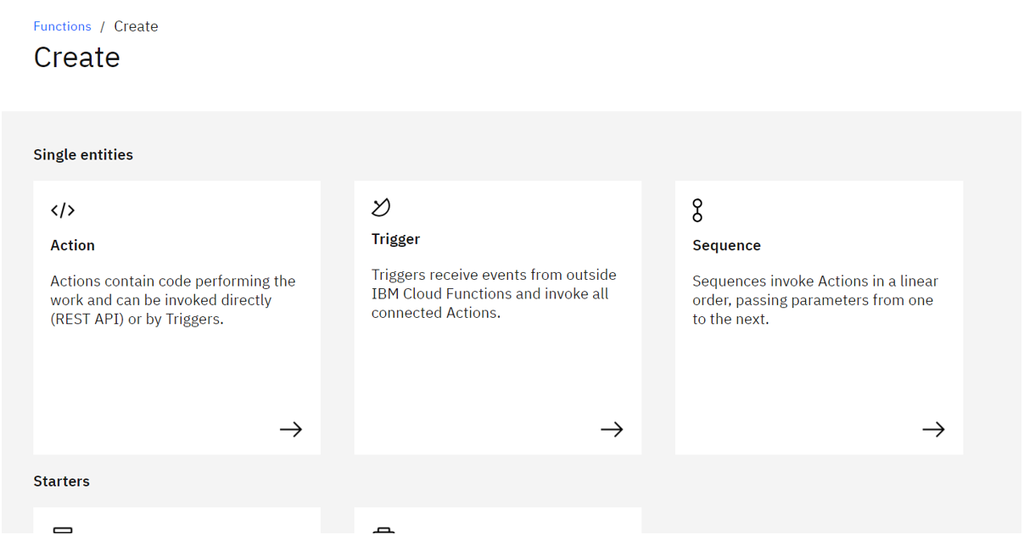
functionsin the search bar. - To create a new cloud function, press the
Start Creatingbutton.
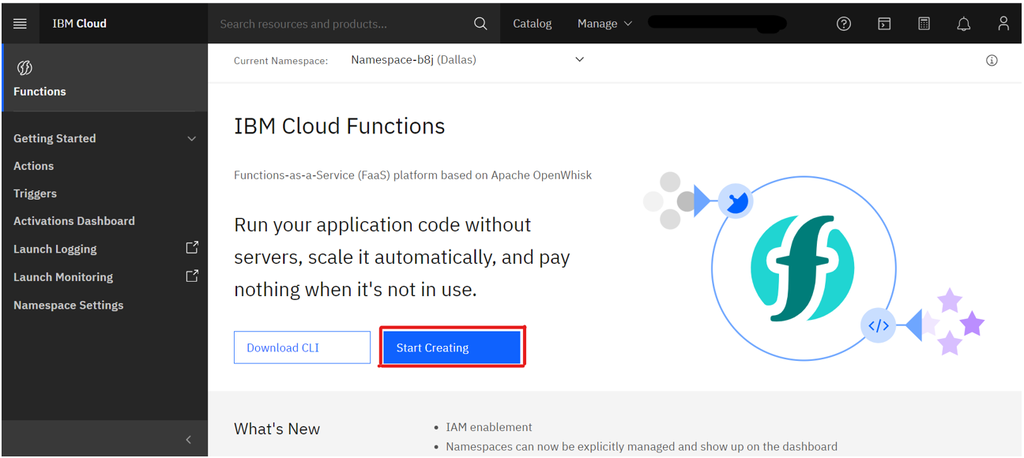
- Click
Triggerto create a receive threat event payload.
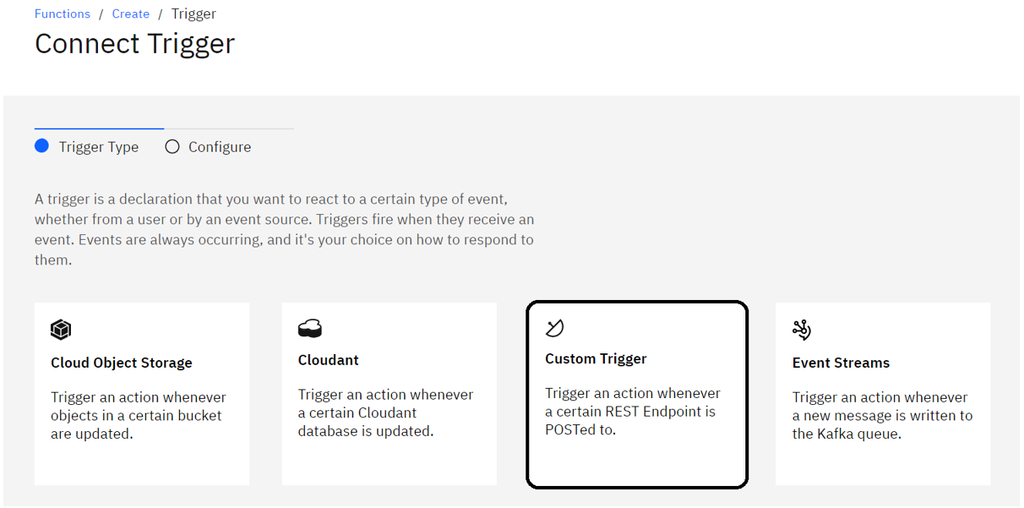
- Click
Custom Triggerto create a public endpoint to receive the threat event payload via HTTP request.
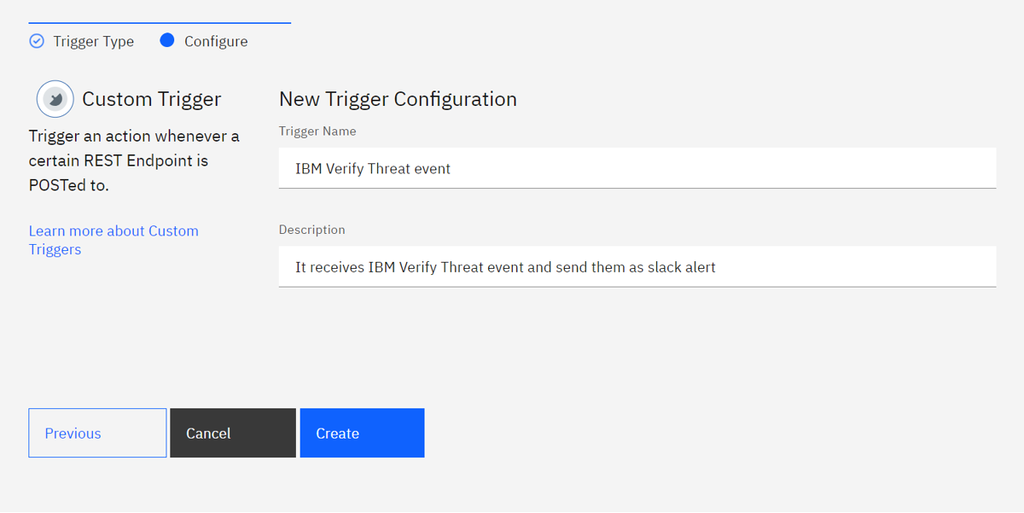
- Provide a Trigger name and description.
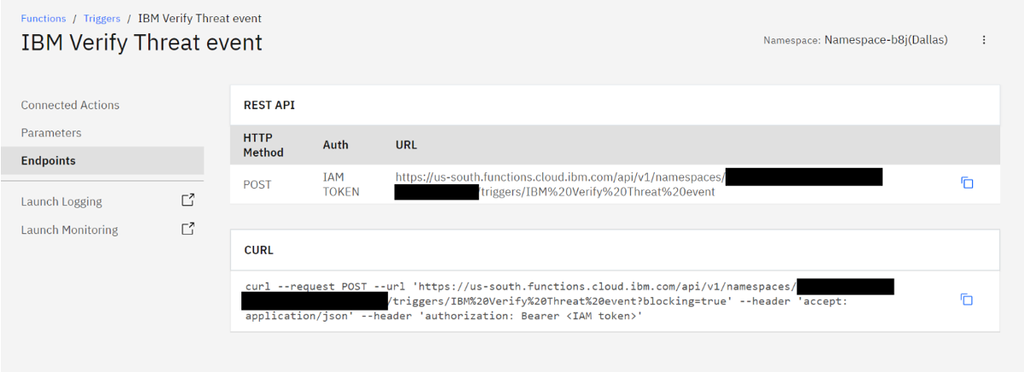
- The trigger is created. The endpoints and sample curl request can be found under the Endpoints section.

- To enable sending alerts to Slack, go to connected actions and click
Add. - To create an action, select the
Create Newtab and provide the action name and runtime. Select Python as the runtime. Then clickCreate & Add. If you have already created an action, you can select the action under theSelect Existingtab.
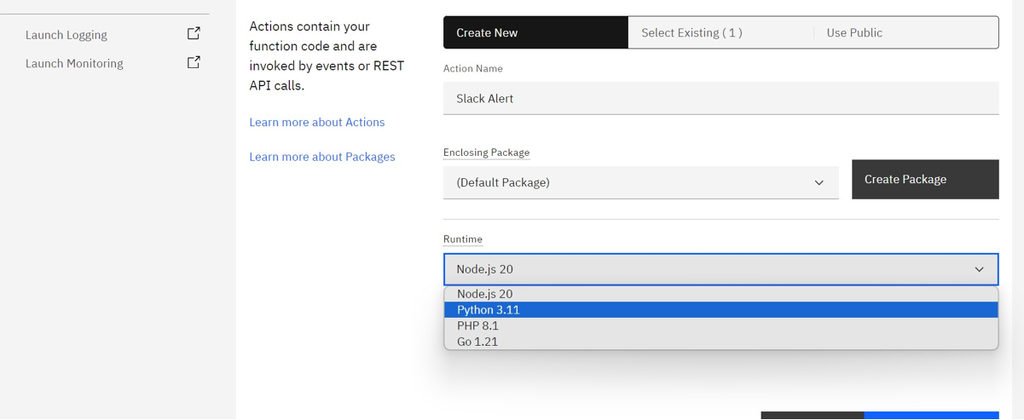
- Select the created action and write code to send alerts to Slack. A sample code is provided for reference.
import sys
import requests
import json

def main(dict):

    print(dict)

    if "test" in dict:
        slack_payload = {"text":str(dict)}

    else:

        slack_payload = {"text":"Alert from notification webhook",
        "blocks":[
                {
                    "type": "header",
                    "text": {
                        "type": "plain_text",
                        "text": f"{dict['data']['rule_name']}"
                    }
                },
                {
                    "type": "divider"
                },
                {
                    "type": "context",
                    "elements": [
                        {
                            "type": "mrkdwn",
                            "text": "*" + dict['data']['summary'].replace('[', '`[', 1) + "`*"
                        }
                    ]
                },
                {
                    "type": "section",
                    "fields": [
                        {
                            "type": "mrkdwn",
                            "text": "*Start Time:* " + "`" + dict['data']['start_time'] + "`"
                        },
                        {
                            "type": "mrkdwn",
                            "text": "*End Time:* " + "`" + dict['data']['end_time'] + "`"
                        },
                        {
                            "type": "mrkdwn",
                            "text": "*Anomalous Event Count*: " + str(dict['data']['anomalous_event_count'])
                        },
                        {
                            "type": "mrkdwn",
                            "text": "*Severity*: " + dict['data']['severity']
                        }
                    ]
                },
                {
                    "type": "divider"
                },
                {
                    "type": "section",
                    "text": {
                        "type": "mrkdwn",
                        "text": "*Alert Details:*\n"
                    },
                    "fields": [
                        {
                            "type": "mrkdwn",
                            "text": "*Top 5 tenants:*\n" + "```" + str(dict['tenantname']) + "```"
                        }
                    ]
                },
                {
                    "type": "divider"
                }
            ]
        }

    url = "<Provide Slack Webhook URL>"
    headers = {"Content-type": "application/json"}
    payload = {"text": "Received this message from cloud functions"}

    response = requests.request('POST', url,headers = headers, data=json.dumps(slack_payload))
    print(response.status_code, response.text)
    if response.status_code == 200:
        return {"message":"Succefully sent the alert to slack"}

    return json.dumps({"status_code": 200, "message": "Received this message from cloud functions"})
- The cloud function activation logs can be found under
Activation Dashboardon the cloud functions main page. - The cloud function endpoint is ready to receive HTTP requests from notification webhooks and can send alerts to Slack.
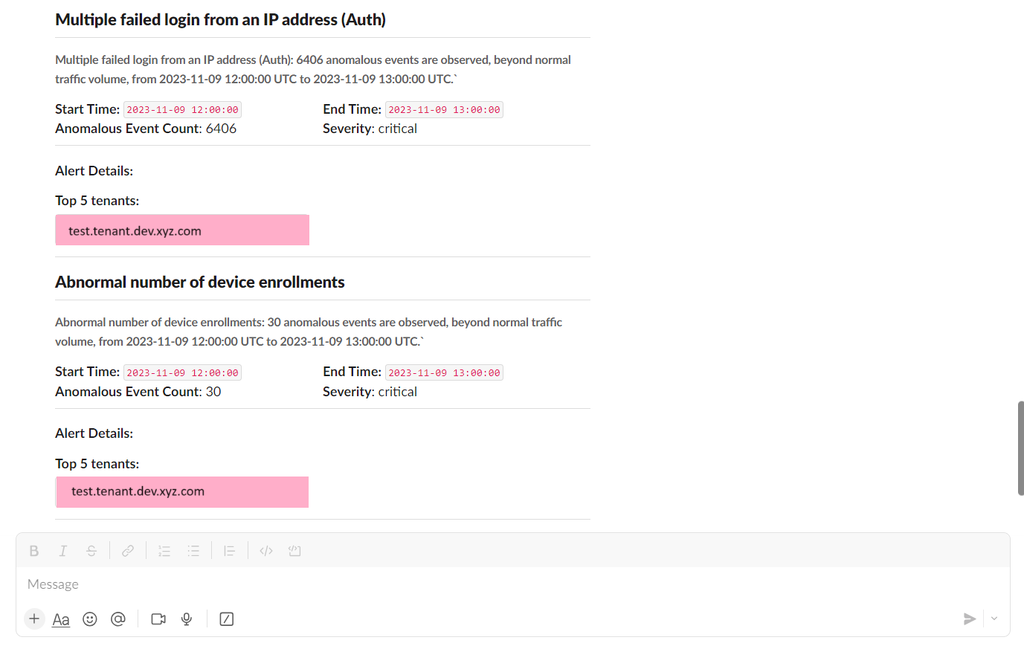
- The sample slack alert looks similar to the following image whenever threat events are generated.
- Similarly, python code can be written for sending threat events to PagerDuty or any other tool.
- For more information regarding cloud functions, refer to the documentation page(https://cloud.ibm.com/docs/openwhisk?topic=openwhisk-getting-started).
Priti Patil & M Krishnakant Achary, IBM Security
Updated 7 months ago
