External callout based attributes
Introduction
It is very unlikely that user repositories, such as Active Directory or Security Directory Server, will contain all data associated with the user. It is also less likely that these directories have the data in the right format that applications expect. To normalize data in an IAM tool is a common activity and typically done through either some scripting language or full-on javascript.
IBM Verify has built in attribute rules that allow for more flexibility when interacting with user’s profile; enriching them, flipping and flopping them, splitting them, joining them. There is also an in app code editor to help make writing and trying out functions very quickly. To learn more about attribute rules and getting started with them, view attribute functions in our KnowledgeCenter.
However, what if the user data lives elsewhere or what if your data needs some very complex logic? Verify supports the ability to call out to an external HTTP endpoint (REST API), and in this guide, we’re going to supplement the incredible functionality that Verify attribute rules provide with the flexibility of IBM Cloud Functions.
Pre-requisites
To get started with IBM Verify attribute functions, you will need
– Have a paid subscription to IBM Verify (this functionality is not available to Trial instances)
– Familiarize yourself with attribute functions in the KnowledgeCenter
– Sign up for IBM Cloud Functions (free tier available)
Create an IBM Cloud Function
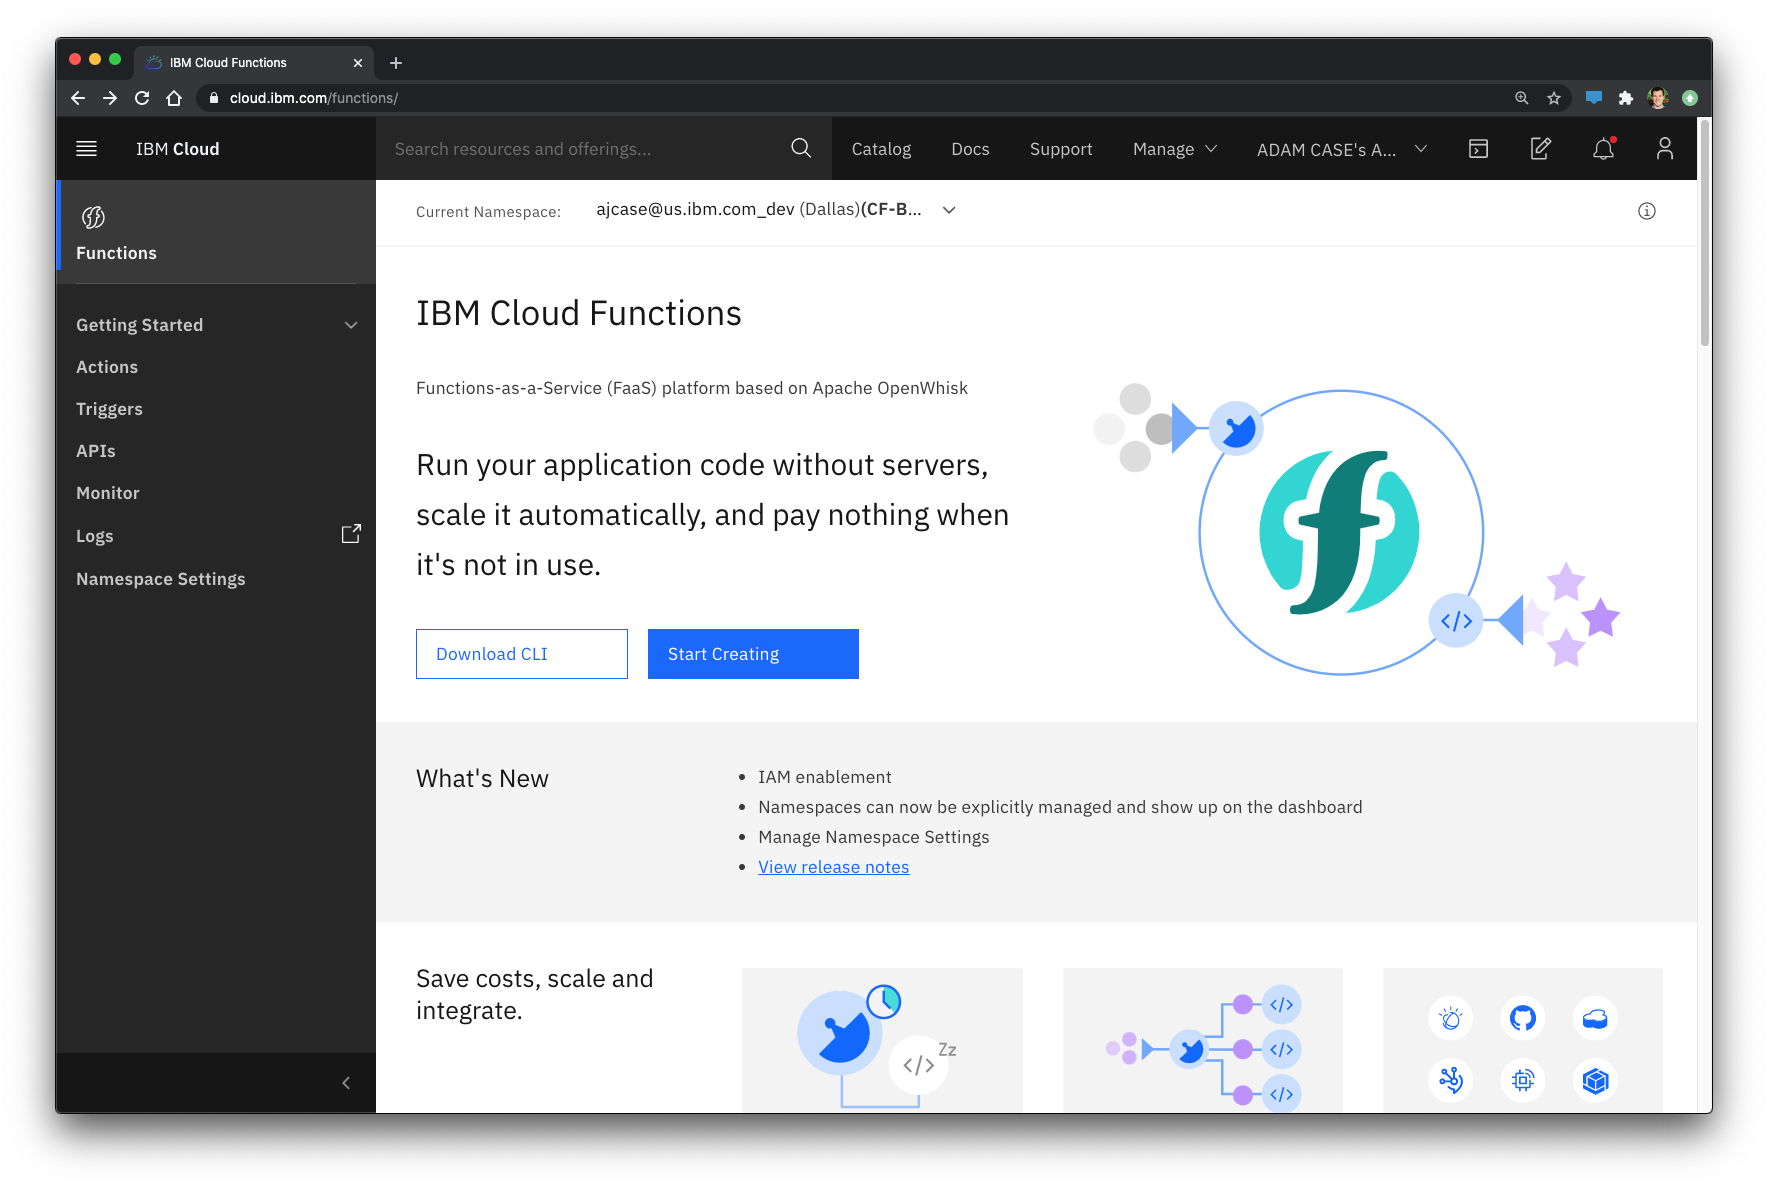
Steps to create an IBM Cloud Function
- Click Start Creating
- Choose “Action” from the Single entitles category
- Give your action a name
- This will be used for reference later.
- Choose your runtime language
For this purpose, we will use Node.js
A code editor should be shown with a boilerplate function. Parameters can be passed into this function (in JSON format) and used for logical evaluation. Whatever is returned in this function’s return will be returned to Verify for use with users.
Return the current month and year using Javascript (basic)
Using javascript’s Date function, we will return a JSON object in the function with the current month, day, and year and do a quick compare to see if today is Christmas day.
function main(params) {
var date = new Date(); // Check if today is Christmas Day
var isChristmas = (date.getMonth() == 12 && date.getDay() == 25) ? true : false;
return {
year: date.getFullYear(),
month: date.getMonth(),
day: date.getDay(),
isChristmas: isChristmas
};
}
The output of this looks like:
{
    "day": 3,
    "isChristmas": false,
    "month": 9,
    "year": 2020
}
In the IBM Cloud Functions UI, you should see something like this:

Setup an API endpoint for the action
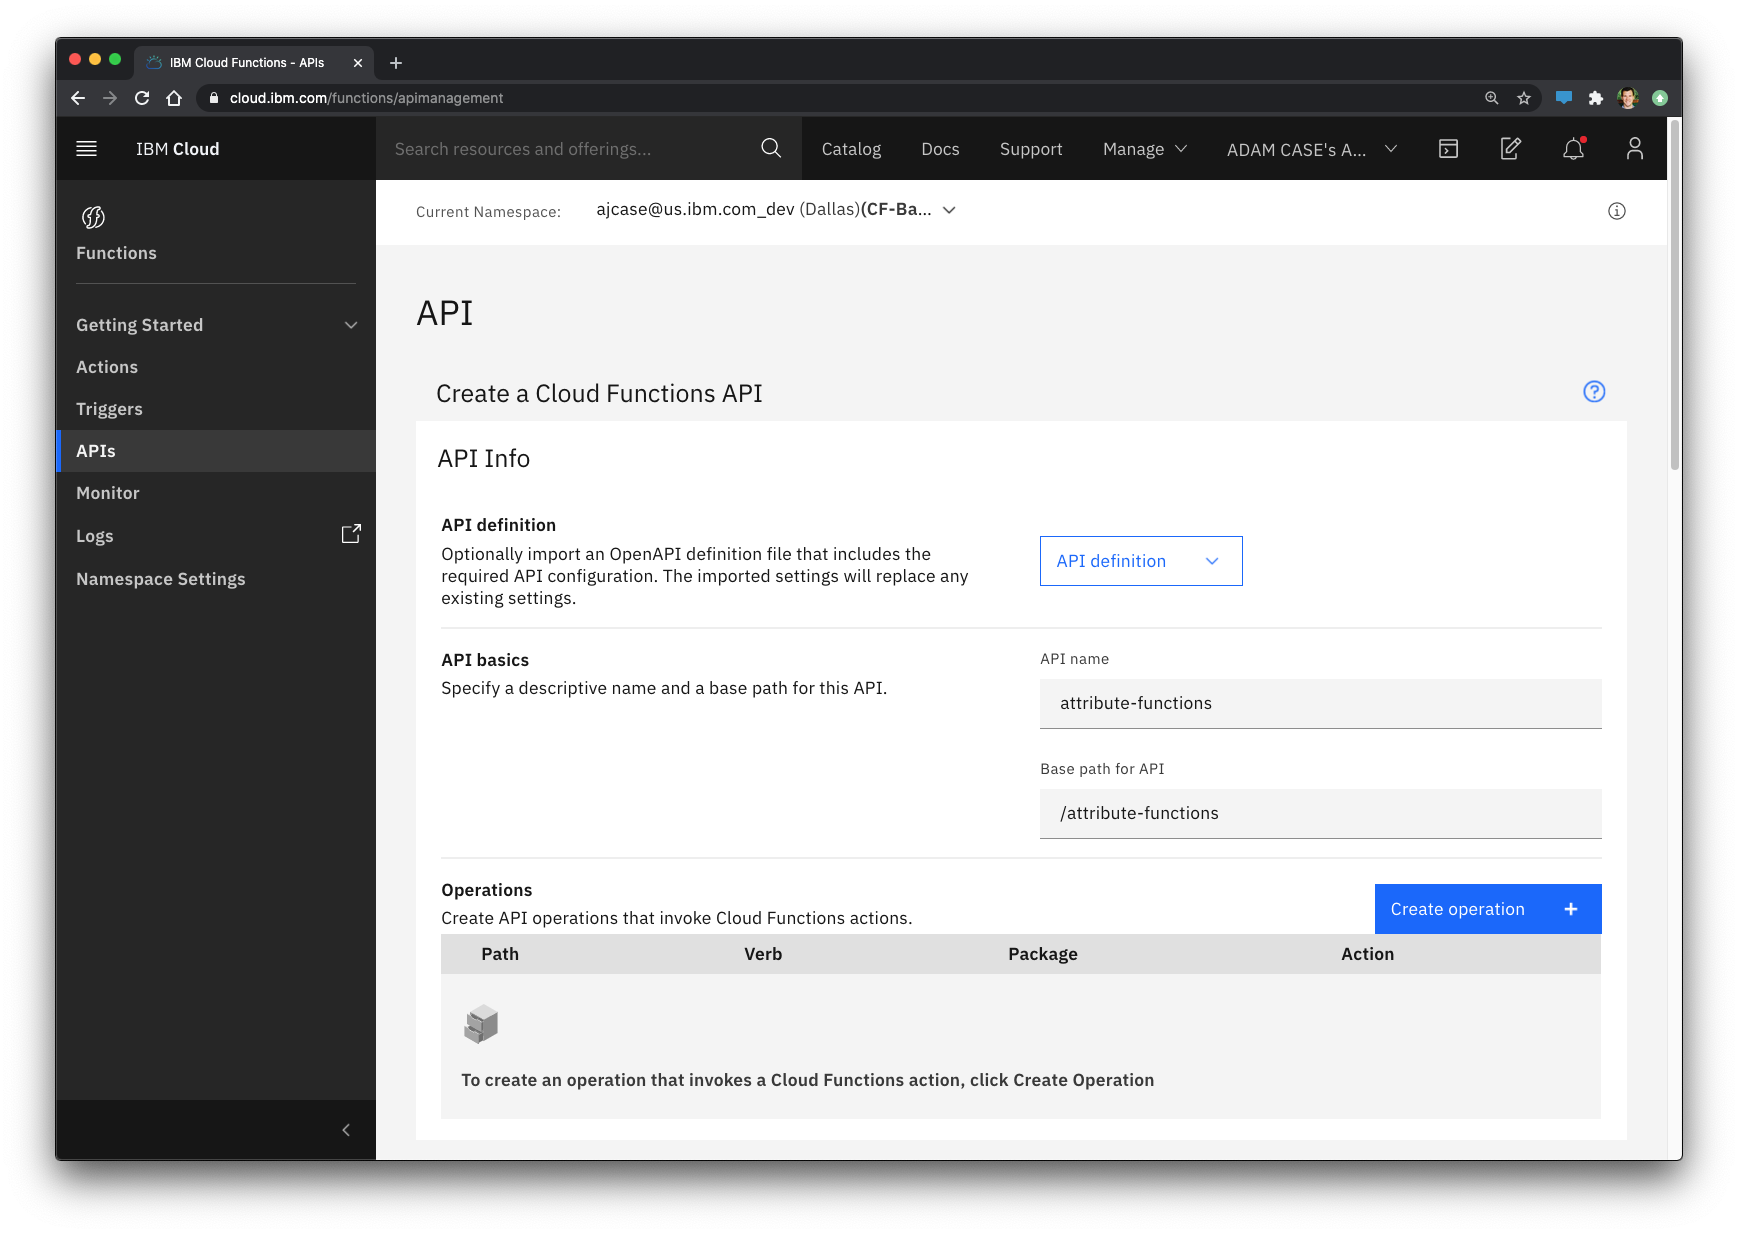
Steps to create an IBM Cloud Function
- In the IBM Cloud navigation, go to the APIs section
- Click Create API
- In the Create a Cloud Functions API section, select API definition
- In the API basics section, specify a descriptive name, this will also auto populate the base path.
- Next, click Create operation
- Create a path called /date
- Select GET from the Verb selection
- Select your action name from the Action selection
- Leave the response content type as application/json
- Click create to save the operation
- Enable Application authentication
- Select API key only for the method. It is best practice to also include a secret for authentication but to simplify this demonstration, we’ll leave that off for now.
- Location will remain as Header
- Leave the parameter for the API key header as X-IBM-Client-ID
- Ignore rate limiting and OAuth user authentication
- Leave CORS enabled
- Click create
The API endpoint is now public and can be used by IBM Verify.
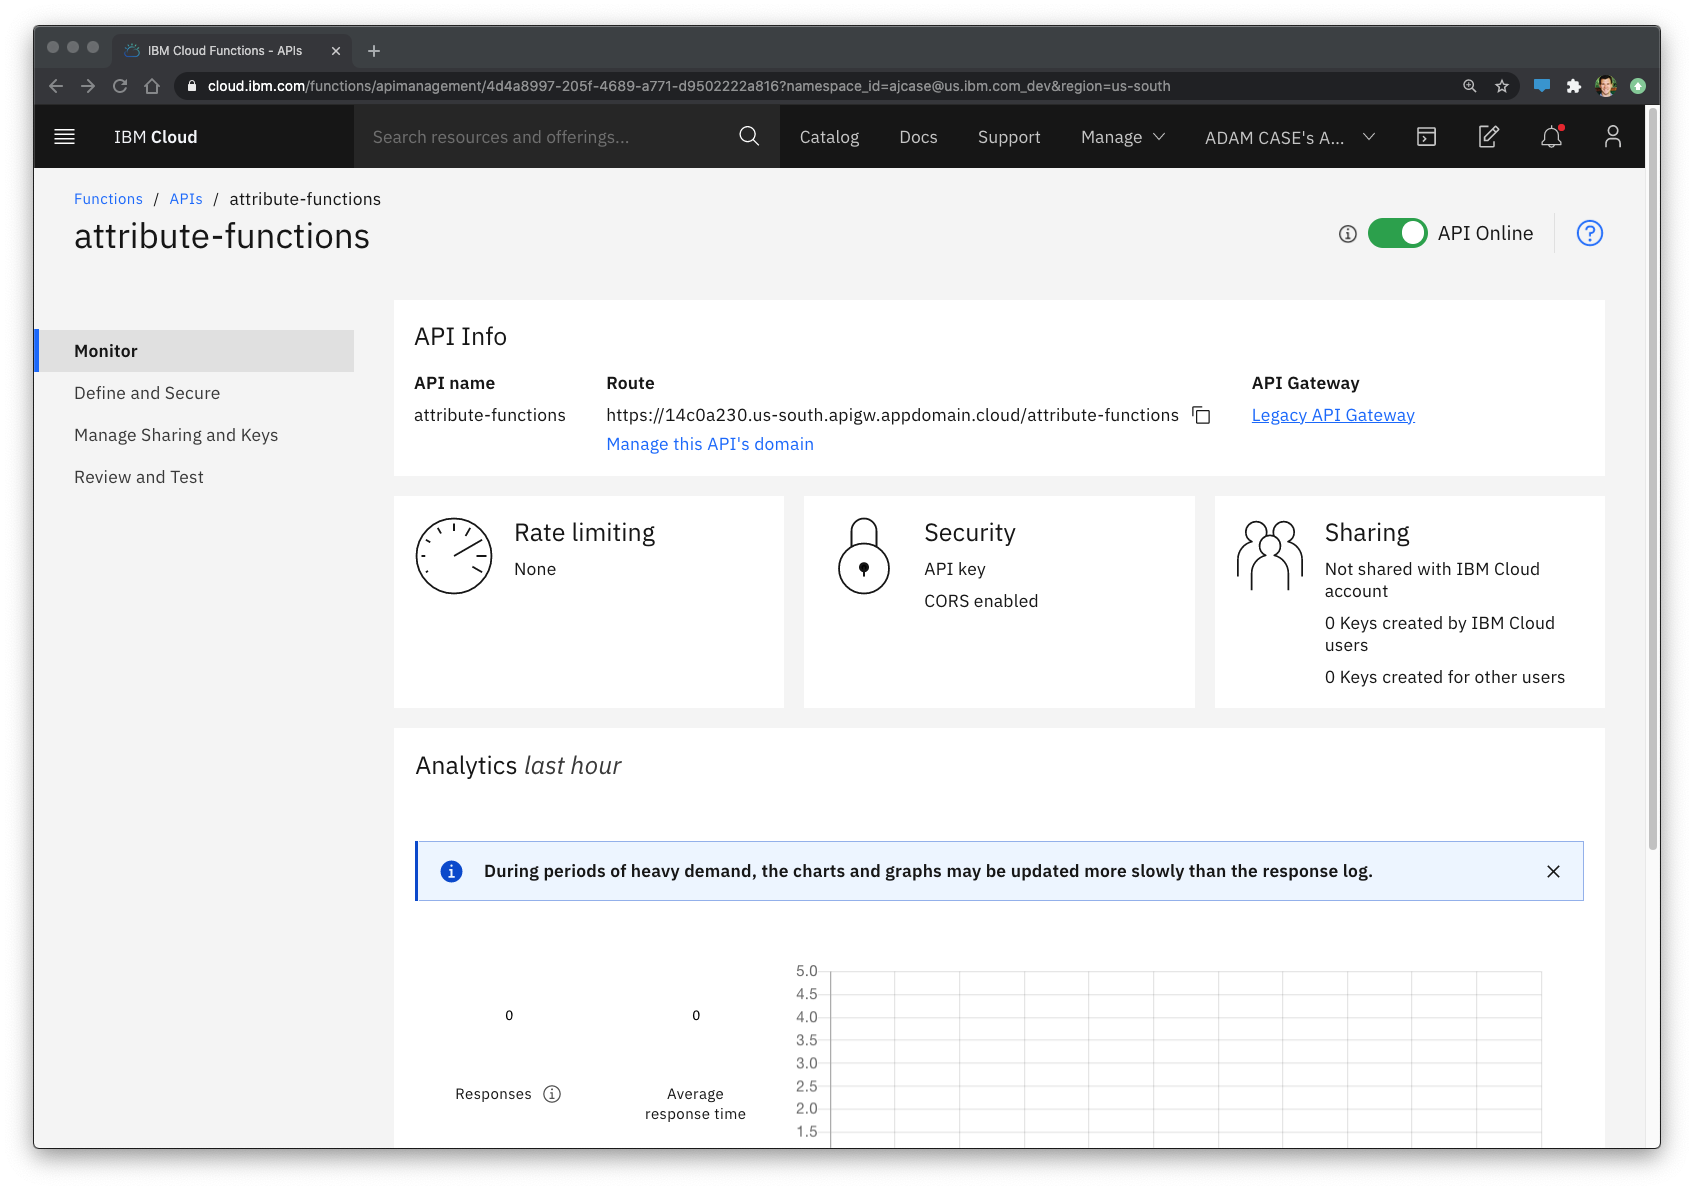
Accept parameters to apply conditional logic (advanced)
IBM Cloud Functions also supports the ability for us to pass parameters into the logic so that the logic can be dynamic based on user data from Verify. In this example, we will accept the user’s country code to determine the proper billing ID that needs to be sent to the application.
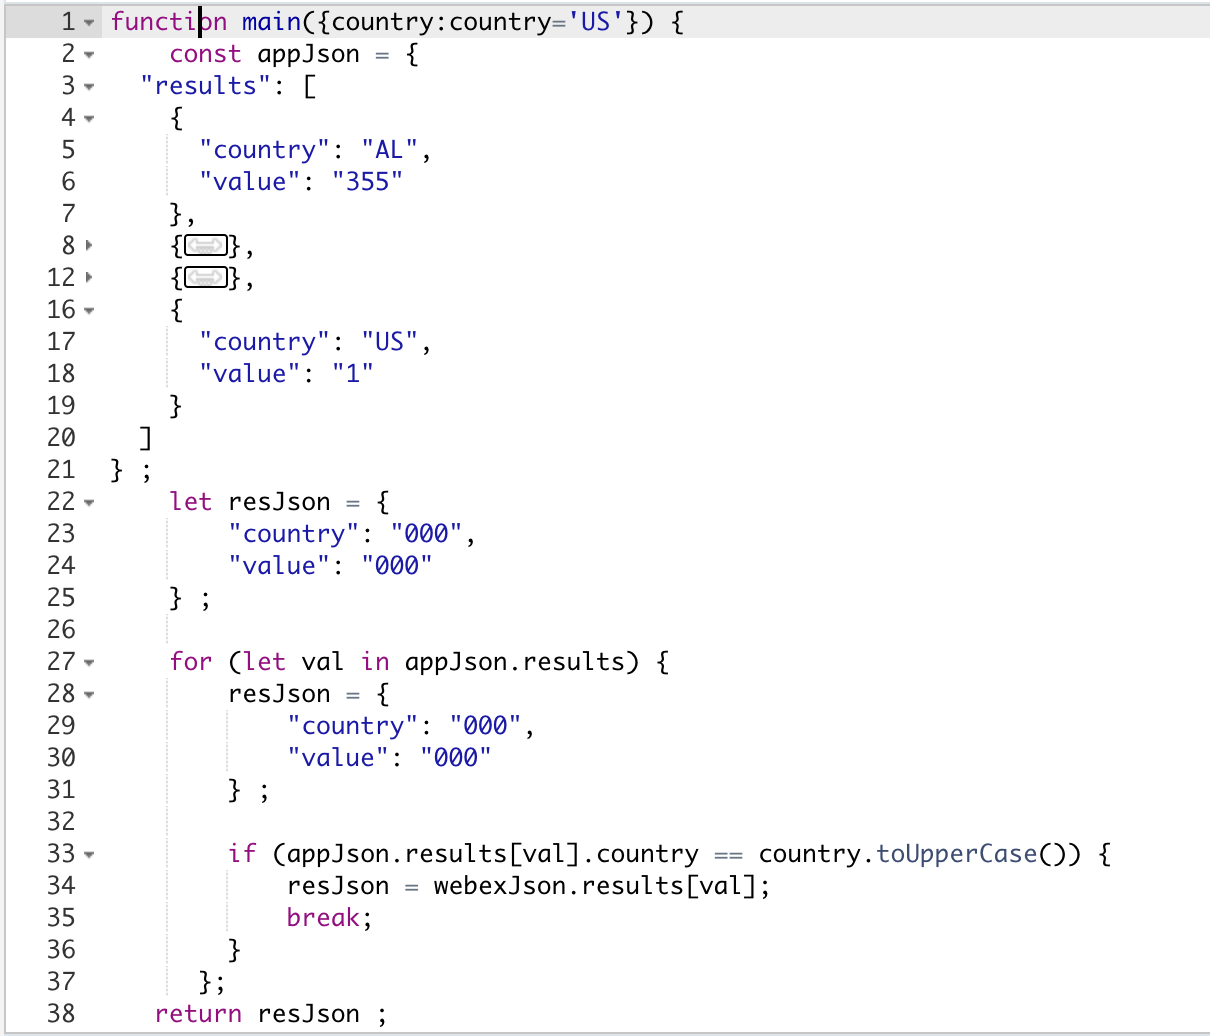
The output of this looks like when country = “us” passed in as input parameter:
{
    "country": "US",
    "value": "1"
}
Create an advanced rule function in Verify
In your IBM Verify administrator console, navigate to Configuration. Switch to the Attributes tab and then click Add attribute.
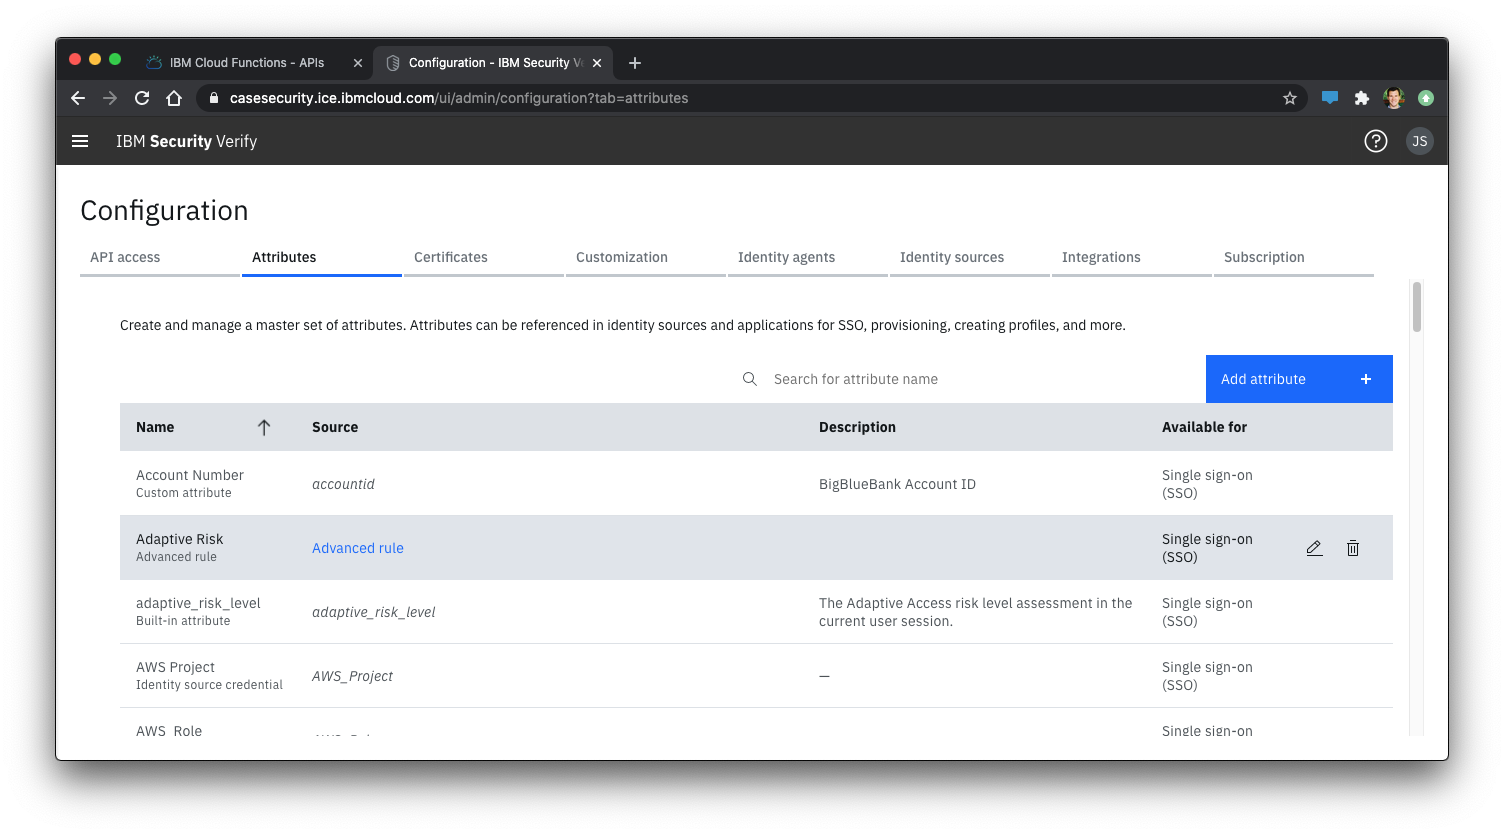
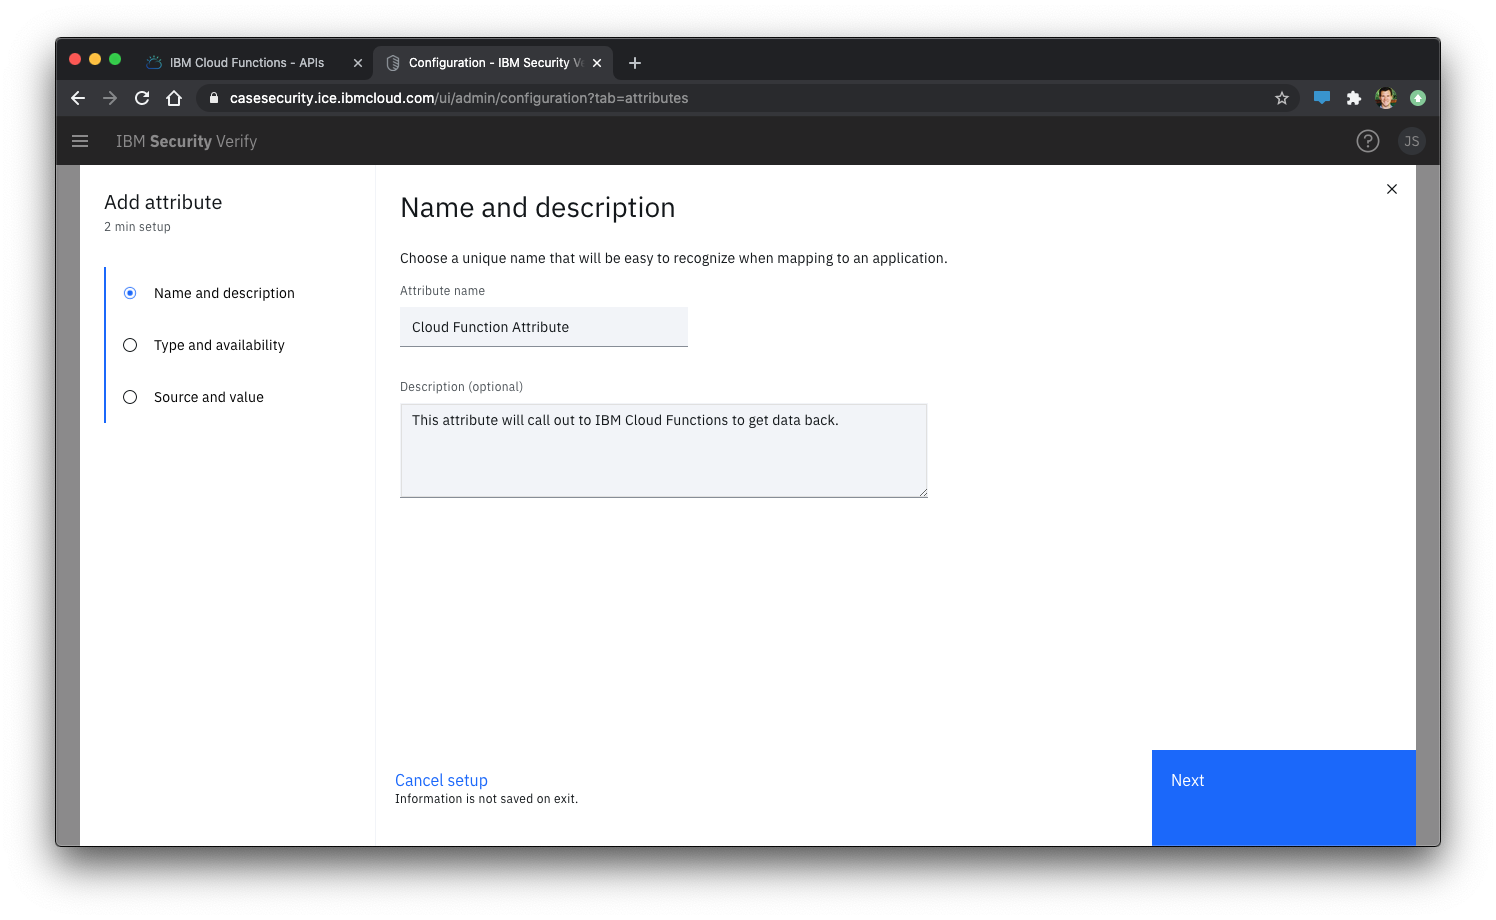
Give the attribute a name. This is used to reference the attribute when selecting attributes during SSO and provisioning setup. We’ll call this Cloud Function Attribute.
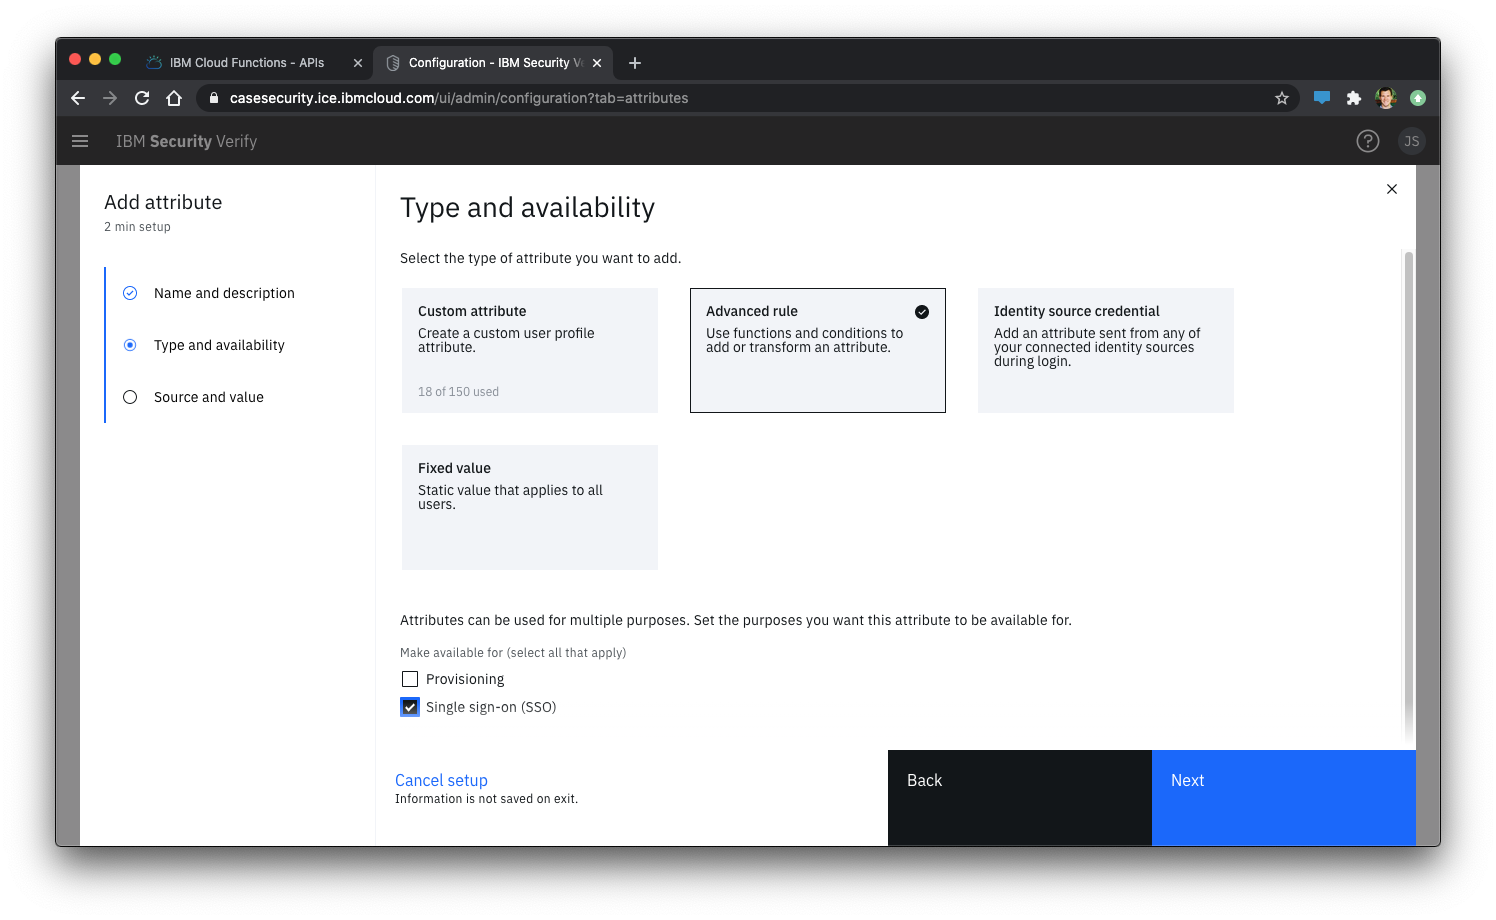
Select Advanced rule from the list of attribute types and select at least one of Single sign-on, or Provisioning.
For the attribute expression, we will be using the HTTP client service attribute function from Verify. Read more on HTTP client in Attribute functions documentation. The syntax for the HTTP client is hc.GetAsJson($url, $headers). The URL must be encased in double quotes and the headers will be a JSON array of the headers.
Putting our IBM Cloud Function URL and token in this syntax looks like the following:
hc.GetAsJson("https://123123123.us-south.apigw.appdomain.cloud/attribute-functions/date",
{"X-IBM-Client-Id":"1748b19e-xxxx-xxxx-xxxx-e5d0f17e900e"})
Optionally, if using something more advanced where you need to pass Verify attributes to the IBM Cloud Function so it can be evaluated, as in the case with parameters, the syntax would look something like the following. We need to pass in a custom attribute from Verify which holds the user's country attribute in to the query string of the API endpoint.
hc.GetAsJson("https://123123.us-east.apigw.appdomain.cloud/hello/world?country="+userOp.GetCustomValue('deptCountry'),
{"x-ibm-client-id":"ffec5287-349d-497b-xxxx-0c6b3b8ad045"})
Put your expression into the code editor. In the “Make sure it works” section, click Show. Click Test to see the results of the HTTP callout.
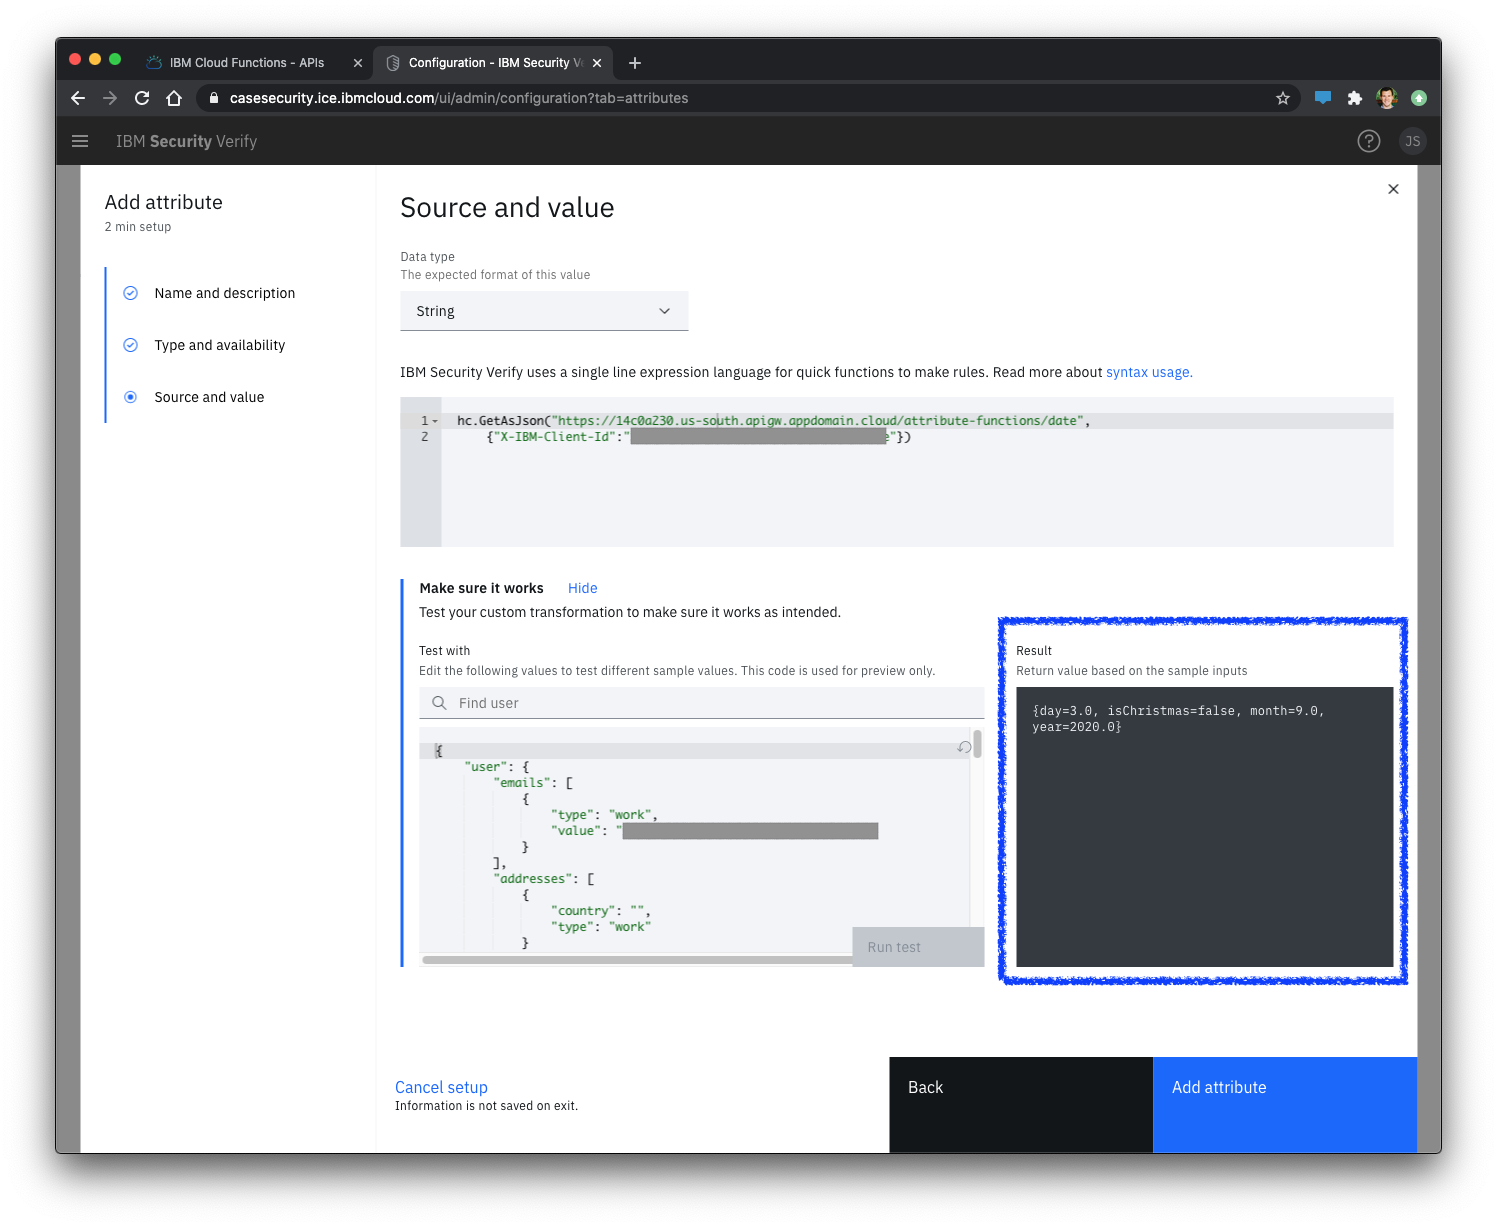
Because this is JSON, you can append JSON syntax to reference objects within the response. In other words, if you wanted to create an attribute specifically to return whether it is Christmas day or not, that would look like the following:
hc.GetAsJson("https://123123.us-south.apigw.appdomain.cloud/attribute-functions/date",
{"X-IBM-Client-Id":"1748b19e-xxxx-xxxx-xxxx-e5d0f17e900e"}).isChristmas
While we can do a lot of business logic with IBM Cloud functions, we can apply additional conditions to the result using native Verify attribute rules. For example, if we wanted change the result of the isChristmas boolean, we could do something like the following:
hc.GetAsJson("https://123123.us-south.apigw.appdomain.cloud/attribute-functions/date",
{"X-IBM-Client-Id":"1748b19e-4303-4a8b-9e8b-e5d0f17e900e"}).isChristmas == true ? "Ho ho ho!" : "You got coal"
Once saved, this attribute can be used for single sign on and provisioning use cases. The possibilities are endless with IBM Cloud Functions and IBM Verify. Enriching user profile with external data drastically opens the doors for other use cases like bringing in external consent information, marketing tool integration, payment card information, loyalty status, and other data sources that Verify does not have locally.
Updated 7 months ago
