Aquera (HR feed and provisioning)
Introduction
The Aquera Platform as a Service is a cloud-based service that provides multi-purpose SCIM gateway services and out-of-the-box connectors for user provisioning/deprovisioning, HR application user onboarding/mastering, delta account aggregation, file operations and compliance automation, password synchronization, and privileged account password validation and rotation.
IBM Verify is born-in-the-cloud IDaaS platform, provides comprehensive identity and access management capabilities from cloud. This is the next-generation IDaaS platform delivering identity and access management use cases for employees (B2E), businesses (B2B) and consumers (CIAM). Leveraging Aquera as a SCIM gateway with IBM Verify delivers seamless inbound integration with HR applications such as Workday, Successfactors, BambooHR, Oracle HCM Cloud, SAP HR. Additionally IBM Verify provides SCIM application template for outbound provisioning that allows connectivity with Aquera and support outbound provisioning with Aquera enabled provisioning adapters.
The integration is broadly divided in two types of use cases
- Inbound HR integration
- Outbound provisioning
Inbound HR integration
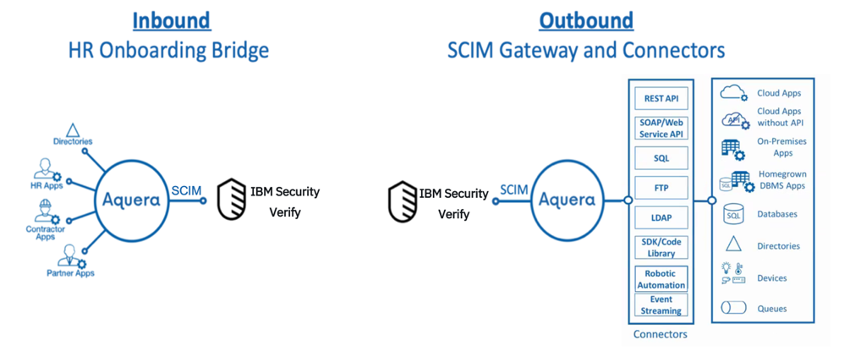
Aquera’s HR Onboarding Bridge masters users (imports employees or customers) from any human capital management application, applicant tracking system, or CRM into IBM Verify. The bridge enables HR-driven, real-time, automated onboarding and offboarding of employees or customers from your IT applications and infrastructure.
When an employee joins an organization and is created in the HR application, the person is automatically provisioned into the IBM Verify Cloud directory by the Aquera Onboarding Bridge. From there, the person can be further auto-provisioned to the various Cloud or on-premises applications enabled with birth-right-access.
Likewise, when a person is marked as a leaver in the HR application, the Aquera Onboarding Bridge automatically updates IBM Verify. The person's access is automatically revoked from IBM Verify and respective provisioned applications.
Check out the out-of-the-box HR applications supported by Aquera.
Outbound provisioning
IBM Verify platform provides a set of out-of-the-box adapters for provisioning to SaaS applications. Provisioning to on-premises repositories like Active Directory is provided by a lightweight containerized Identity Provisioning Bridge. Additionally, the custom application template provides a SCIM client that allows any SCIM enabled application to be integrated for outbound provisioning. This same SCIM client that can be configured with Aquera’s Account Provisioning Gateway to integrate with Aquera-supported outbound provisioning adapters.
The Aquera Account Provisioning Gateway translates identity management platform SCIM requests into REST-based API calls, SOAP/webservice-based APIs calls, SQL commands, LDAP operations, robotic automations, SDK library calls and queue messages across your entire IT infrastructure covering all the places where your users have accounts.
Check out the Account Provisioning Gateway provided by Aquera.
Pre-requisites
Creating Aquera Domain
Make sure you have created an Aquera account and have administrative access for the same. If you do not have an Aquera account, you will need to contact Aquera support through https://www.aquera.com/.
Once you have the Aquera account, it can be accessed using: https://<your_domain>.aquera.io
Getting IBM Verify account
Make sure that you have created a IBM Verify tenant.
Employee data synchronization to Verify from HR applications via Aquera
The Aquera Identity Integration Platform as a Service closes the connectivity gaps for real-time identity governance and lifecycle management workflows. The platform offers SCIM gateway services for account provisioning and aggregation. Aquera provides out-of-the-box connectivity from any HR application to IBM Verify.
Aquera will act as a bridge between IBM Verify and HR applications. Follow the steps below to orchestrate employee data synchronization across IBM Verify and the HR application.
Onboarding IBM Verify with Aquera
Steps
- Login to your Aquera account using: https://<your_domain>.aquera.io.
- Click on “Applications”
- Click on “Add Application”

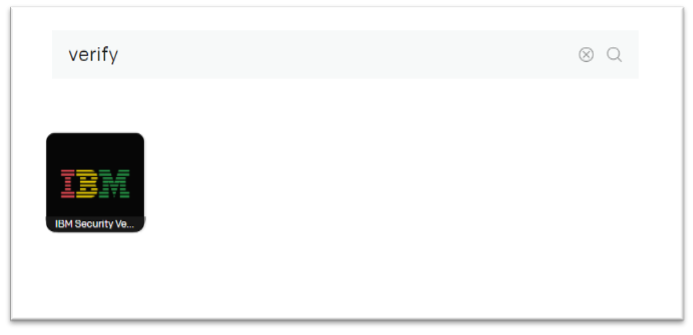
- Search for “Verify” from the catalogue
- Click on “IBM Verify” icon
- Provide the details for.
- Display Name: Any name of your choice
- Tenant: Fully qualified domain name of Verify tenant
- Username: Client ID of API Client
- Password: Client secret of API Client
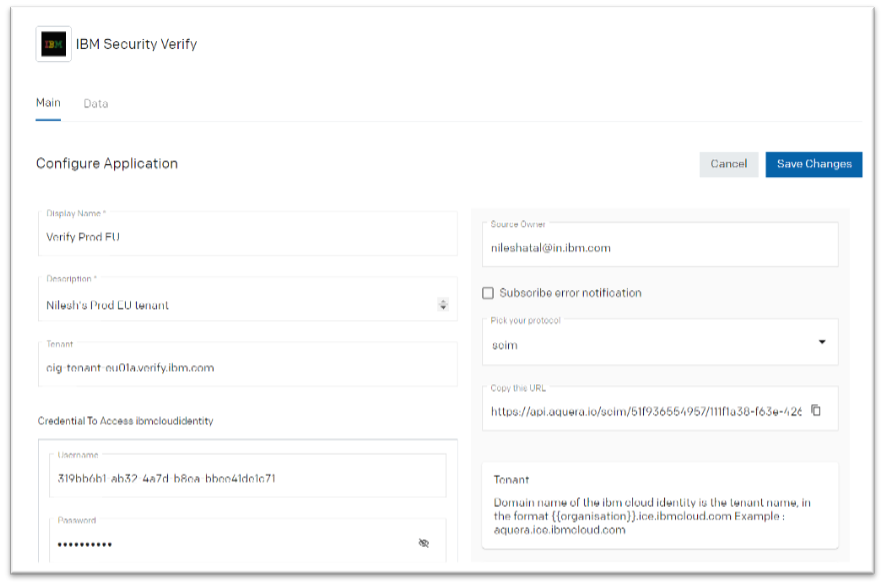
- Click “Save Changes”
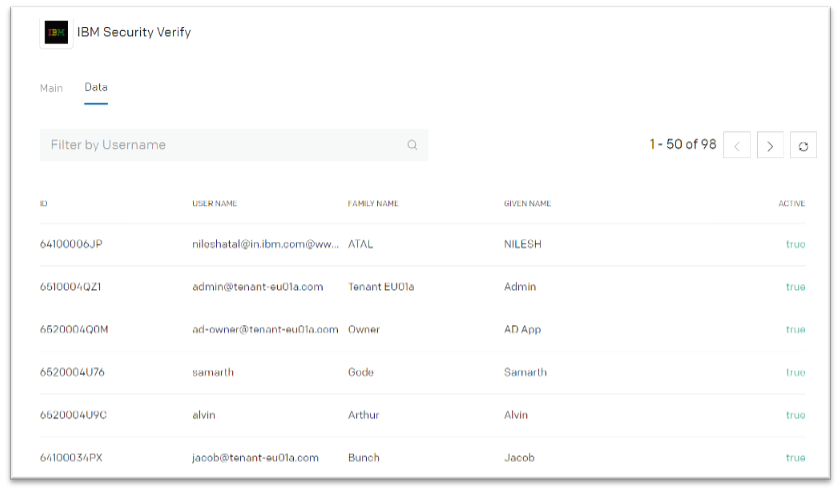
- Click on the Data tab.
If the configuration details are correct, the user records will be fetched from the IBM Verify tenant.
Configuring an inbound HR integration
There are many popular HRMS solutions available in the market today such as SuccessFactors, Workday, BambooHR etc. It is essential to be able to synchronize employee data from HRMS providers with IBM Verify. This can be easily done using the Aquera HR onboarding bridge.
This section describes the detailed steps required to setup BambooHR as source HRMS application which feeds employee data to IBM Verify.
BambooHR employee data synchronization with Verify via Aquera
- Login to your Aquera account using: https://<your_domain>.aquera.io.
- Click on “Applications”
- Click on “Add Application”
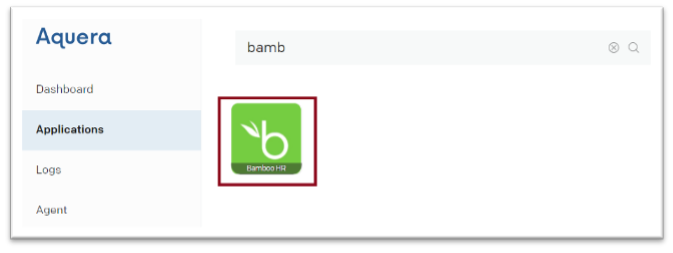
- Search for “BambooHR” from the catalogue
- Click on “BambooHR” icon
- Provide the details for Name, Description, Tenant and Token. You will need to get the Token from the BambooHR portal. For details steps refer to the Aquera documentation for BambooHR at: https://support.aquera.com/hc/en-us/articles/360020300534-BambooHR-Configuration-Guide.
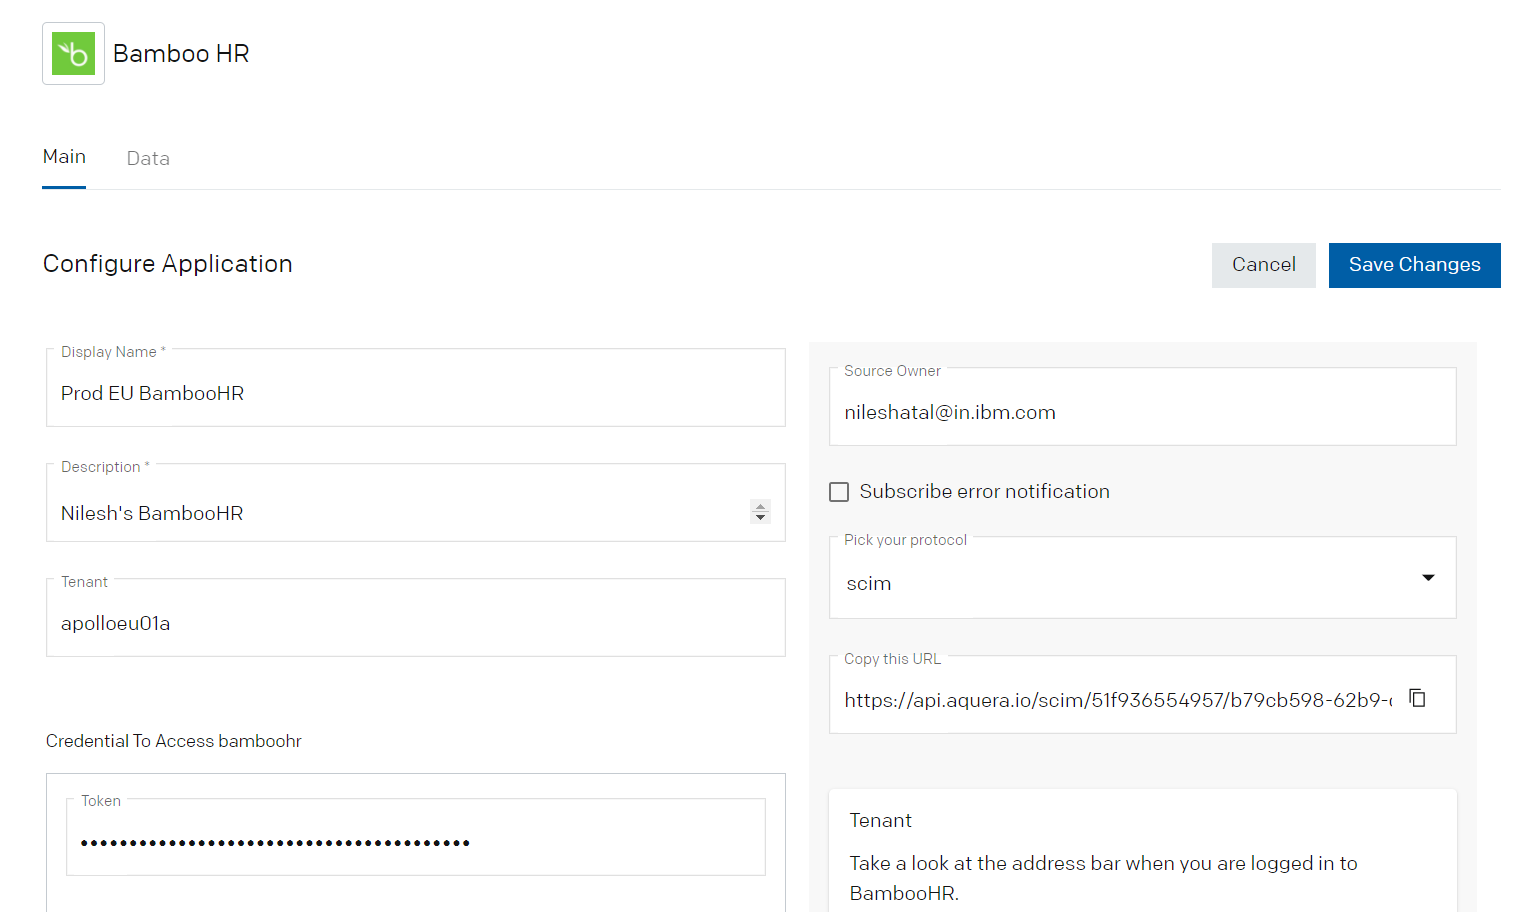
- Save the changes
- Click on the Data tab.
If the Token and Tenant details are correct, the employee details will be fetched from the BambooHR.
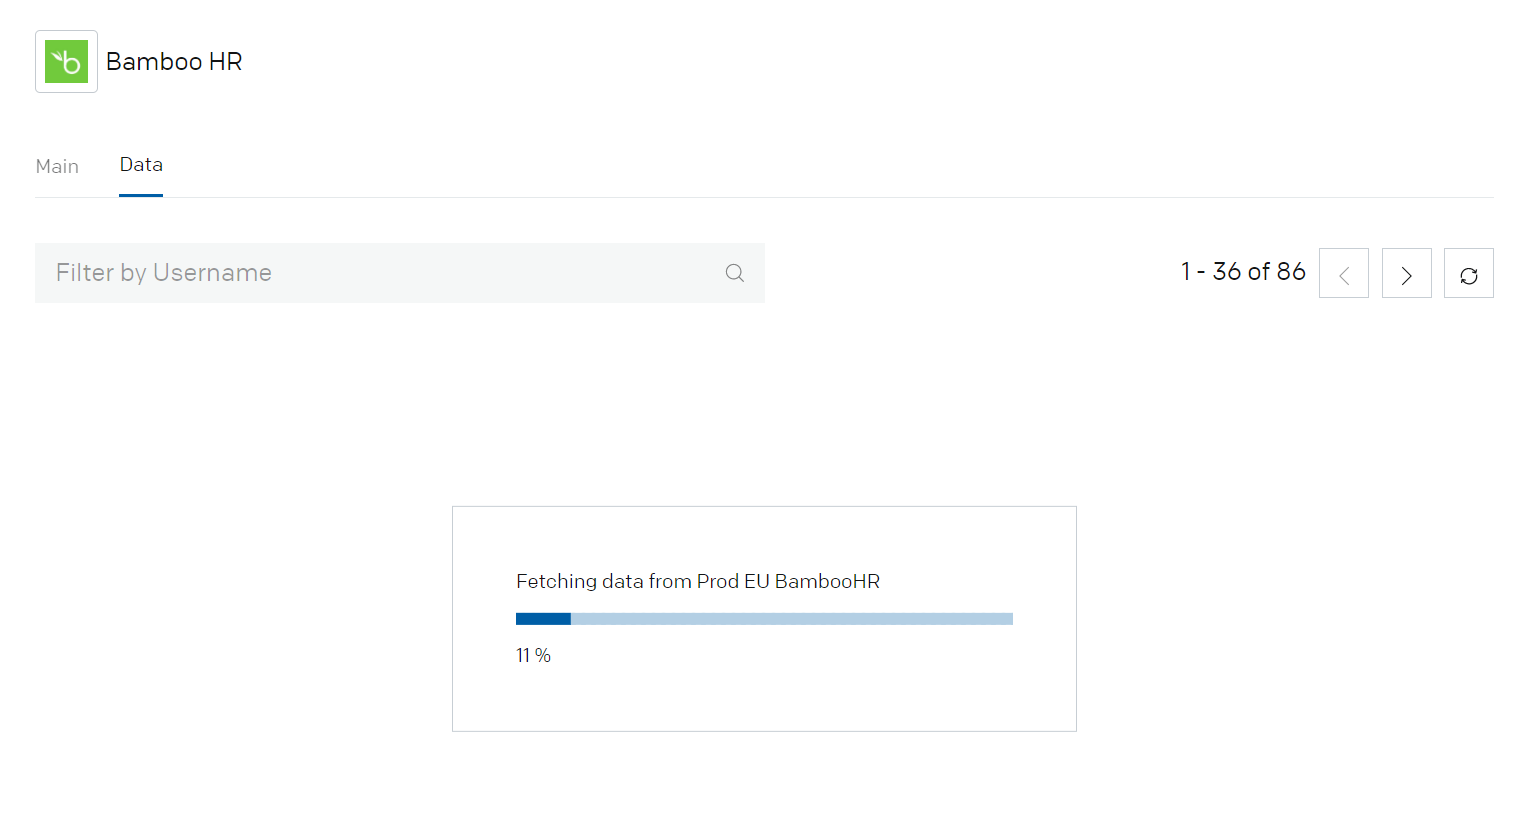
- Validate the successful import of the Employees into the Aquera tenant
Configure an Aquera orchestration with Verify
To orchestrate the employee synchronization, follow the steps below:
- Login to your Aquera account using: https://<your_domain>.aquera.io.
- Click on “Orchestration”
- Click on “Create Orchestration”

- On the “Configuration” tab provide the “Basic Details” such as:
- Name
- Orchestrations Type: ScimToScim
- Source Application: BambooHR application created above
- Target Application: IBM Verify application created above
- Uncheck the “Report only” check box
- Update limit: Unlimited
- Match expression: SOURCE[ENT].employeeNumber == DEST[ENT].employeeNumber
- Import limit: Unlimited
- Make sure to enable the "Group management" in order to define "Group Rules"
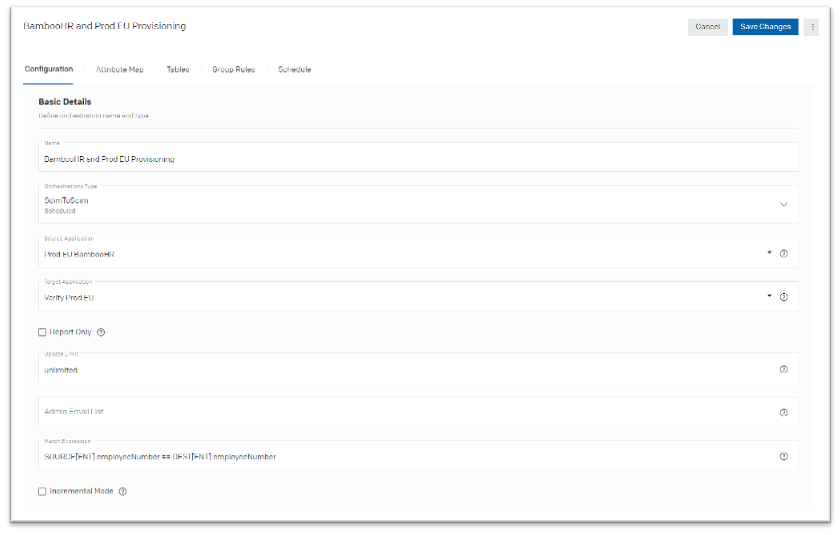
- Save the changes
- On the “Attribute Map” tab validate the attribute mapping from Source to Target. Update the mapping as required.
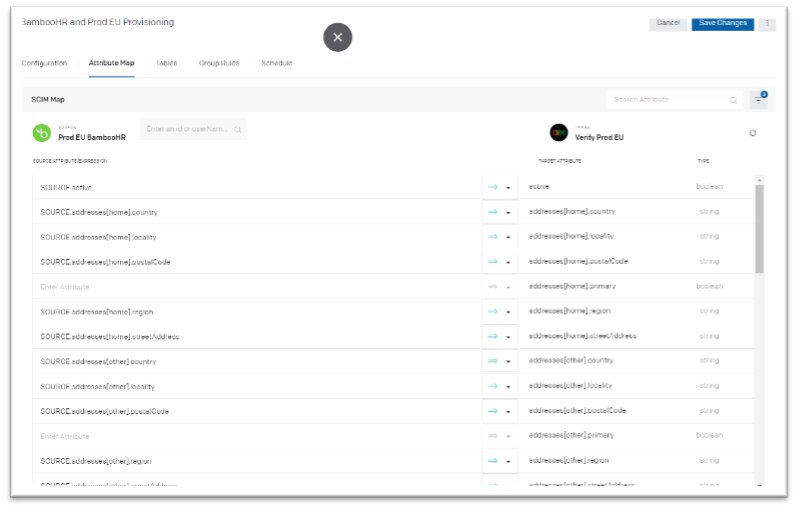
Attribute mapping
Make sure to map the proper attribute for “emails[work].value” so that newly imported user can receive an e-mail with their initial password.

- Save the changes
- Keep the “Tables” and “Group Rules” tabs as default
- On the “Schedule” tab, define the schedule for orchestration as required
- Save the changes
Execute the orchestration
To initiate the Aquera orchestration with IBM Verify:
- Login to your Aquera account using: https://<your_domain>.aquera.io.
- Click on “Orchestration”
- Click on “Execute” action against the newly created orchestration

- Monitor the progress of synchronization by navigating to Logs > Orchestration tab
- Click on row to view details of logs
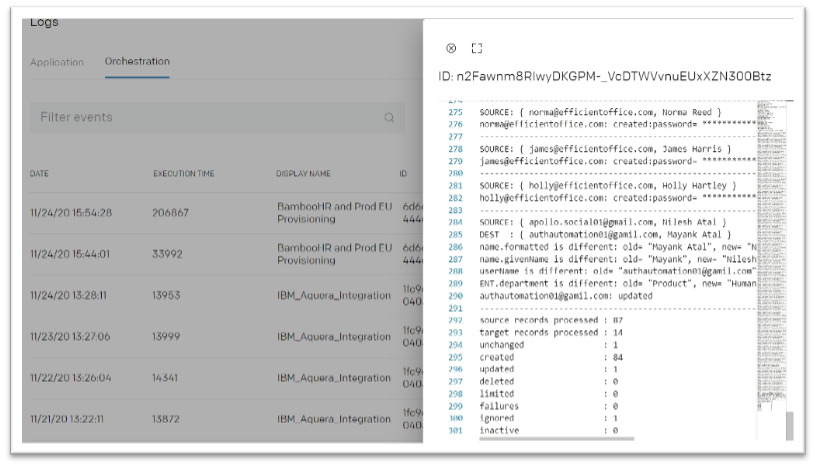
- Validate the details of employee record created / updated / deleted in the logs
Validate employee import in Verify
- Login to IBM Verify as administrator
- Access the admin console
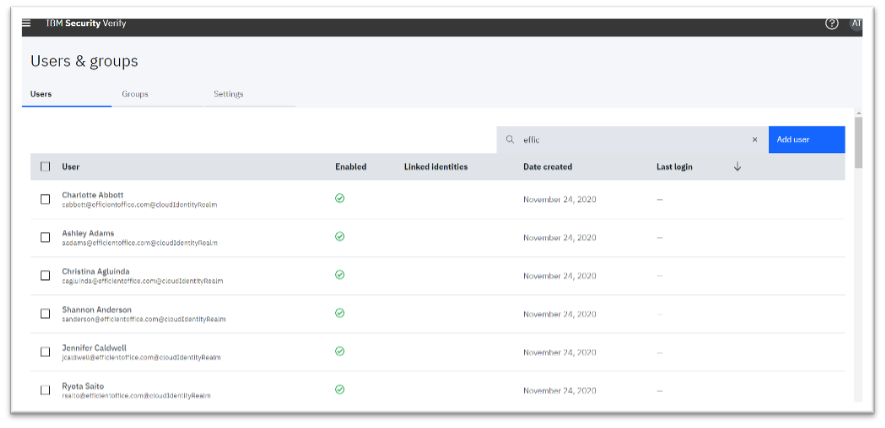
- Navigate to Users and Groups
- Validate that users got imported to the Verify
- Also verify that each newly created user gets the email having password for Verify login
Password email
Note: The new user will get the password email only if the user has valid email address populated during user synchronization.
Outbound user account lifecycle
IBM Verify supports out-of-the-box provisioning for many applications such as Active Directory, Salesforce etc. However, some applications may not have out of box account lifecycle support using Verify. Aquera can bridge the account lifecycle gap.
Aquera’s Account Provisioning Gateway translates SCIM requests from IBM Verify into REST-based API calls, SOAP/webservice-based APIs calls, SQL commands, LDAP operations, robotic automations, SDK library calls and queue messages across IT infrastructure covering all the places where users have accounts.
The gateway creates, updates, deletes or deactivates accounts from any application, database, directory, or device. Additionally, the gateway synchronizes passwords into your applications that use secure web authentication (SWA) or into your thick client applications.
To demonstrate the capability, below are the detailed steps for account lifecycle management of MySQL accounts.
Install and configure MySQL server
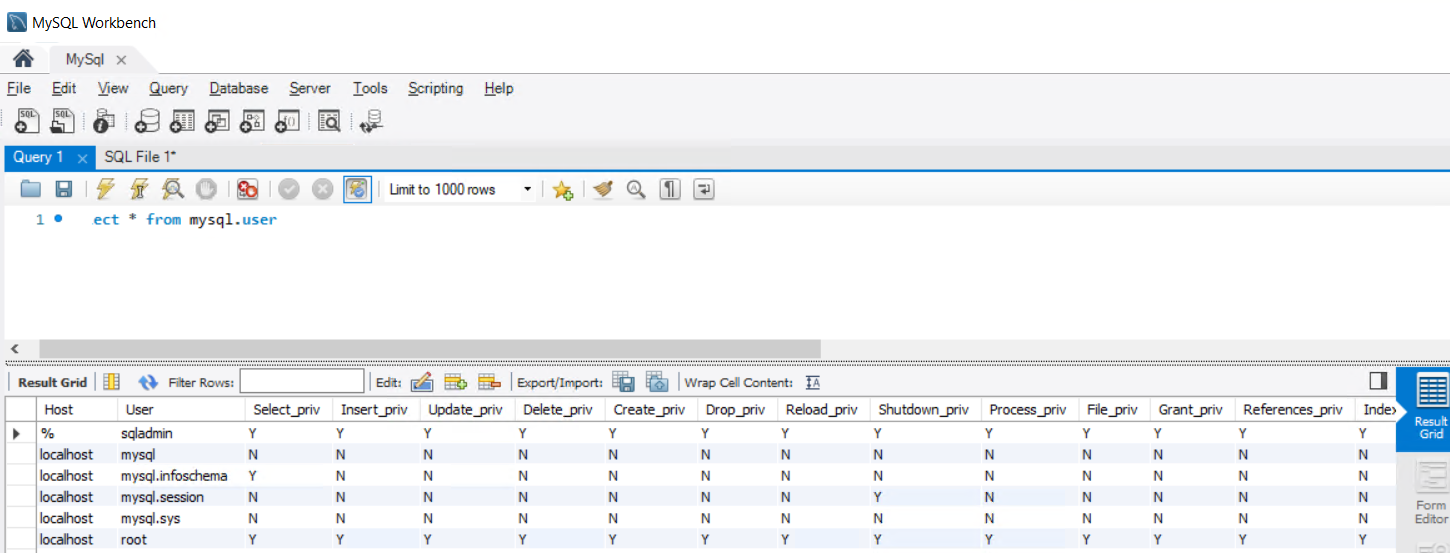
Install the MySQL server on your on-premises system which is behind the firewall. It is recommended to create an admin user who has privileges to administer the MySQL server. For this demonstration, an “sqladmin” user is created and used hereafter.
Validate that the admin user can connect to your MySQL server and manage the users. The user permissions can be validated by using a command such as:
select * from mysql.user
Install Aquera Agent
Login to Aquera portal and download the agent which need to be install on the MySQL server which is behind the enterprise firewall
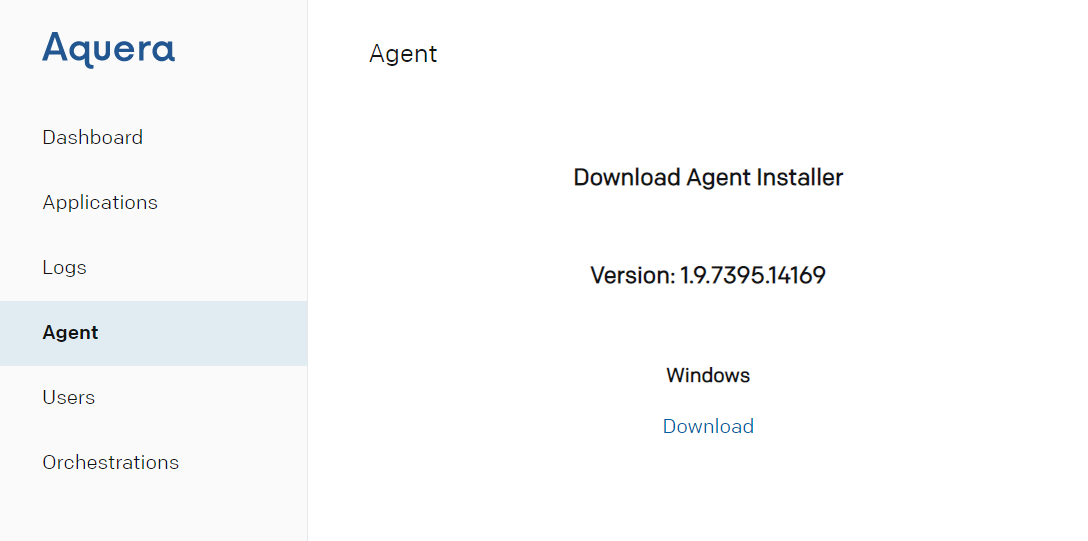
Note: For now, Aquera supports agent installation only for Windows platform.
Now install the “Aquera agent” on the MySQL server using the installer downloaded in above step.
After the successful installation open the Windows services to validate that the “Aquera Agent” service is running.

MySQL user account lifecycle using Verify via Aquera
Once the required applications are available, it's time to connect them together to manage the various user accounts of MySQL.
Onboarding MySQL application with Aquera
- Login to your Aquera account using Url as: https://<your_domain>.aquera.io.
- Click on “Applications”
- Click on “Add Application”
- Search for “MySQL” from the catalogue
- Click on “MySQL” icon
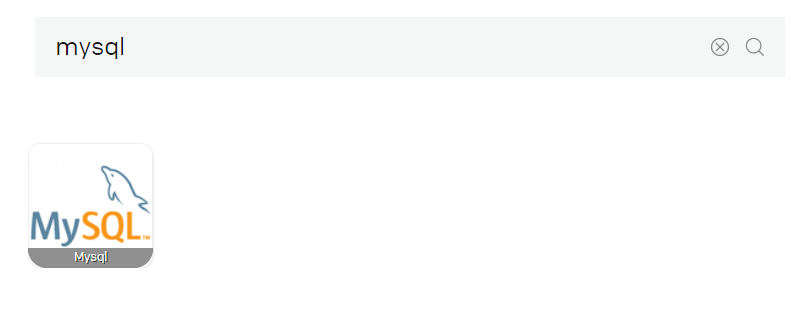
- Provide the details for Name, Description, Tenant and Token
o Provide the Tenant name as “proxy” if the MySQL server is beyond firewall
o Provide Username and Password under “Credential To Access mysql”
o Select “Connection” as “Aquera Agent” as the server is beyond the firewall
o Provide the details of “Hostname” and “Port”
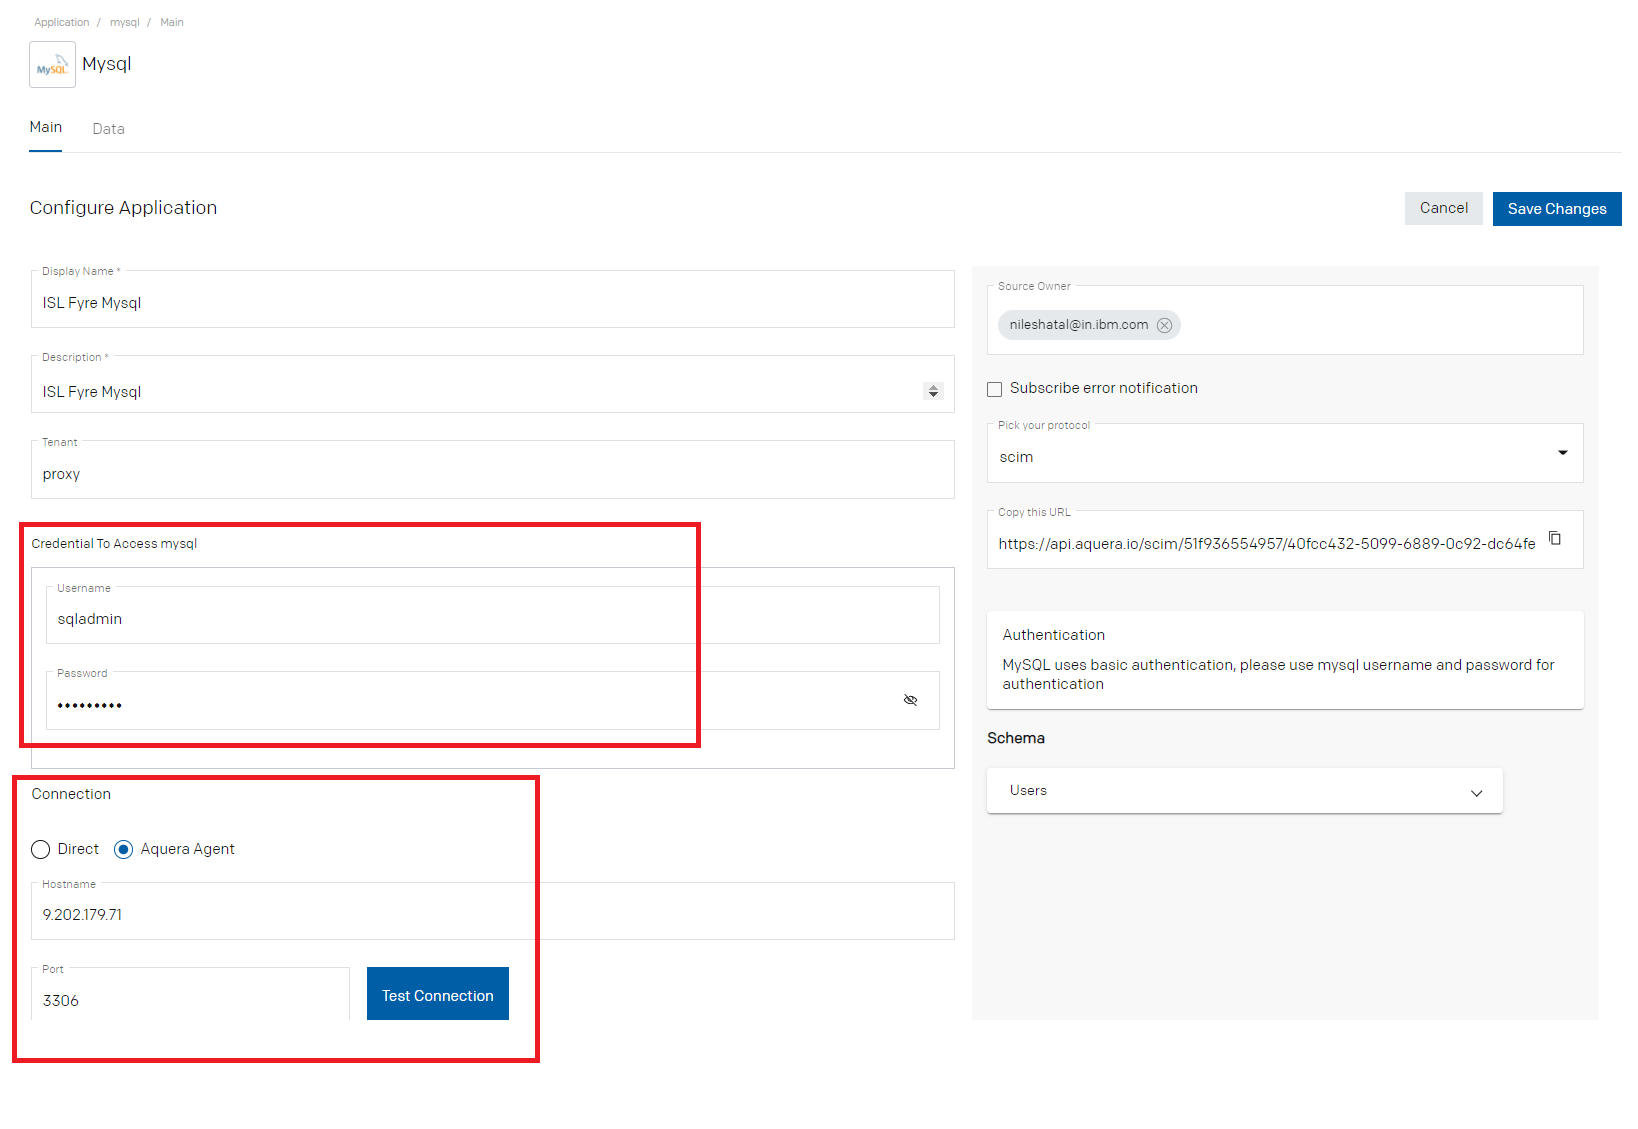
- Save the changes
- Copy the SCIM URL from the Application configuration page above. This URL will be required while configuring application in IBM Verify
- Click on “Test Connection”
- Validate that connection is successful
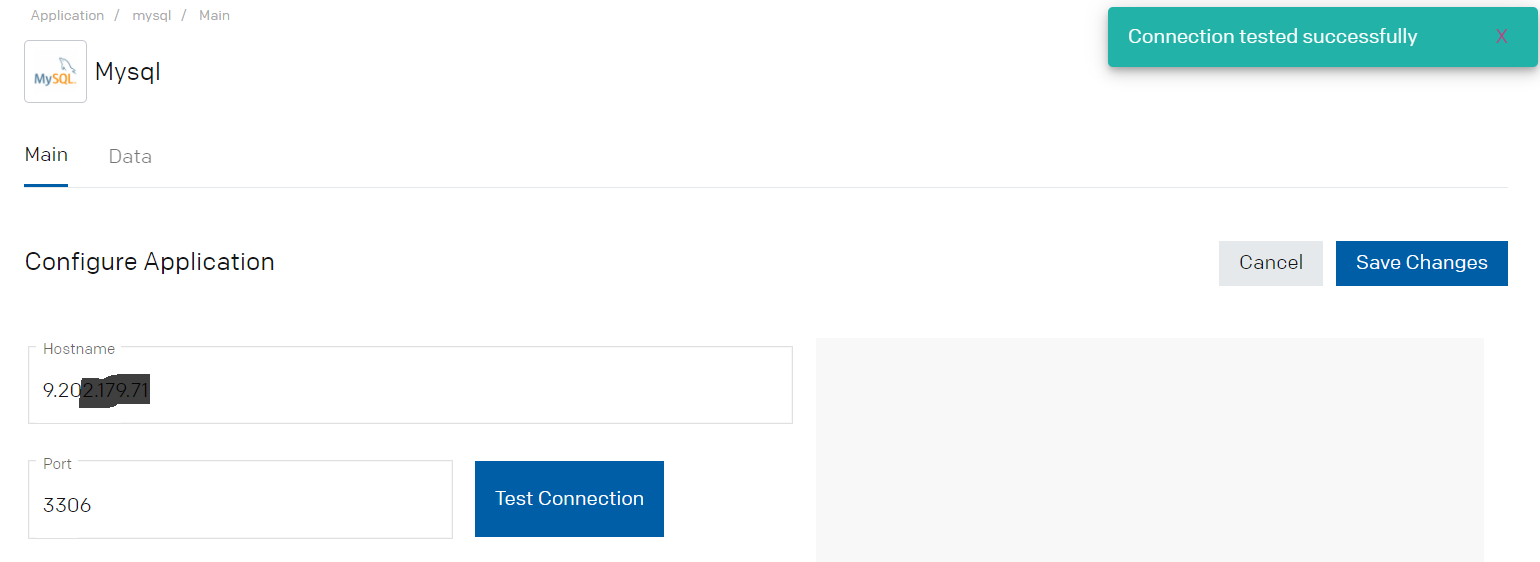
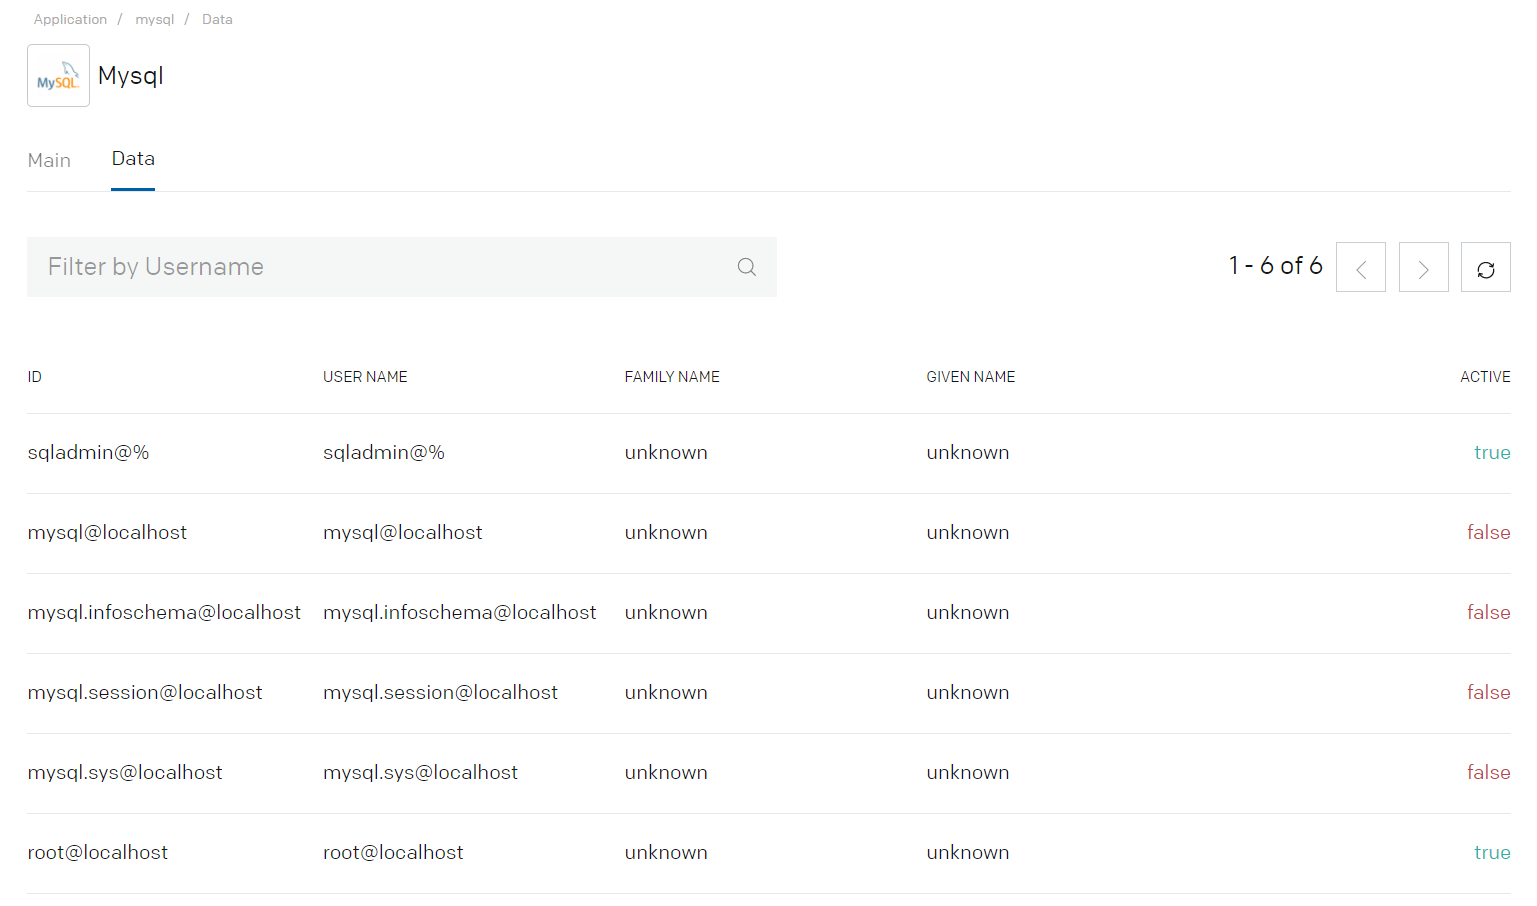
- Click on the Data tab. If the integration details are correct then user details will be fetched from the MySQL.
- Validate the successful import of the Employees into the Aquera tenant
Creating custom application in Verify
Next step is to create an application in IBM Verify which will be used for MySQL user account lifecycle.
- Login to IBM Verify as administrator
- On the IBM Verify Applications page, click the Add application button

- On the Select Application Type dialog, click on “Custom Application”
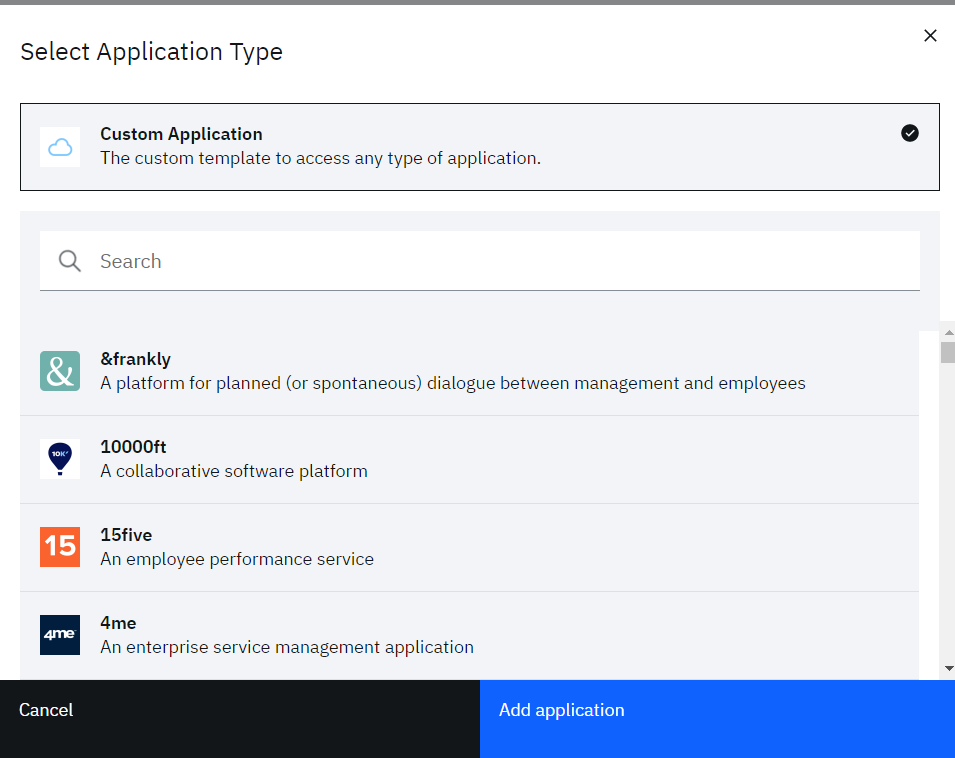
- Click “Add application”
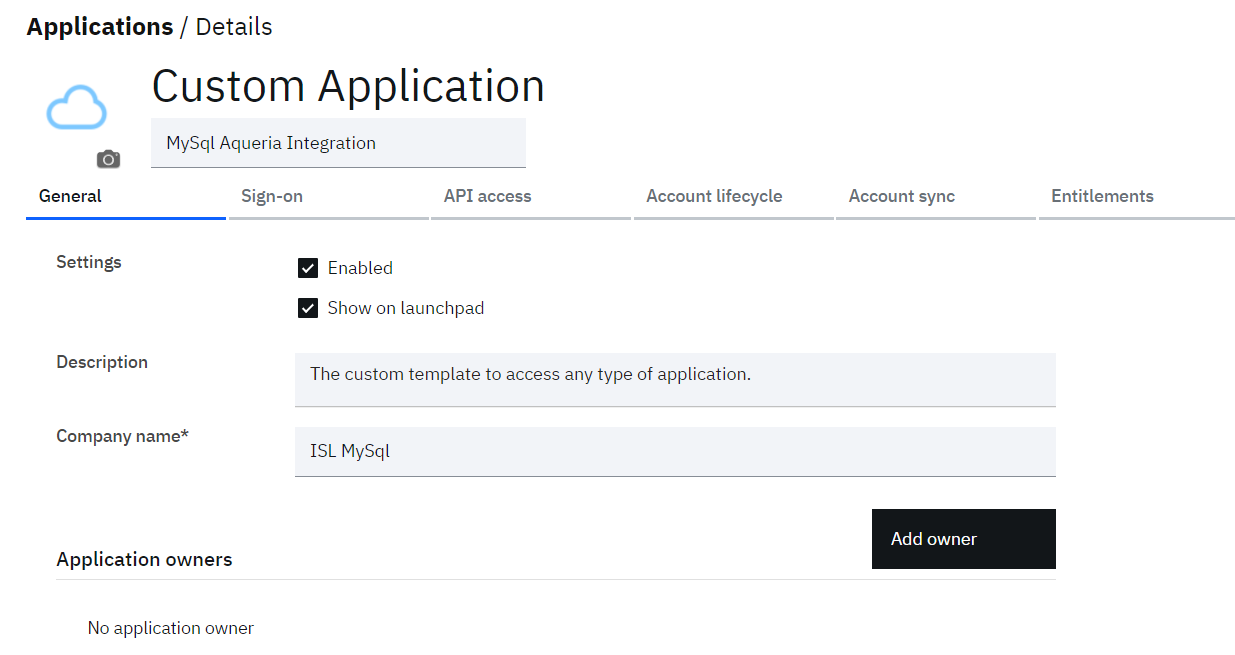
- On “General” tab, provide “Company name”
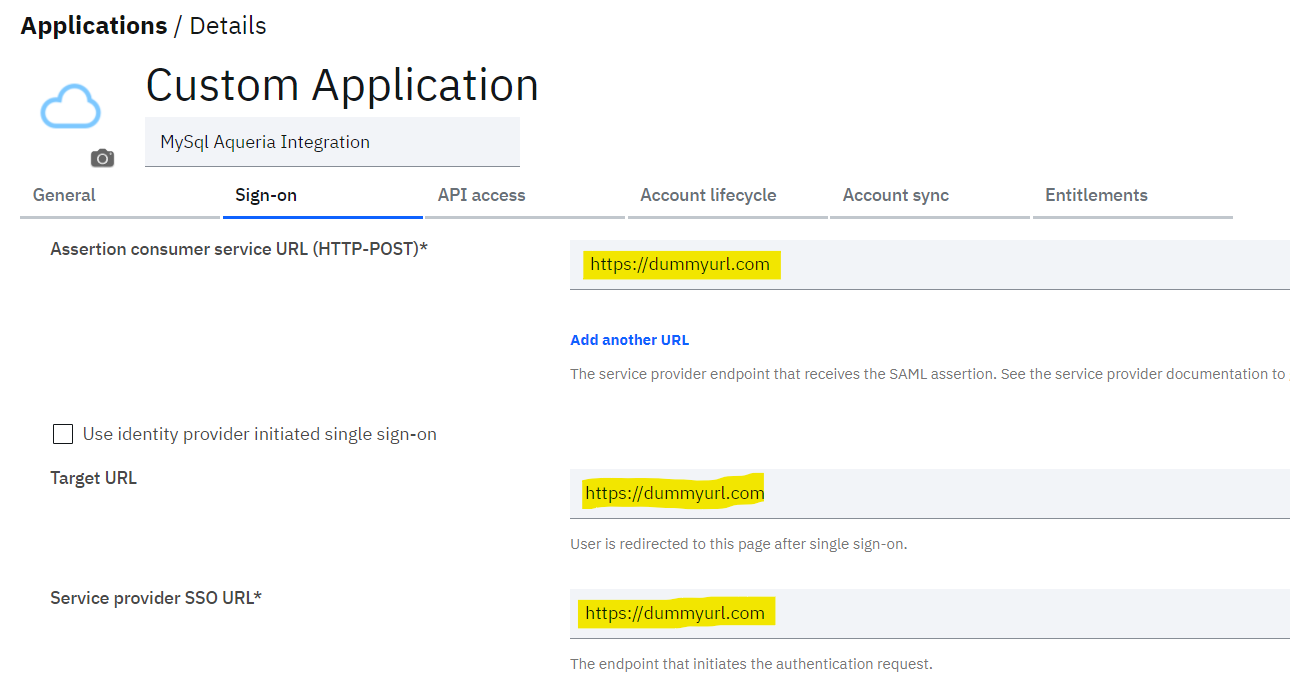
- On “Sign-on” tab provide some dummy values for mandatory fields. For now this is the workaround to save Custom application as these attributes are not required for user account lifecycle.
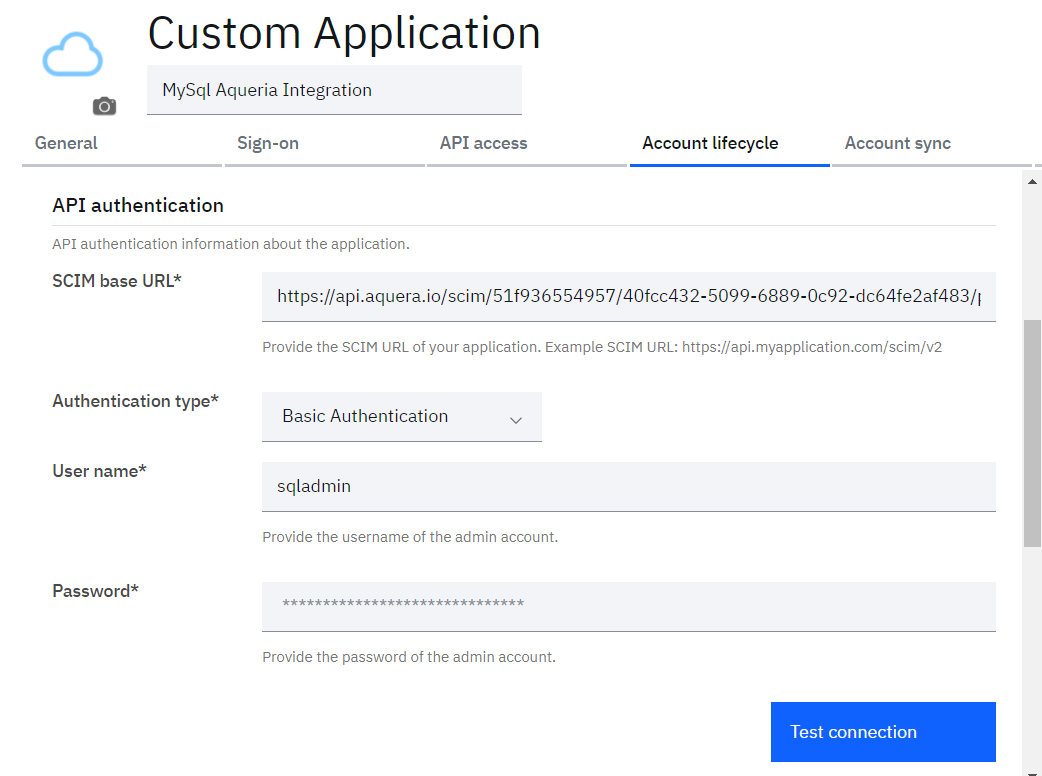
- On “Account lifecycle” tab
o set the “Provision accounts” and “Deprovision accounts” as “Automatic”
o Set the “SCIM base URL” as the URL copied from MySQL application in Aquera portal
o Select “Authentication type” as “Basic Authentication”
o Provide “Username” and “Password” of MySQL admin
-
Click “Test connection” to validate the connectivity across the Aquera tenant
-
If all the components are able to communicate properly then Success message gets displayed as:
“The connection test was successful” -
Save the changes
-
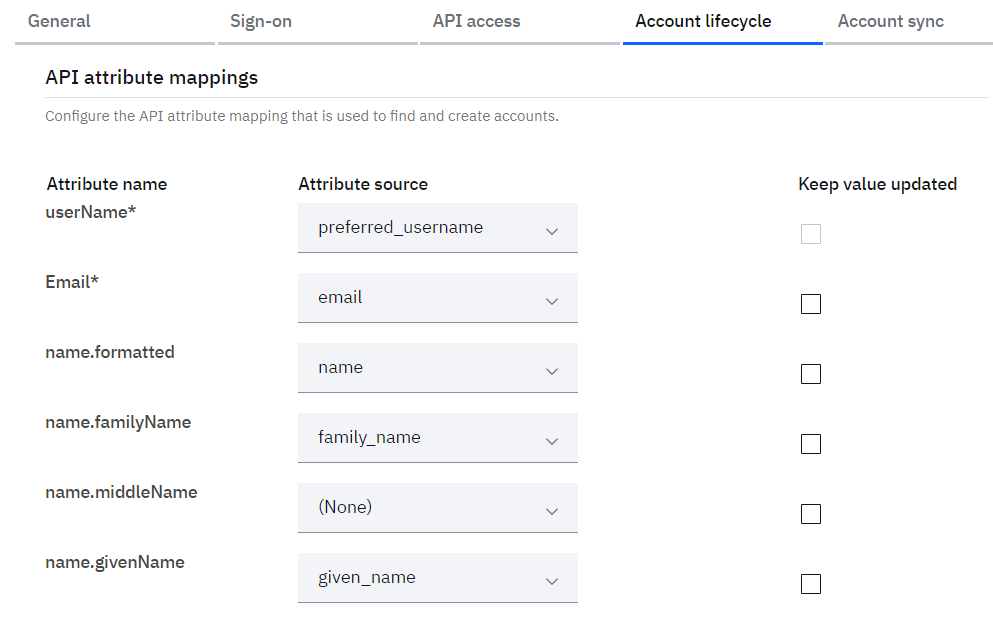
Scroll further below and validate the “API attribute mappings” as
o userName = preferred_username
o name.givenName = given_name
o name.familyName = family_name
o employeeNumber = employee_id
o Email = email
o phoneNumbers = mobile_number -
Optionally select the “Keep value updated” checkbox against each attribute if the value of the attribute is required to be kept updated with the source data
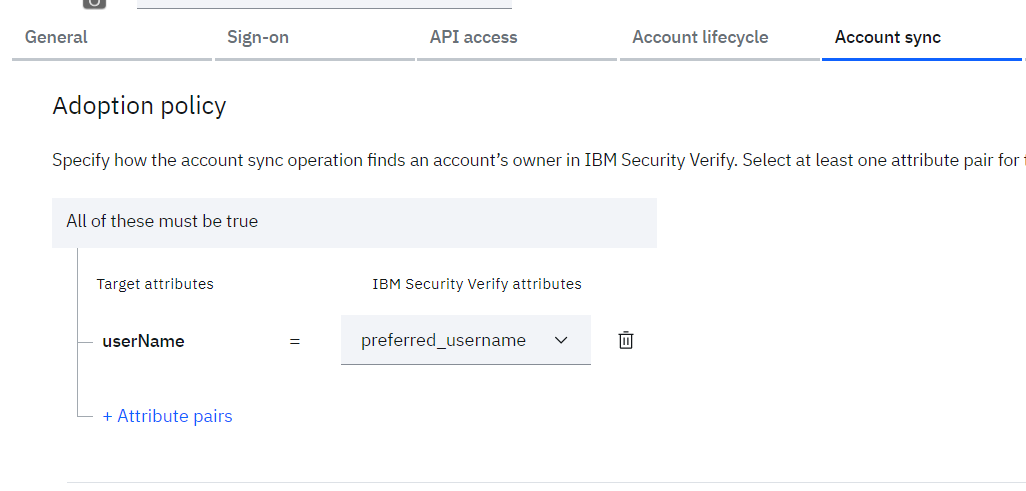
- Click on “Account sync” tab
- Click on “+ Attribute pairs” to add the attribute rule to be used to match the users from salesforce with the existing users in IBM Verify. Define the rules as:
o userName = preferred_username
- Click the Save button
- Click on “Entitlements” tab
- Select “Access Type” as “Select users and groups, and assign individual accesses”
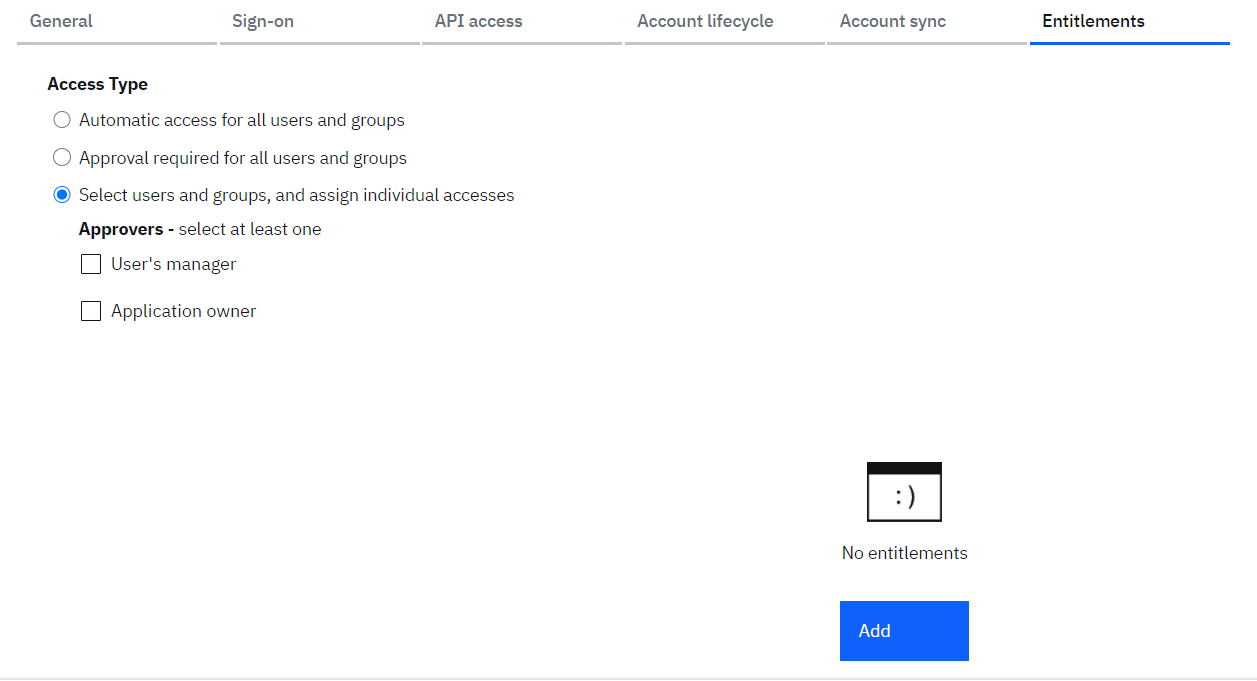
- Click on “Add”
- Search for “Sales” group in the “Select User/Group” popup
- Select “Sales” group (which should have been created before)
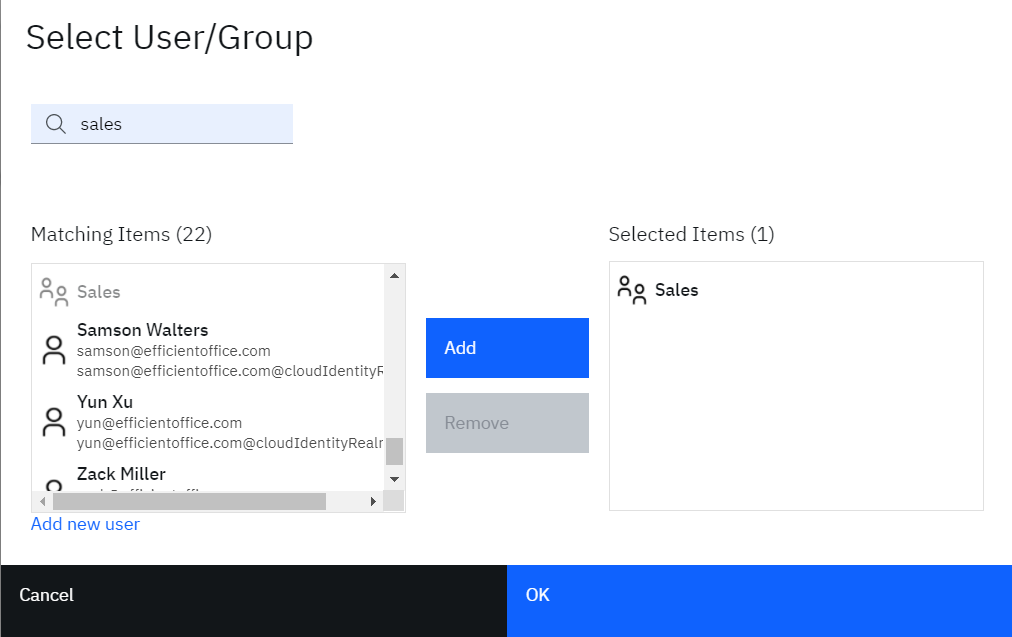
- Click “OK”
- Save the application
Create user along with MySQL account provisioning
- Log into your IBM Verify tenant as your administrative user
- Go to Users & groups
- Click the Add user button
- Create a user. You can create any user you like (as long as it doesn’t clash with existing ones). For example:
o Identity Source = Cloud Directory
o User name = podrick@localhost
o Given name = Podrick
o Surname = Payne
o Email = a valid real email address (such as the email tied to the admin user for this IBM Verify tenant)
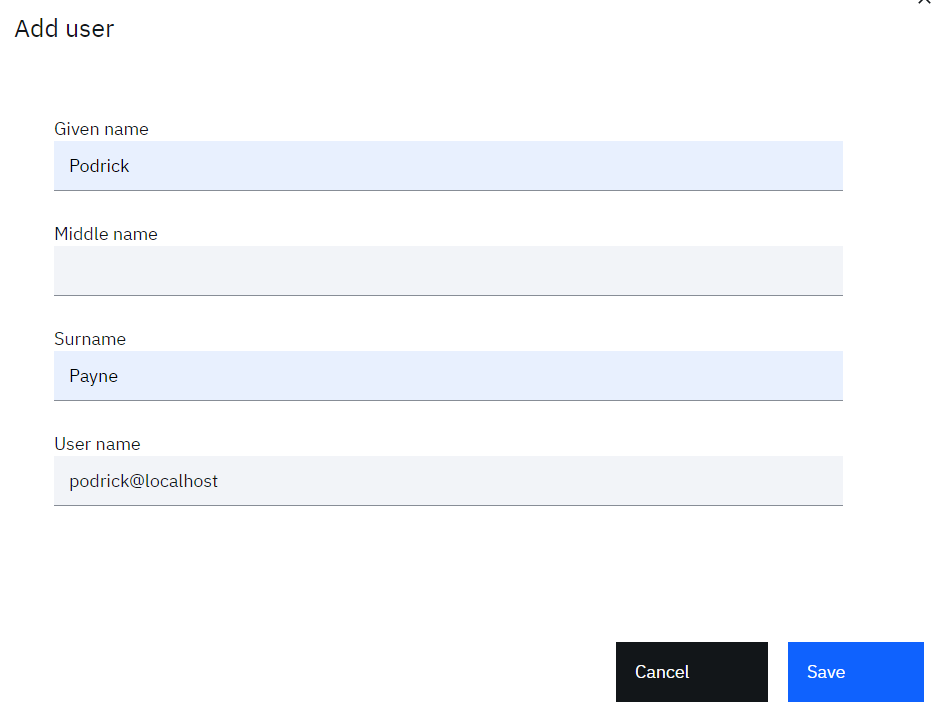
- Click the Save button to create the user

The user is now created.
Add User to Sales Group
Note that we have entitled the “Sales” group with “Automatic access” for the MySQL application. Now in order to provision new MySQL account for newly created user, we can make the new user as a member of “Sales” group. This will trigger the automatic provisioning for the MySQL account.
- Return to the IBM Verify admin interface as the admin user
- In the Users & groups function, click on the Groups tab
- Hover over the Sales group and click the Edit icon
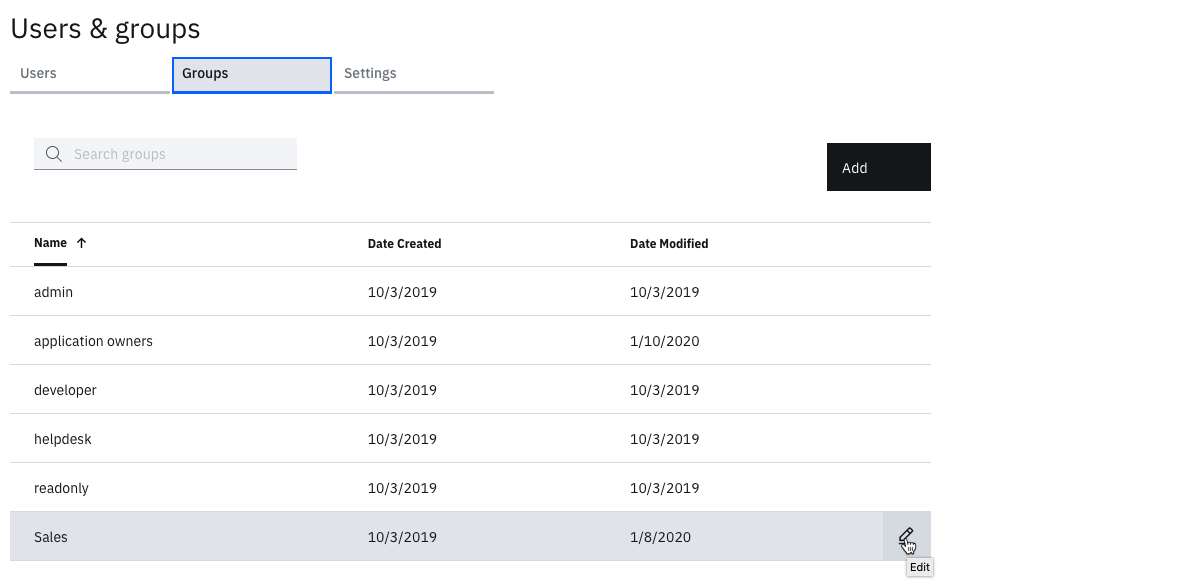
- Click the Add button beside Group Members
- Search for name of new user which will get listed in the “Search results”. Select it and click Select, this will move the user to “Selected users & groups”:
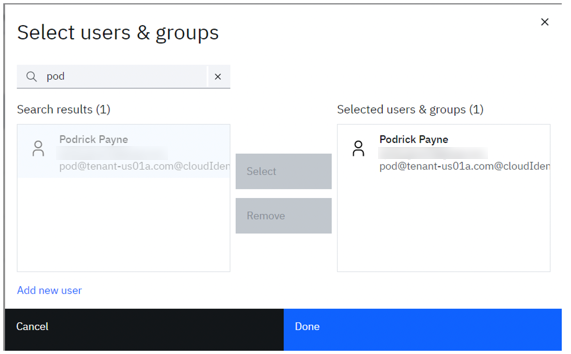
- Click the OK button to add them, then Save on the Edit Group dialog
Check new user in MySQL
- Open MySQL workbench with connect to MySQL server using administrative privilege
- Search for the available users by command:
select * from mysql.user
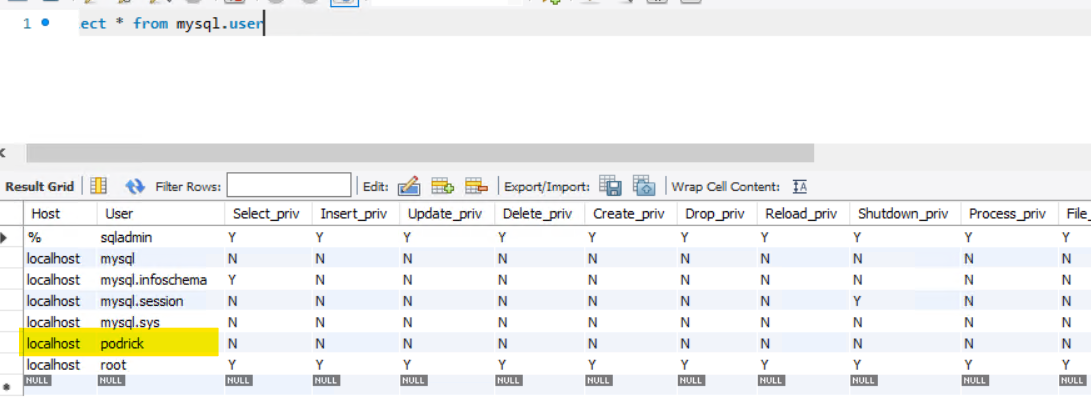
- Validate that new user has been created in MySQL
- Also, the user provisioning task can be monitored by Verify admin from Admin console
- Navigate to Governance > Operation results tab

Nilesh Atal, IBM Security
Updated 7 months ago
