Multi-step user registration
This article illustrates how a multi-step user registration experience can be created by using the flow designer. This is a typical Consumer Identity and Access Management (CIAM) use case, where the registration process is segregated in multiple steps to keep the user engaged.
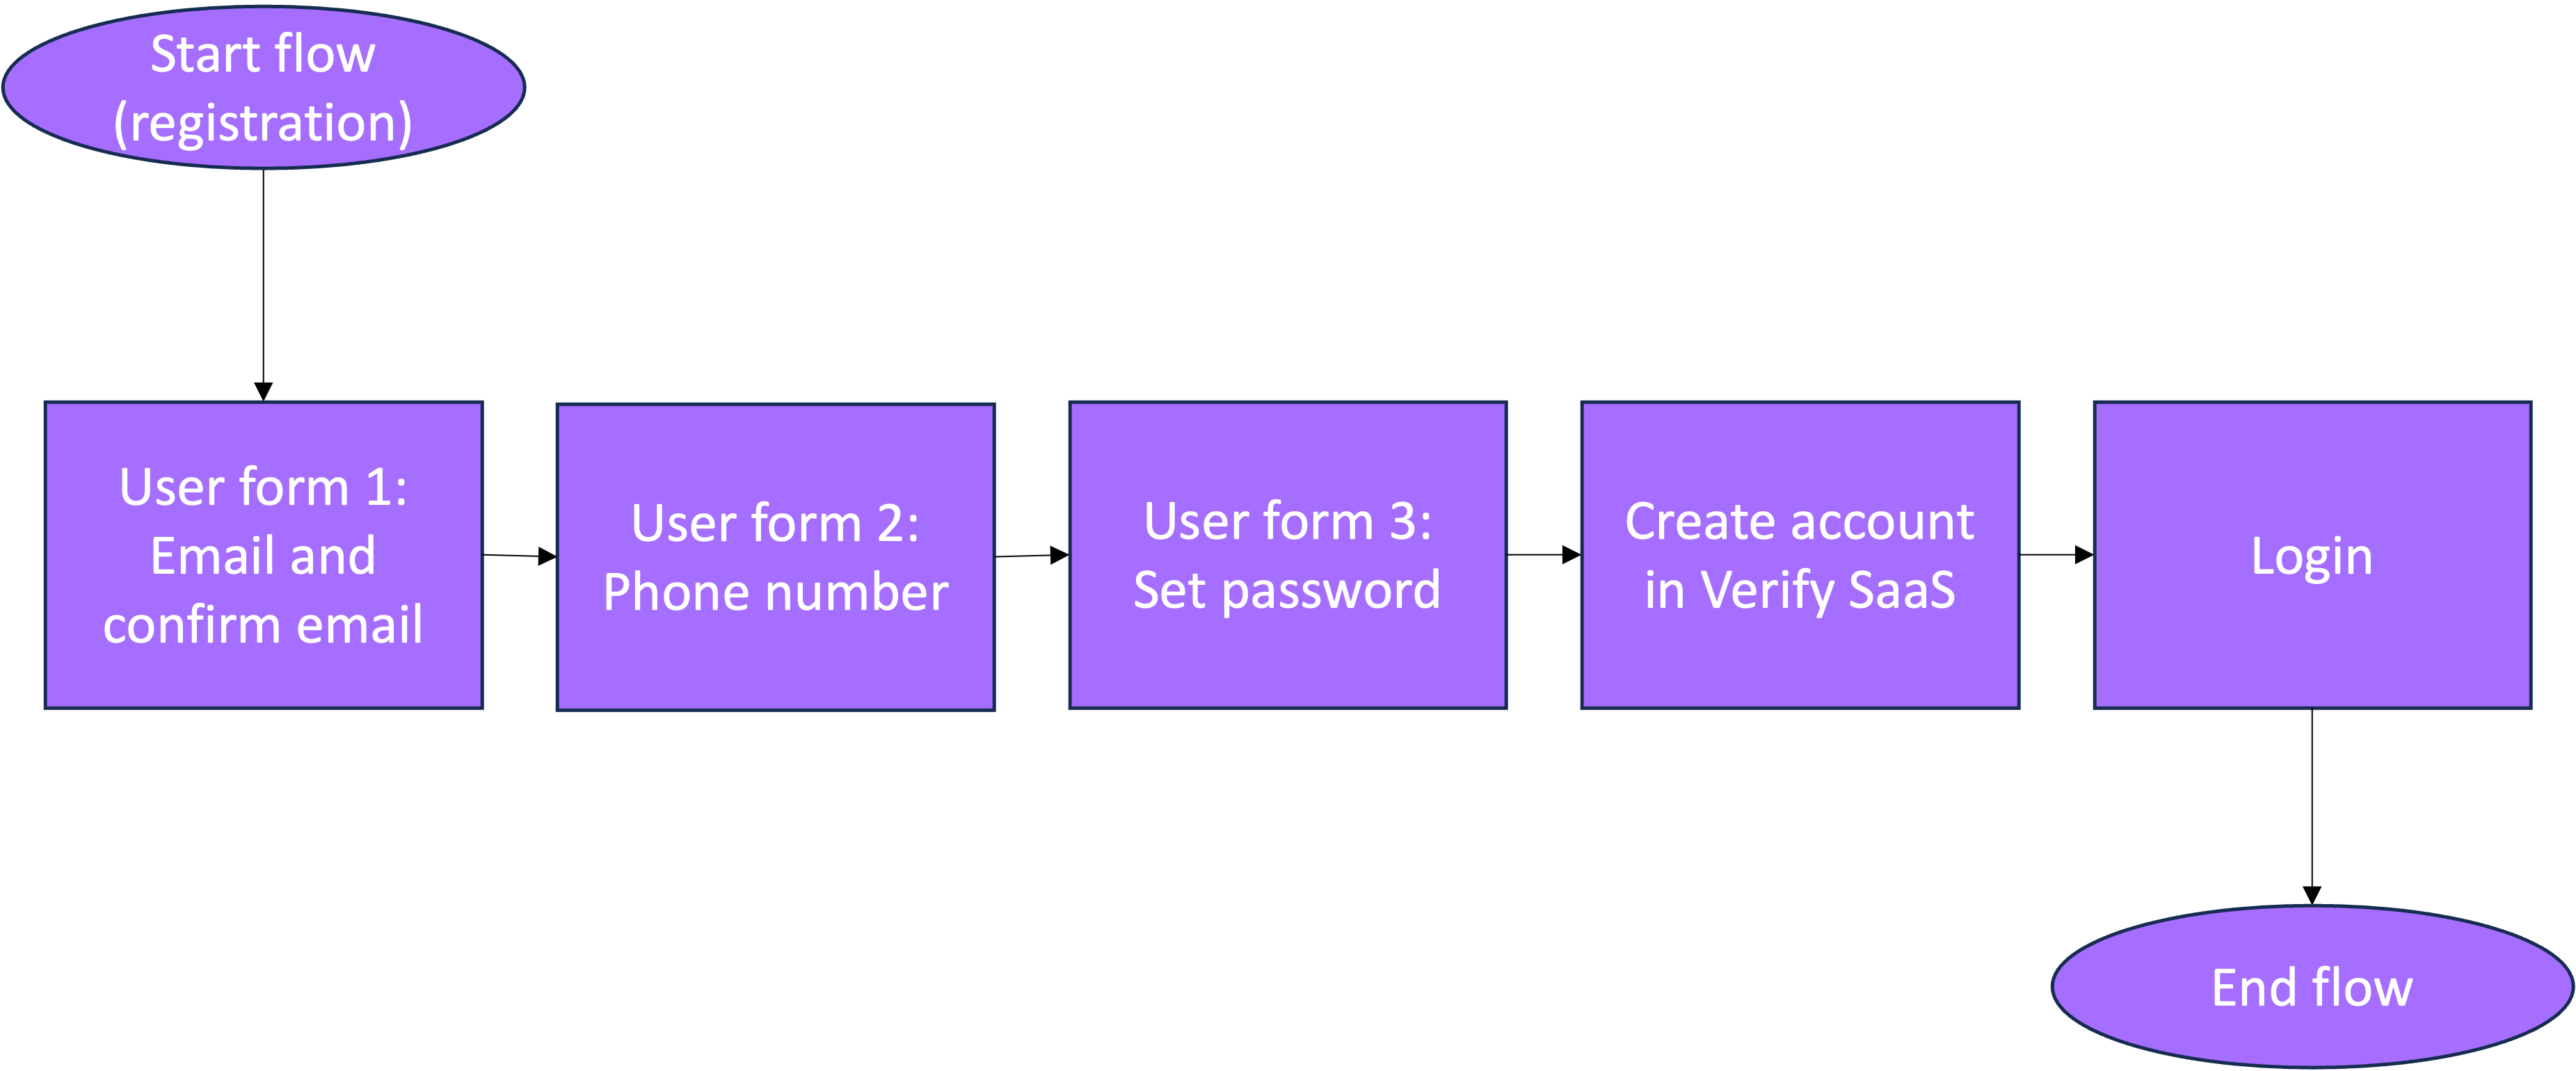
Overview of the flow
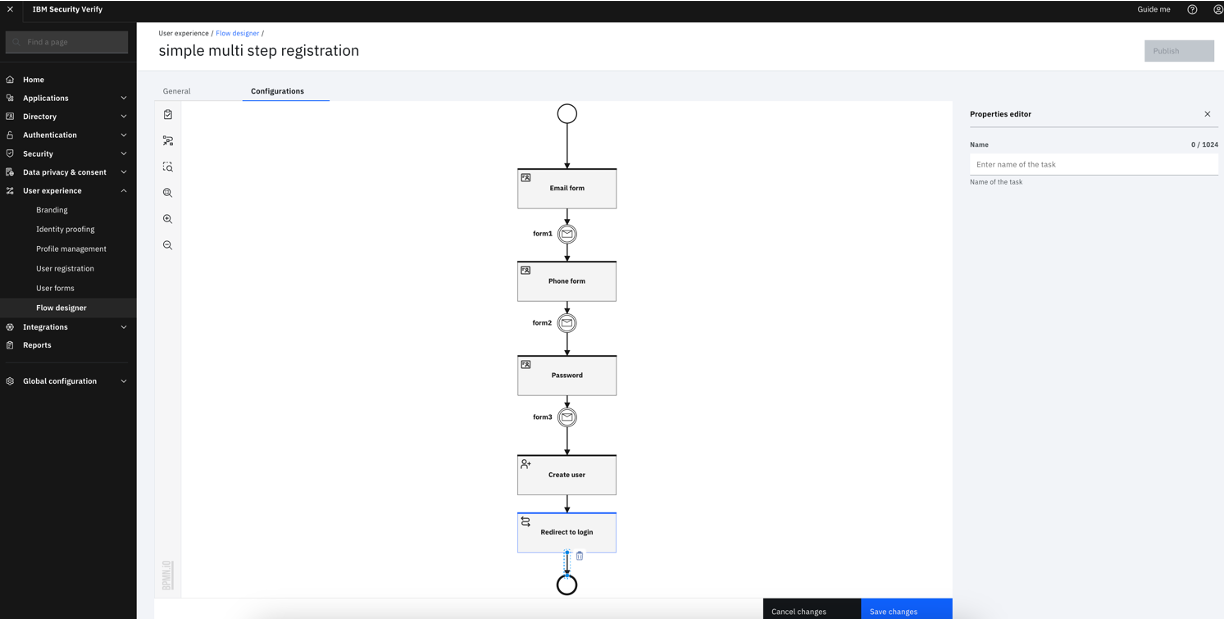
The flow includes the following steps:
- Ask the user to provide an email and also use the email as the username.
- Ask the user to verify their email with an Email-OTP.
- Ask the user to provide a phone number.
- Ask the user to provide a password.
- Create a user profile.
- Redirect the user to login.
Prerequisites
- IBM Verify tenant
- Flow designer must be enabled in your tenant
- User forms must be enabled in your tenant
Configuring the flow forms
Create the appropriate user forms
Create the user forms that are to be used for orchestrating the end-to-end registration experience. In this case, three user forms must be created.
Note
This guide only demonstrates the creation of 3 forms with specific fields. Additional attributes and additional forms can be created and connected to expand the attribute collection and steps in the desired registration flow. This can be done by introducing additional elements in the form builder.
Email capture and verification form
-
When logged in as administrator in the IBM Verify, navigate to "User experience".
-
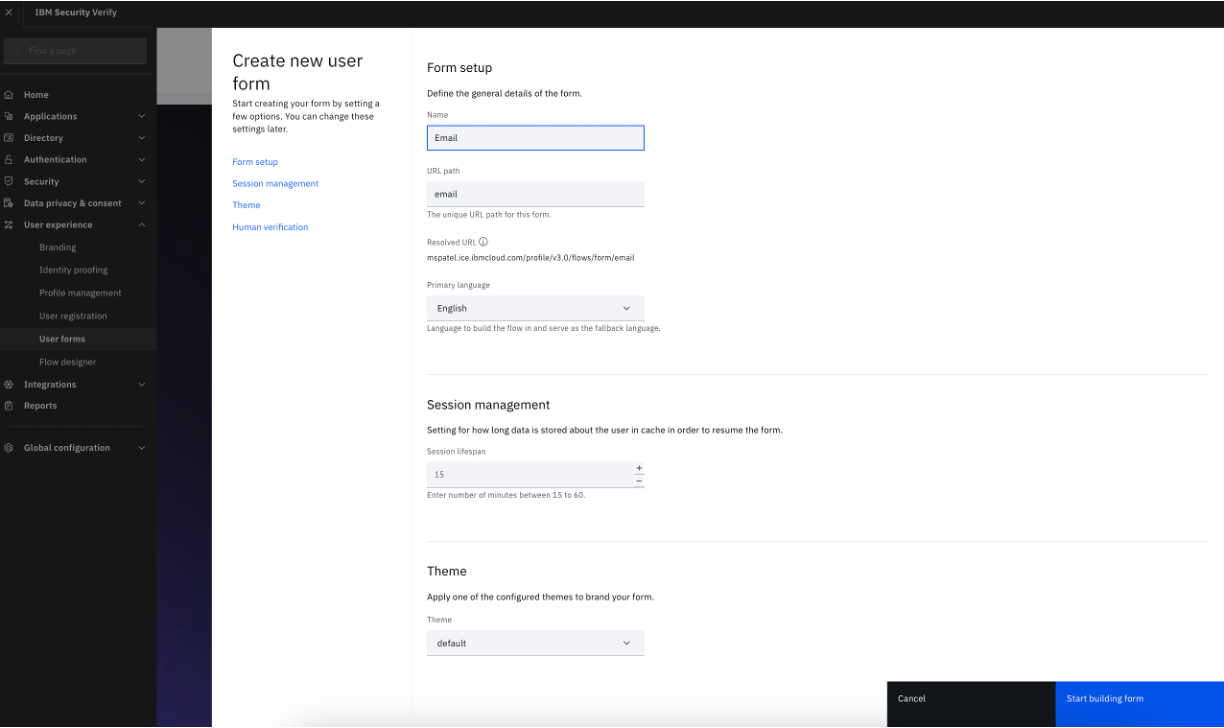
Under "User experience", select "User forms" > "Create form".
-
Enter a form name. For example, "Email". You may modify other settings, such as the Primary language, Session management, Theme and Human verification.
-
Click "Start building form".
-
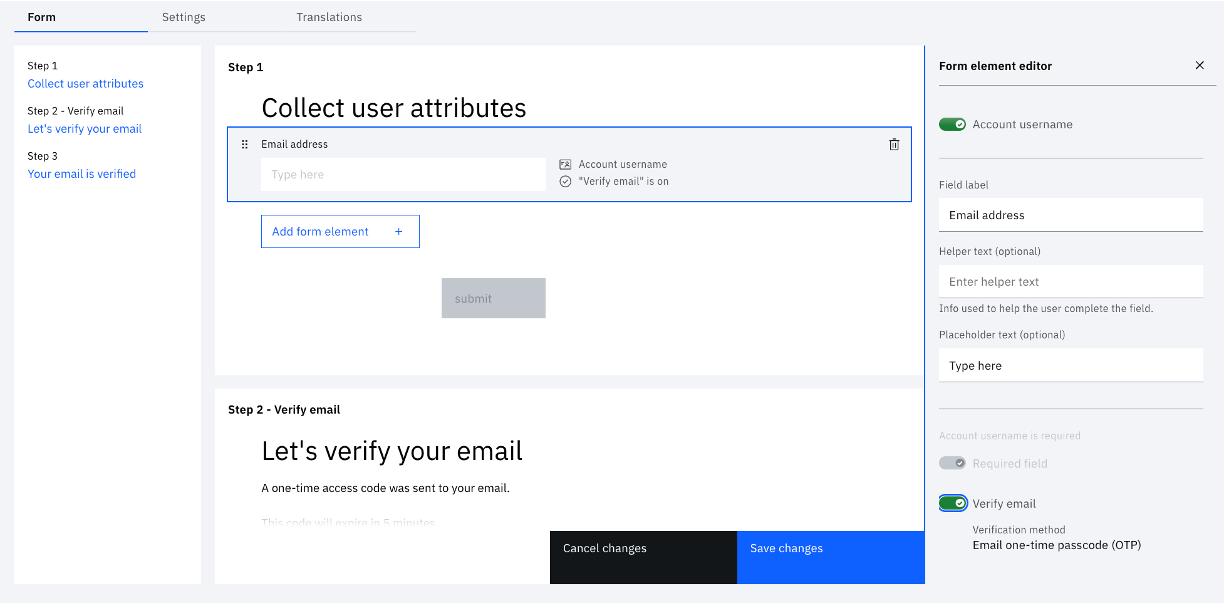
Click the "Email address" element in the form to set the proper settings in the "Form element editor" panel.
-
Switch on the "Account username" and "Verify email" toggle button.
-
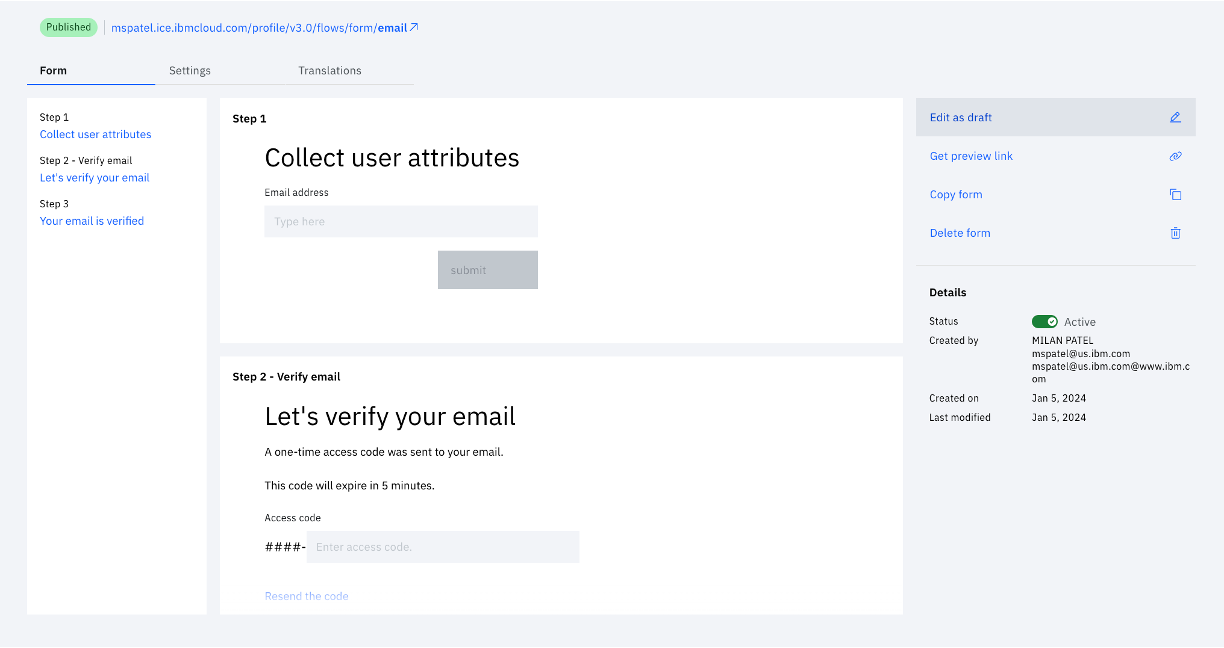
Click "Save changes" and "Publish".
Note
The other settings such as branding, text displayed in Email OTP verification, attribute field text, and more can be customised in any user form.
Phone capture and verification form
-
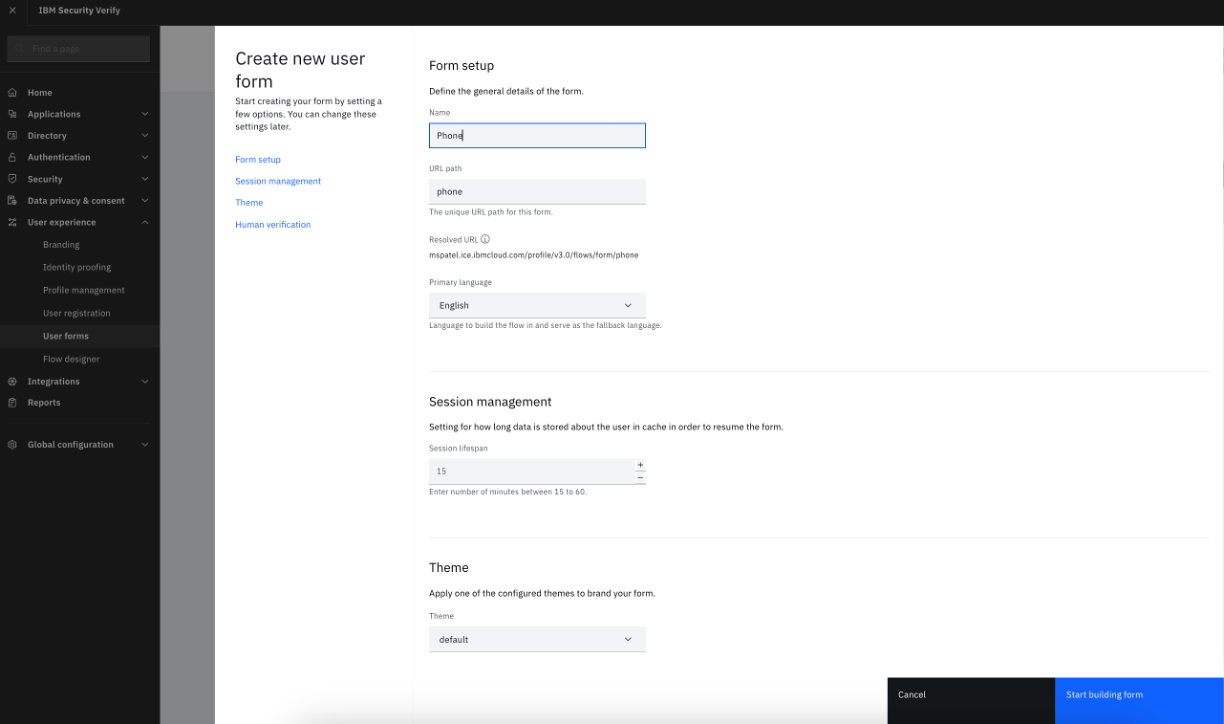
Navigate to "User experience" and select "User forms" > "Create form" to create a new form.
-
Enter a form name. For example, "Phone".
-
Click "Start building form".
-
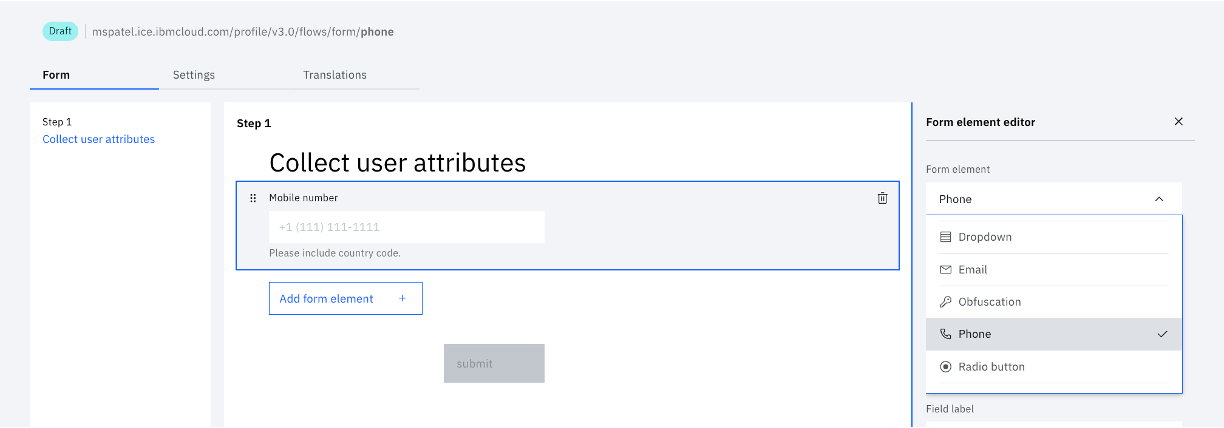
Click the "Email address" element in the form to change the element to Phone number.
-
In the "Form element editor" panel, select "Phone" from the "Form element" drop down.
-
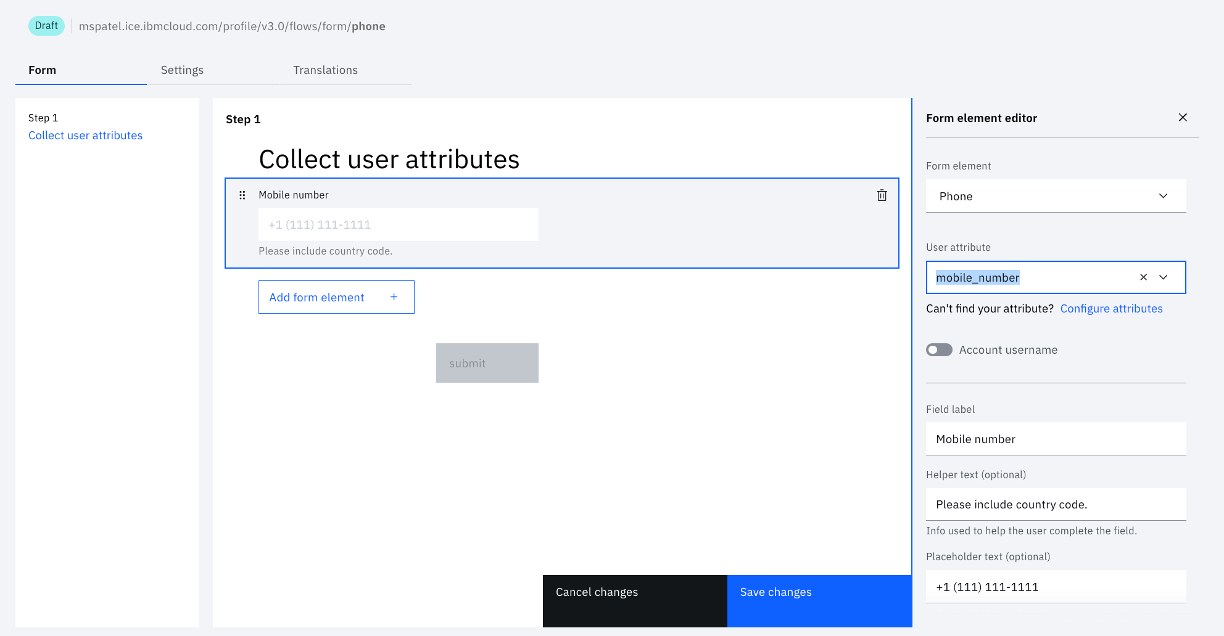
Specify the "User attribute" to be "mobile_number". Note: Phone number verification is disabled due to the need for having SMS quota on the tenant. Trial tenants by default do not have SMS quota. SMS quota can be requested by contacting an IBM Security sales rep or asking within the trial for help. Once SMS quota is added to the tenant, being able to verify a phone number is possible with a Voice or SMS OTP.
-
Click "Save changes" and "Publish".
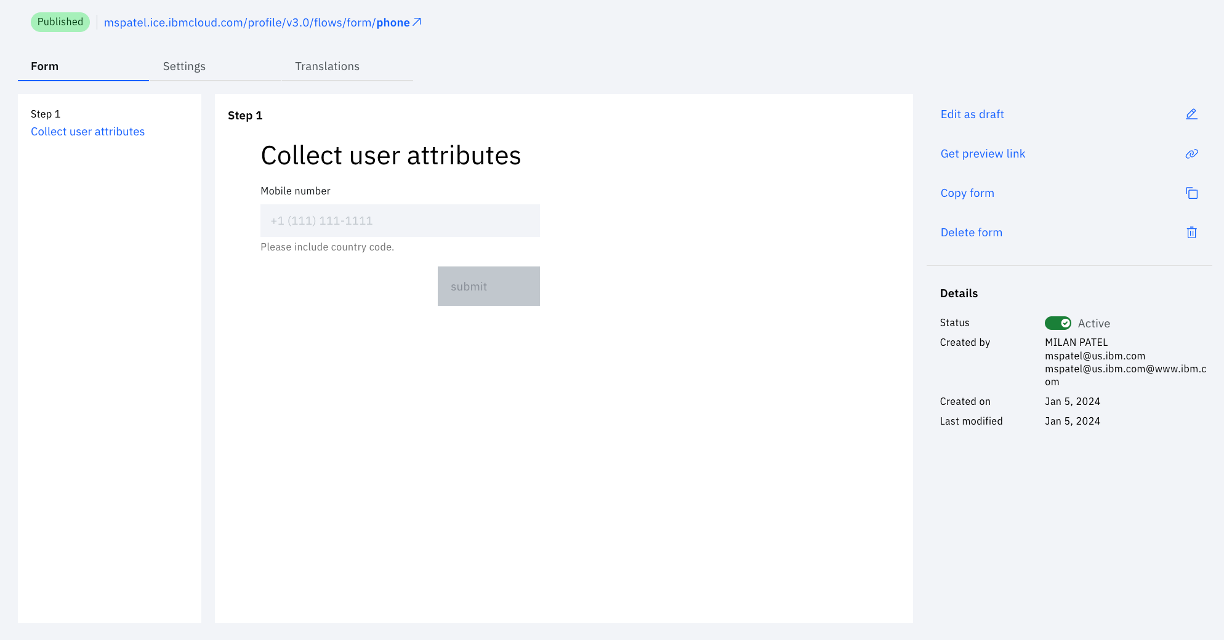
With this, you have now created the second of three forms needed.
Password creation form
-
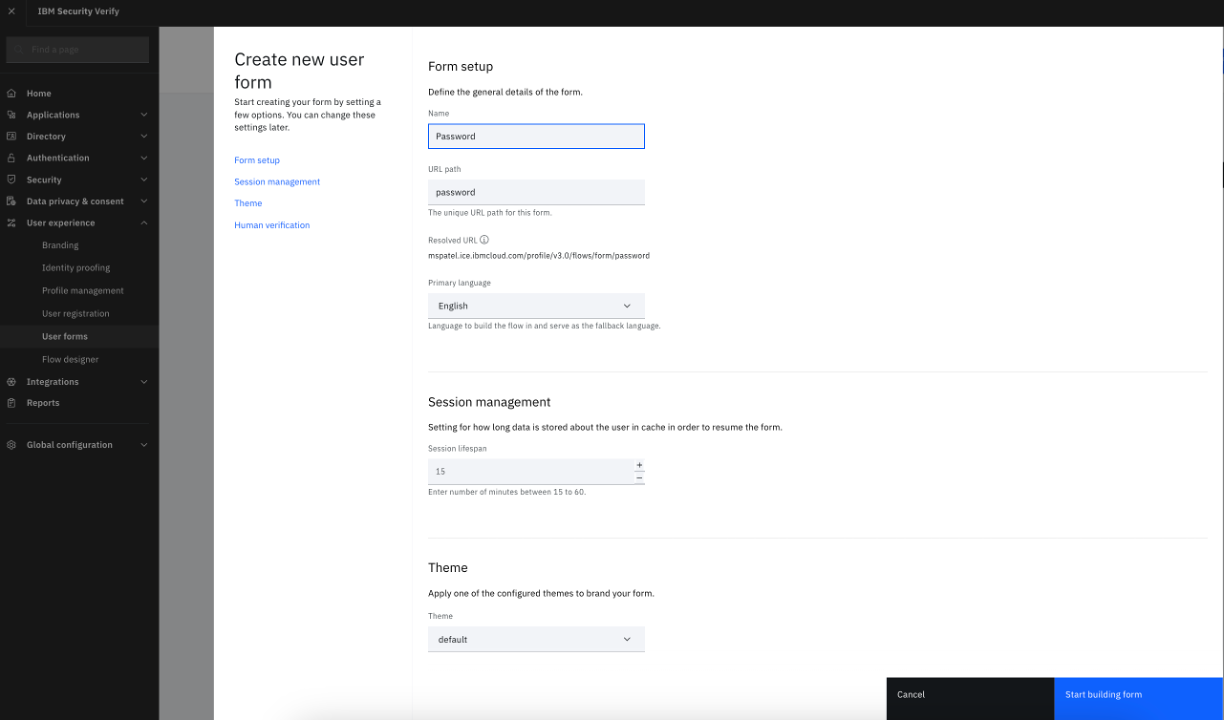
Navigate to "User experience" and select "User forms" > "Create form" to create a new form.
-
Enter a form name. For example, "Password".
-
Click "Start building form".
-
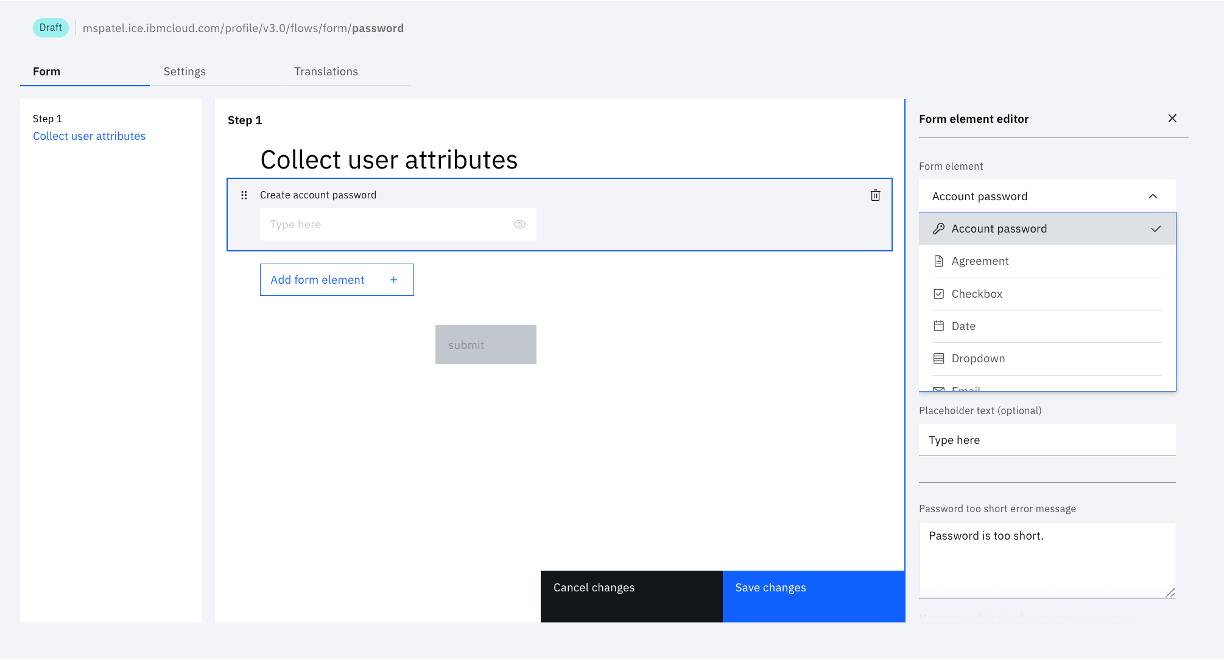
Click the "Email address" element in the form to change the element to Password.
-
In the "Form element editor" panel, select "Account password" from the "Form element" drop down.
-
Click "Save changes" and "Publish".
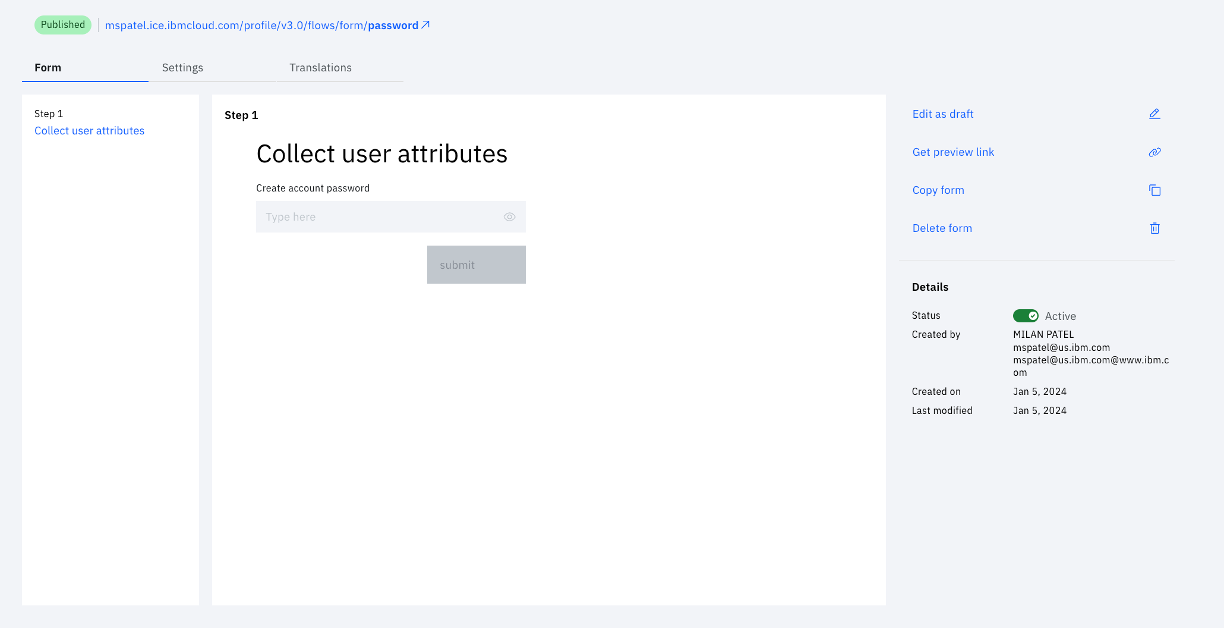
With this, you have now created the third of three forms needed.
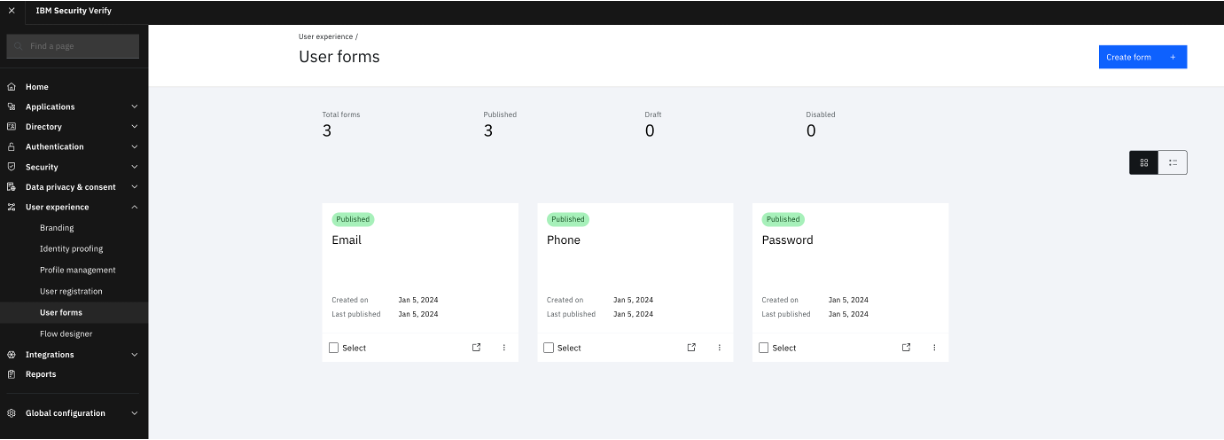
At this point, there should be three published forms in the "User forms" listing.
Orchestrating the flow
After all the necessary forms are created, the next step is to join the forms together in an end-to-end registration experience.
-
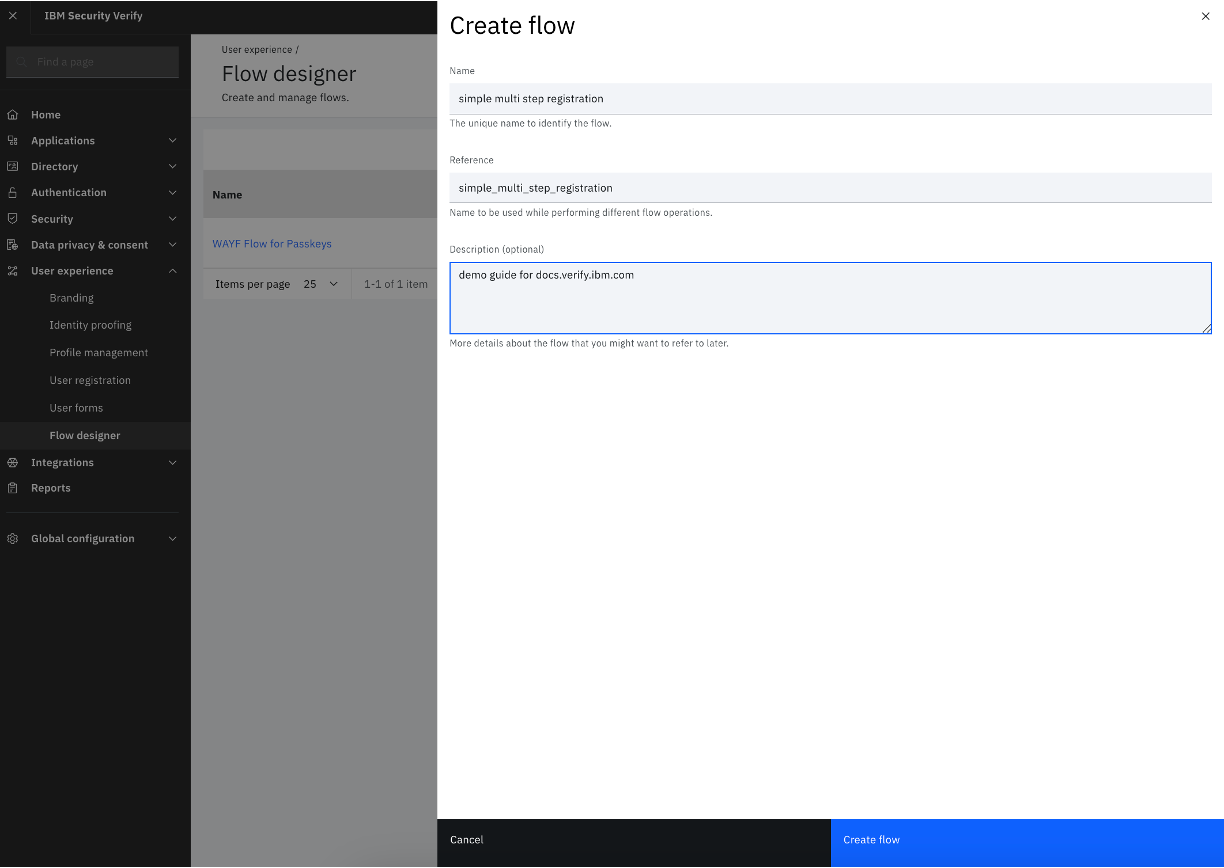
Navigate to "Flow designer" under "User experience" and selct "Create flow"
-
Enter the corresponding flow name, for example "simple multi step registration". Create the flow.
-
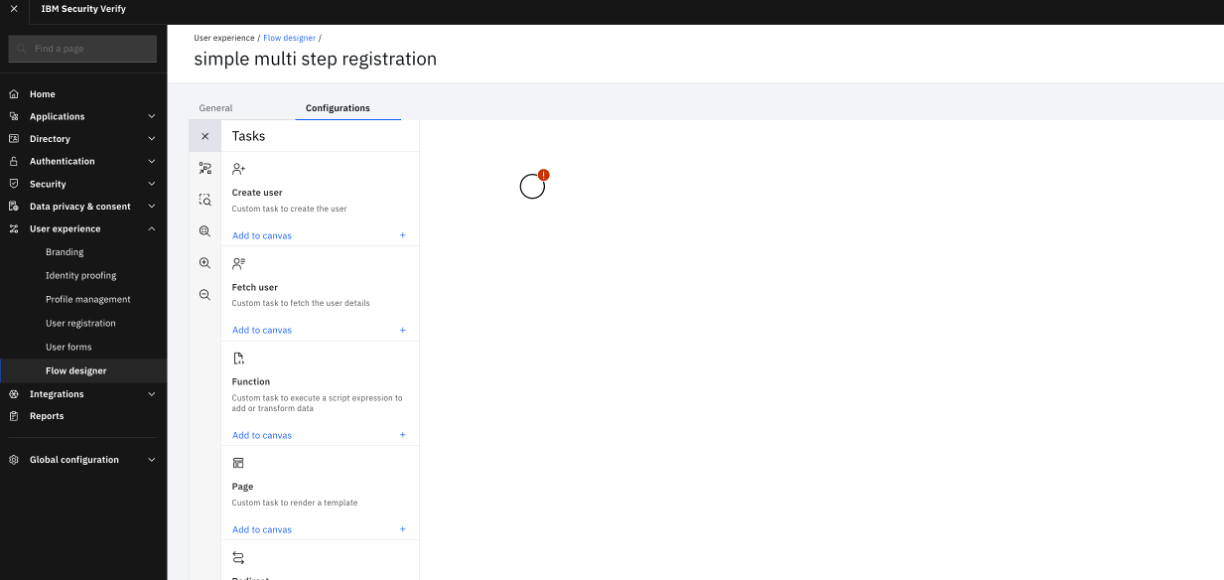
A blank canvas with a circle appears. This is the "Start" node needed to start the flow.
-
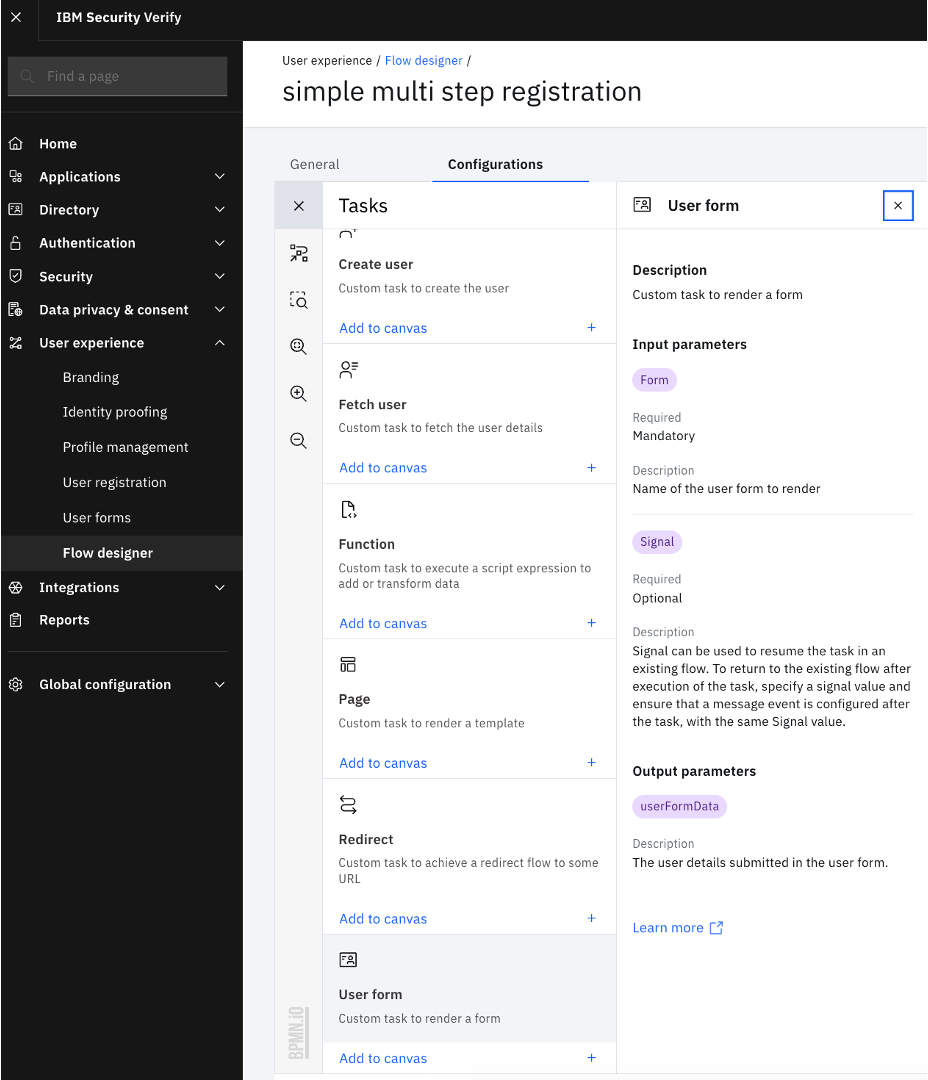
Click the "User form" task.
-
Click "Add to canvas" and exit out of the "User form" side panel.
-
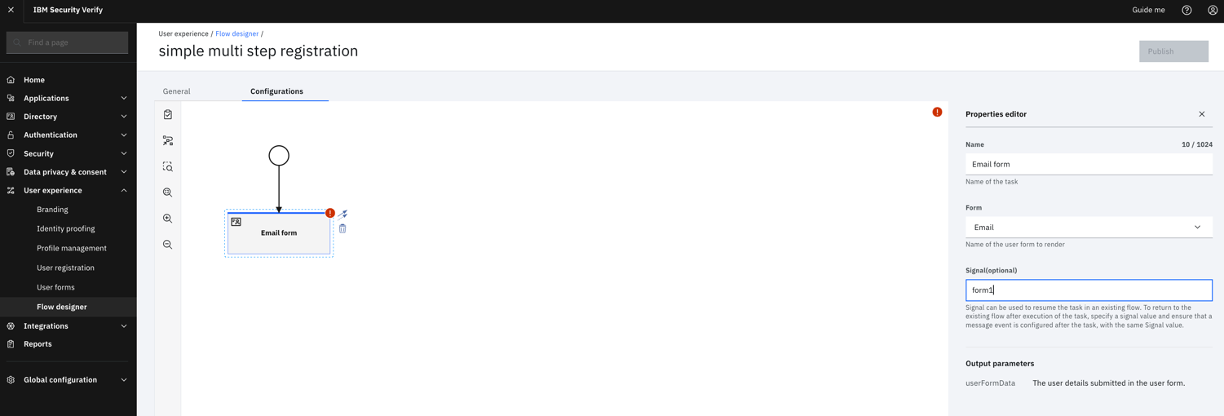
Select the "User form" on the canvas that was added. Name it appropriately and ensure the "Form" is "Email". In the "Signal" section, enter "form1".
-
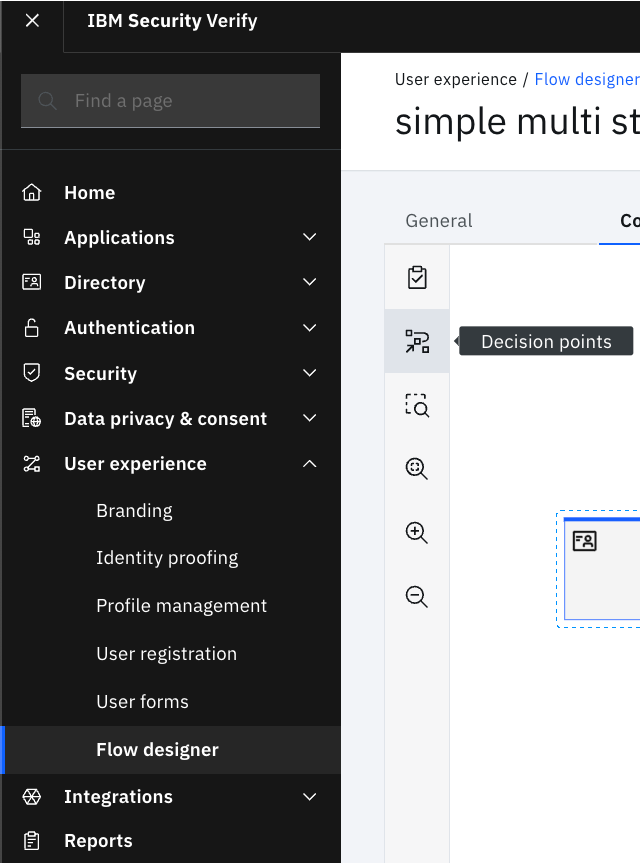
Navigate to "Decision points" to configure the next step of the flow.
-
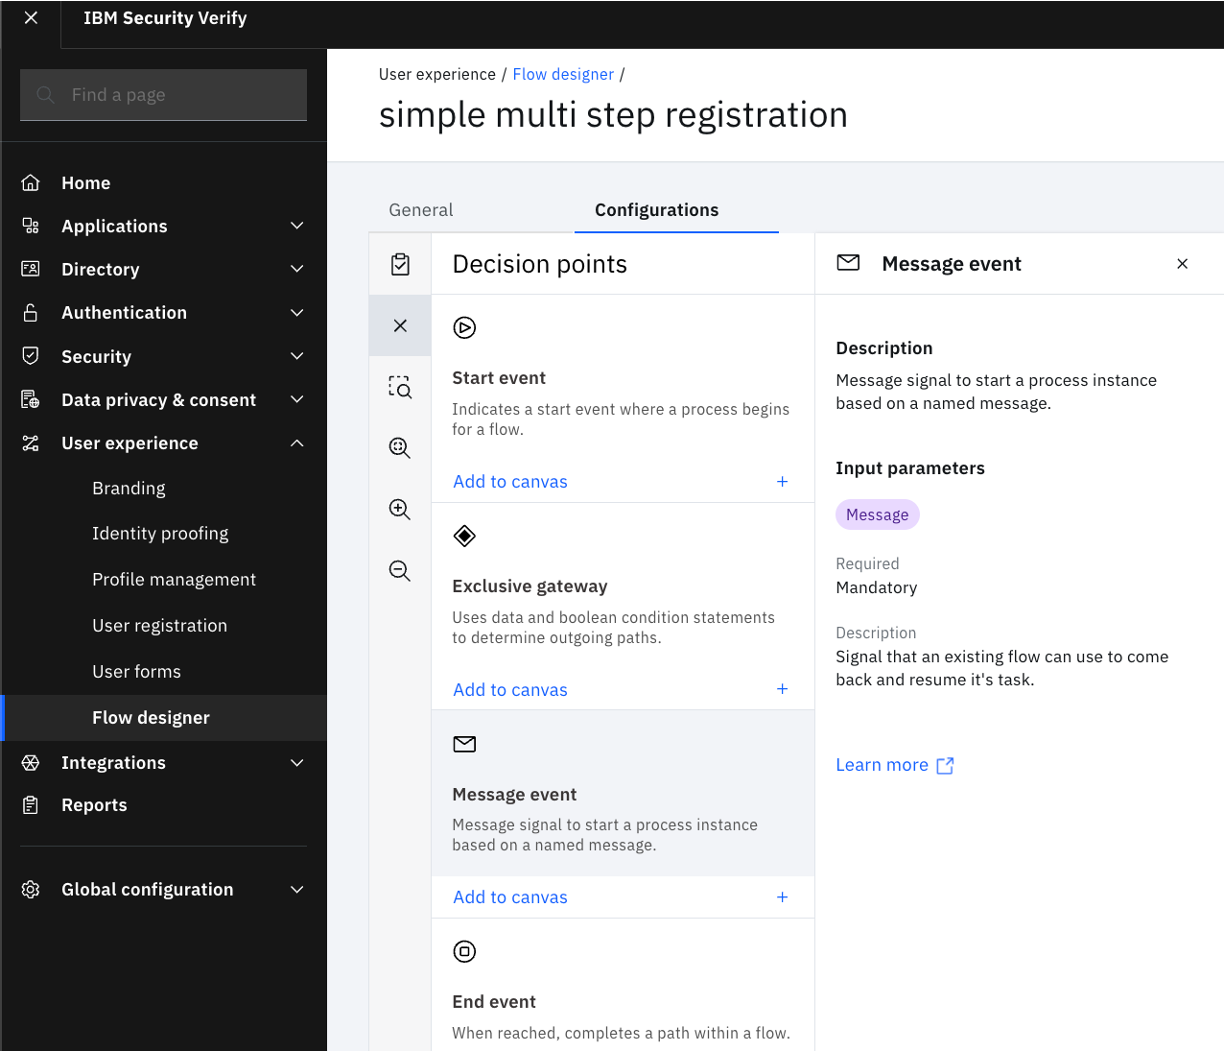
Click "Message event" and "Add to canvas". Exit out of the "Message event" side panel. Note: a Message event is a signal to the flow to move to the next step.
-
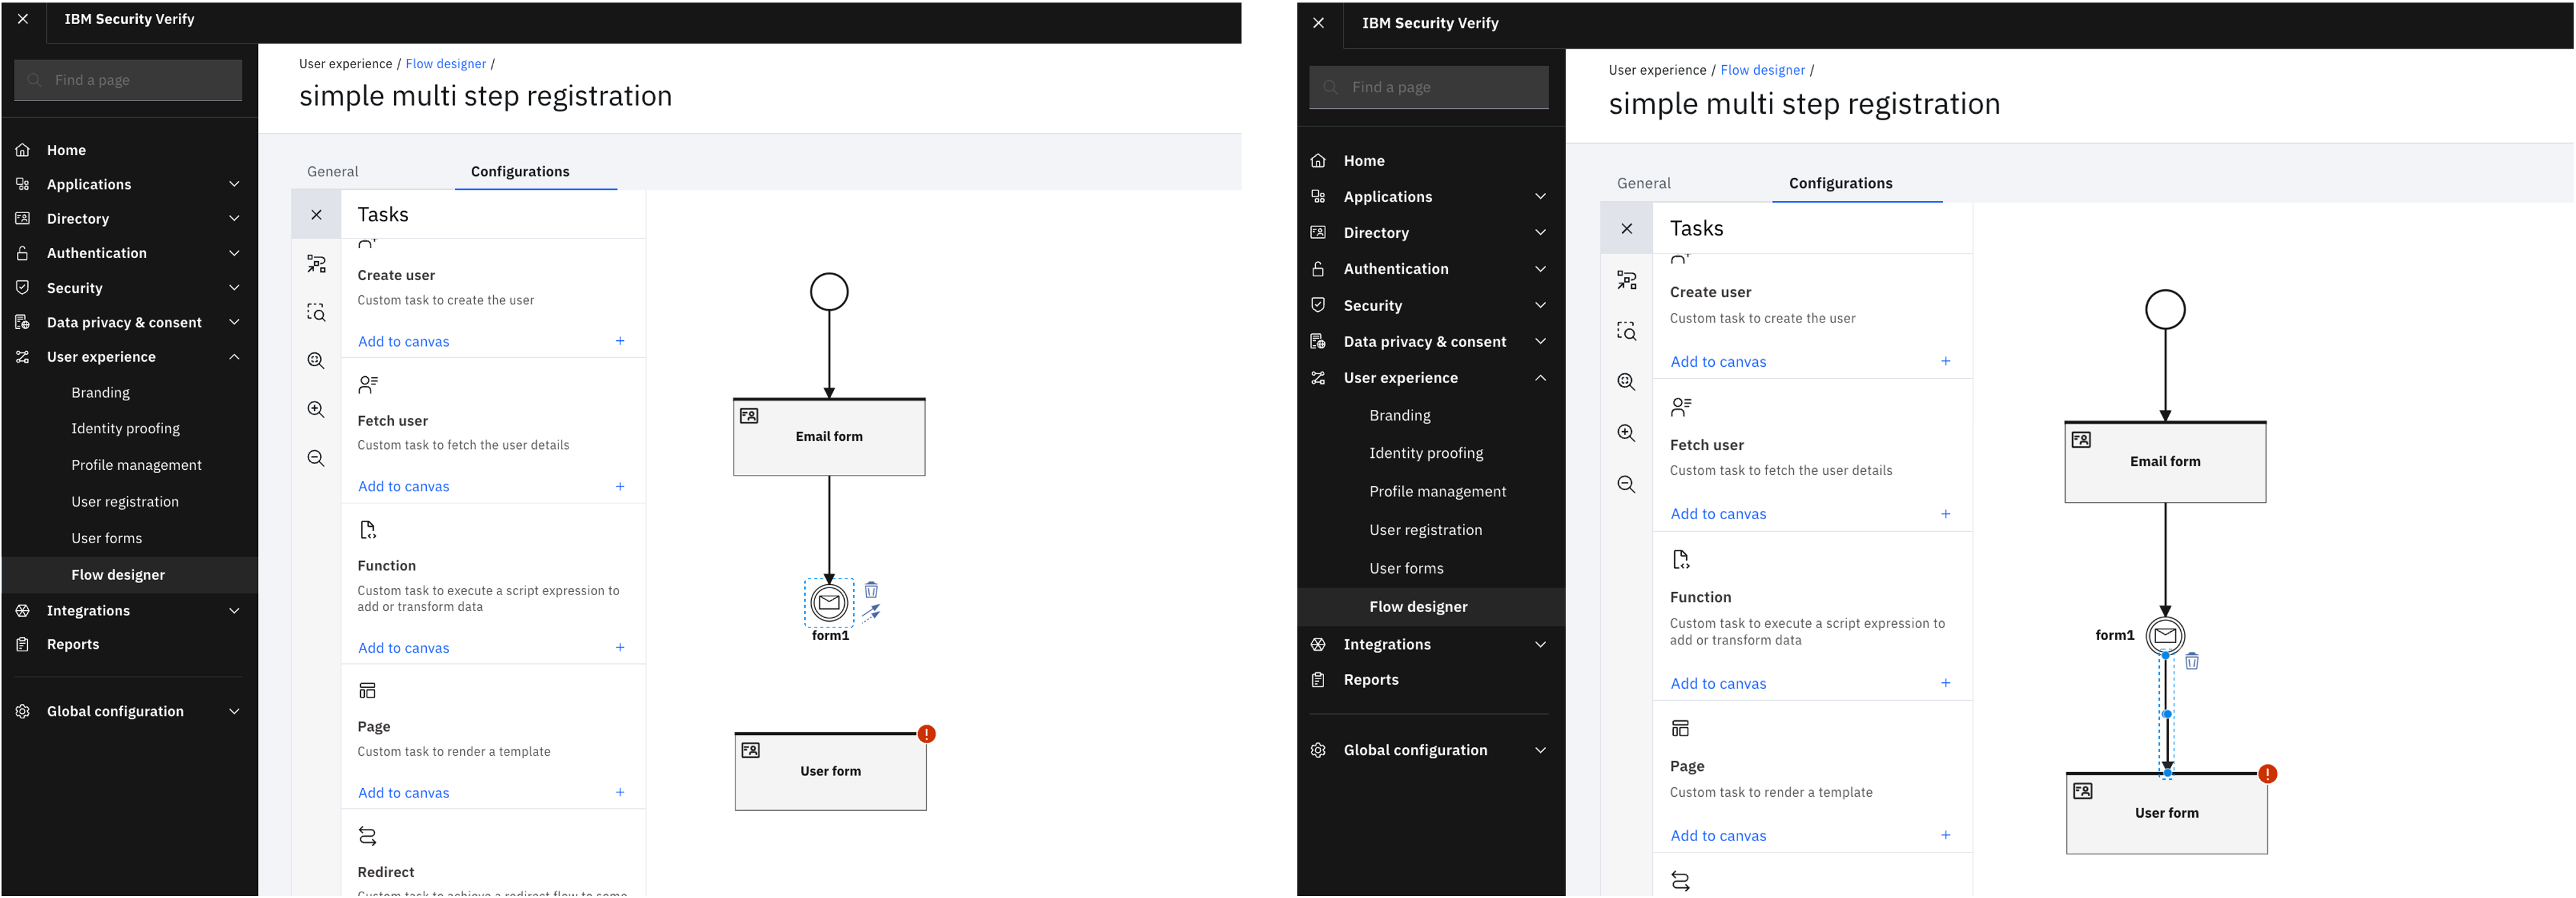
Click the "Email form" node. A blue arrow appears on the top-right of the node. Connect that arrow to the newly added "Message event".

-
Click the "Message event" and enter the message Name and Message. For example, enter "form1" for both. Note: The "Message" text must be same as that entered in step 6 in the "Signal".

-
Navigate to "Tasks" and add a new "User form". This is similar to what was done in step 4.
-
Connect the "form1" Message to the newly added "User form" on the canvas.
-
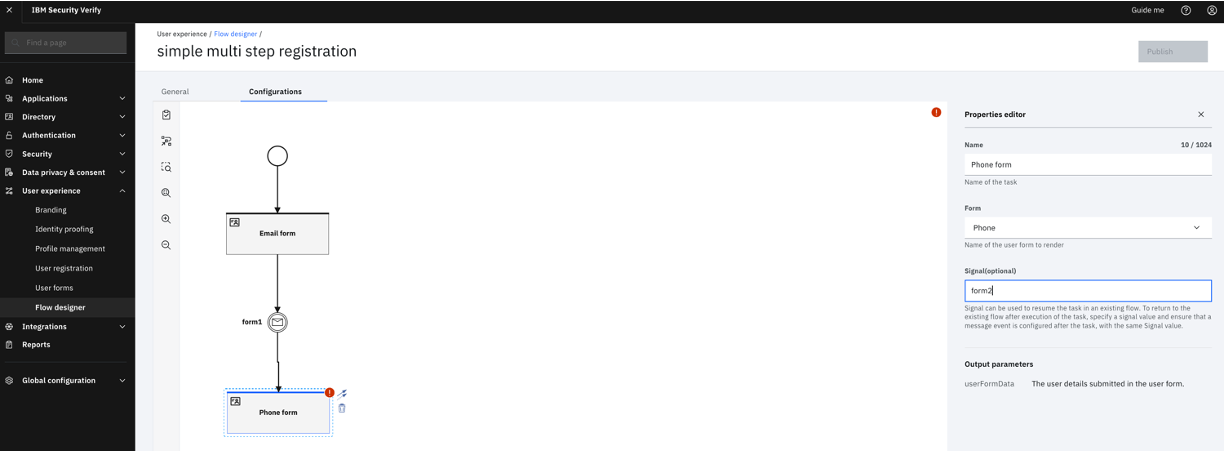
Select the newly added "User form". Name it appropriately and ensure the "Form" is "Phone". In the "Signal" section, enter "form2".
-
Navigate to "Decision points" to add a new "Message event" as described in steps 7 and 8.
-
Click the "Phone form" node. A blue arrow appears on the top-right of the node. Connect that arrow to the newly added "Message event". This is similar to step 9.
-
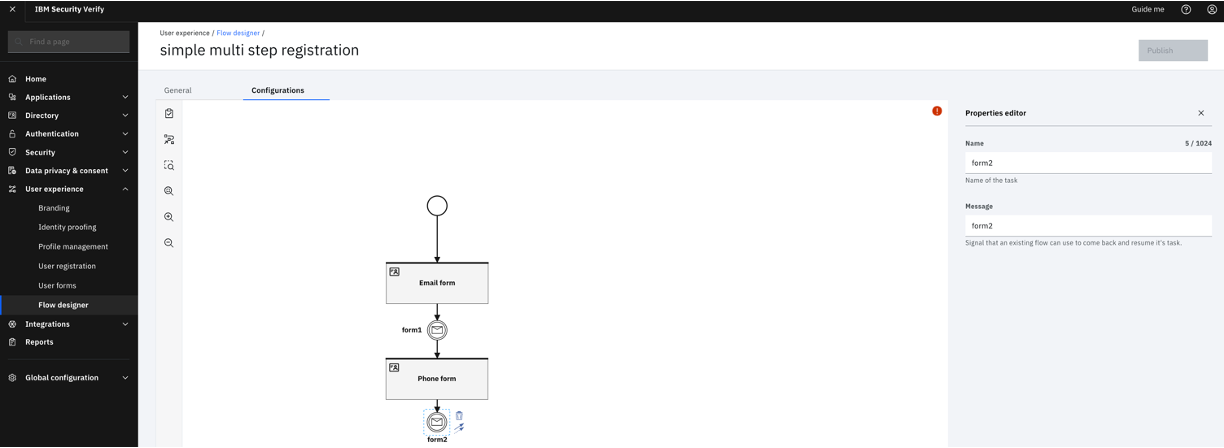
Click the "Message event" and enter the message Name and Message. For example, enter "form2" for both. Note: The "Message" text must be same as that entered in step 13 in the "Signal".
-
Navigate to "Tasks" and add a new "User form". This is similar to what was done in step 4.
-
Connect the "form2" Message to the newly added "User form" on the canvas.
-
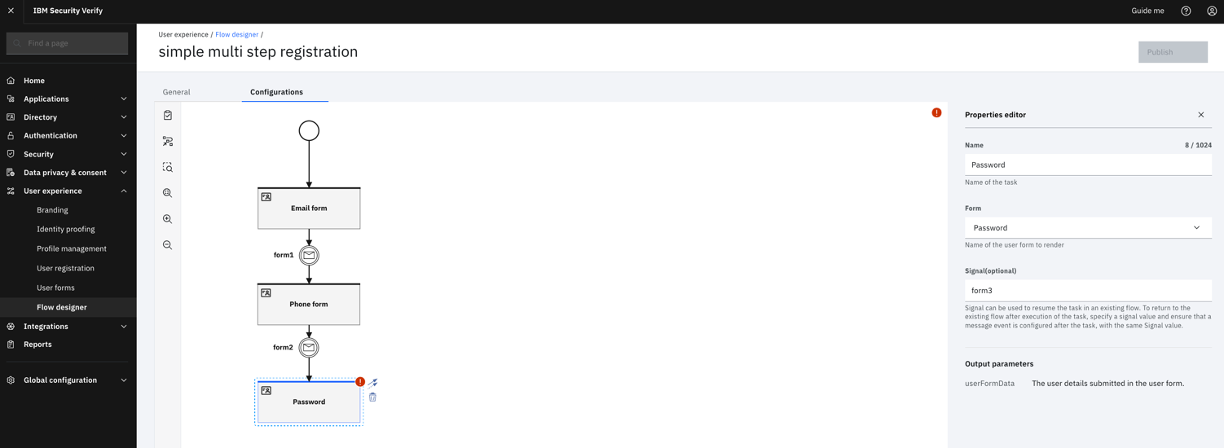
Select the newly added "User form". Name it appropriately and ensure the "Form" is "Password". In the "Signal" section, enter "form3".
-
Navigate to "Decision points" to add a new "Message event" as described in steps 7 and 8.
-
Click the "Phone form" node. A blue arrow appears on the top-right of the node. Connect that arrow to the newly added "Message event". This is similar to step 9.
-
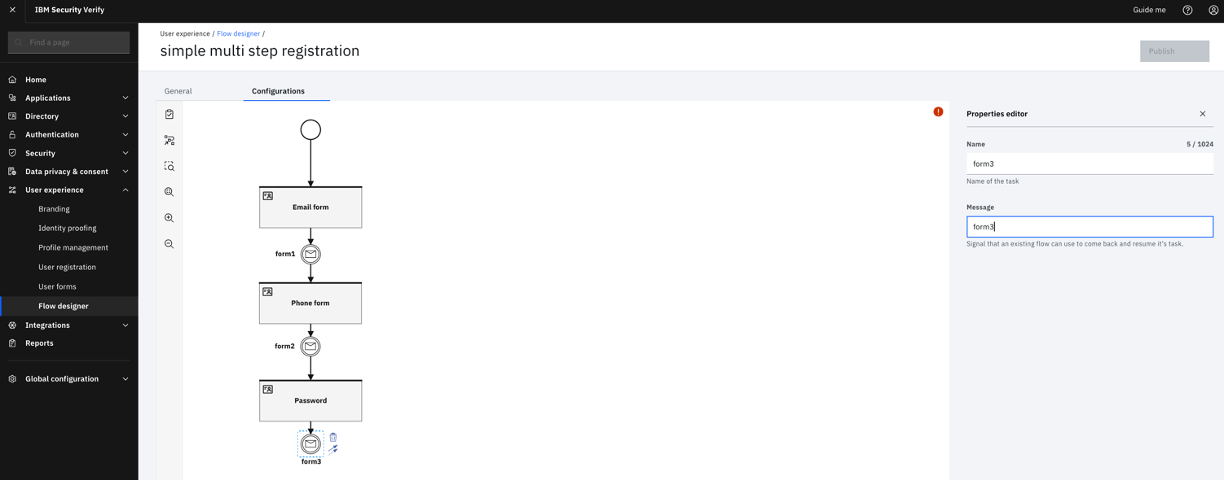
Click the "Message event" and enter the message Name and Message. For example, enter "form3" for both. Note: The "Message" text must be same as that entered in step 19 in the "Signal".
-
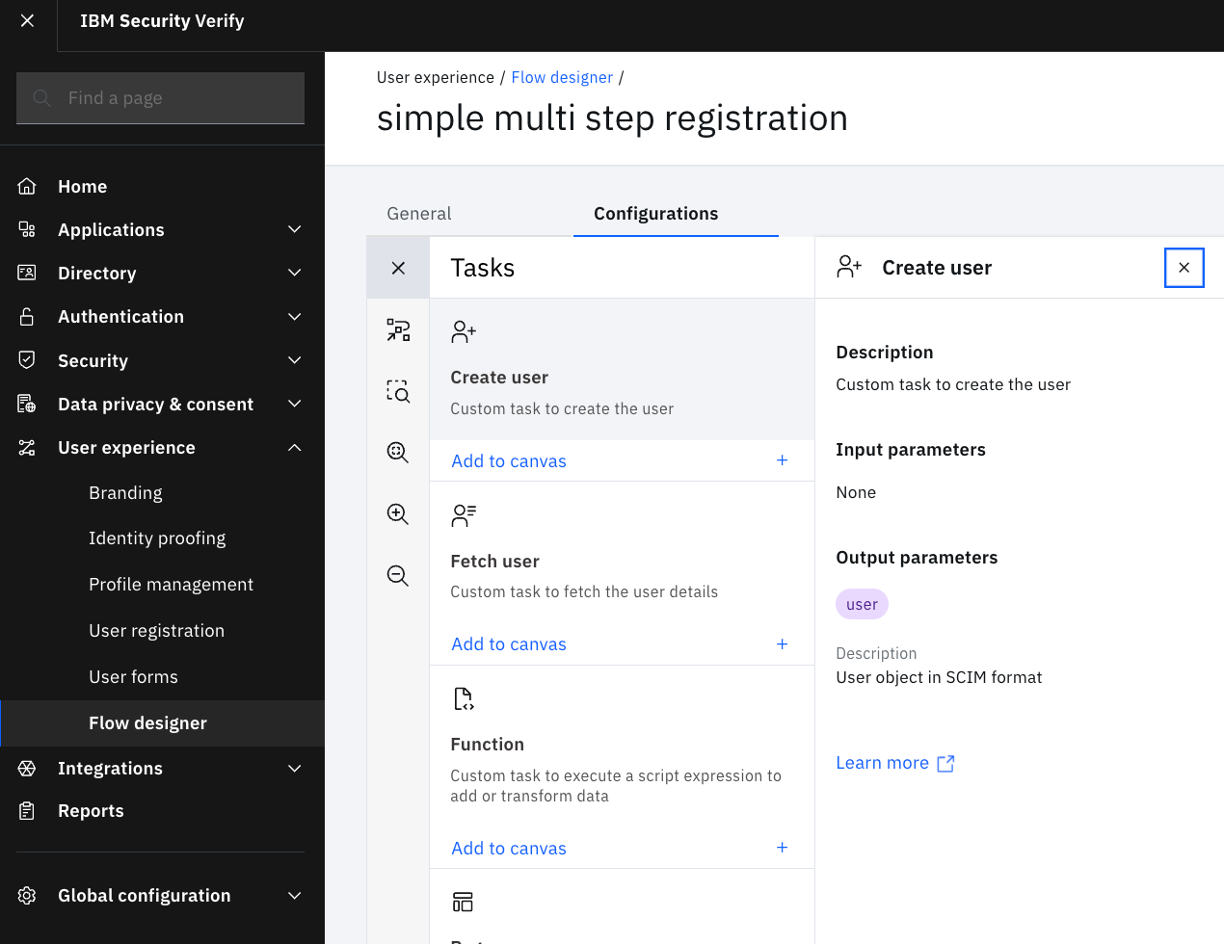
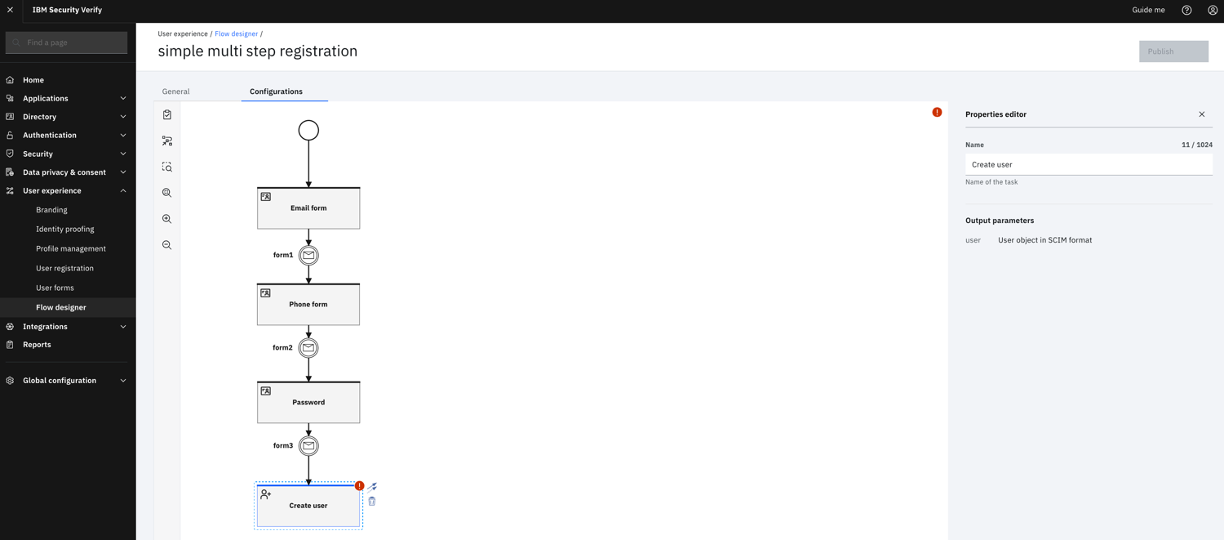
Navigate to "Tasks" and add the "Create user" task to the canvas. This task creates a user in IBM Verify's cloud directory once the registration process is complete.
-
Connect the "form3" Message to the "Create user" task.
-
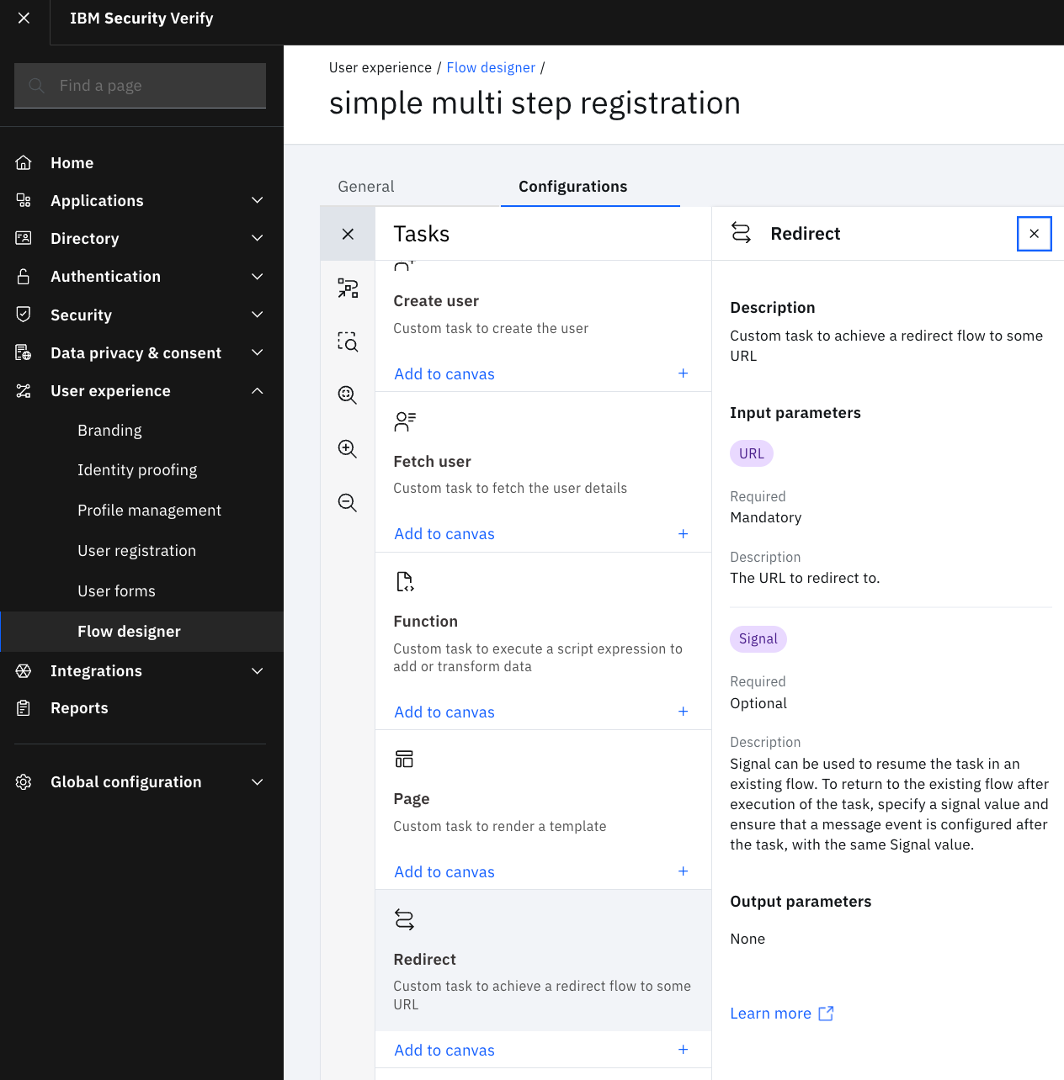
Navigate to "Tasks" and add the "Redirect" task to the canvas. This task redirects the user to login once the account is created.
-
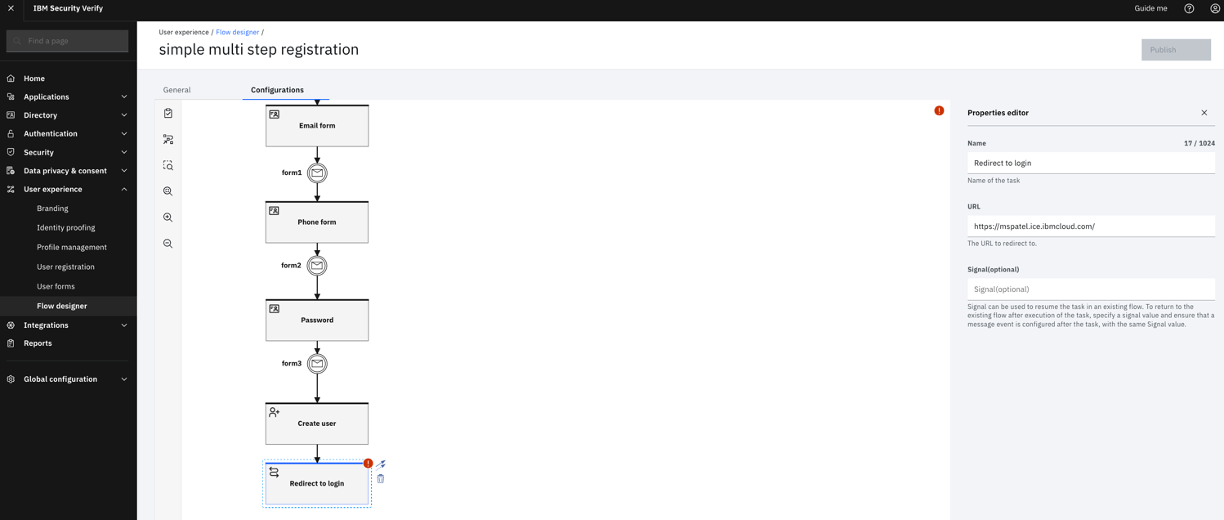
Connect the "Create user" task to the "Redirect" task.
-
Select the newly added "Redirect" task. Name it appropriately. In the URL, enter the Verify tenant URL so that after the user account is created, the user is re-directed to login.
-
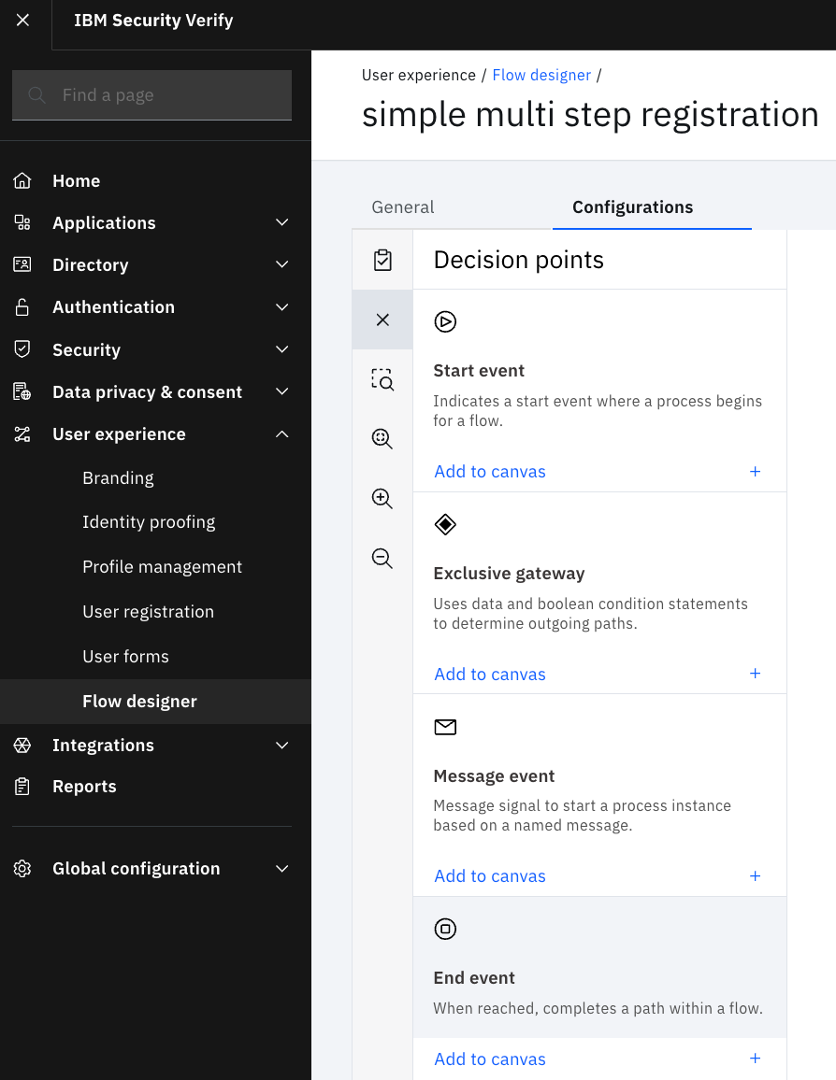
Navigate to "Decision points" to complete the flow by adding the "End event".
-
Connect the "Redirect" task with the "End event" decision point. The flow is now created end to end.
-
Click "Save changes" and "Publish".
-
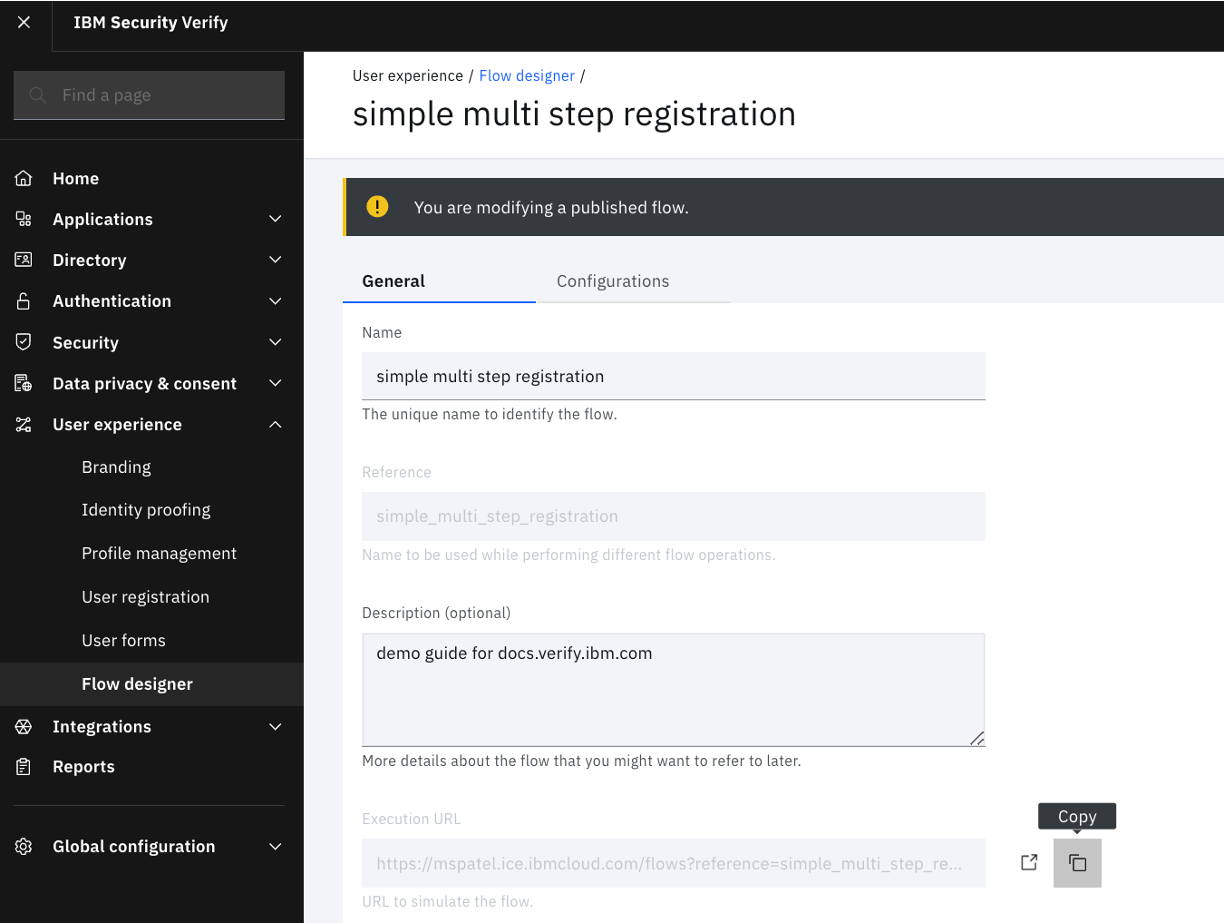
Navigate to "General" tab within "Flow designer" and copy the "Execution URL". The "Execution URL" triggers the multi-step user registration flow.
-
Paste the "Execution URL" in an incognito browser tab. Use a personal email and proceed to complete the flow.
Additional risk and fraud orchestration
To add additional risk and fraud orchestration many things can be set on the tenant. For example, purposely two things can be easily added.
- Enable password intelligence to ensure users that create accounts do not use common, phished, or stolen credentials.
- Enable MFA on the login to ensure users are required to complete an MFA on first login. An access policy can be created and applied.
- Recaptcha for human verification can be configured in a user form.
The wrap
This flow describes how you can easily create a multi-step user registration journey using User forms and Flow designer. This end to end creation of the user journey required no coding and was as simple as dragging, defining, and dropping the appropriate artifacts within the IBM Verify platform.
Updated 7 months ago
