Orchestrating identity modernization using IBM Verify
Orchestrating identity modernization using IBM Verify
Introduction
An organisation needs to manage and transform their identities and user repositories. The identities can be in an on-premises user repository or Cloud.
Here are the main two use cases:
-
Migrating identities from on-premises to IBM Verify's Cloud Directory starts the organisations cloud journey and refrains their efforts in hardware maintenance and skills for certain user repositories like LDAP or AD.
-
Migrate the user repository to a different vendor example – Ping Identity or Okta.
The article demonstrates the configuration steps that are needed to migrate users from LDAP or AD to IBM Verify and to migrate the LDAP or AD users to a 3rd party identity provider.
Migration of users from LDAP/AD to IBM Verify
Managing a user repository requires time and skills to provide a continuous maintenance and support.
The organizations need a solution to reduce the in-house cost incurred in repository management and rather focus on the actual business aspect of their applications.
IBM Verify has its own user repository known as Cloud Directory, which provides a seamless migration path to move users from an on-premises directory to Cloud Directory.
Prerequisite:
Configuration on IBM Verify side:
-
Login to the Admin console
-
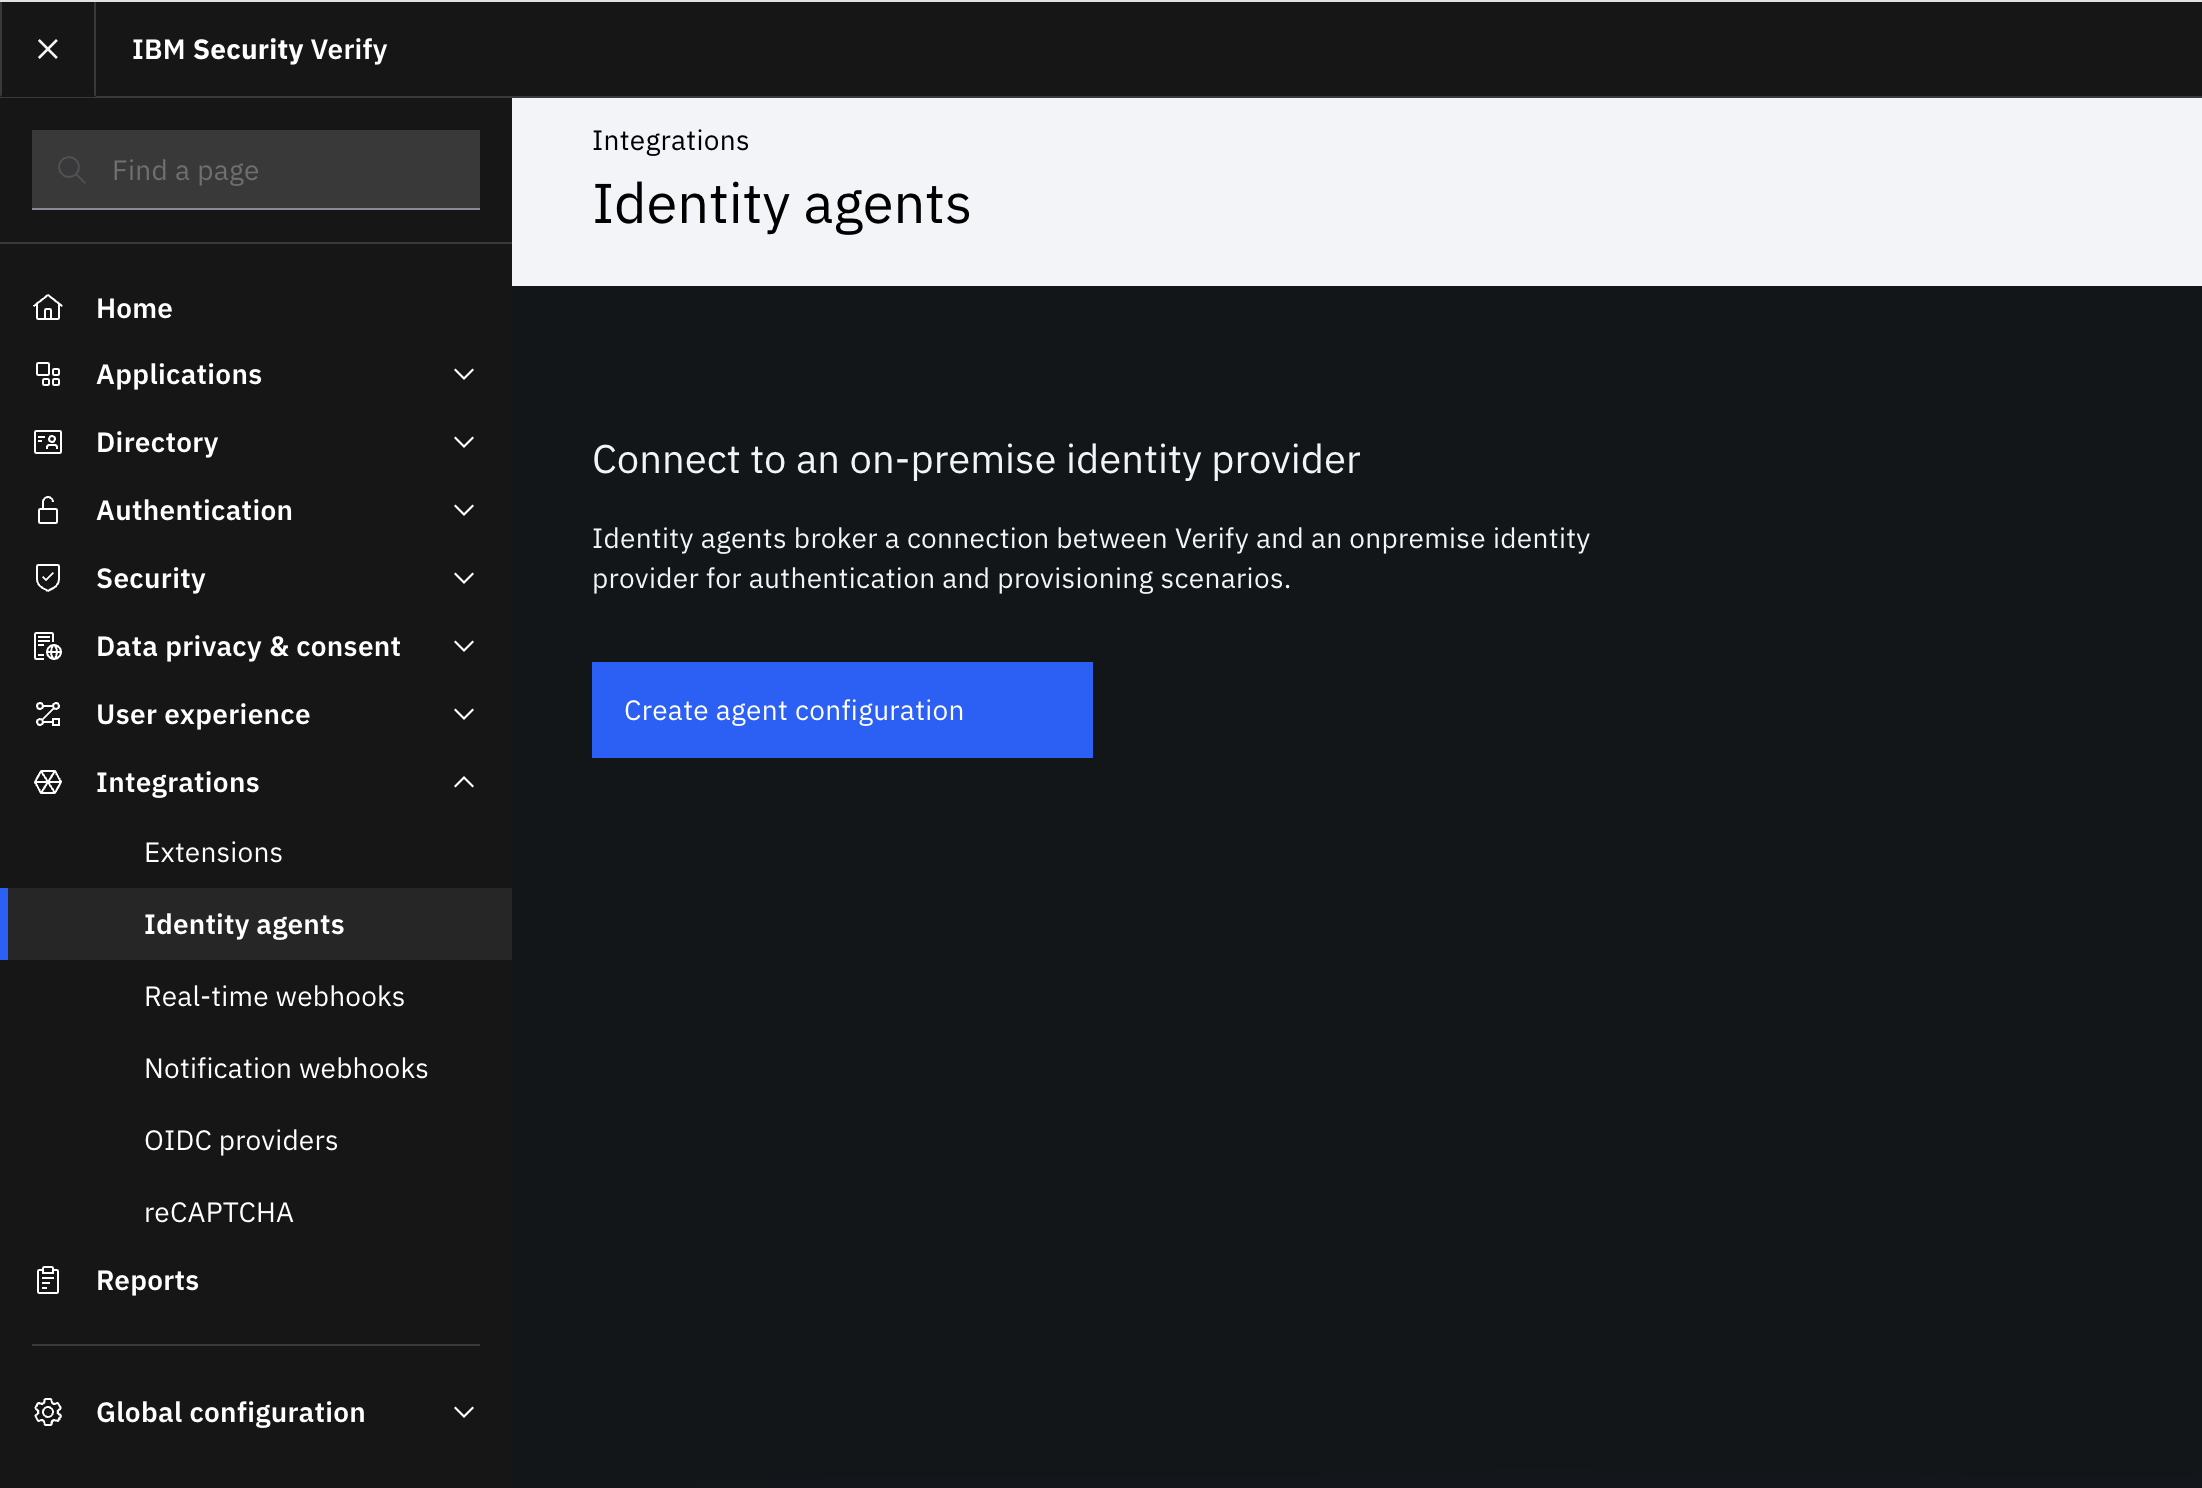
Go to Integrations > Identity agents.
-
Select Create agent configuration.
-
Select Authentication as the purpose and select the LDAP tile.
Click Next.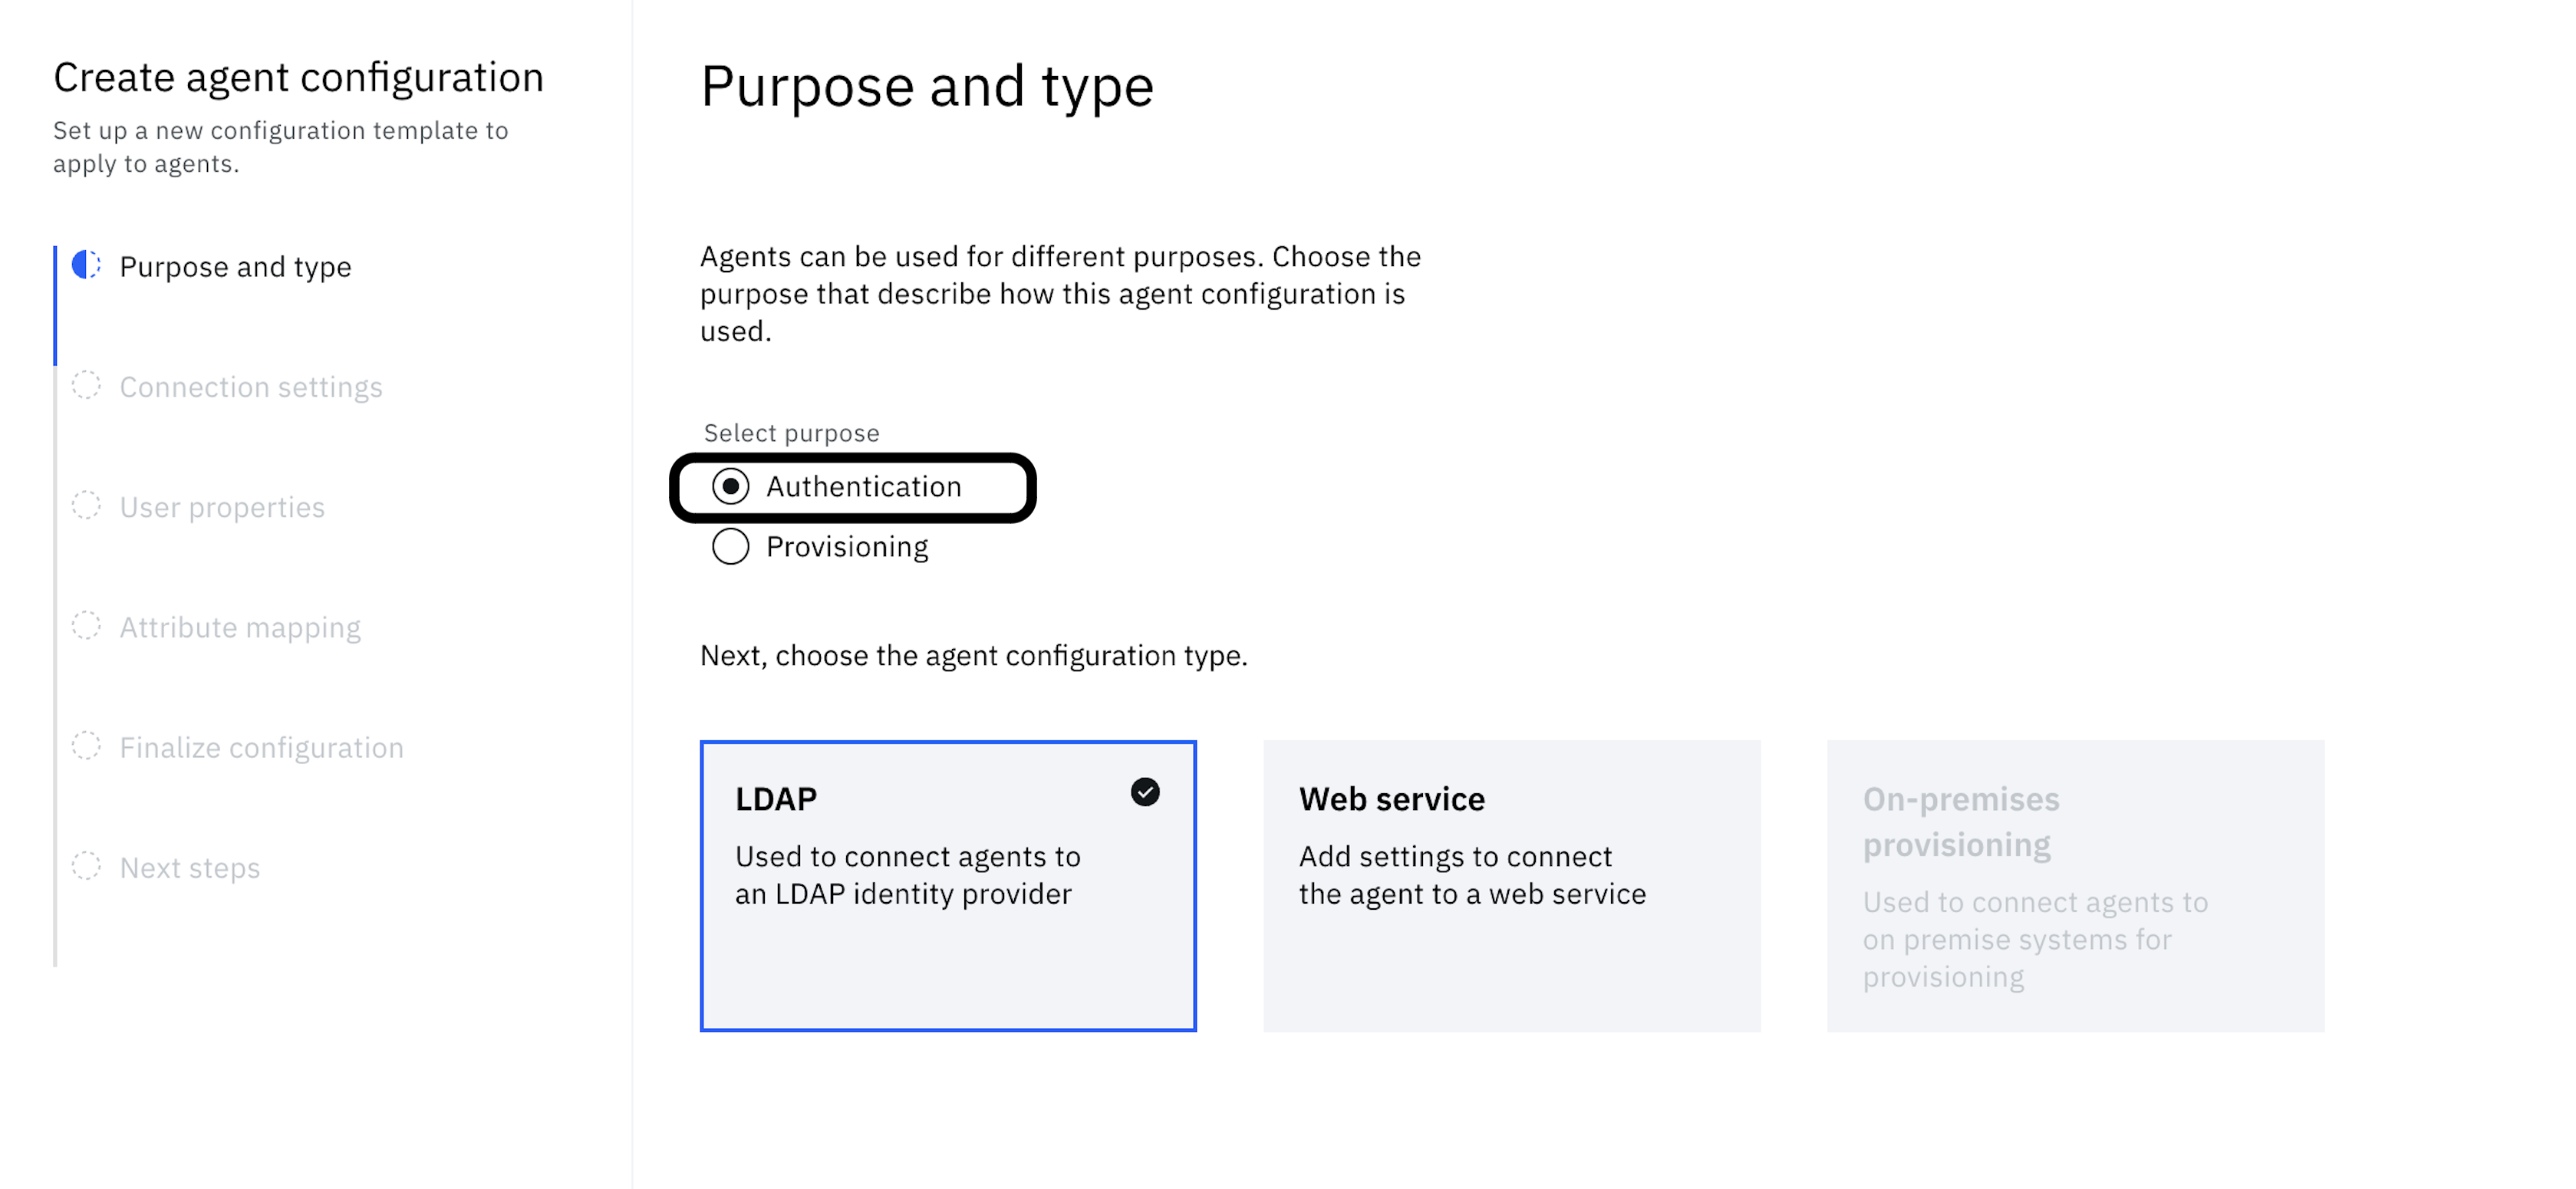
-
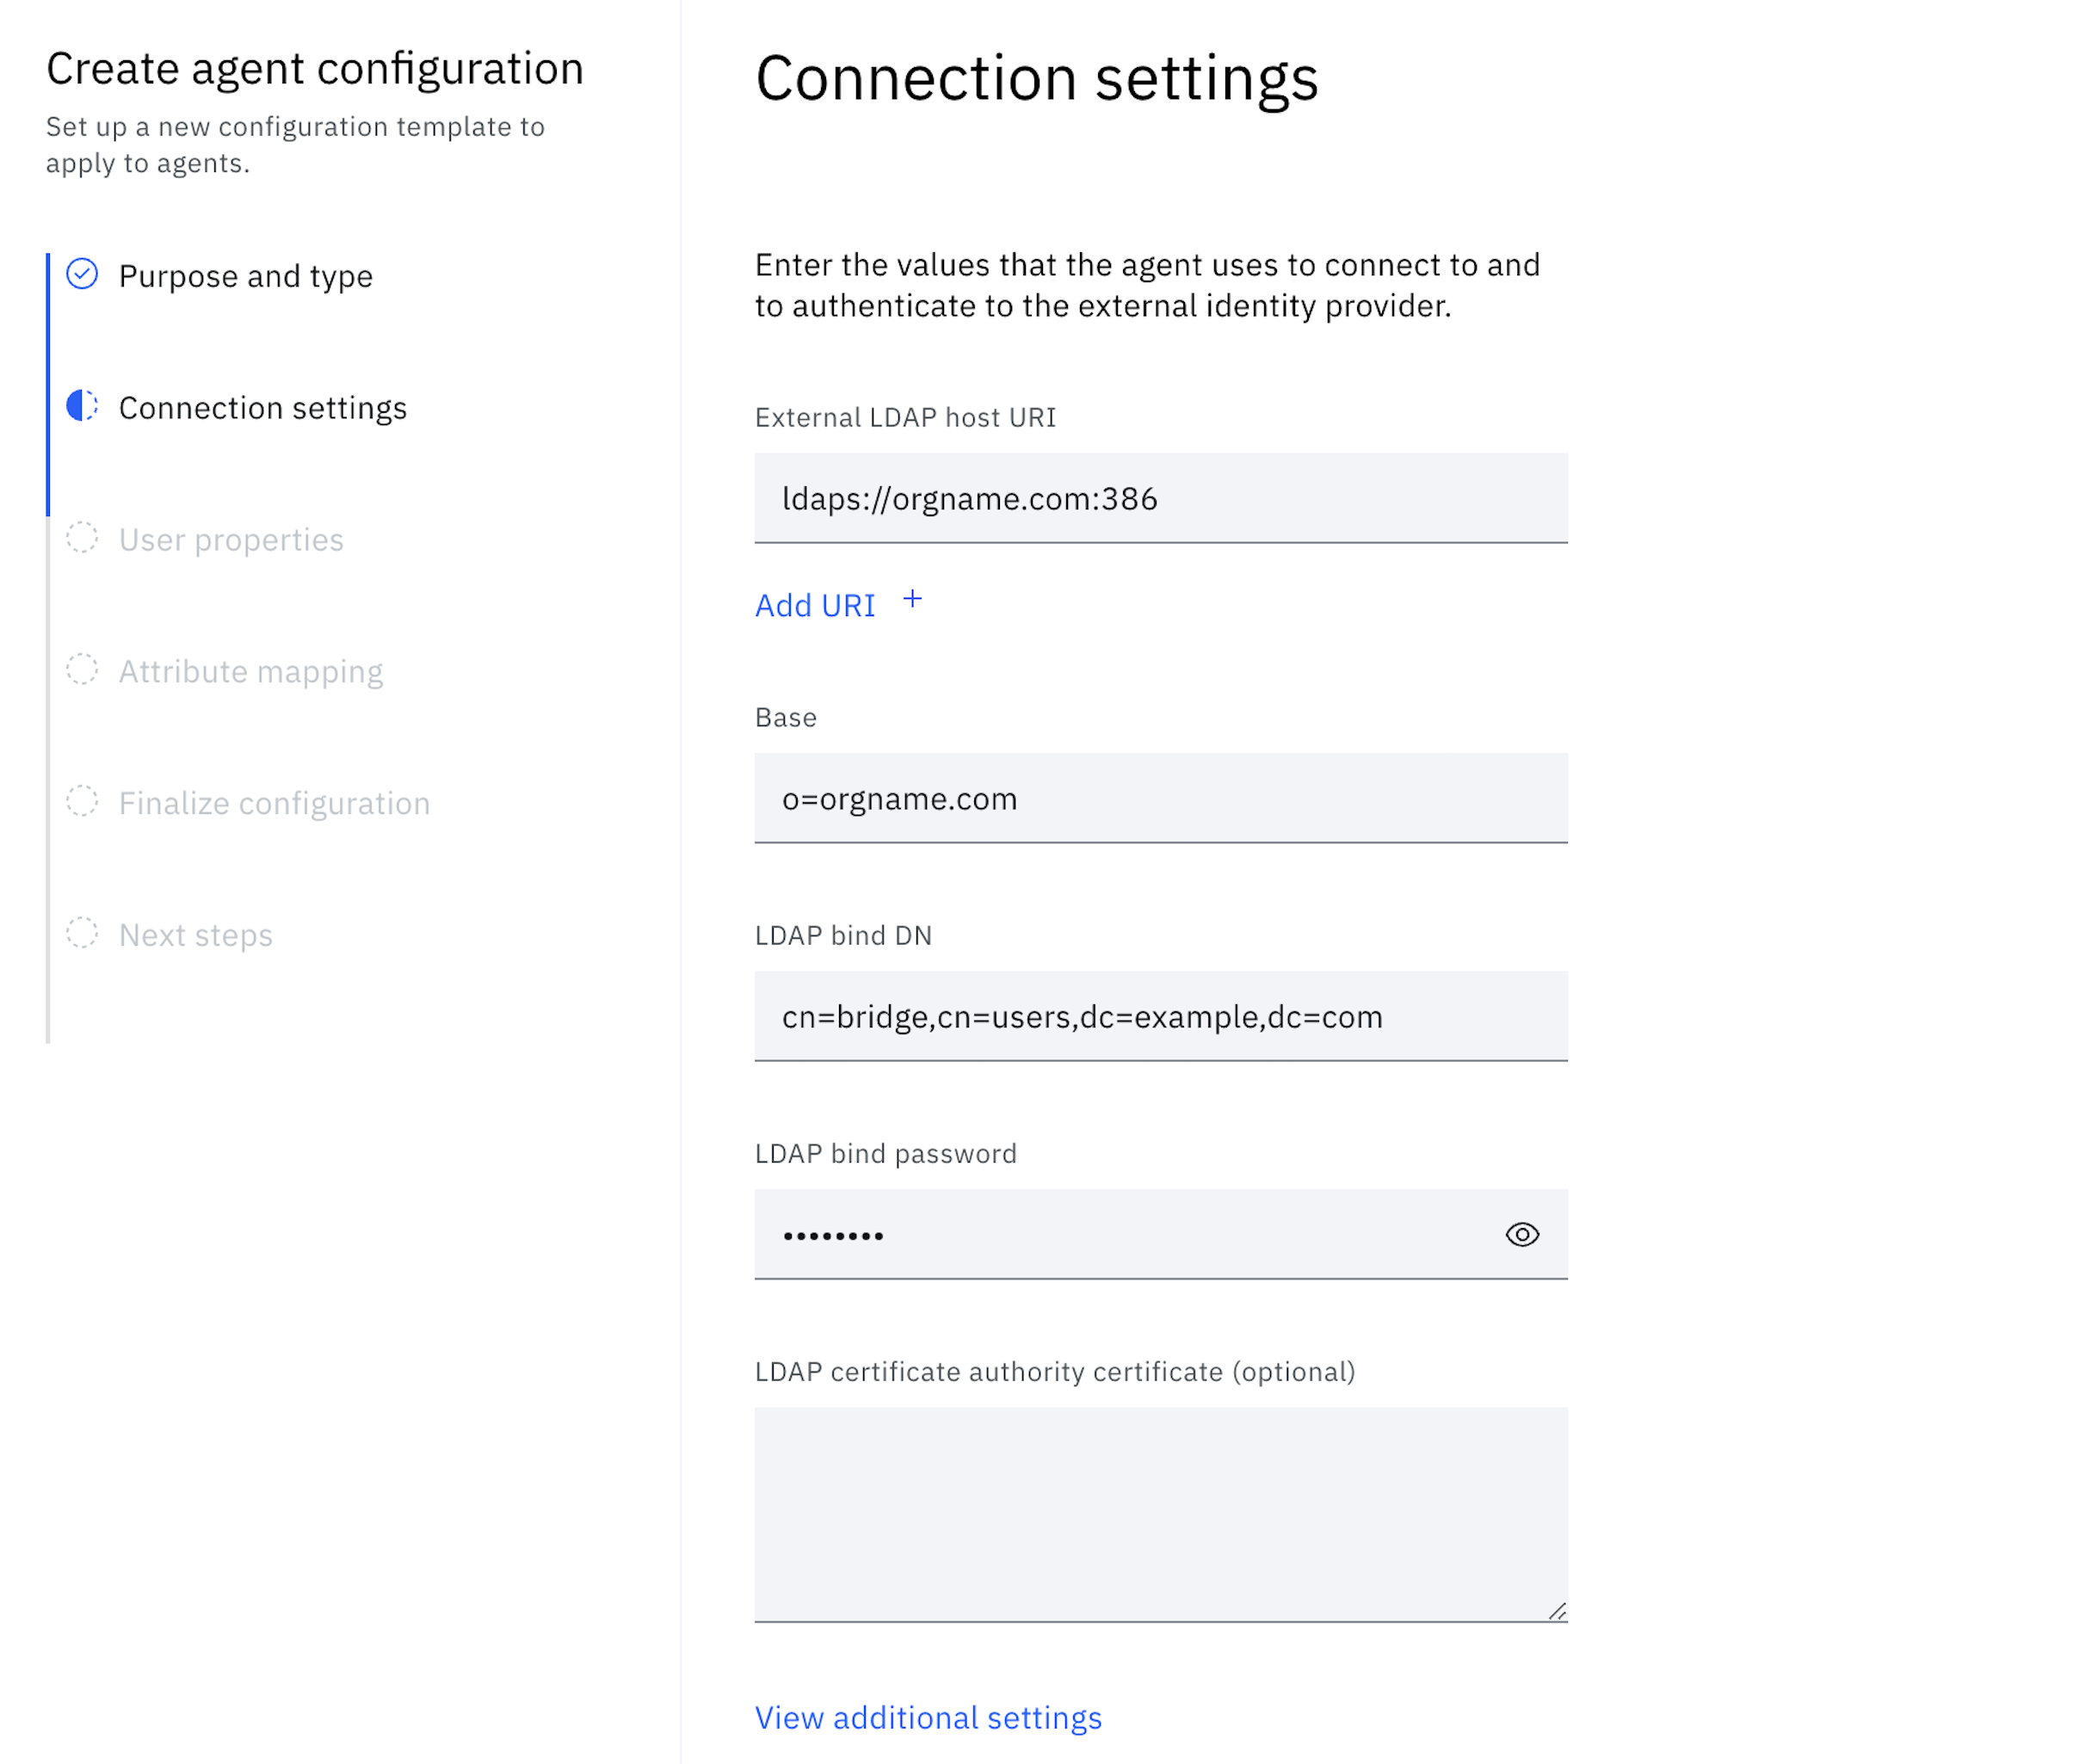
Under Connection settings, provide the LDAP connection details.
-
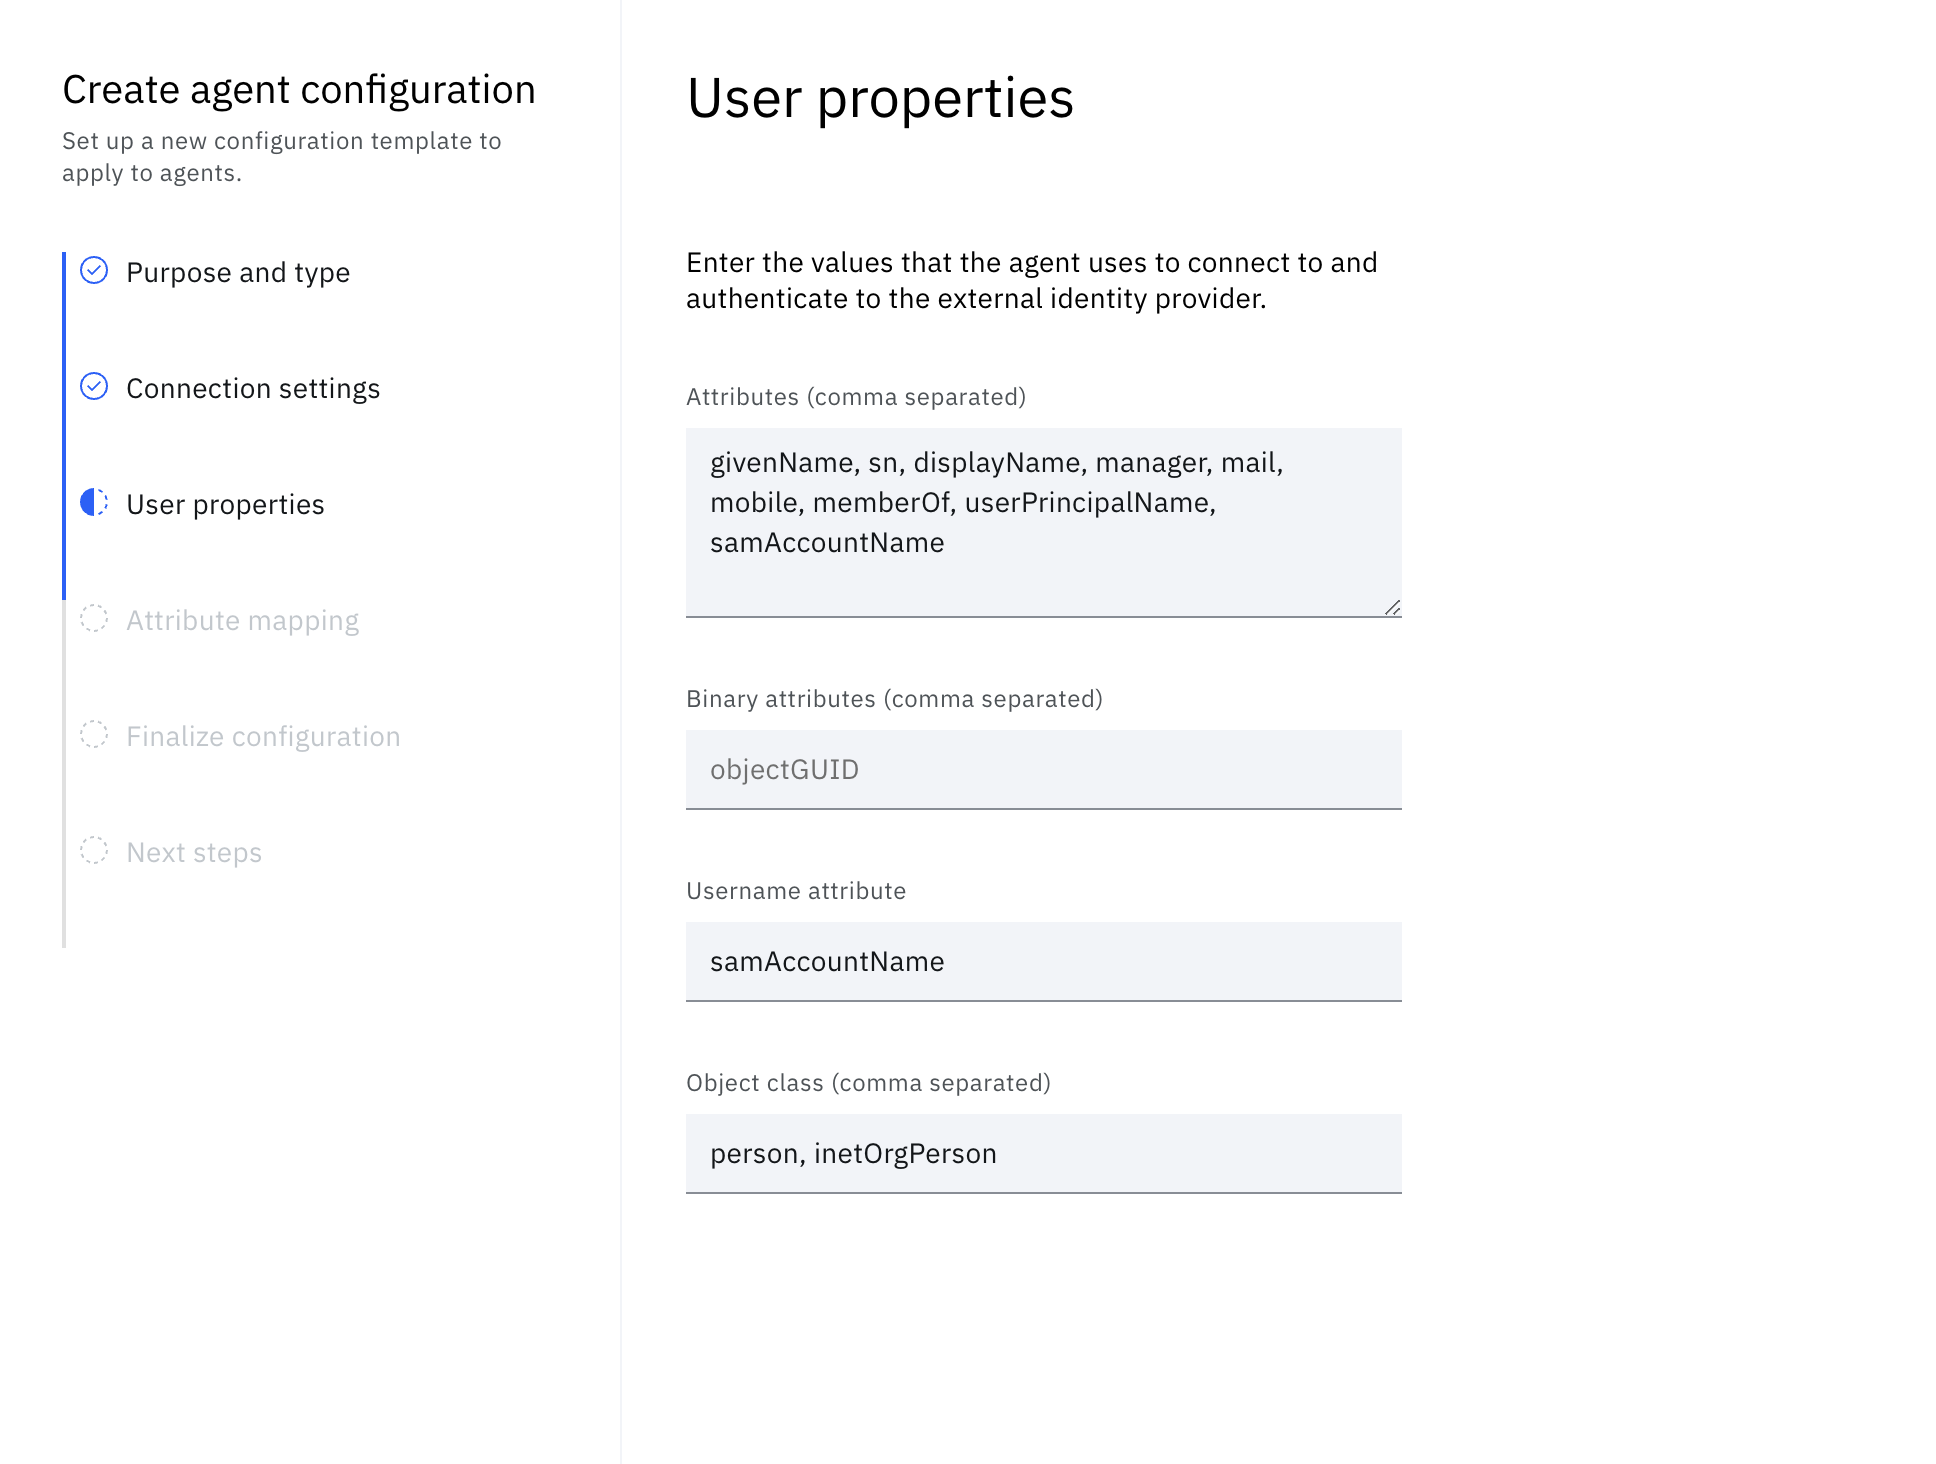
Under User properties, enter the user attributes that are defined user properties and returned from a successful password verification operation.
-
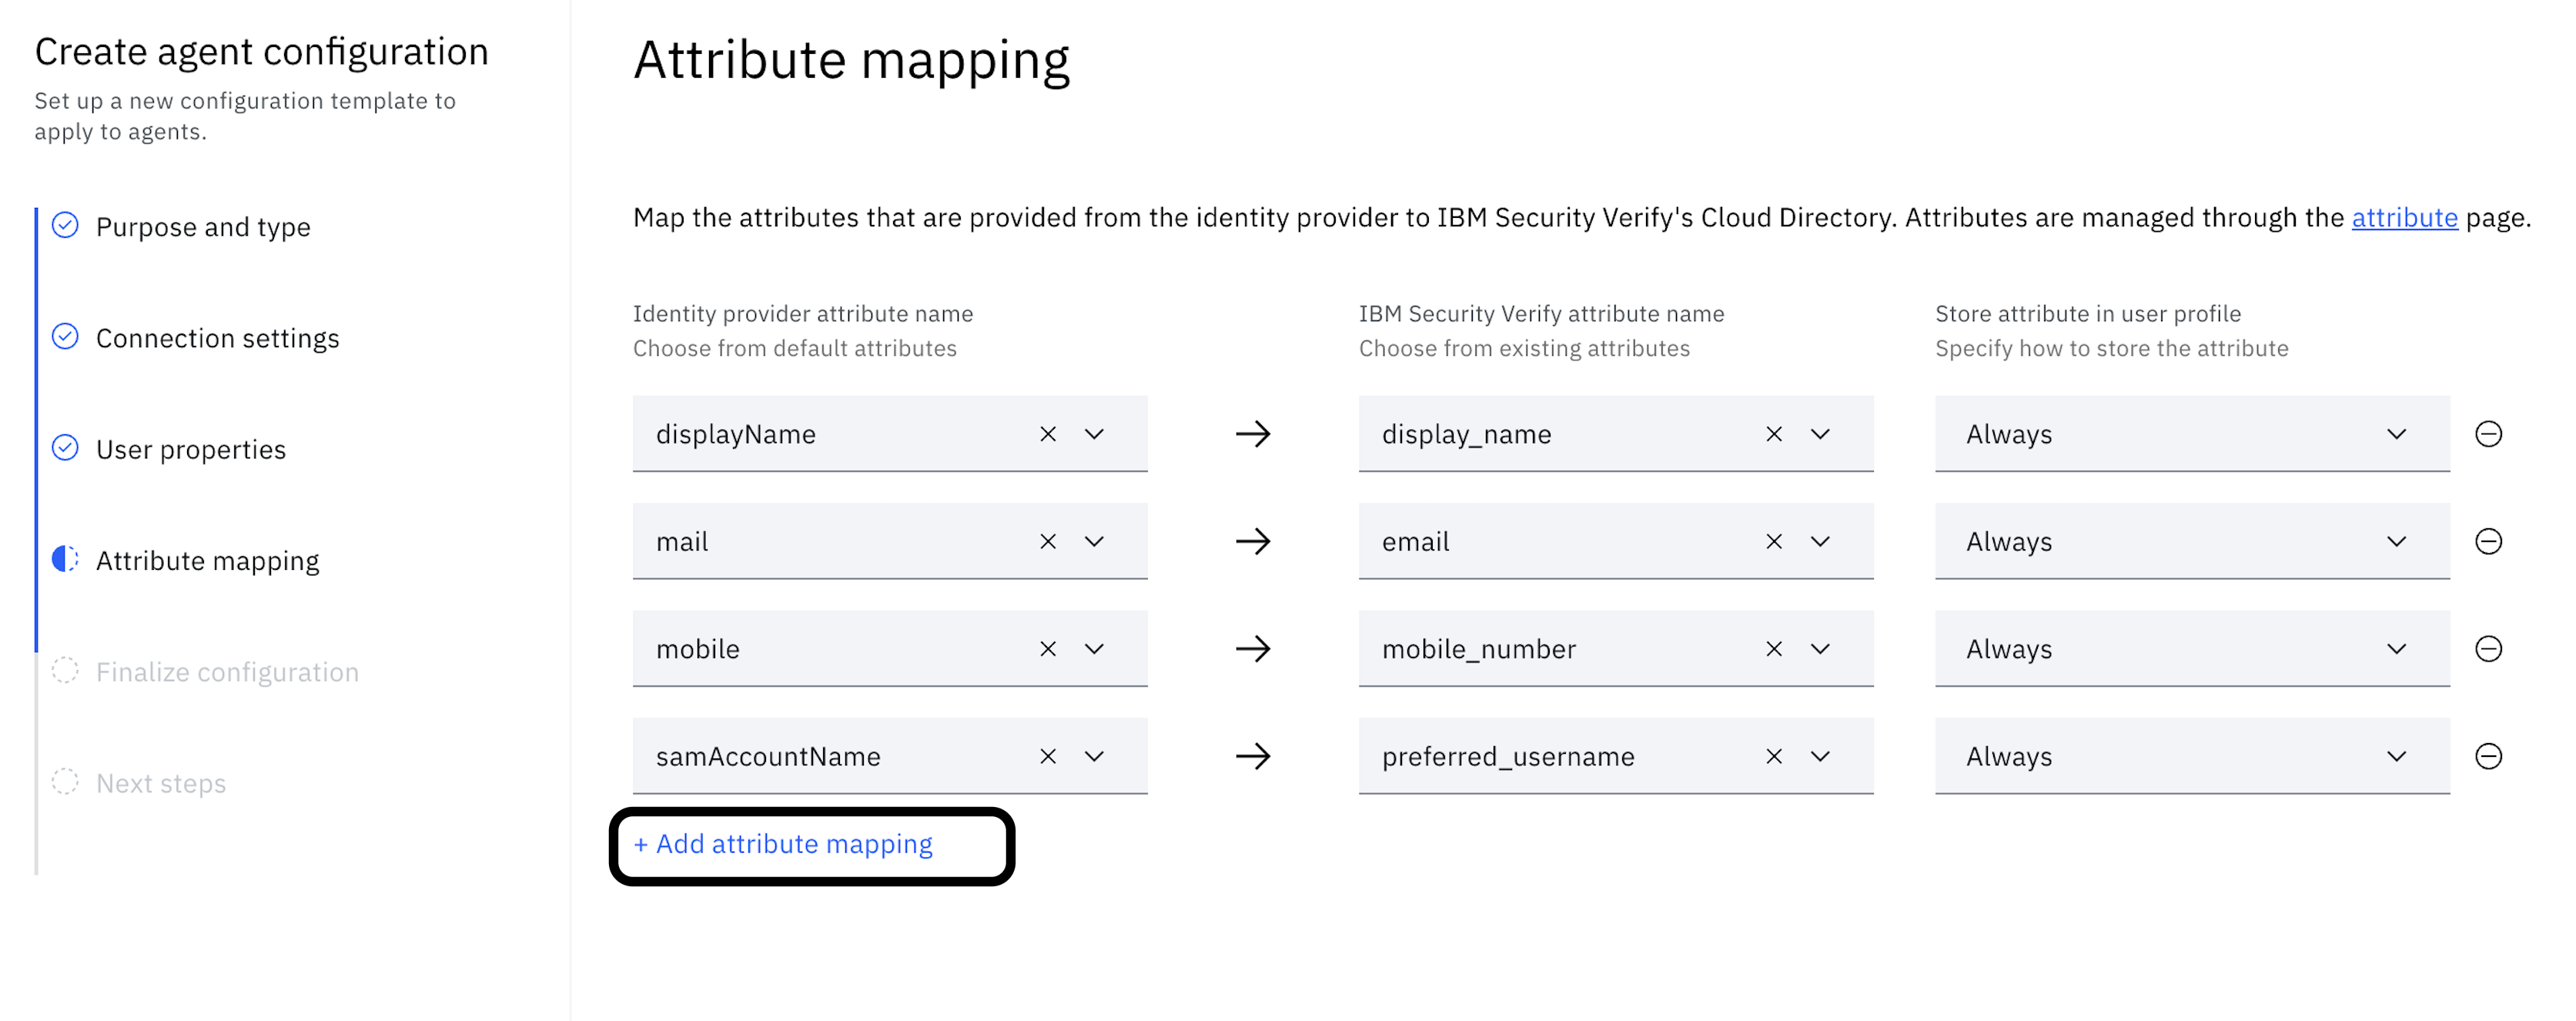
Under Attribute mapping, map the identity provider attributes from the identity provider to the Verify Cloud Directory attributes.
-
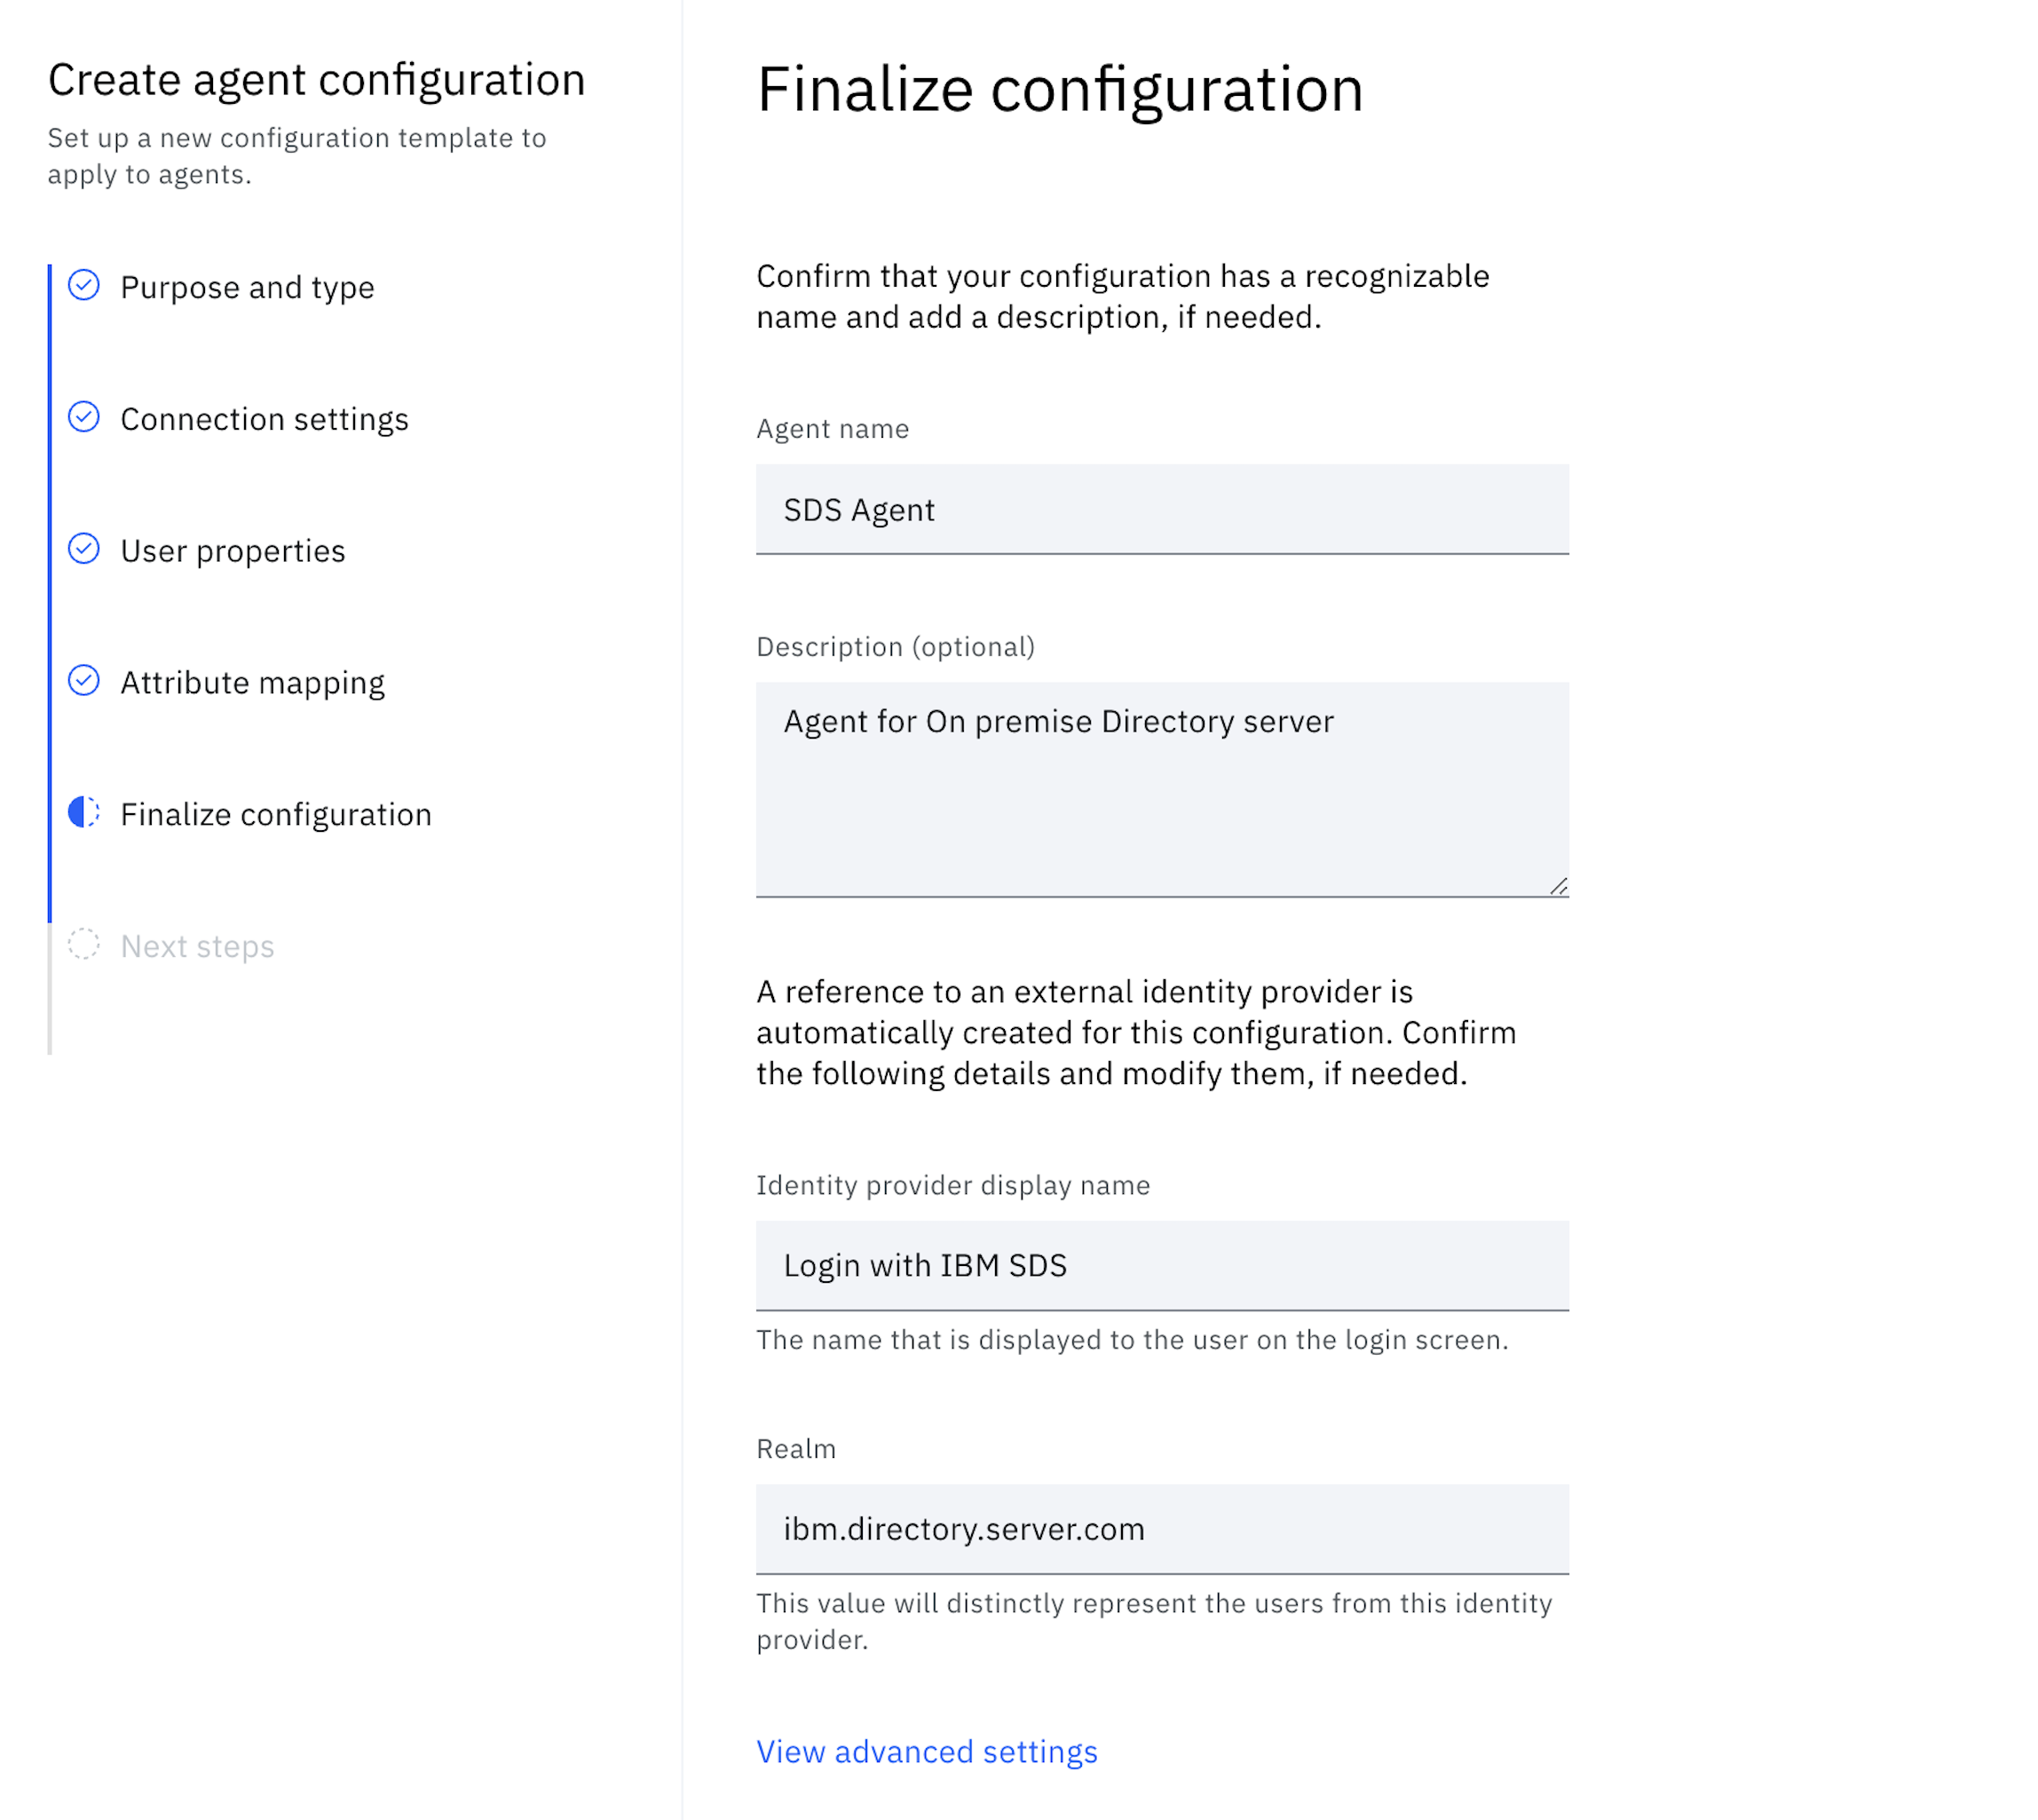
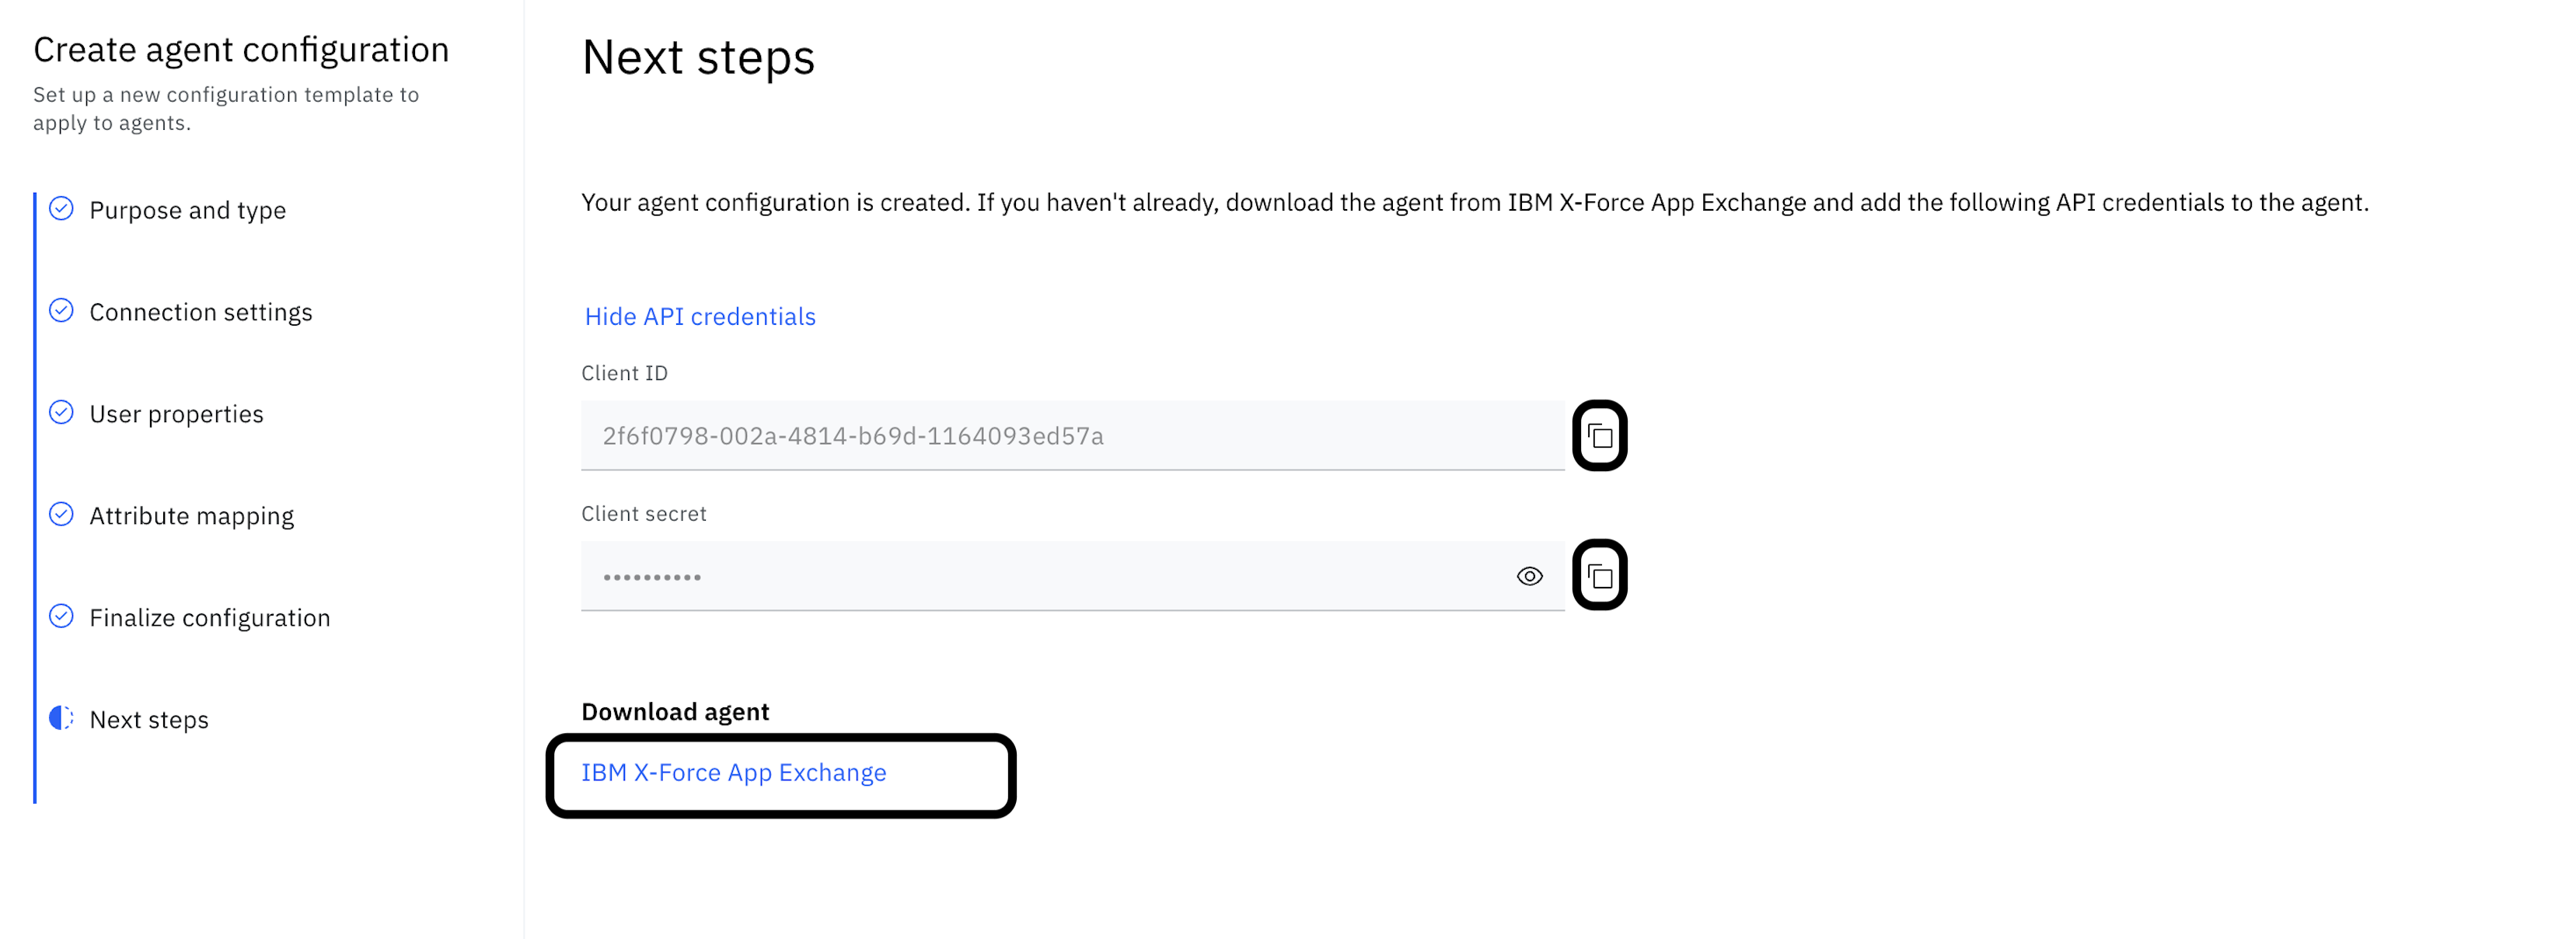
In the Next steps section, the following actions need to be taken.
-
Select View API credentials and use the copy to clipboard icon to copy and store the Client ID and Client secret.
-
. Download the bridge agent from the IBM Container Repository (ICR). Refer to Installing and configuring the Verify Bridge on Docker for further details.
-
-
The configuration is added to Identity agents and the identity provider is listed in Authentication > Identity providers tab.
-
Now, lets enable user migration for newly created Identity provider.
-
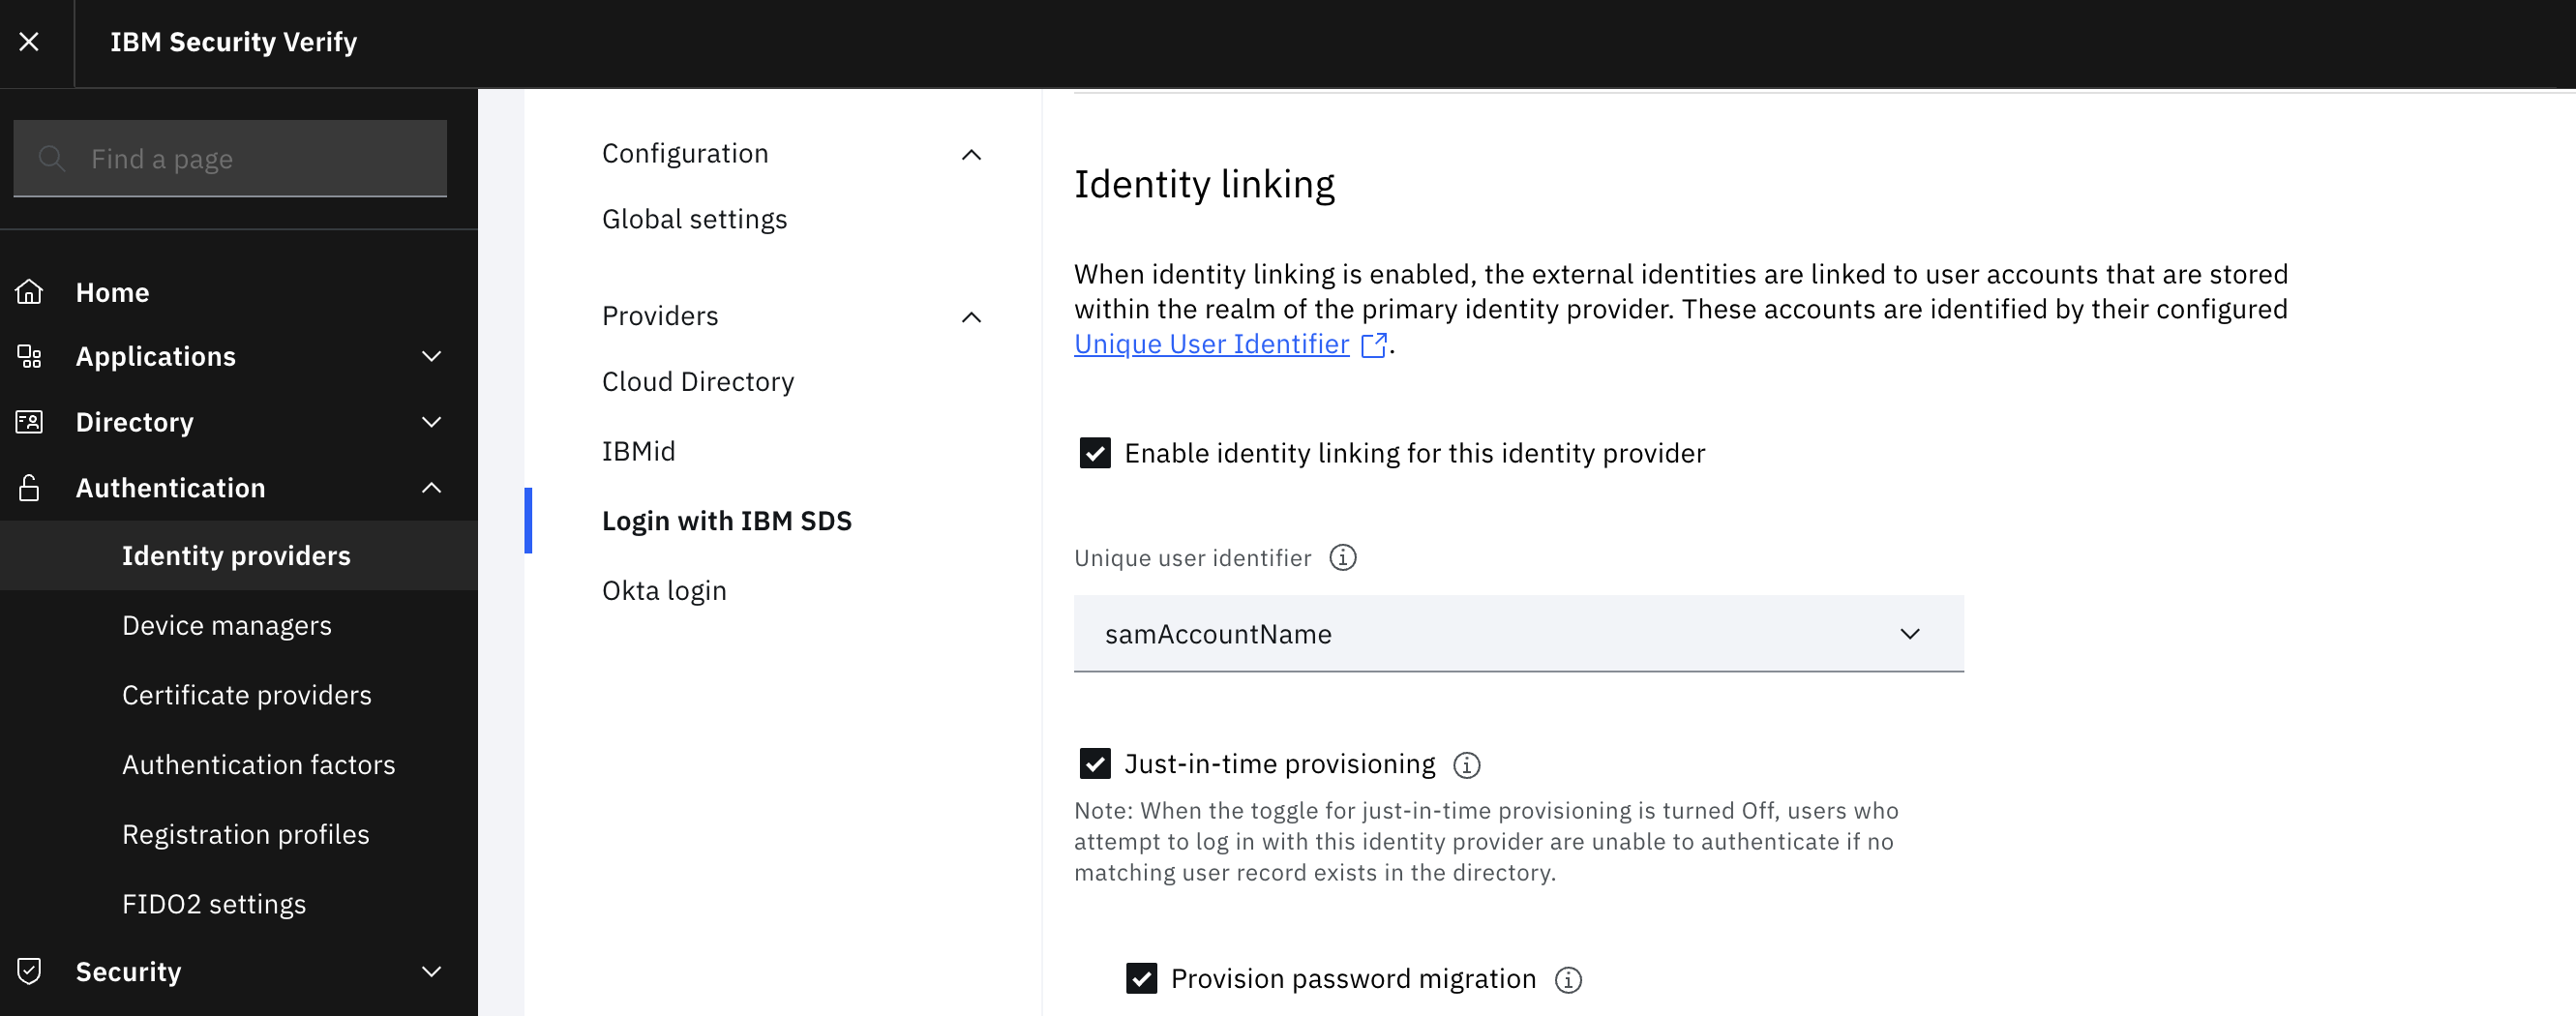
In the Identity Linking section, select Enable Identity linking for this identity provider and select a Unique user identifier from the dropdown list.
-
Enable the Just-in-time provisioning option.
-
Under Just-in-time provisioning, check the Provision password migration checkbox to enable user password migration to the Cloud Directory.
-
Configuration is complete now, next steps are actual login flow and validation.
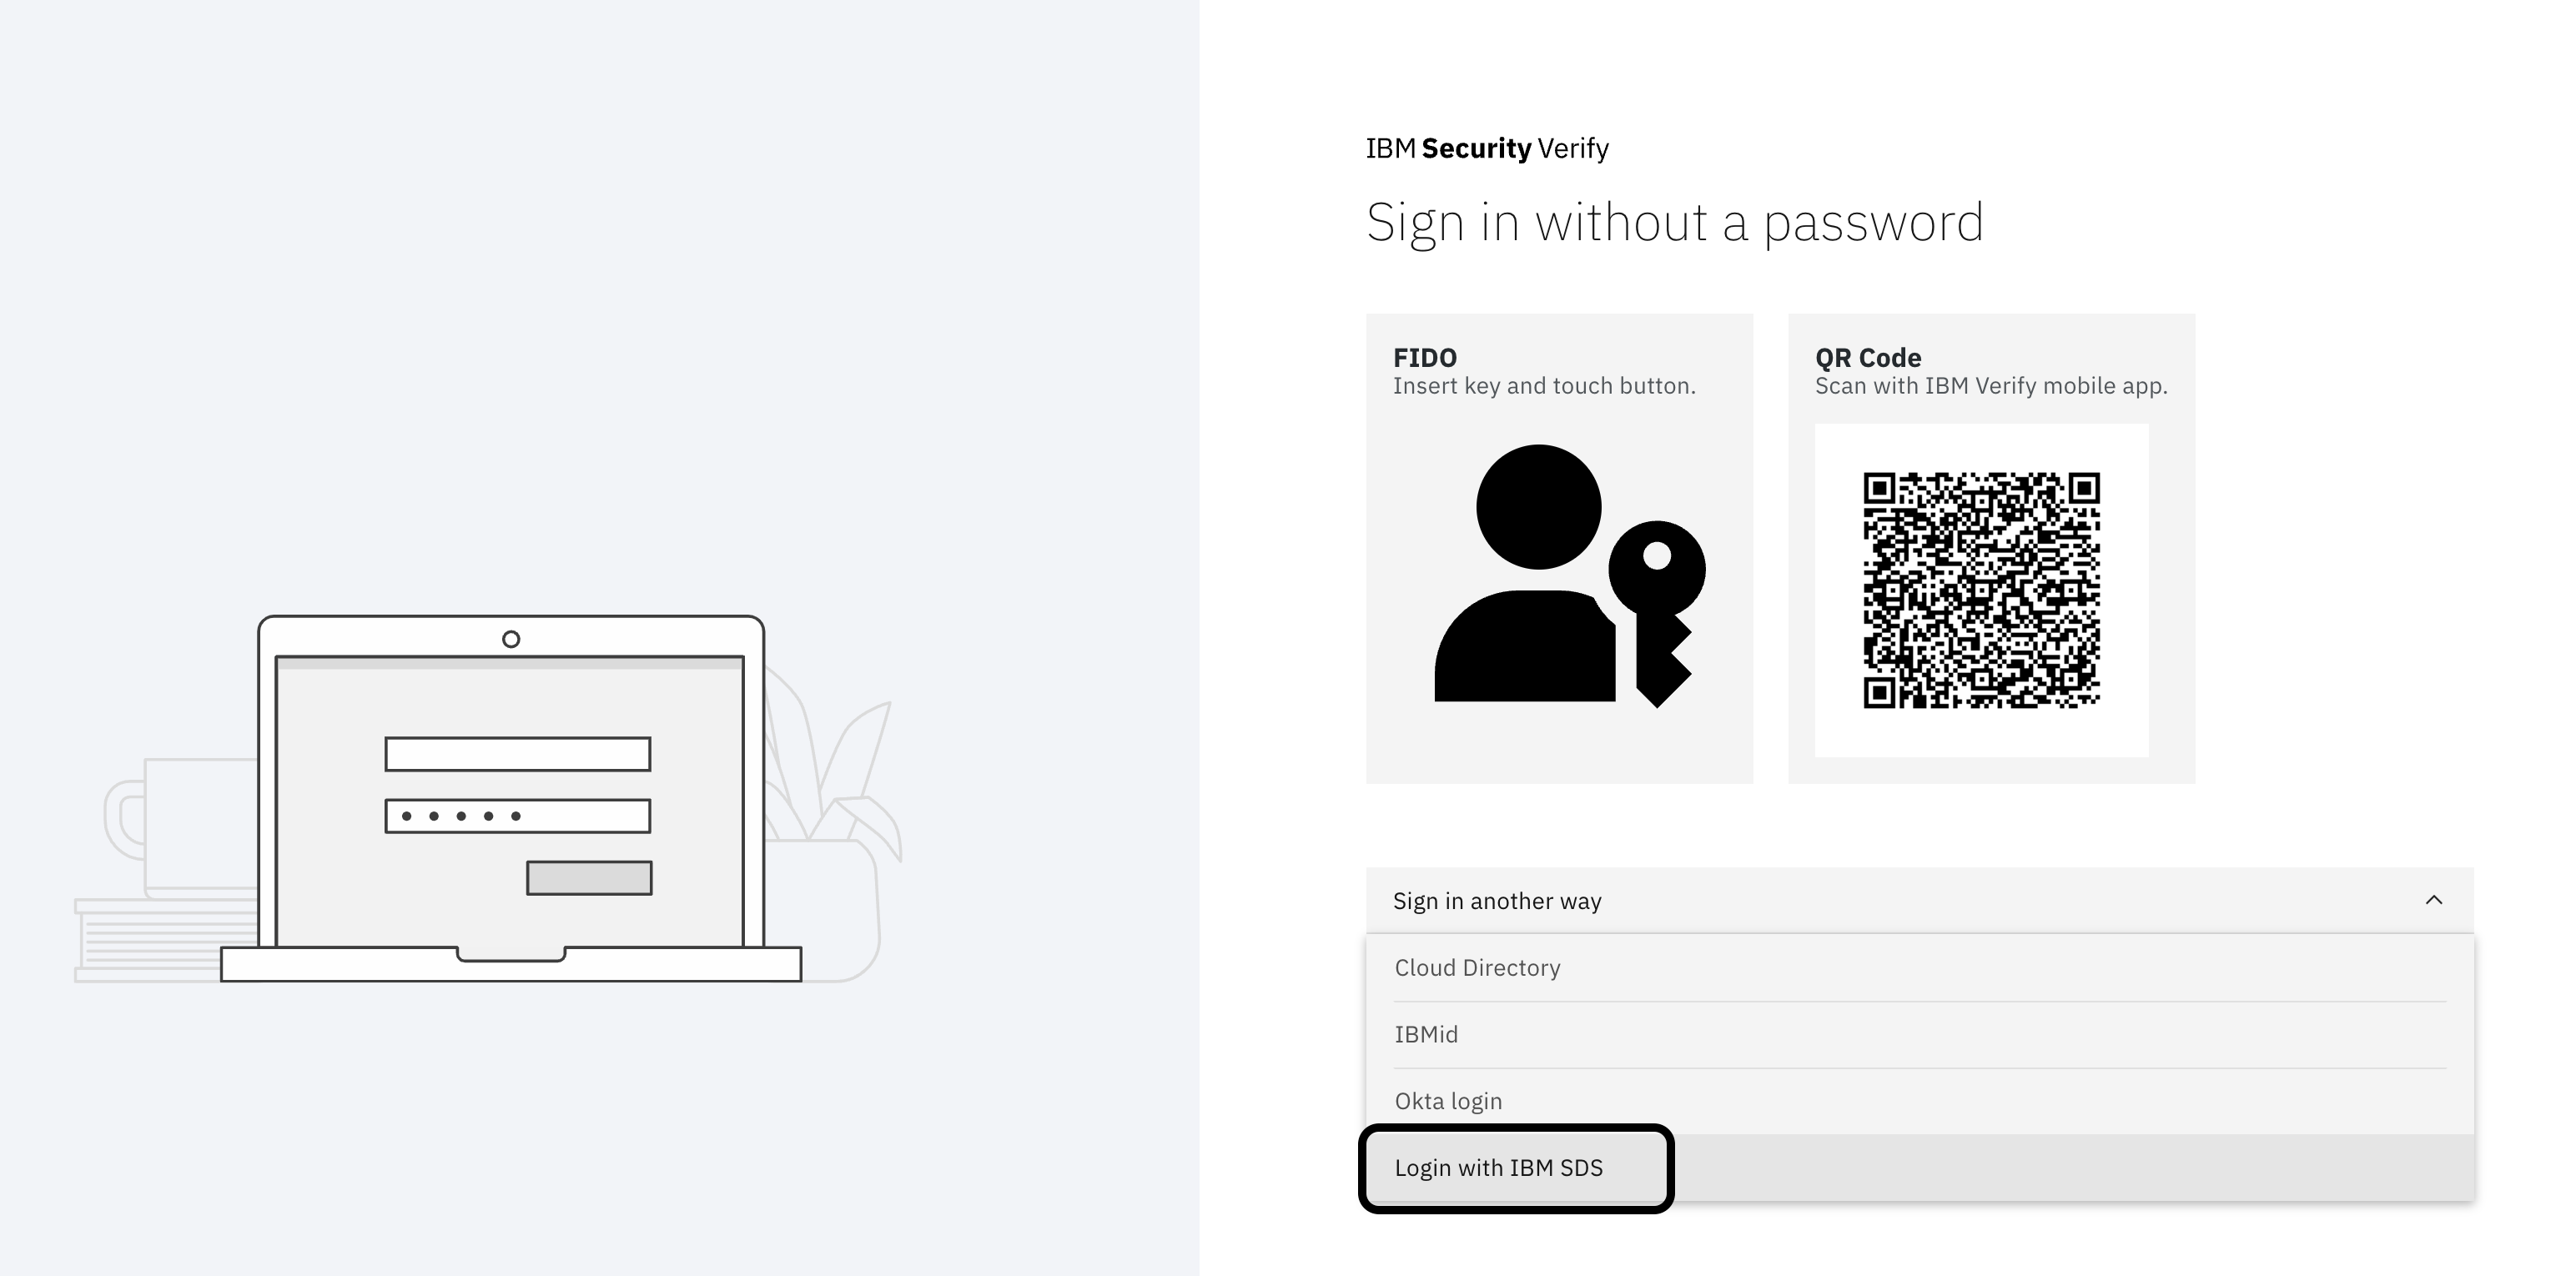
Login with IBM SDS
Go to your IBM Verify tenant and choose the option of login using IBM SDS. Provide user details that are present in SDS.
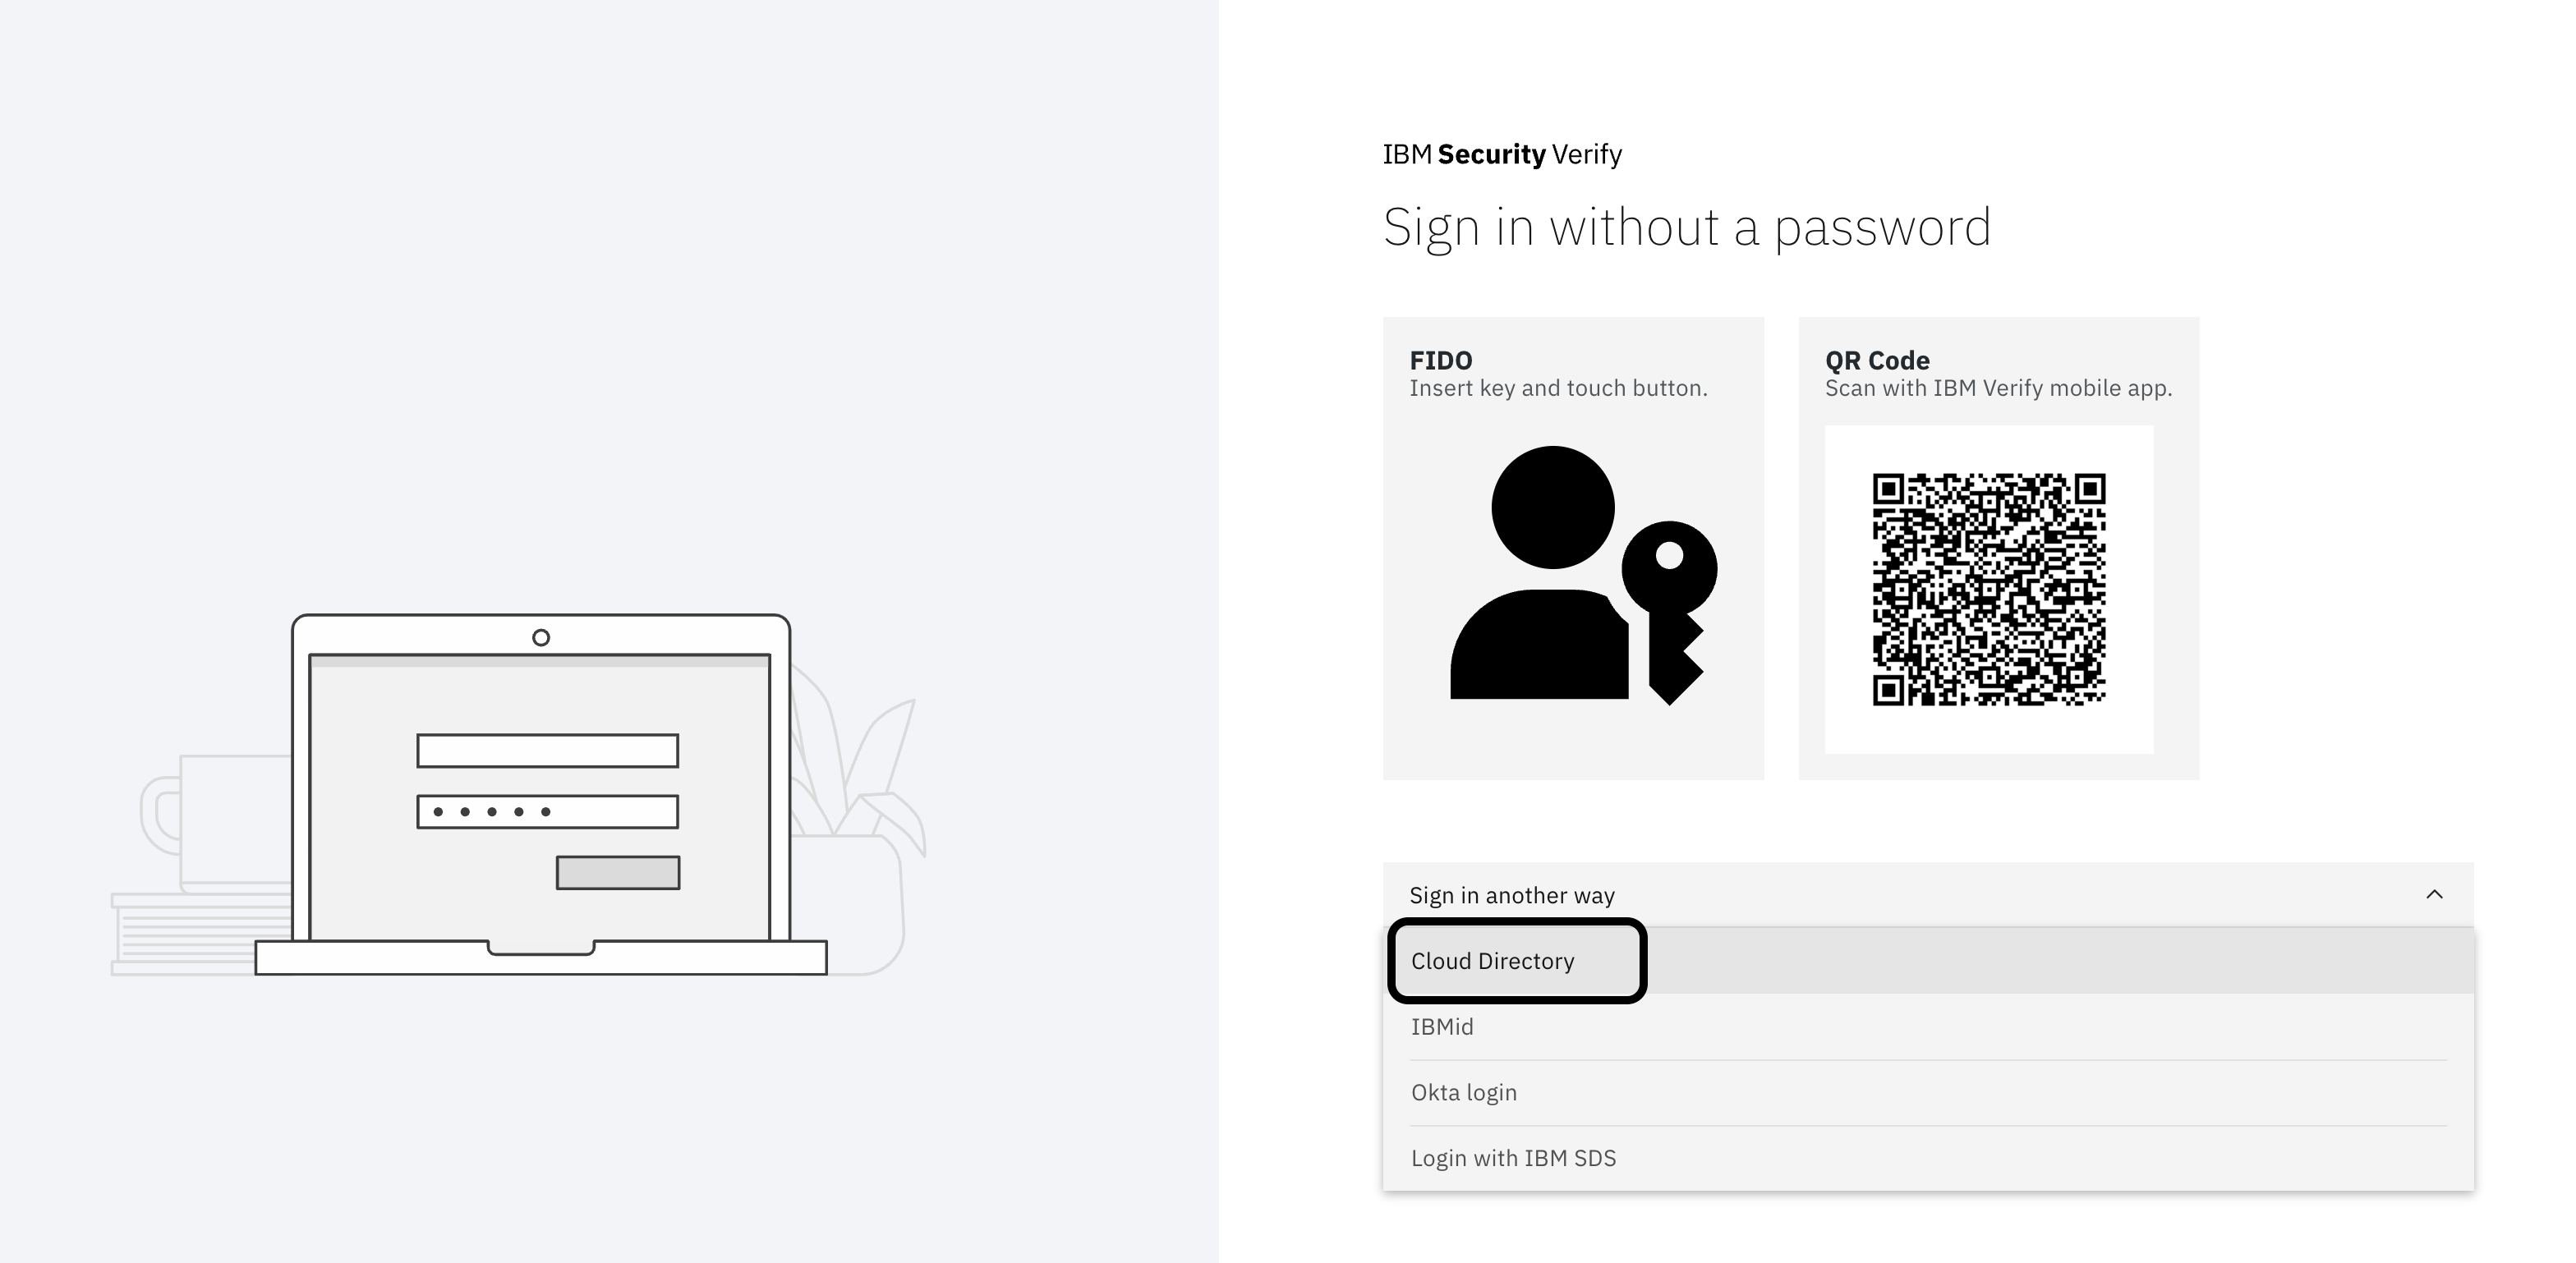
Login with Cloud Directory
Go to your IBM Verify tenant and choose the option of login using Cloud Directory. Ensure to provide the same credentials that you used during login with SDS. Essentially, now the user is migrated to Cloud Directory and they don't need to bother about changing the username or password.
This concludes the first use case of migration of users from LDAP to IBM Verify's Cloud Directory.
Migration of users from LDAP/AD to third party identity provider
Now, let's consider the second use case of migrating users from LDAP or AD to any third-party identity provider. In, the described use case, Okta is the third-party provider, however, it can be Ping or Azure.
Prerequisite:
- IBM Verify tenant
- Flow designer enabled in your tenant
- IBM Verify SaaS Resources contents downloaded or cloned to your machine. Refer to the parent page for details on how to achieve this. The folder is referred here-on as
$GIT_REPO. - On-premise LDAP or AD, which is current user repository
- Okta tenant
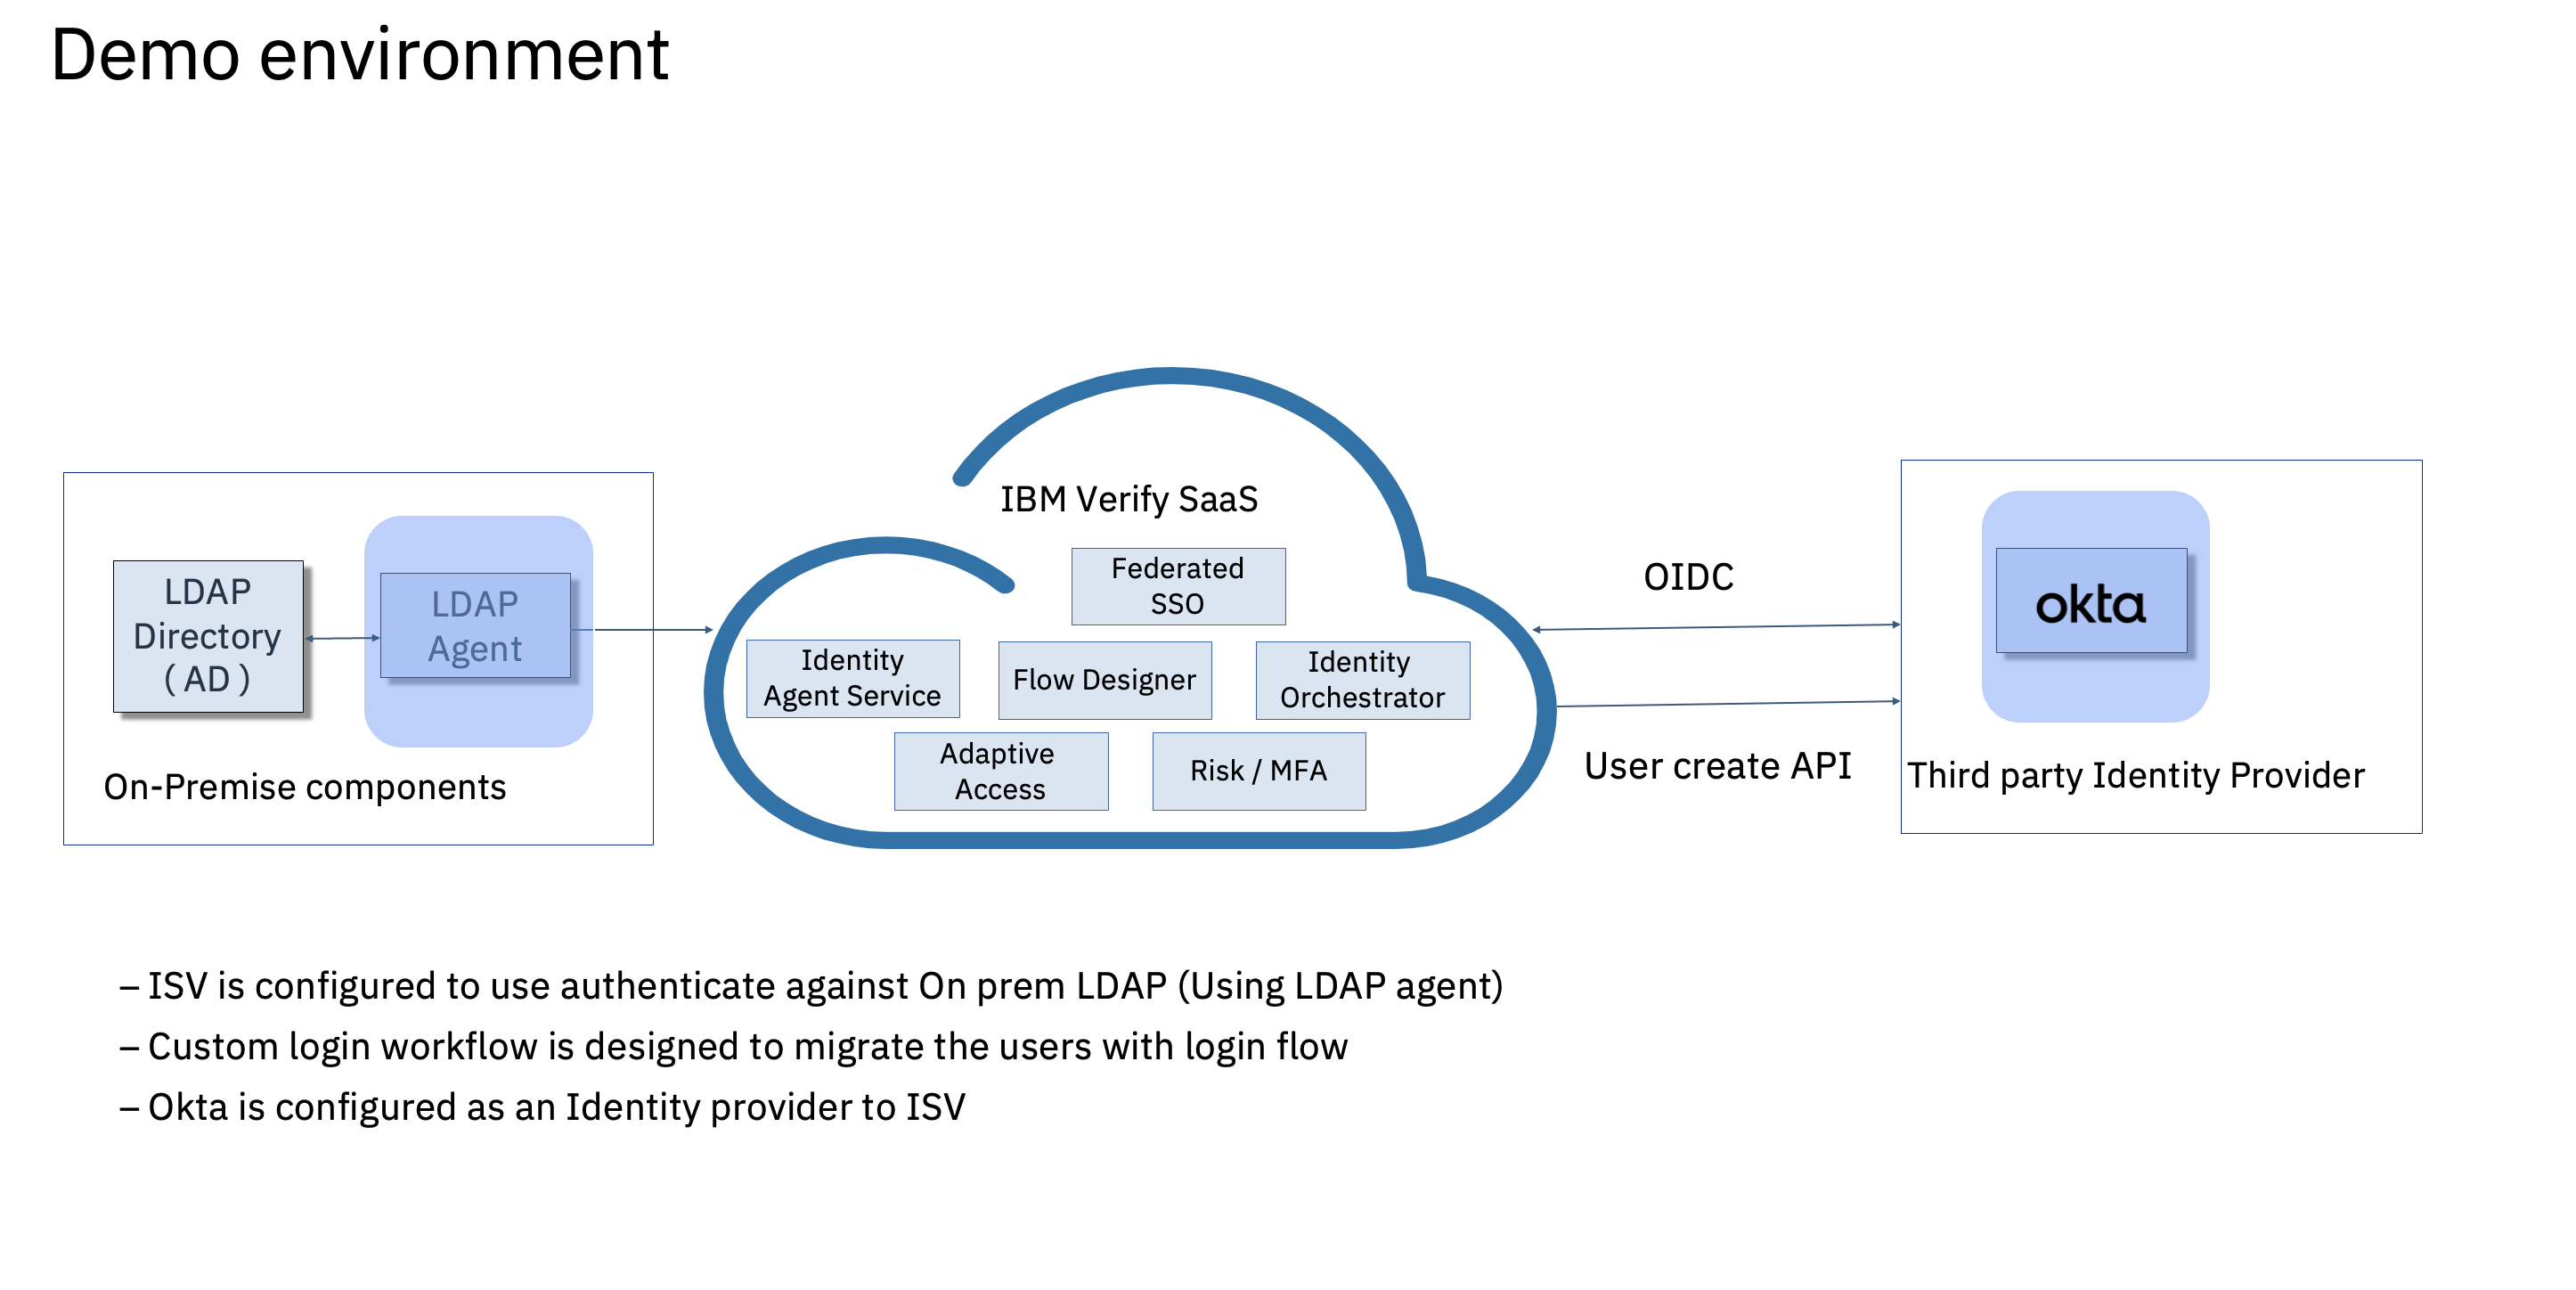
The following can be achieved by using the setup -
- Use Identity orchestrator as a mechanism to migrate the users that exist on On-prem user registry.
- Migrate the users with part of the login experience.
- Users are navigated into the modern authentication experience after migration.
- Eventually, sunset the on-prem user repository.
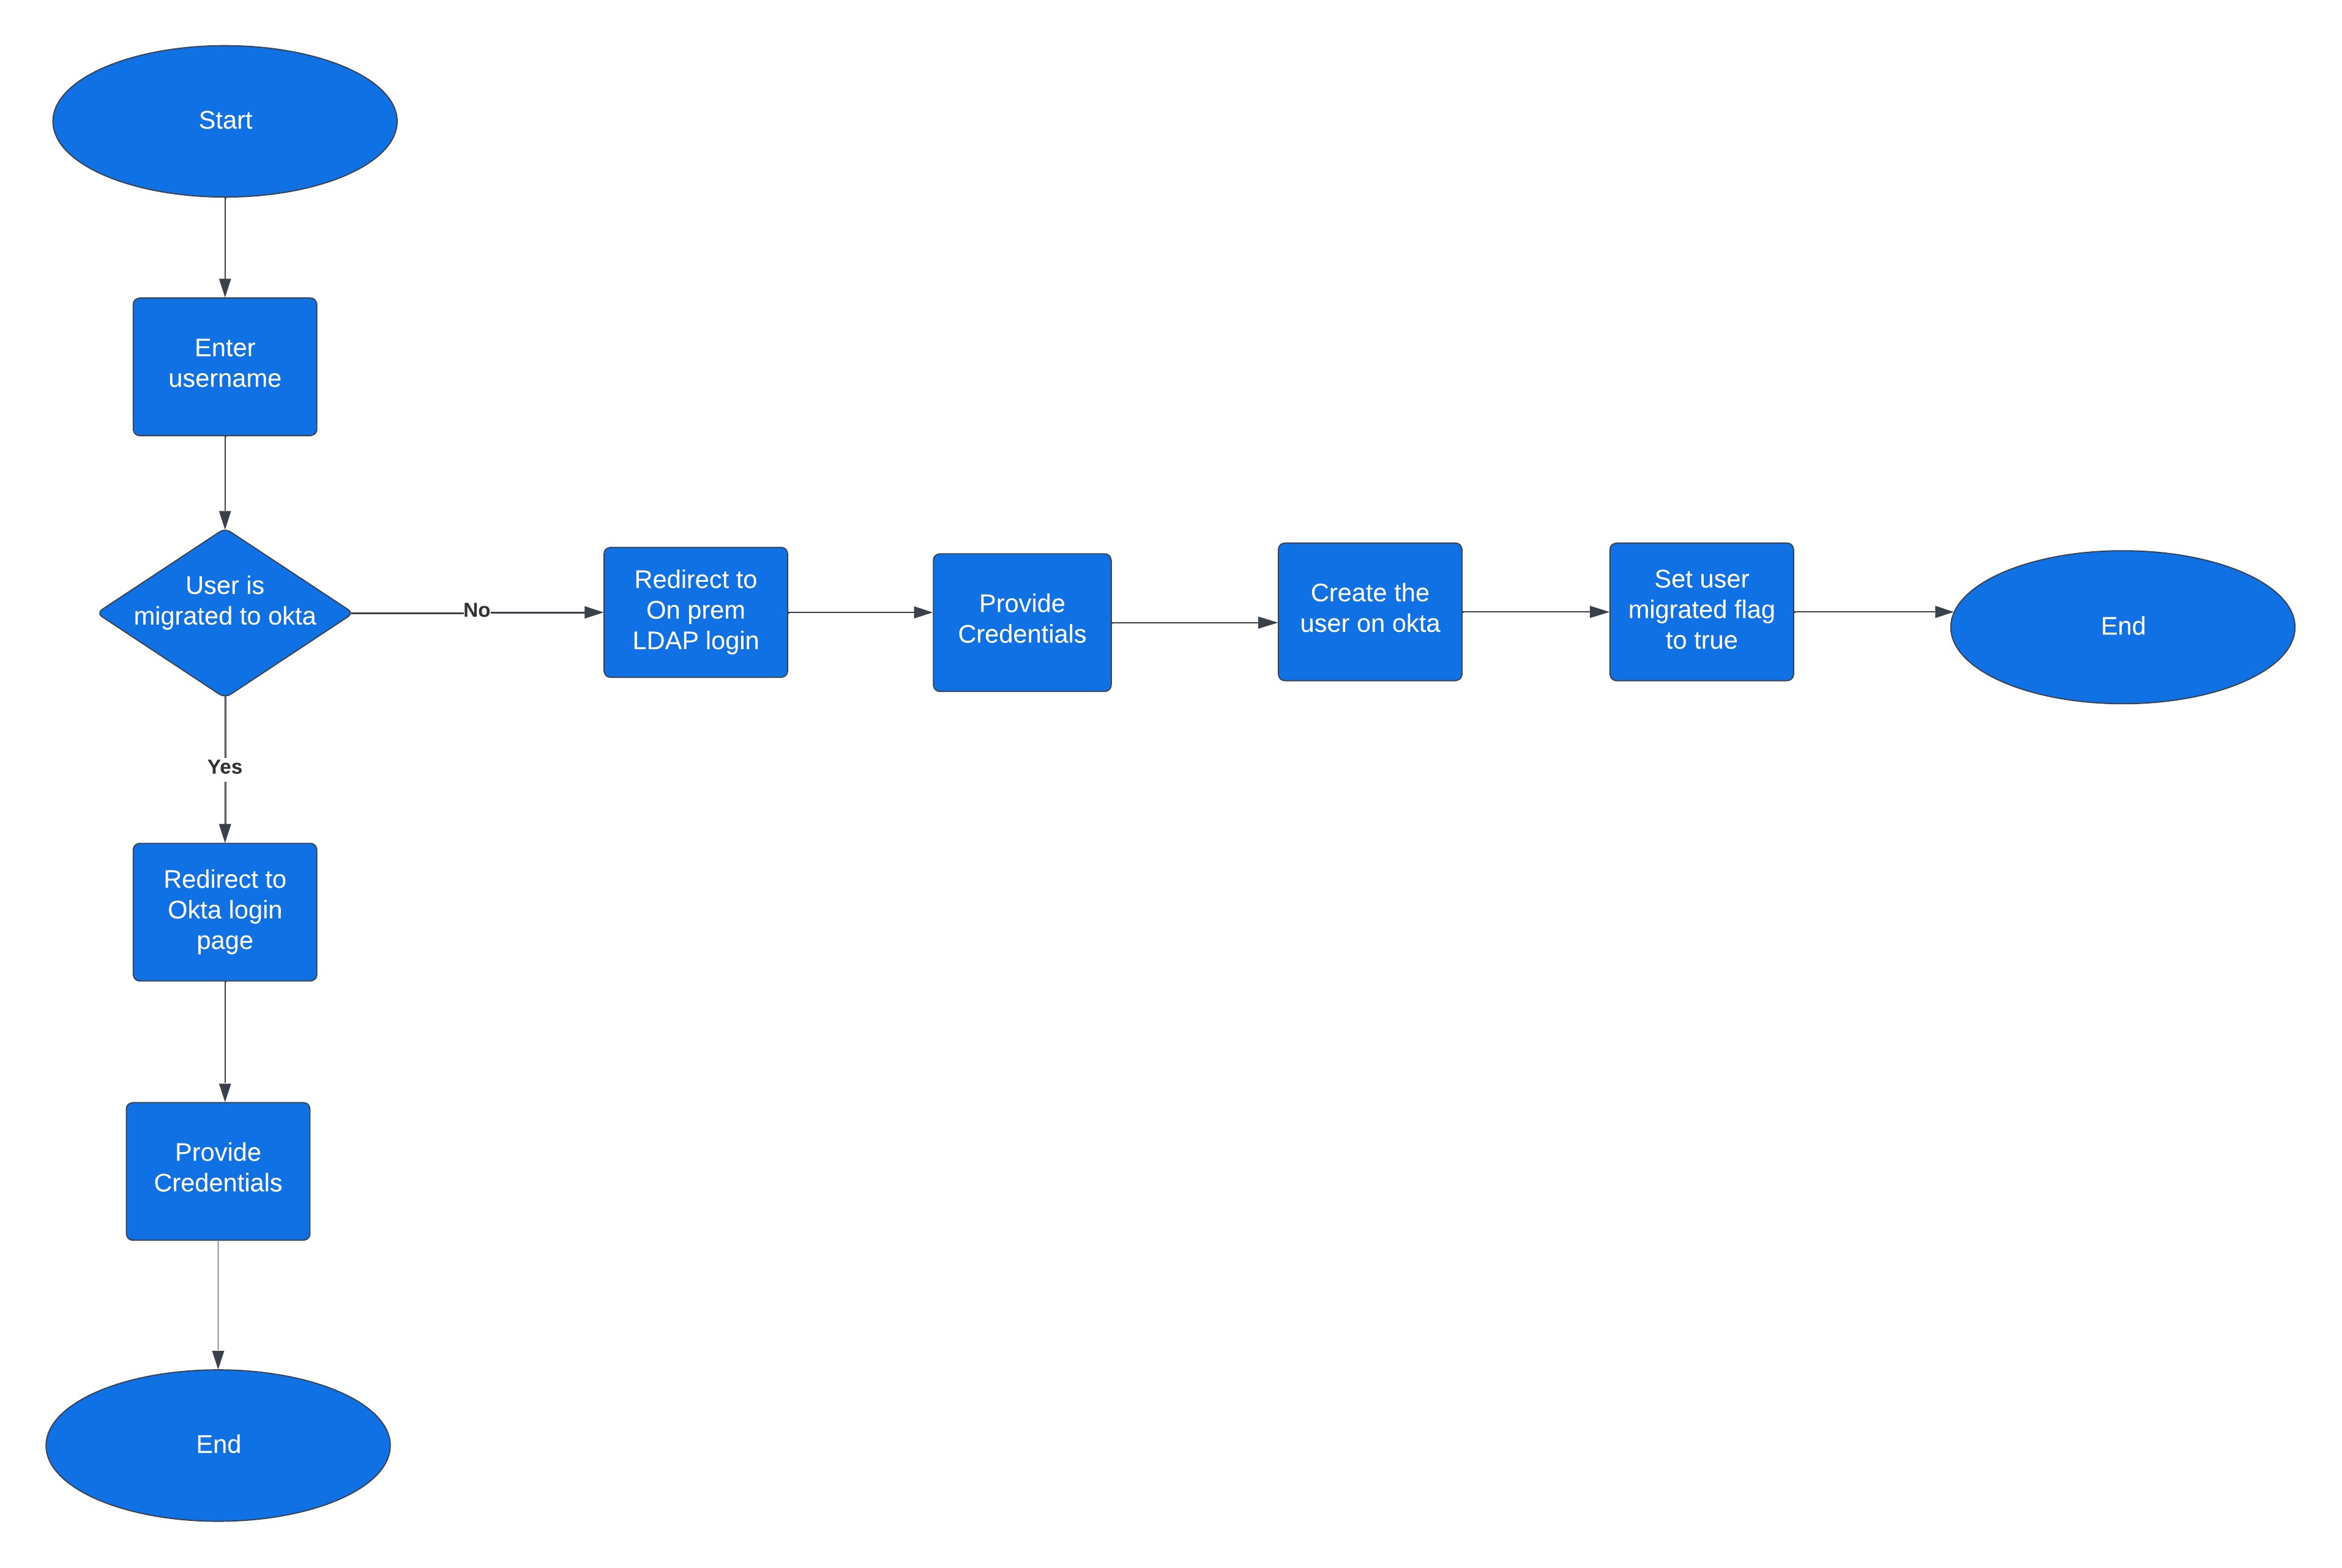
Overview of the flow :
Configuration on Okta side:
-
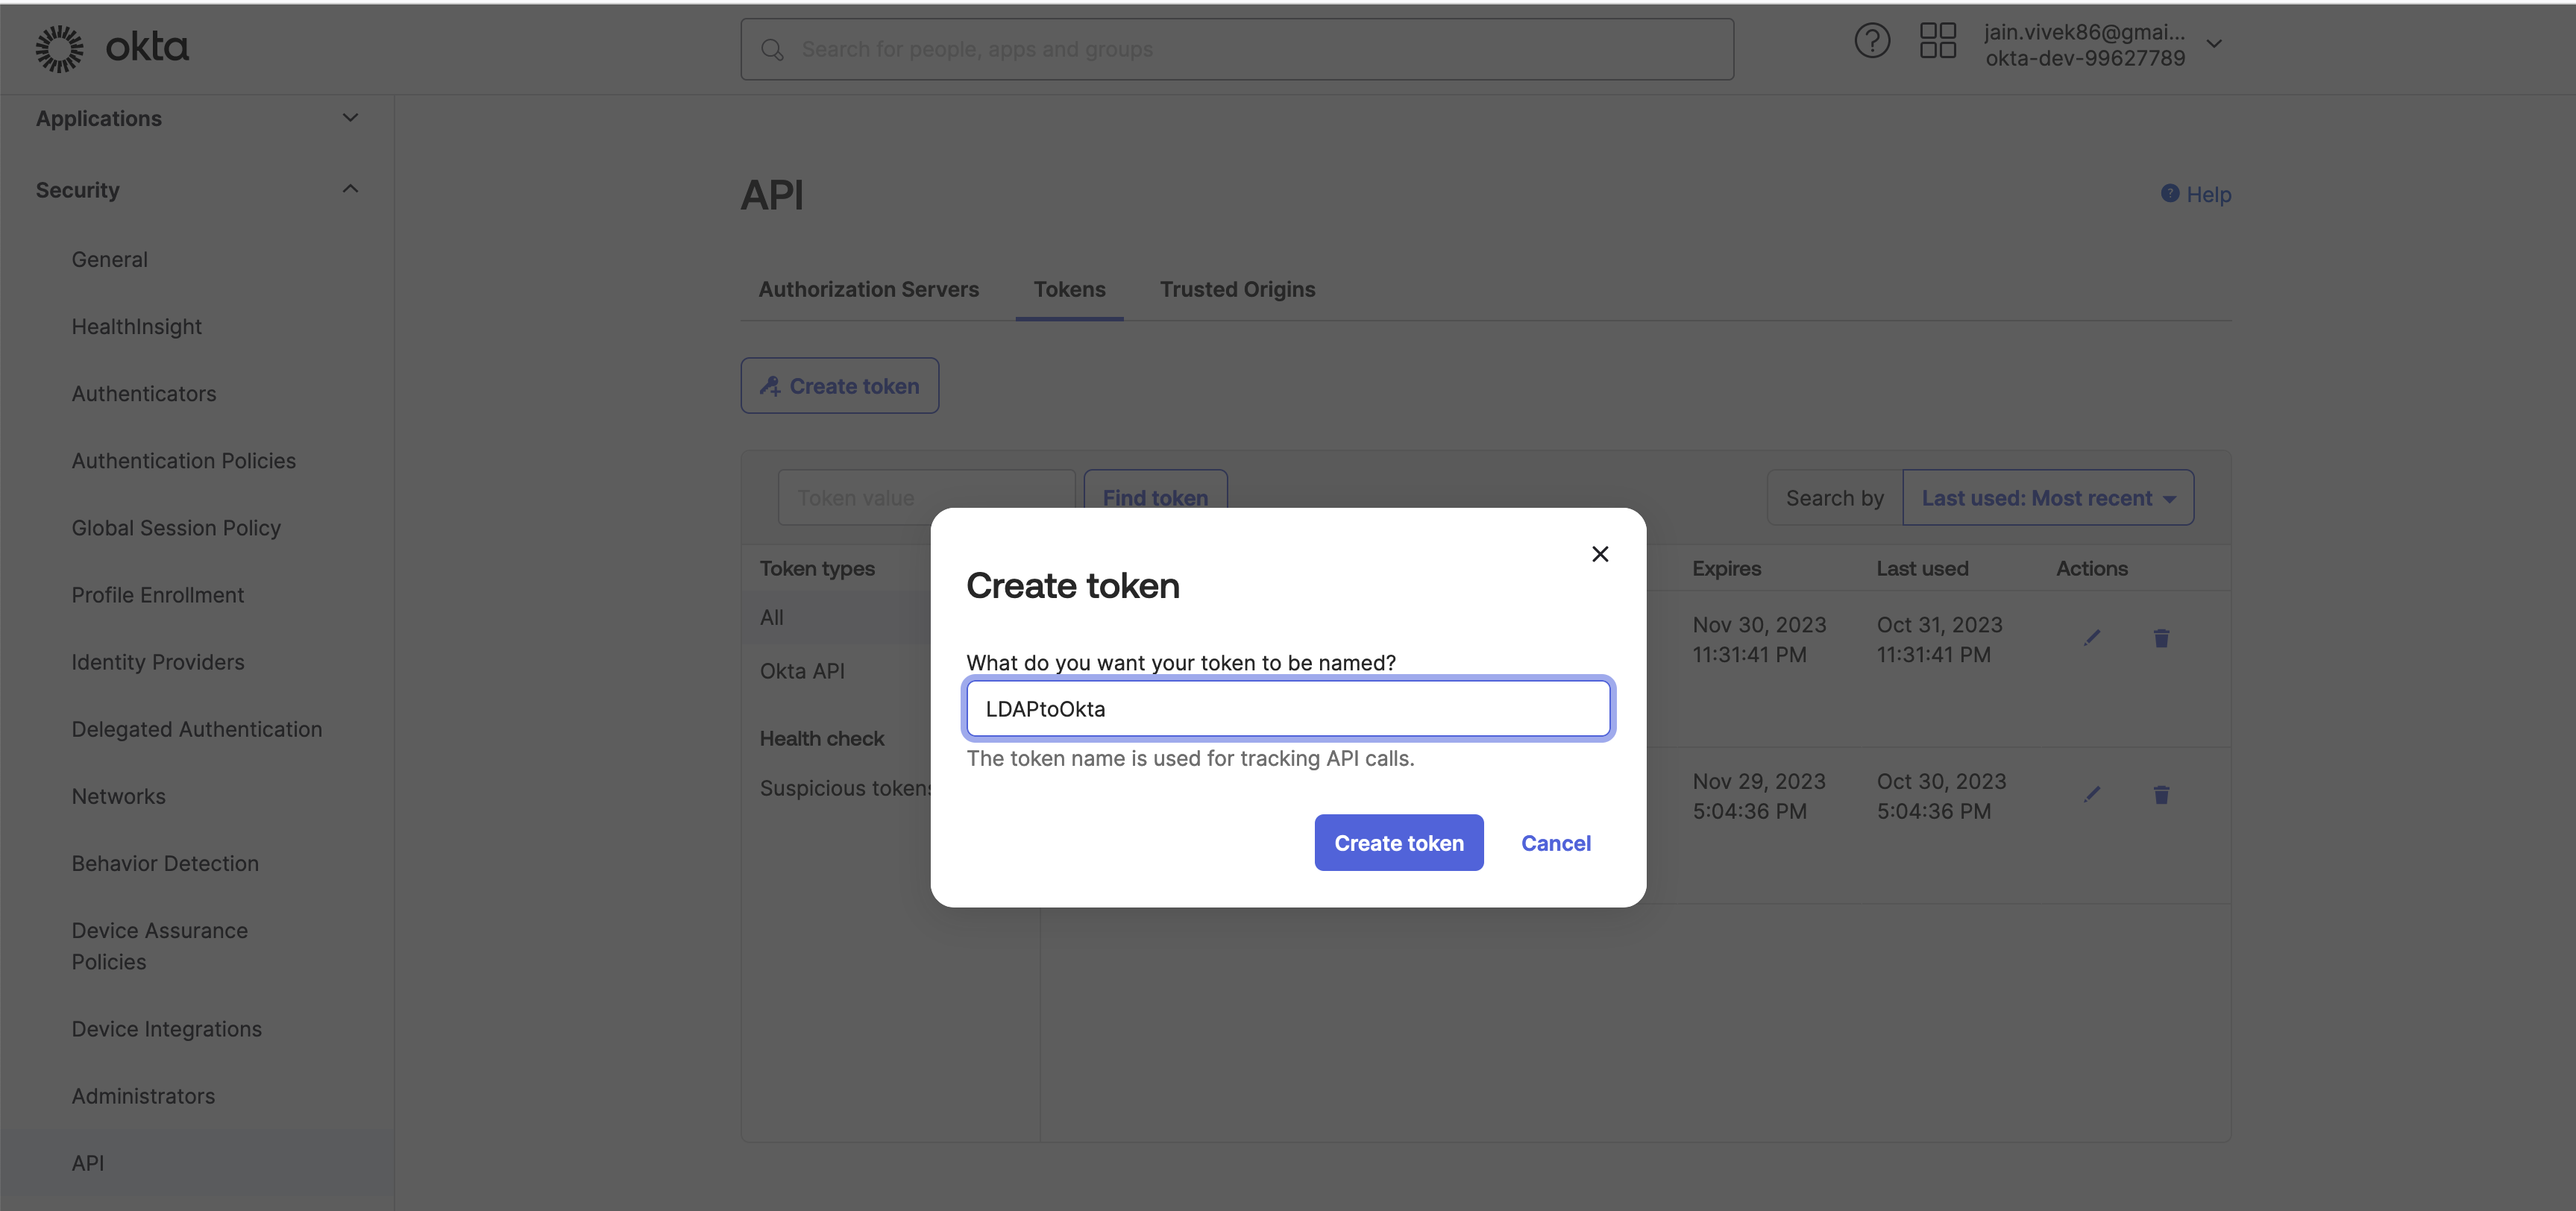
Generate a token so that API can be executed on your tenant. After login, in the left-side menu, go to Security-> API -> Create Token.
-
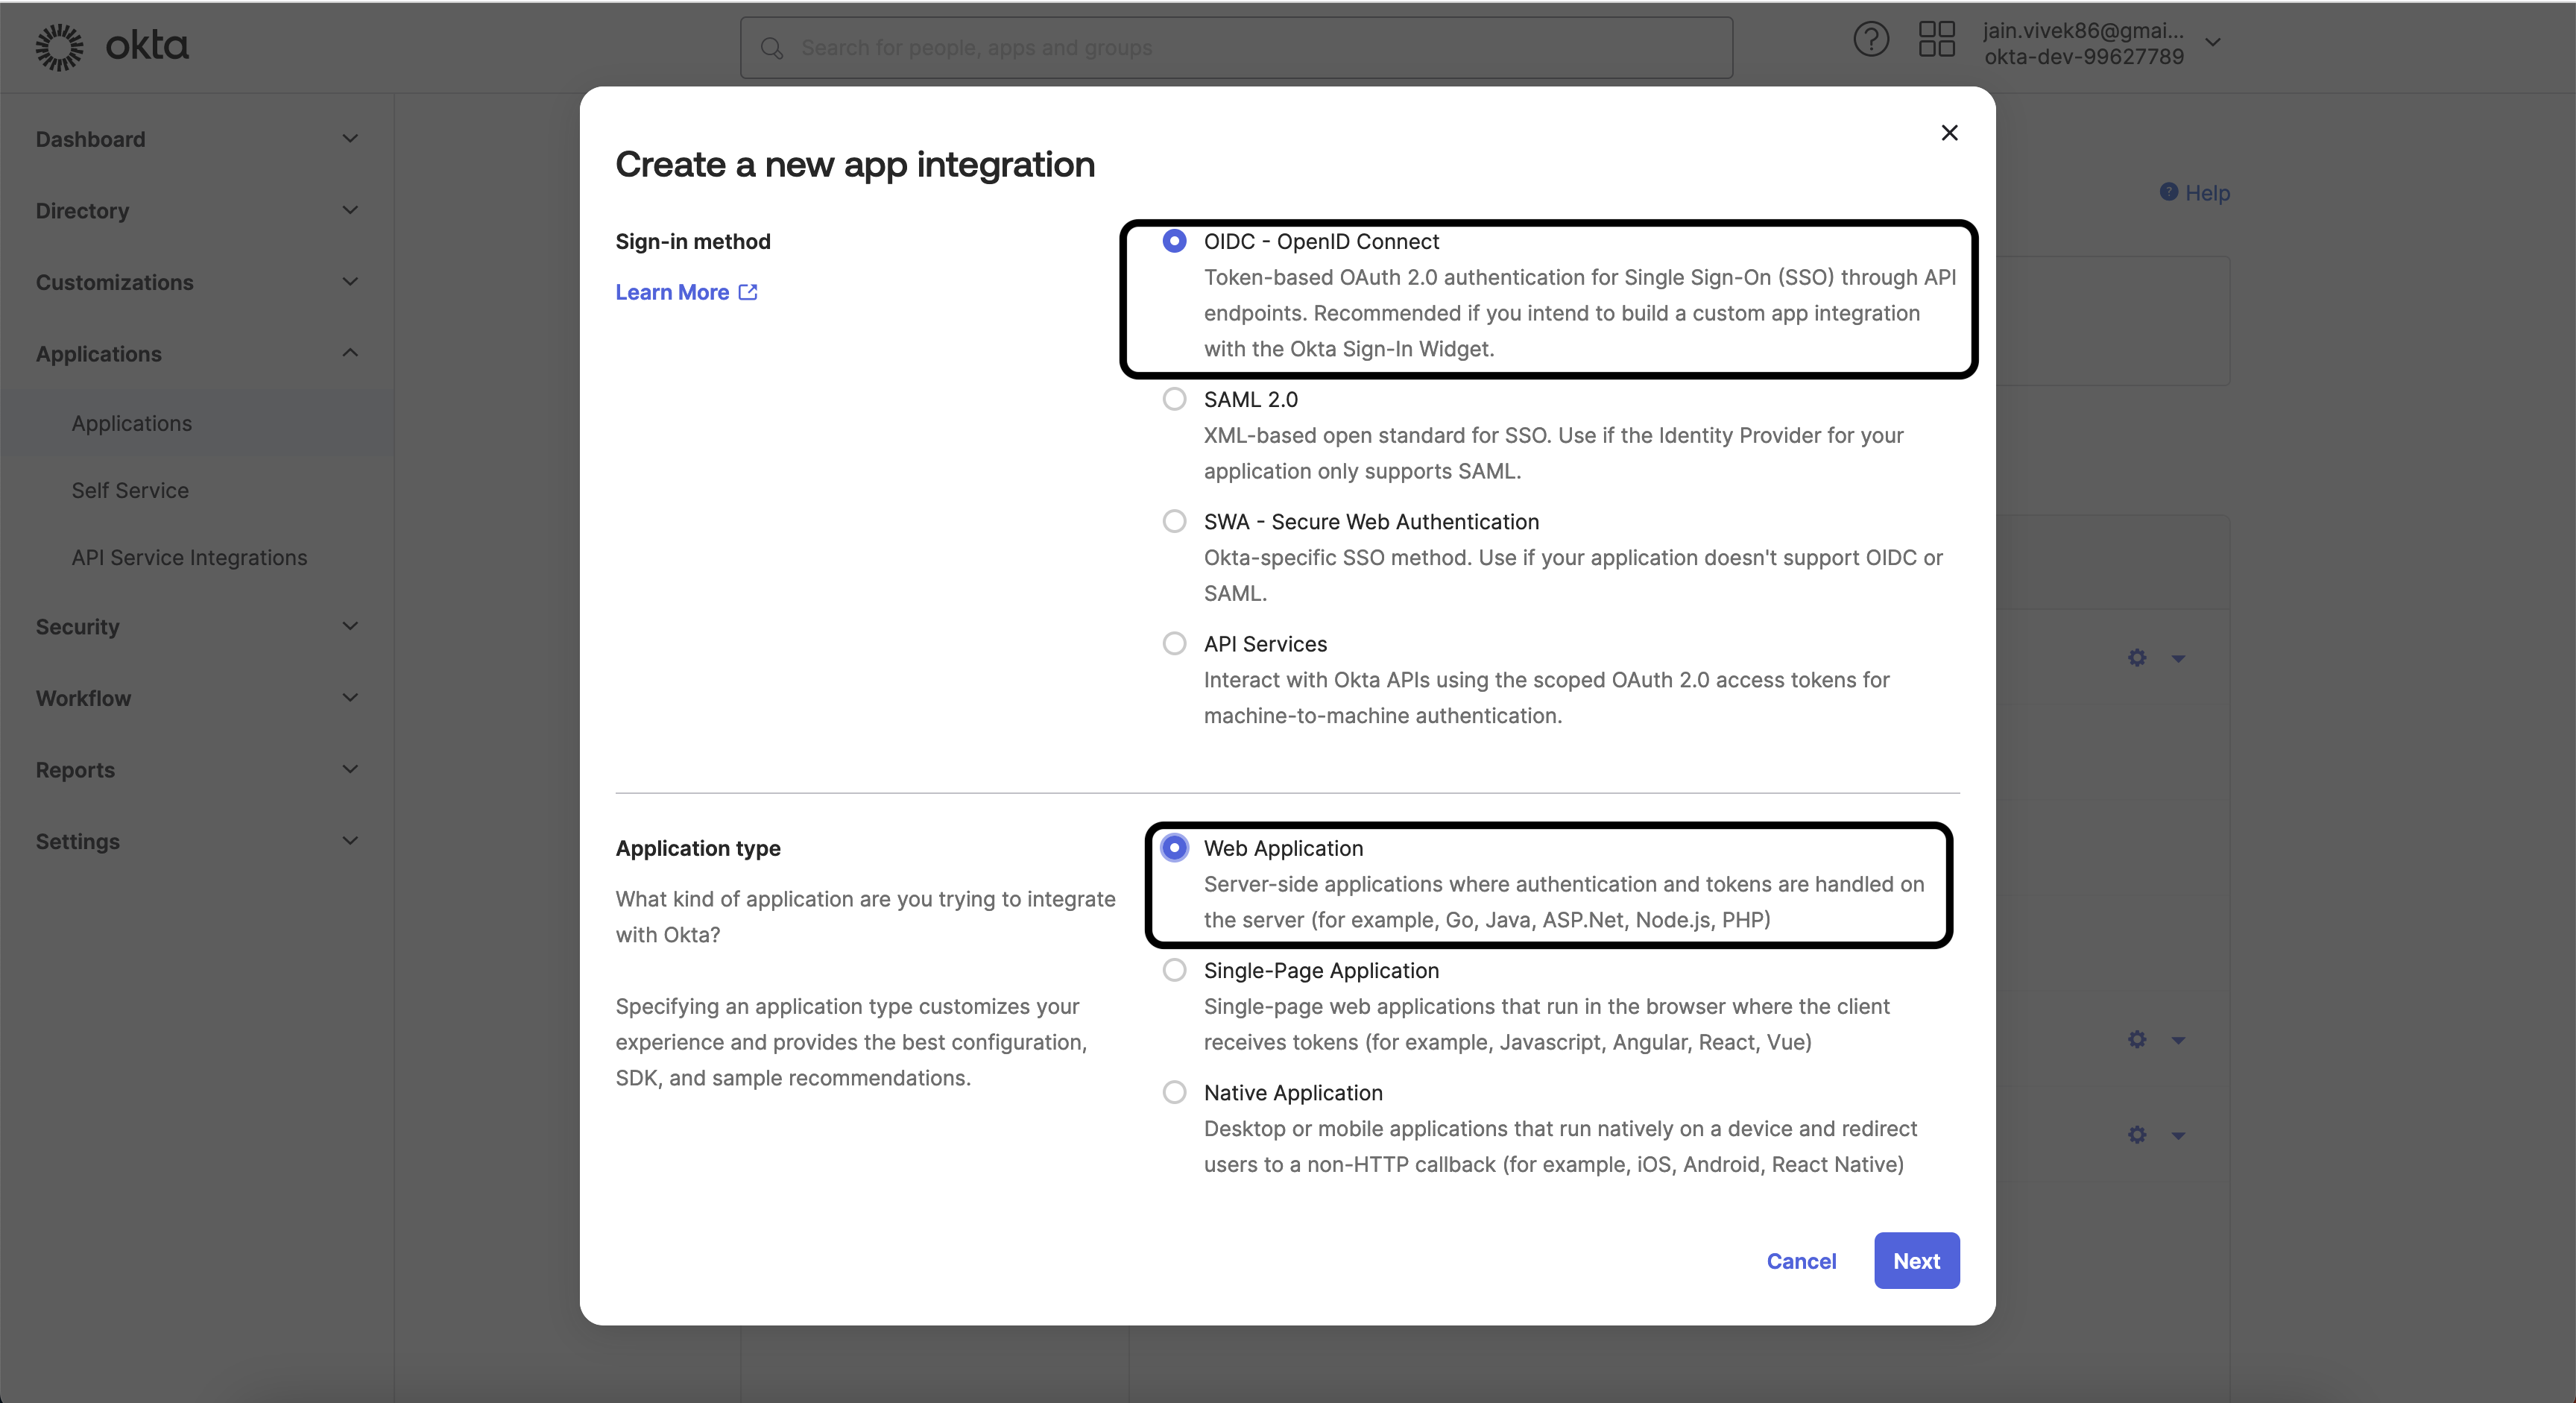
Configure a Web App application to establish federation between Okta and IBM Verify.
-
Login to the Admin console -> Application (On the left menu) -> Application -> Create App integration -> OIDC
-
Choose the Grant type that you want to configure - by default Authorization Code Grant type is configured.
-
Provide Sign-in redirect URIs. The values come from IBM Verify. For example,
https://<your_verify_tenant>/auth/redirect. -
Capture the client id and secret, they are required at the time of configuration in IBM Verify.
Configuration steps on IBM Verify side:
Enable IBM Verify to authenticate against On-premise LDAP or AD, here are the steps to do that -
Active Directory as an identity source
https://www.ibm.com/docs/en/security-verify?topic=providers-configuring-prem-ldap-provider
Okta needs to be added as an identity provider to IBM Verify
Configuration path - Log in to Admin console -> Authentication -> Identity Provider -> Add Identity provider -> OIDC Enterprise.
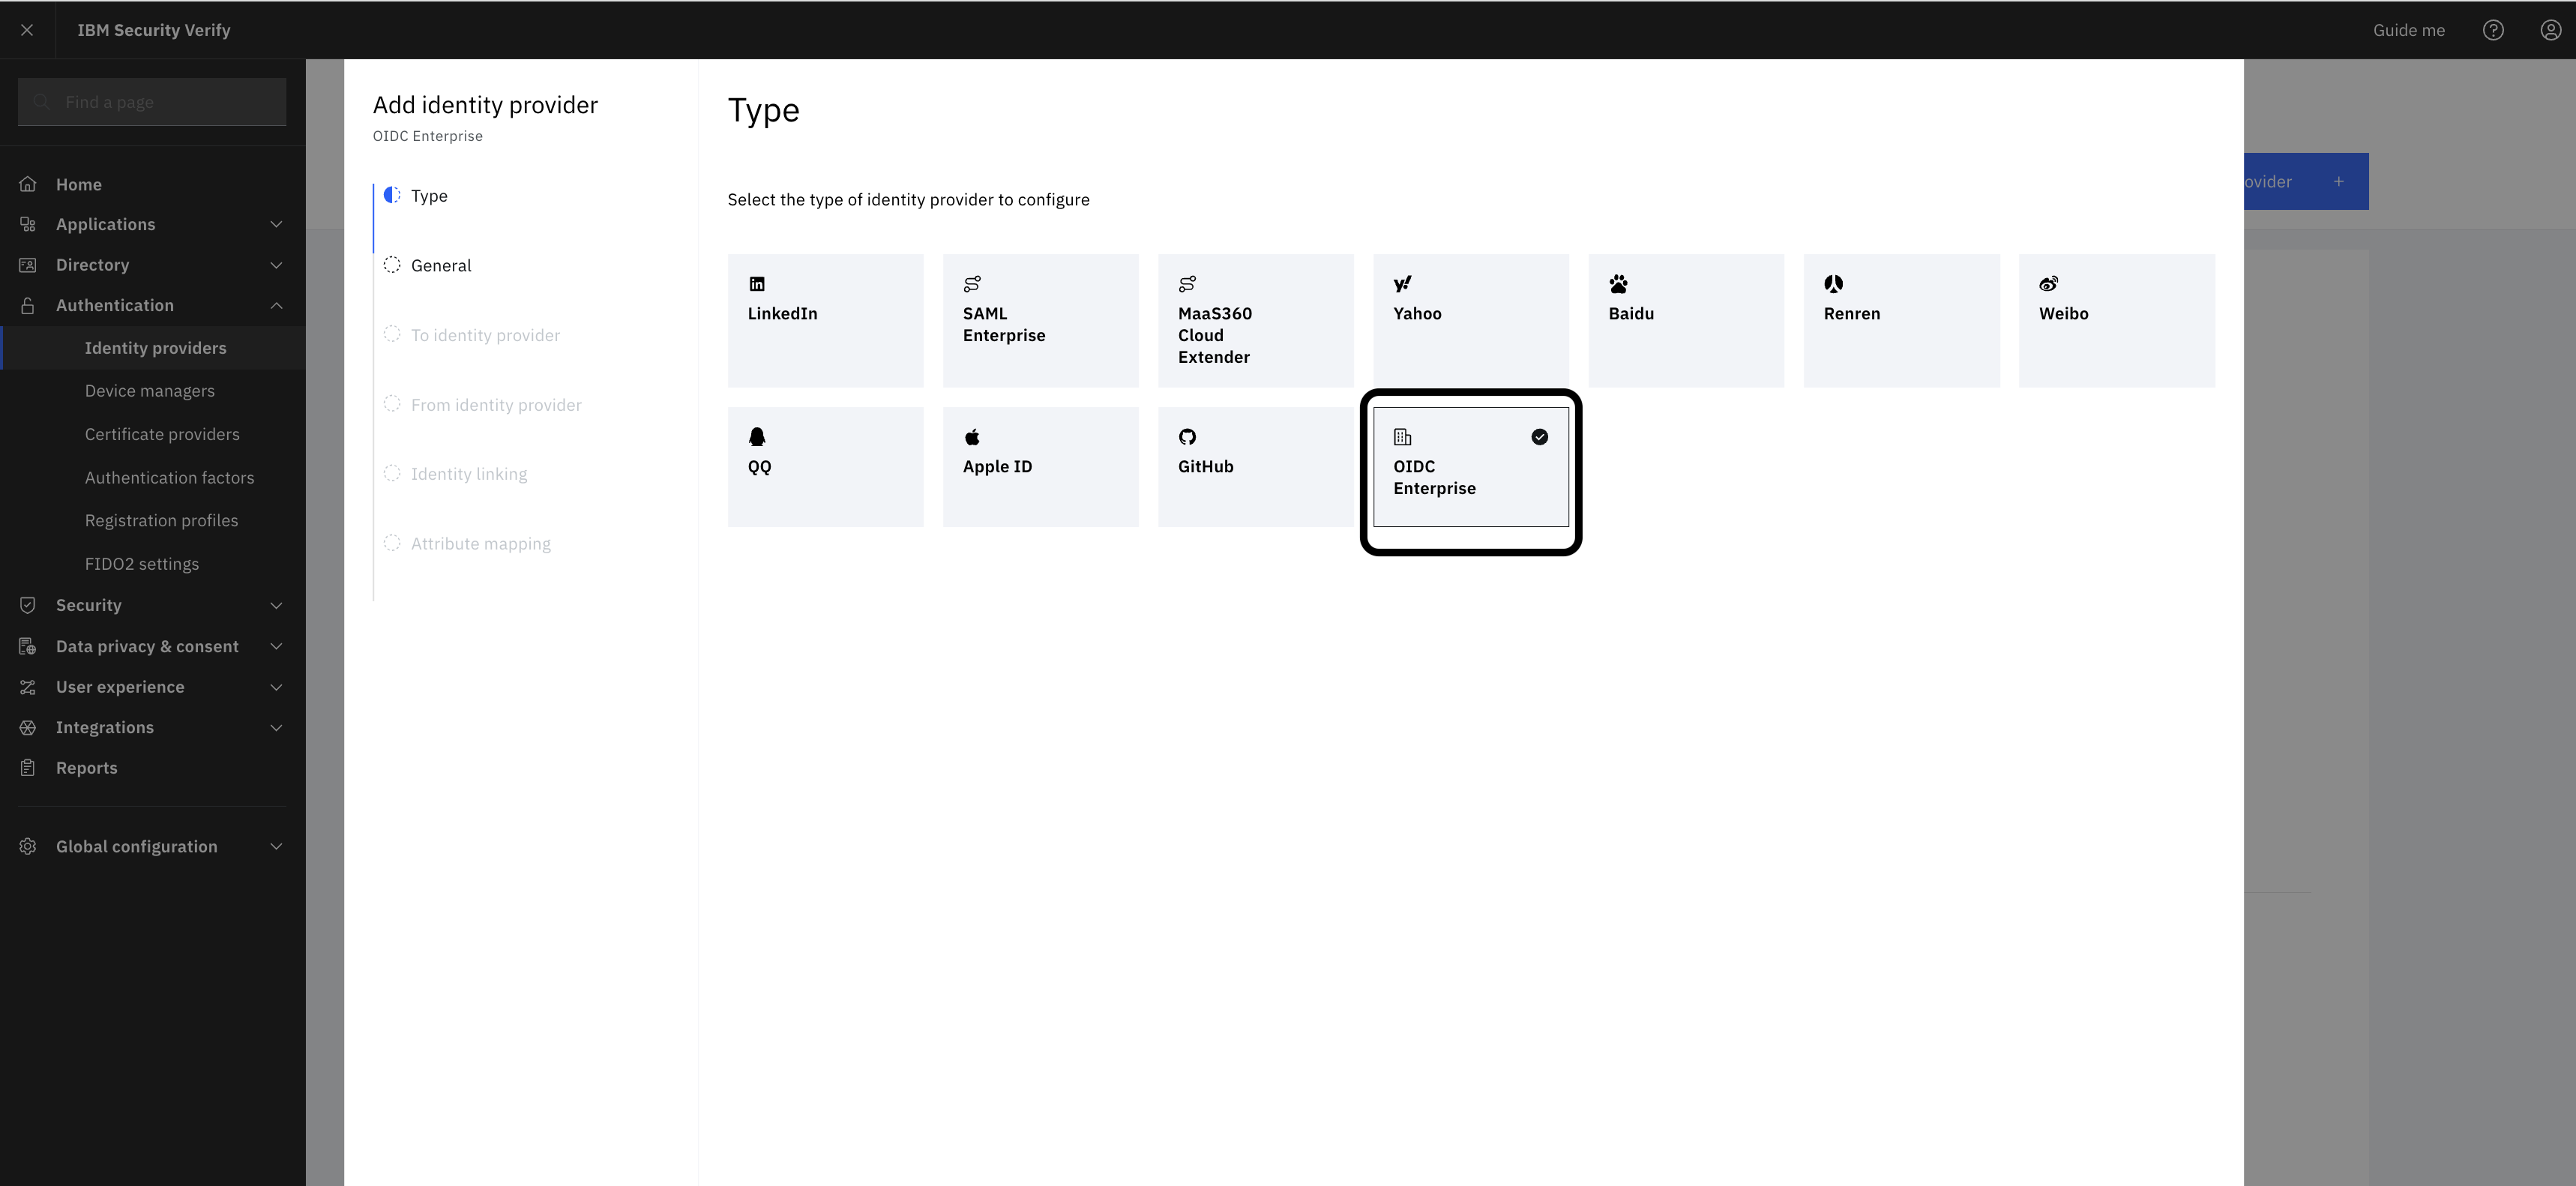
Provide the okta OIDC well know endpoint. For example, https://<yourtenant>-admin.okta.com/.well-known/openid-configuration.
Set Realm and issuer of the newly configured identity source. The tenant name itself can also be used. For example https://<yourtenant>-admin.okta.com.
Create a custom attribute and assign a rule to it
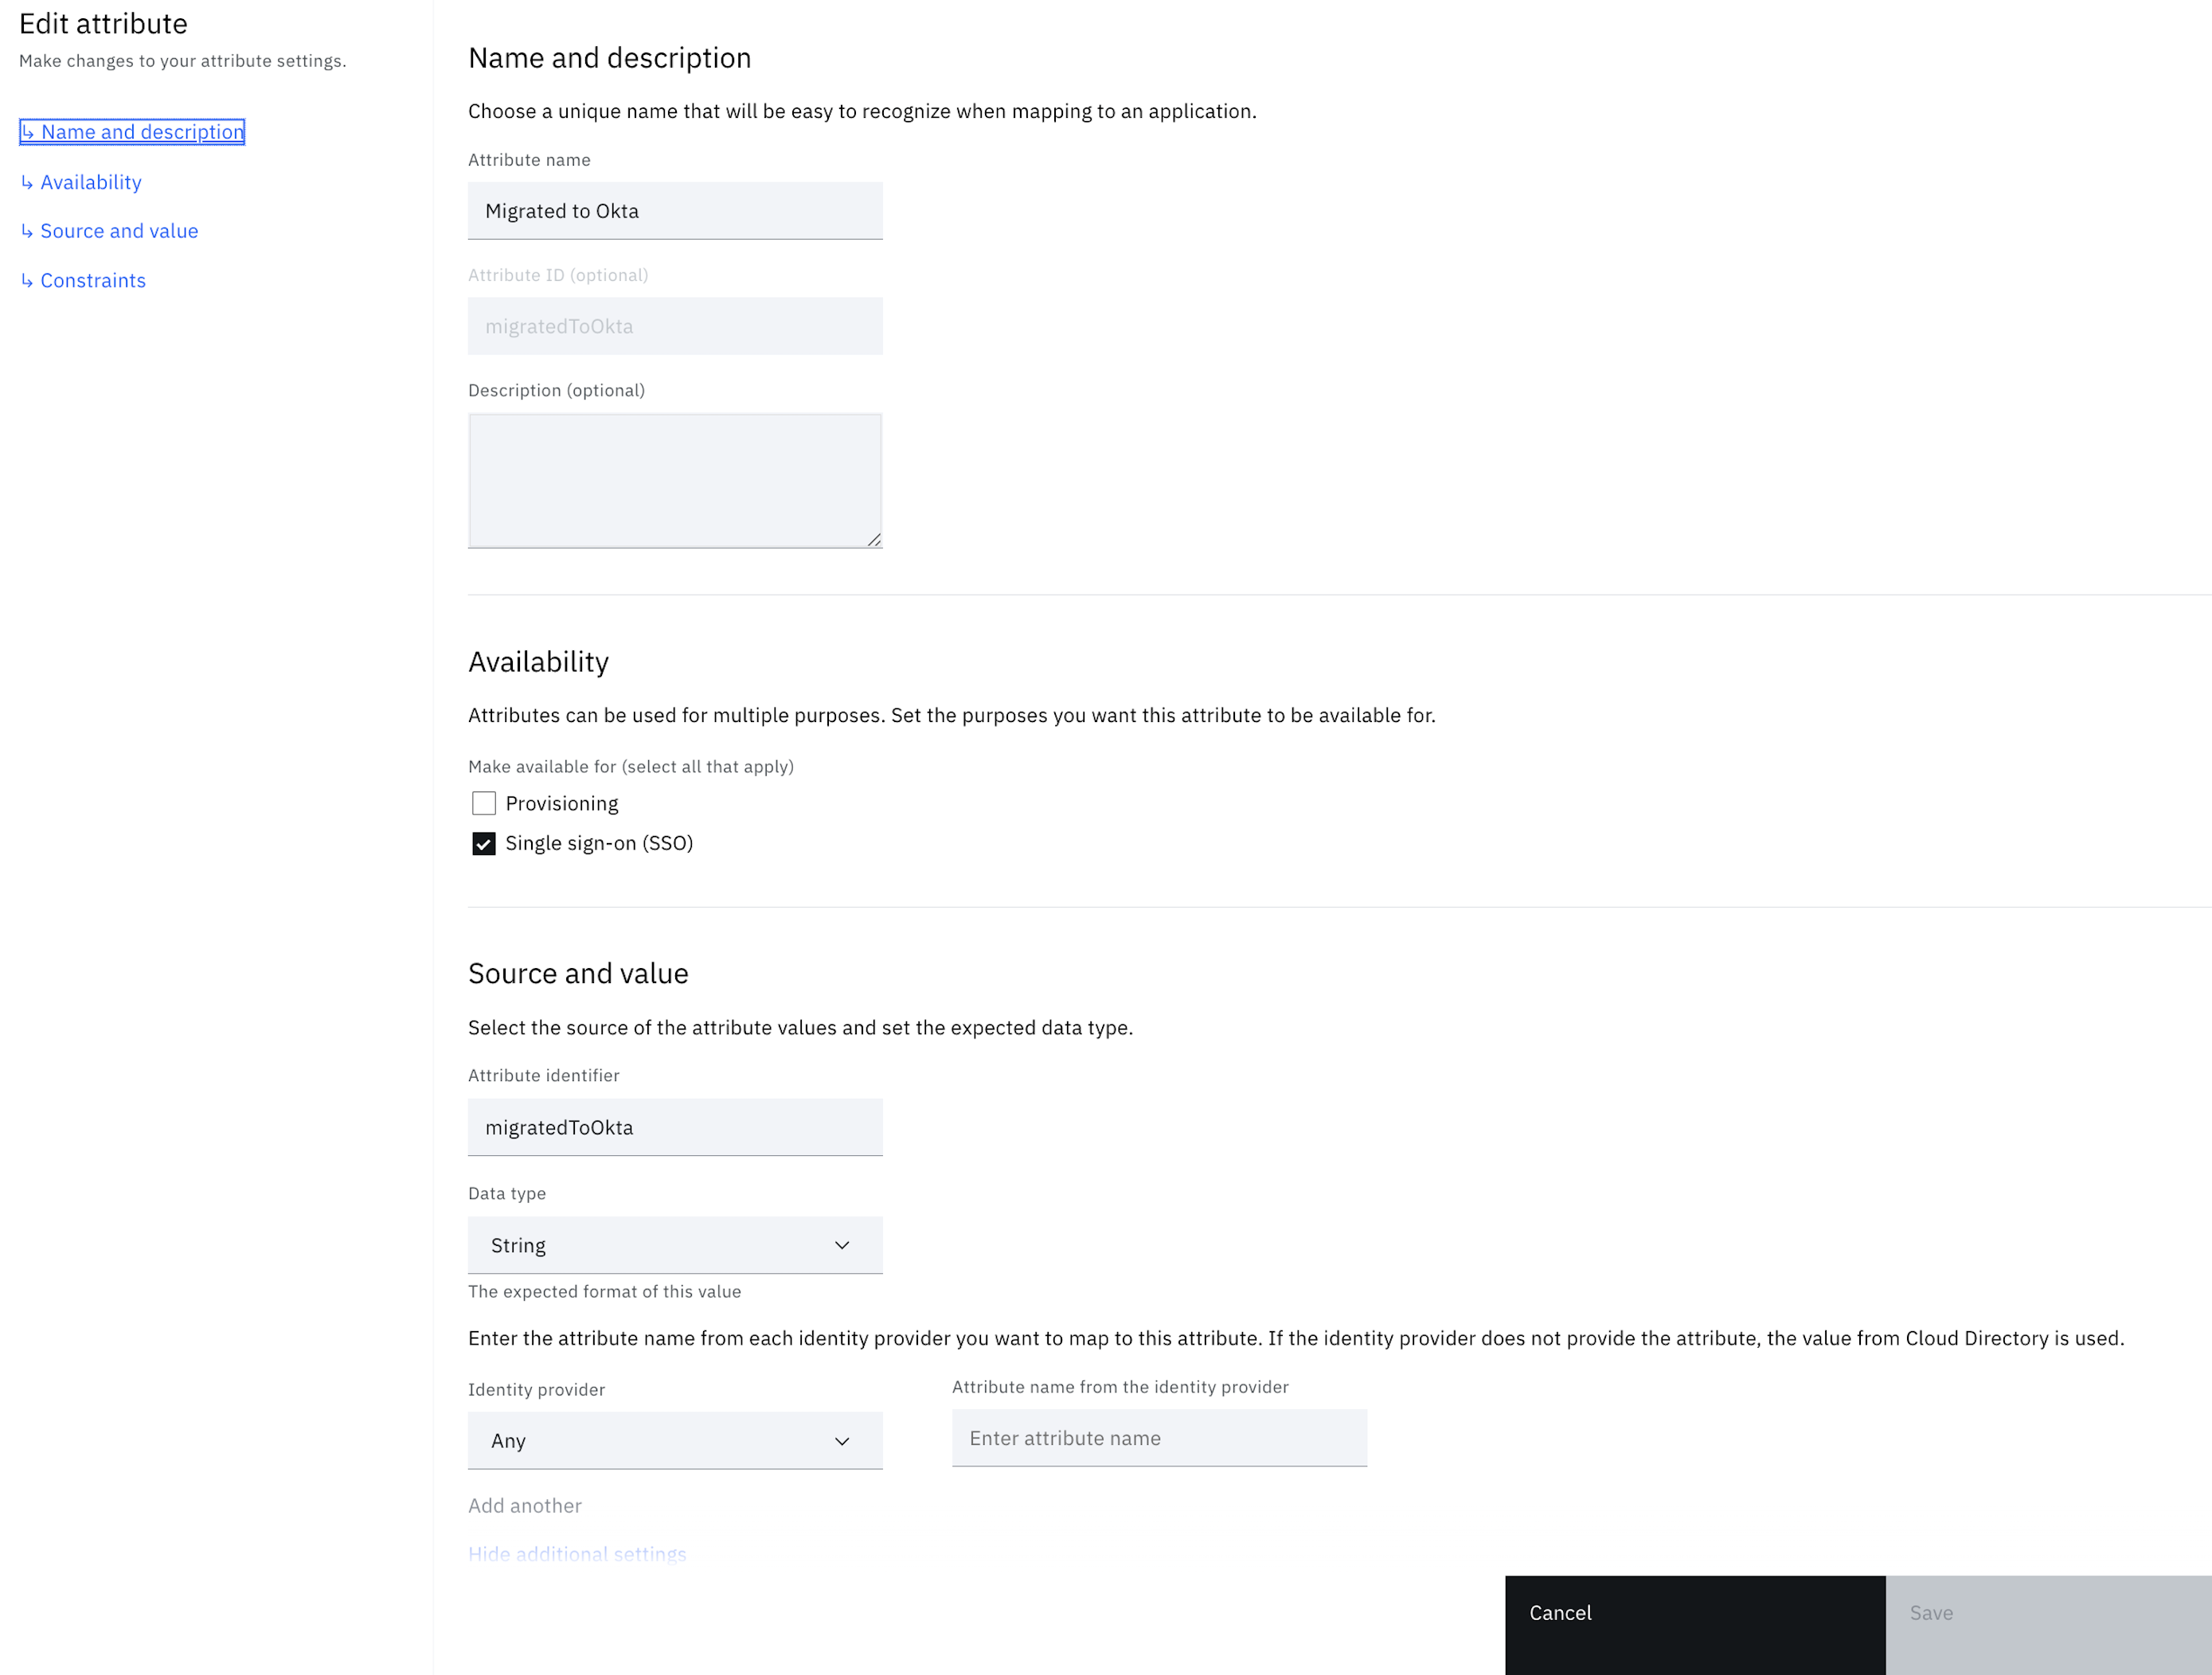
Now, a flag is needed to store the value pointing whether the user is migrated or not. The flag can be termed as Migrated to Okta.
Create a custom profile attribute – From the left-side menu, click Directory > Attributes> Custom attribute.
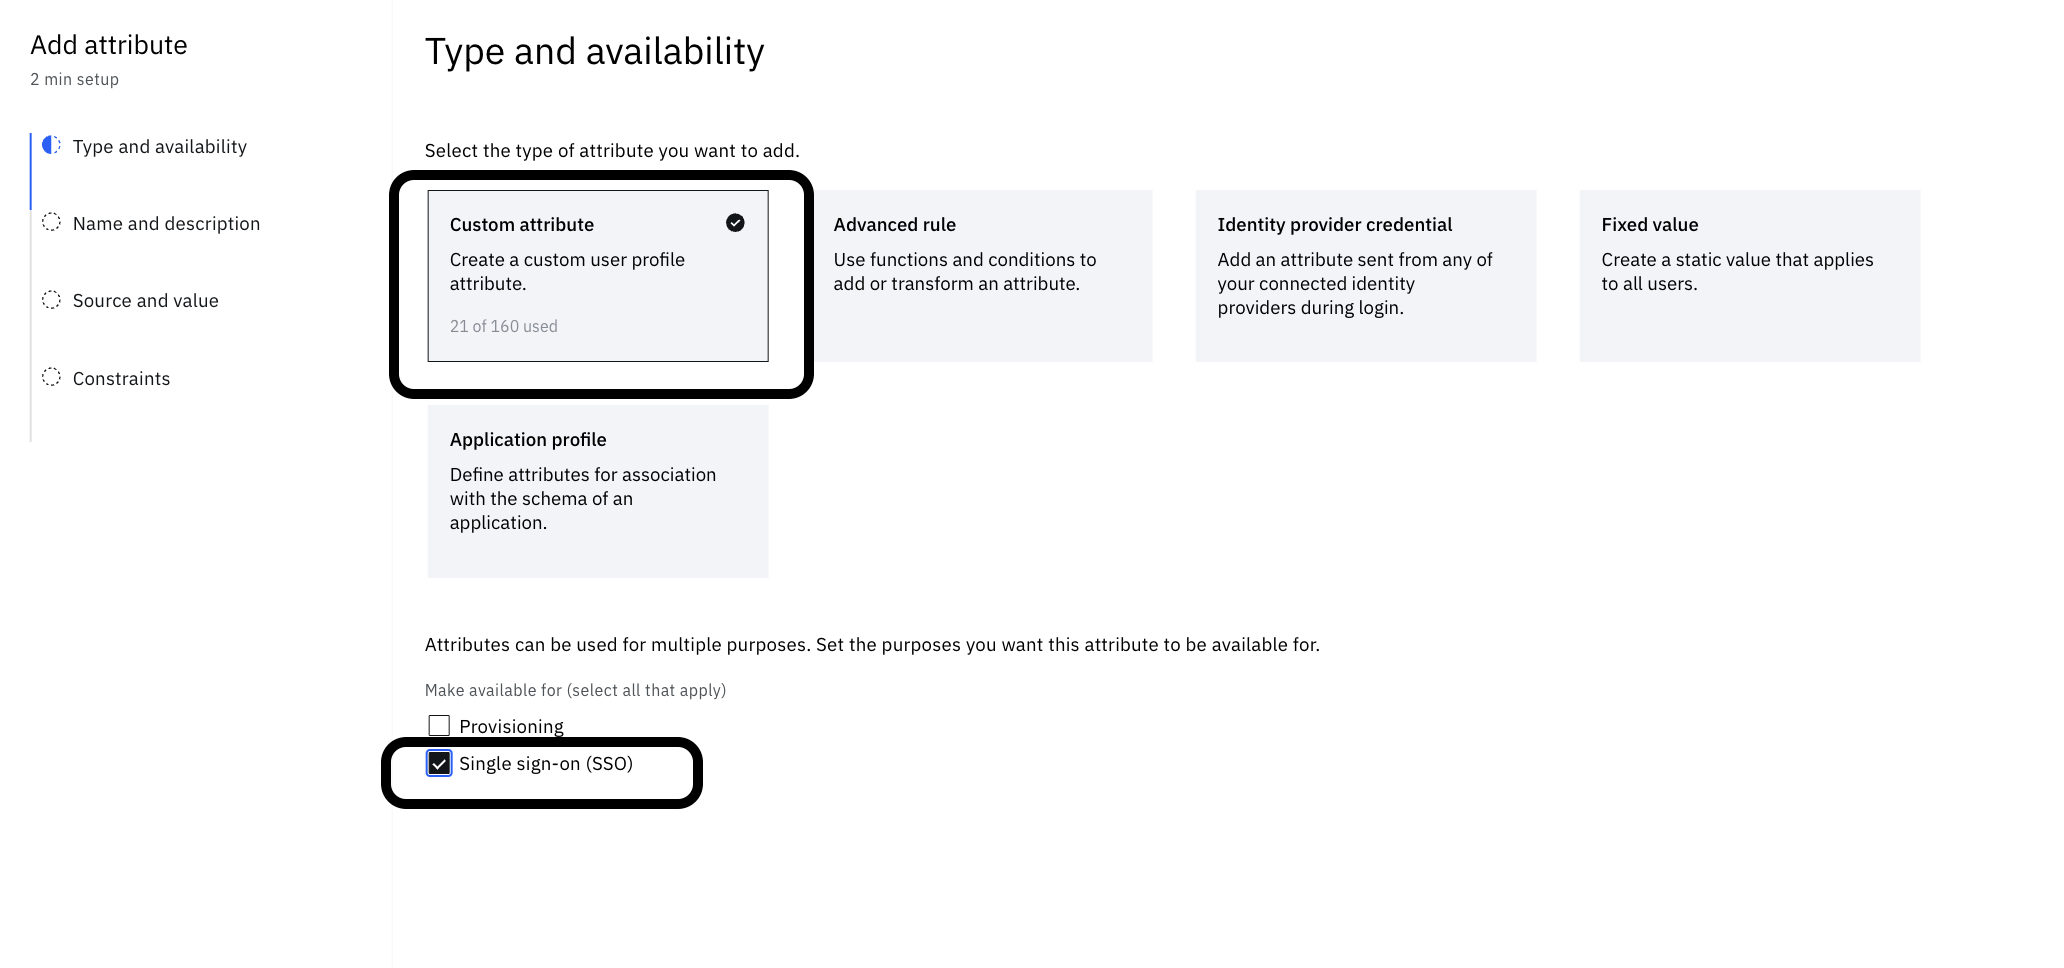
The following screenshot demonstrates the look after saving.
To attach a rule, in left menu go to Authentication -> Identity provider -> Global settings -> Attribute mapping.
Copy the following script and use it with custom attribute (Migrated to Okta). The custom rule is to create the user (Just in time) with the login flow and map it to a custom attribute (Migrated to Okta). In this way, it can be captured when the user logins next time and what login experience needs to be offered.
statements:
- context: >
    oktaTenant := "https://<your-tenant>-admin.okta.com"
- if:
    match: idsuser.getValue("JIT_realmName") != "<this is your On prem LDAP identity source realm name>"
    return: "false"
- context: >
    oktaToken := "<token>"
- context: >
    r := hc.Post(context.oktaTenant + "/api/v1/users", {
        "Accept": "application/json",
        "Content-Type": "application/json",
        "Authorization": "SSWS " + context.oktaToken
    }, jsonToString({
        "profile": {
            "firstName": idsuser.getValue("givenName"),
            "lastName": idsuser.getValue("sn"),
            "email": idsuser.getValue("mail"),
            "login": idsuser.getValue("mail")
        },
        "credentials": {
            "password" : { "value": idsuser.getValue("password") }
        }
    }))
- return: >
  context.r.responseBody.status == "ACTIVE" ? "true" : (context.r.responseBody.status)
This is how it looks like -

Custom branding theme
This flow presents custom pages and so, a theme needs to be created to prevent affecting the flows using the default theme. There are two customized files:
- custom_page1.html: This requests for the username.
- custom_page2.html: This shows an error in the event that the flow fails.
Login to the IBM Verify admin console and follow the provided steps.
-
From the left-side menu, select User experience and click on Branding
-
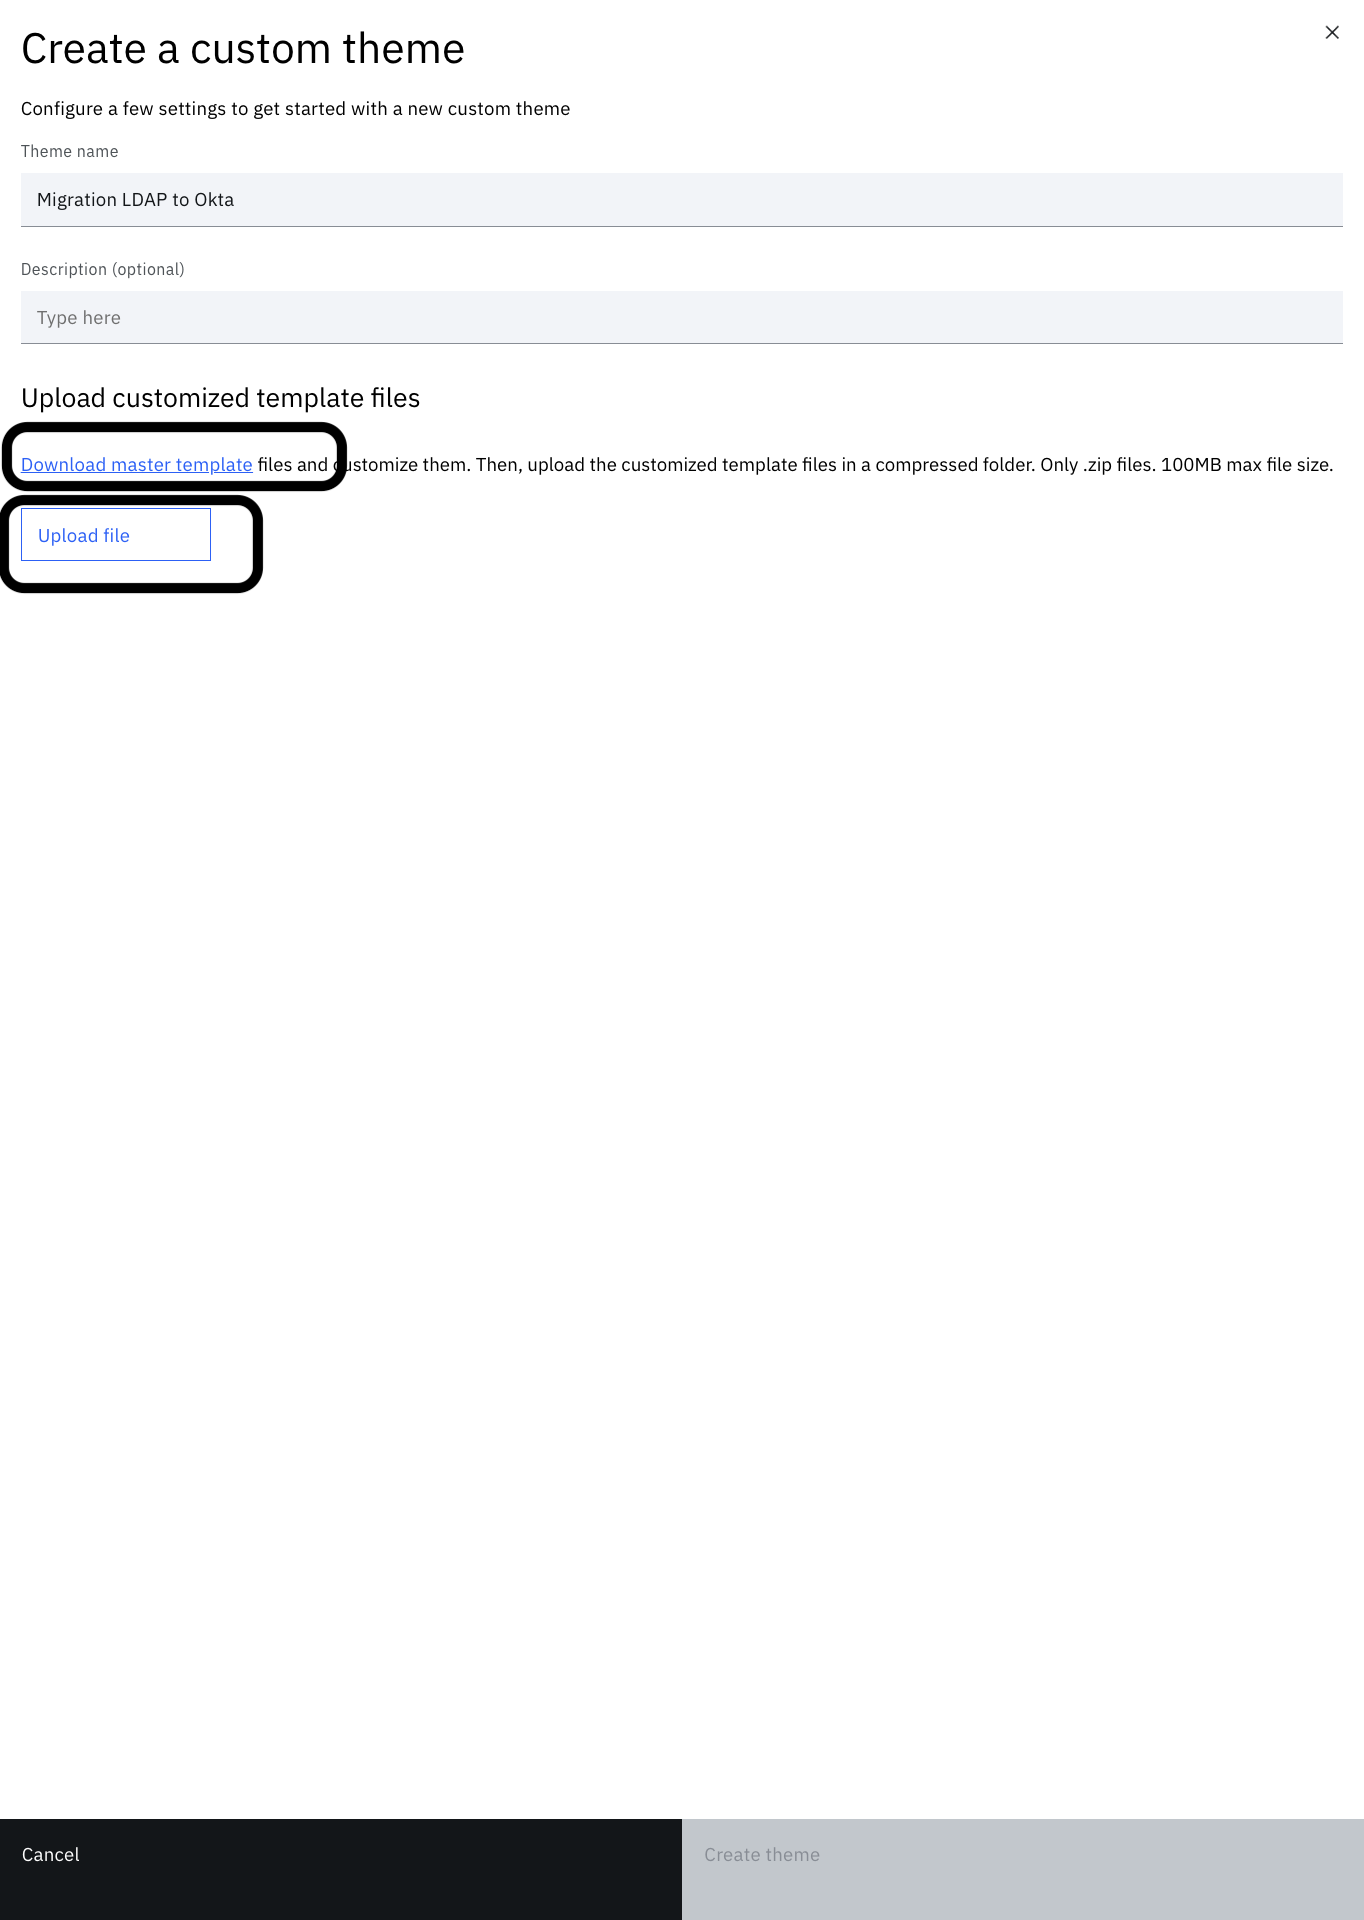
Create a new branding theme called "Migration LDAP to Okta". You can follow the steps mentioned here.
-
Click on the theme tile to view the file tree.
-
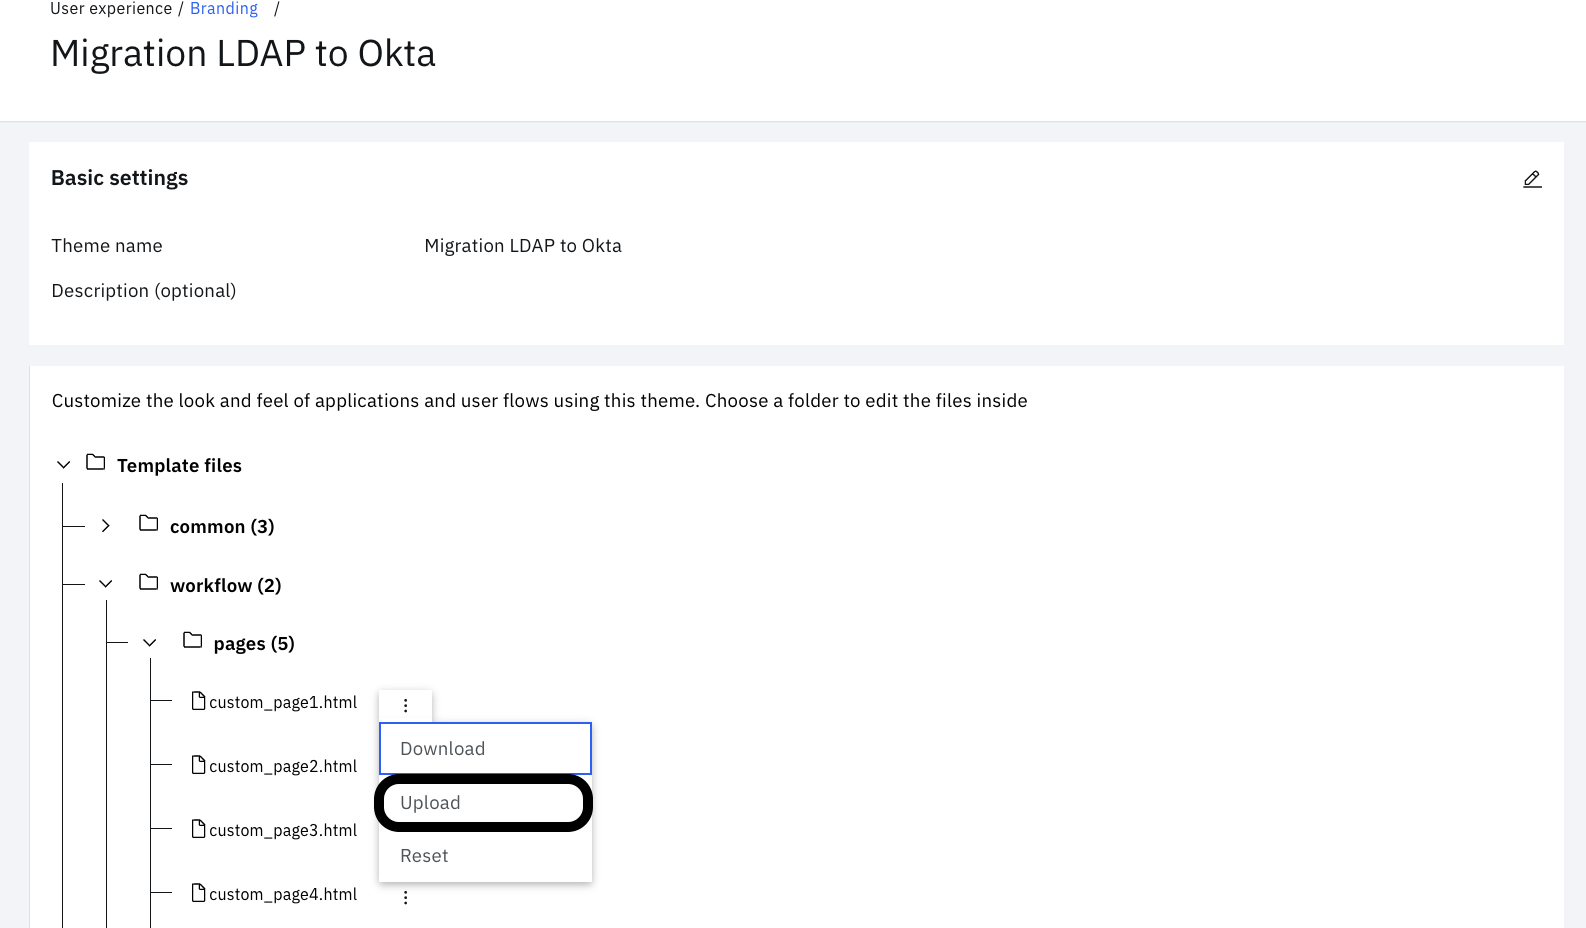
Expand "workflow" > "pages" and click on the three vertical dots next to "custom_page1.html". Click "Upload".
-
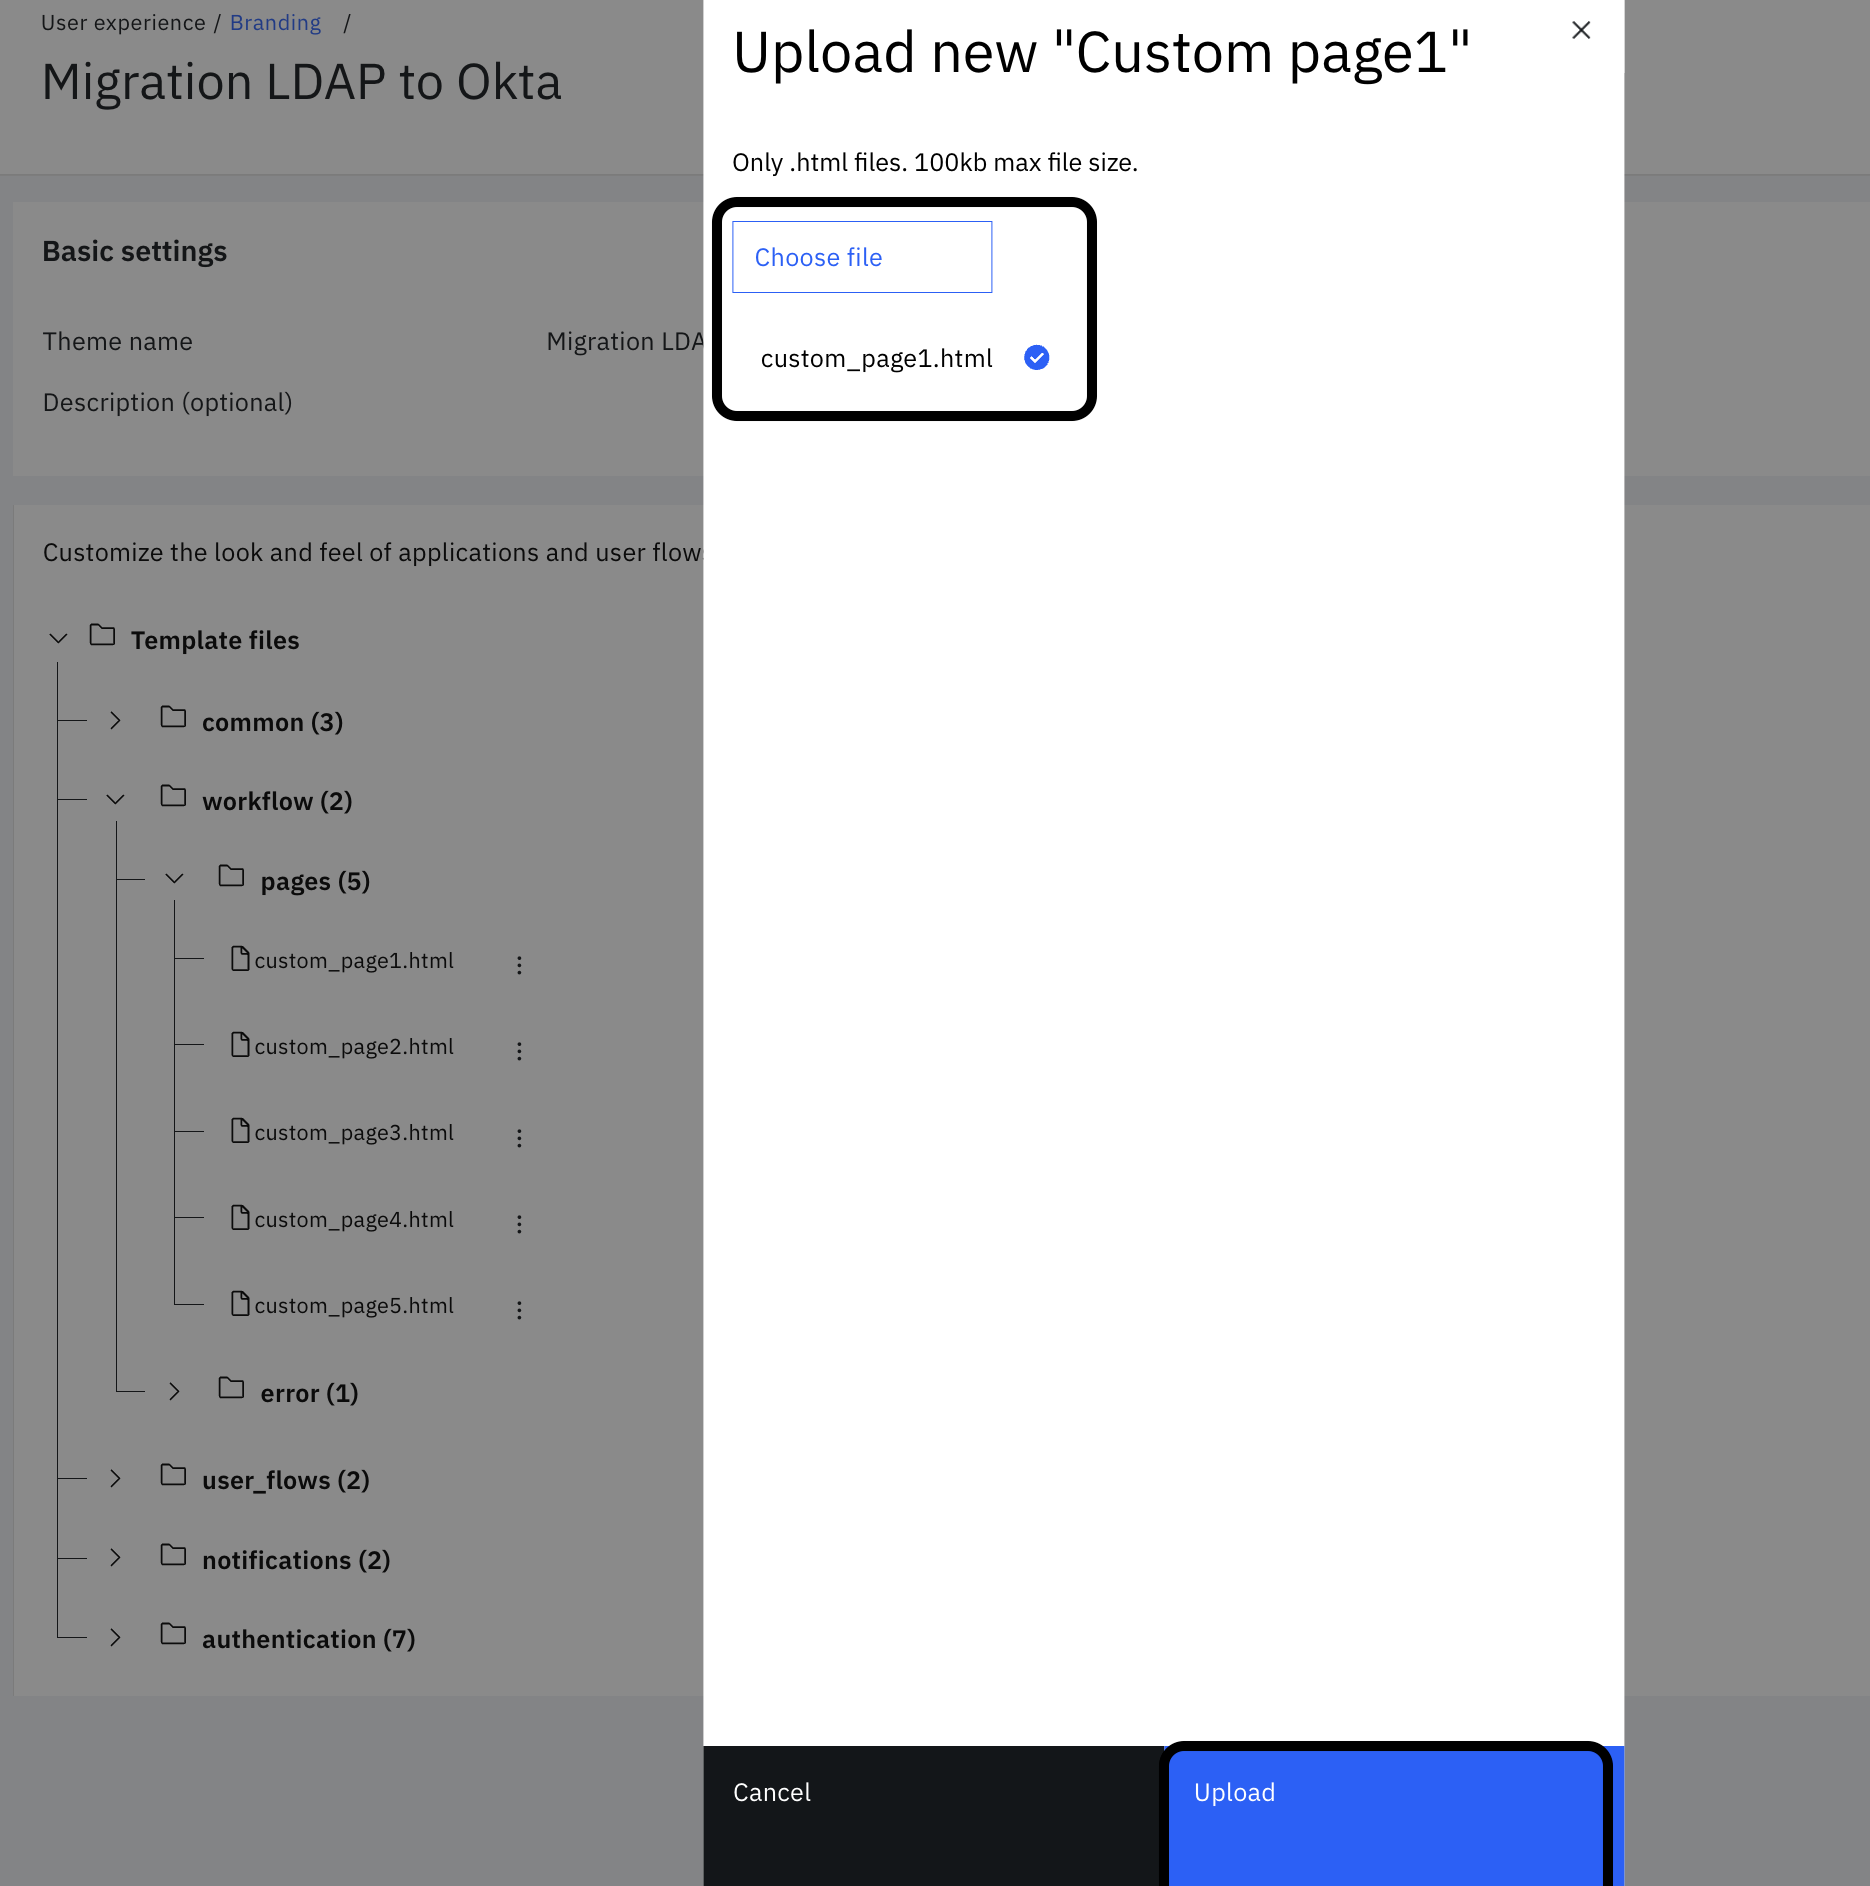
Choose "$GIT_REPO/flows/ldap_to_okta_migration/pages/templates/workflow/default/custom_page1.html" from the local folder. Then click "Upload".
-
Similar to the earlier step, under "workflow" > "pages", click on the three vertical dots next to "custom_page2.html". Click "Upload".
-
Choose "$GIT_REPO/flows/ldap_to_okta_migration/pages/templates/workflow/default/custom_page2.html" from the local folder. Then click "Upload".
Import the workflow
-
From the left-side menu, select User experience and click on Flow designer.
-
Click the Import icon adjacent the Create flow button.

-
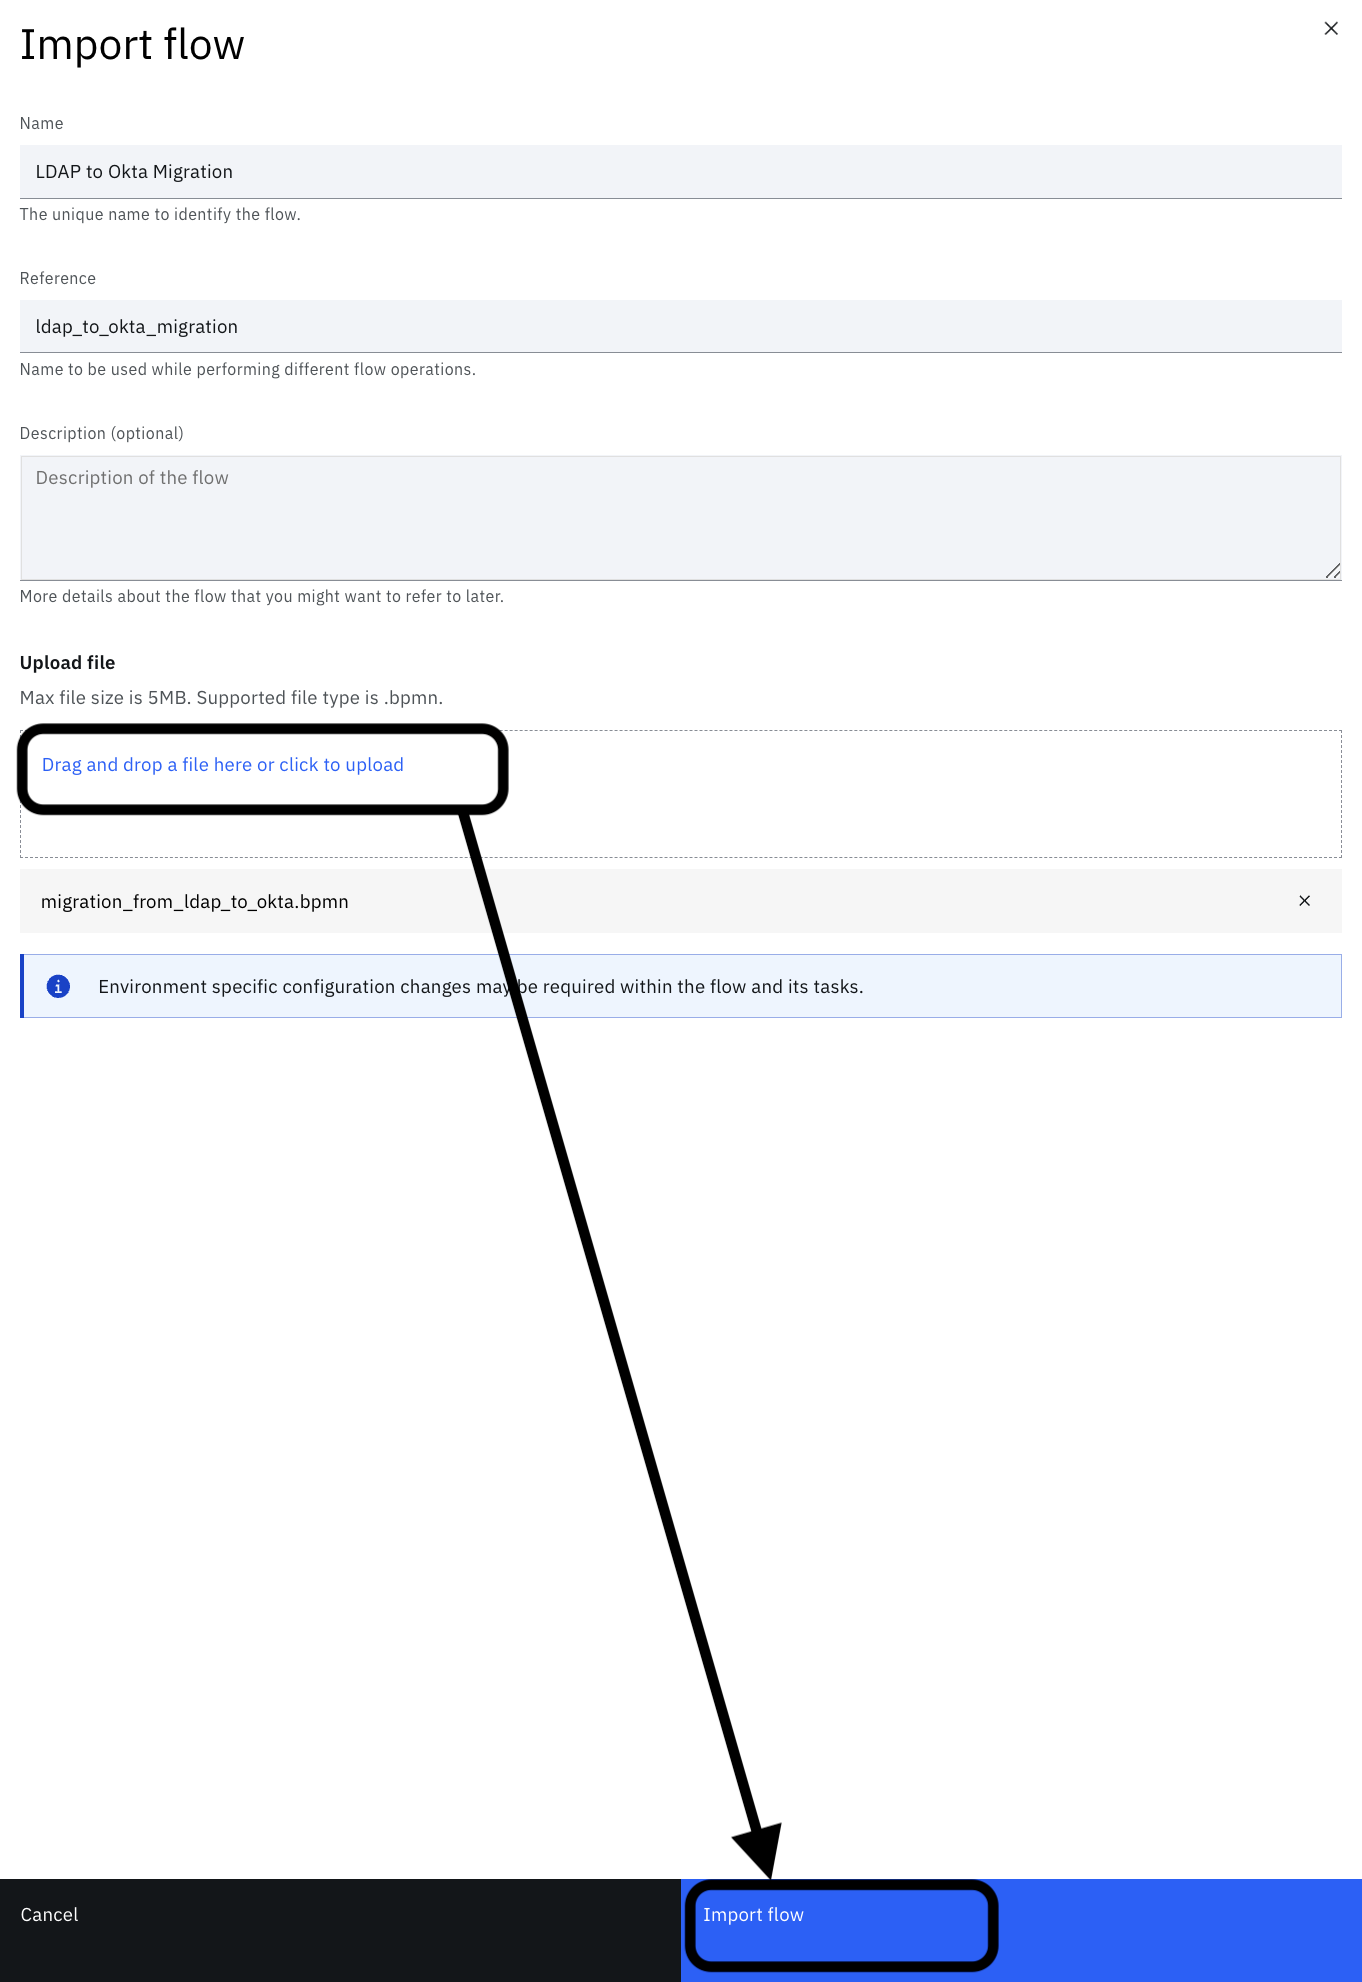
Enter the details and upload the file located at "$GIT_REPO/flows/ldap_to_okta_migration/ldap_to_okta_migration.bpmn". Click Import flow.
-
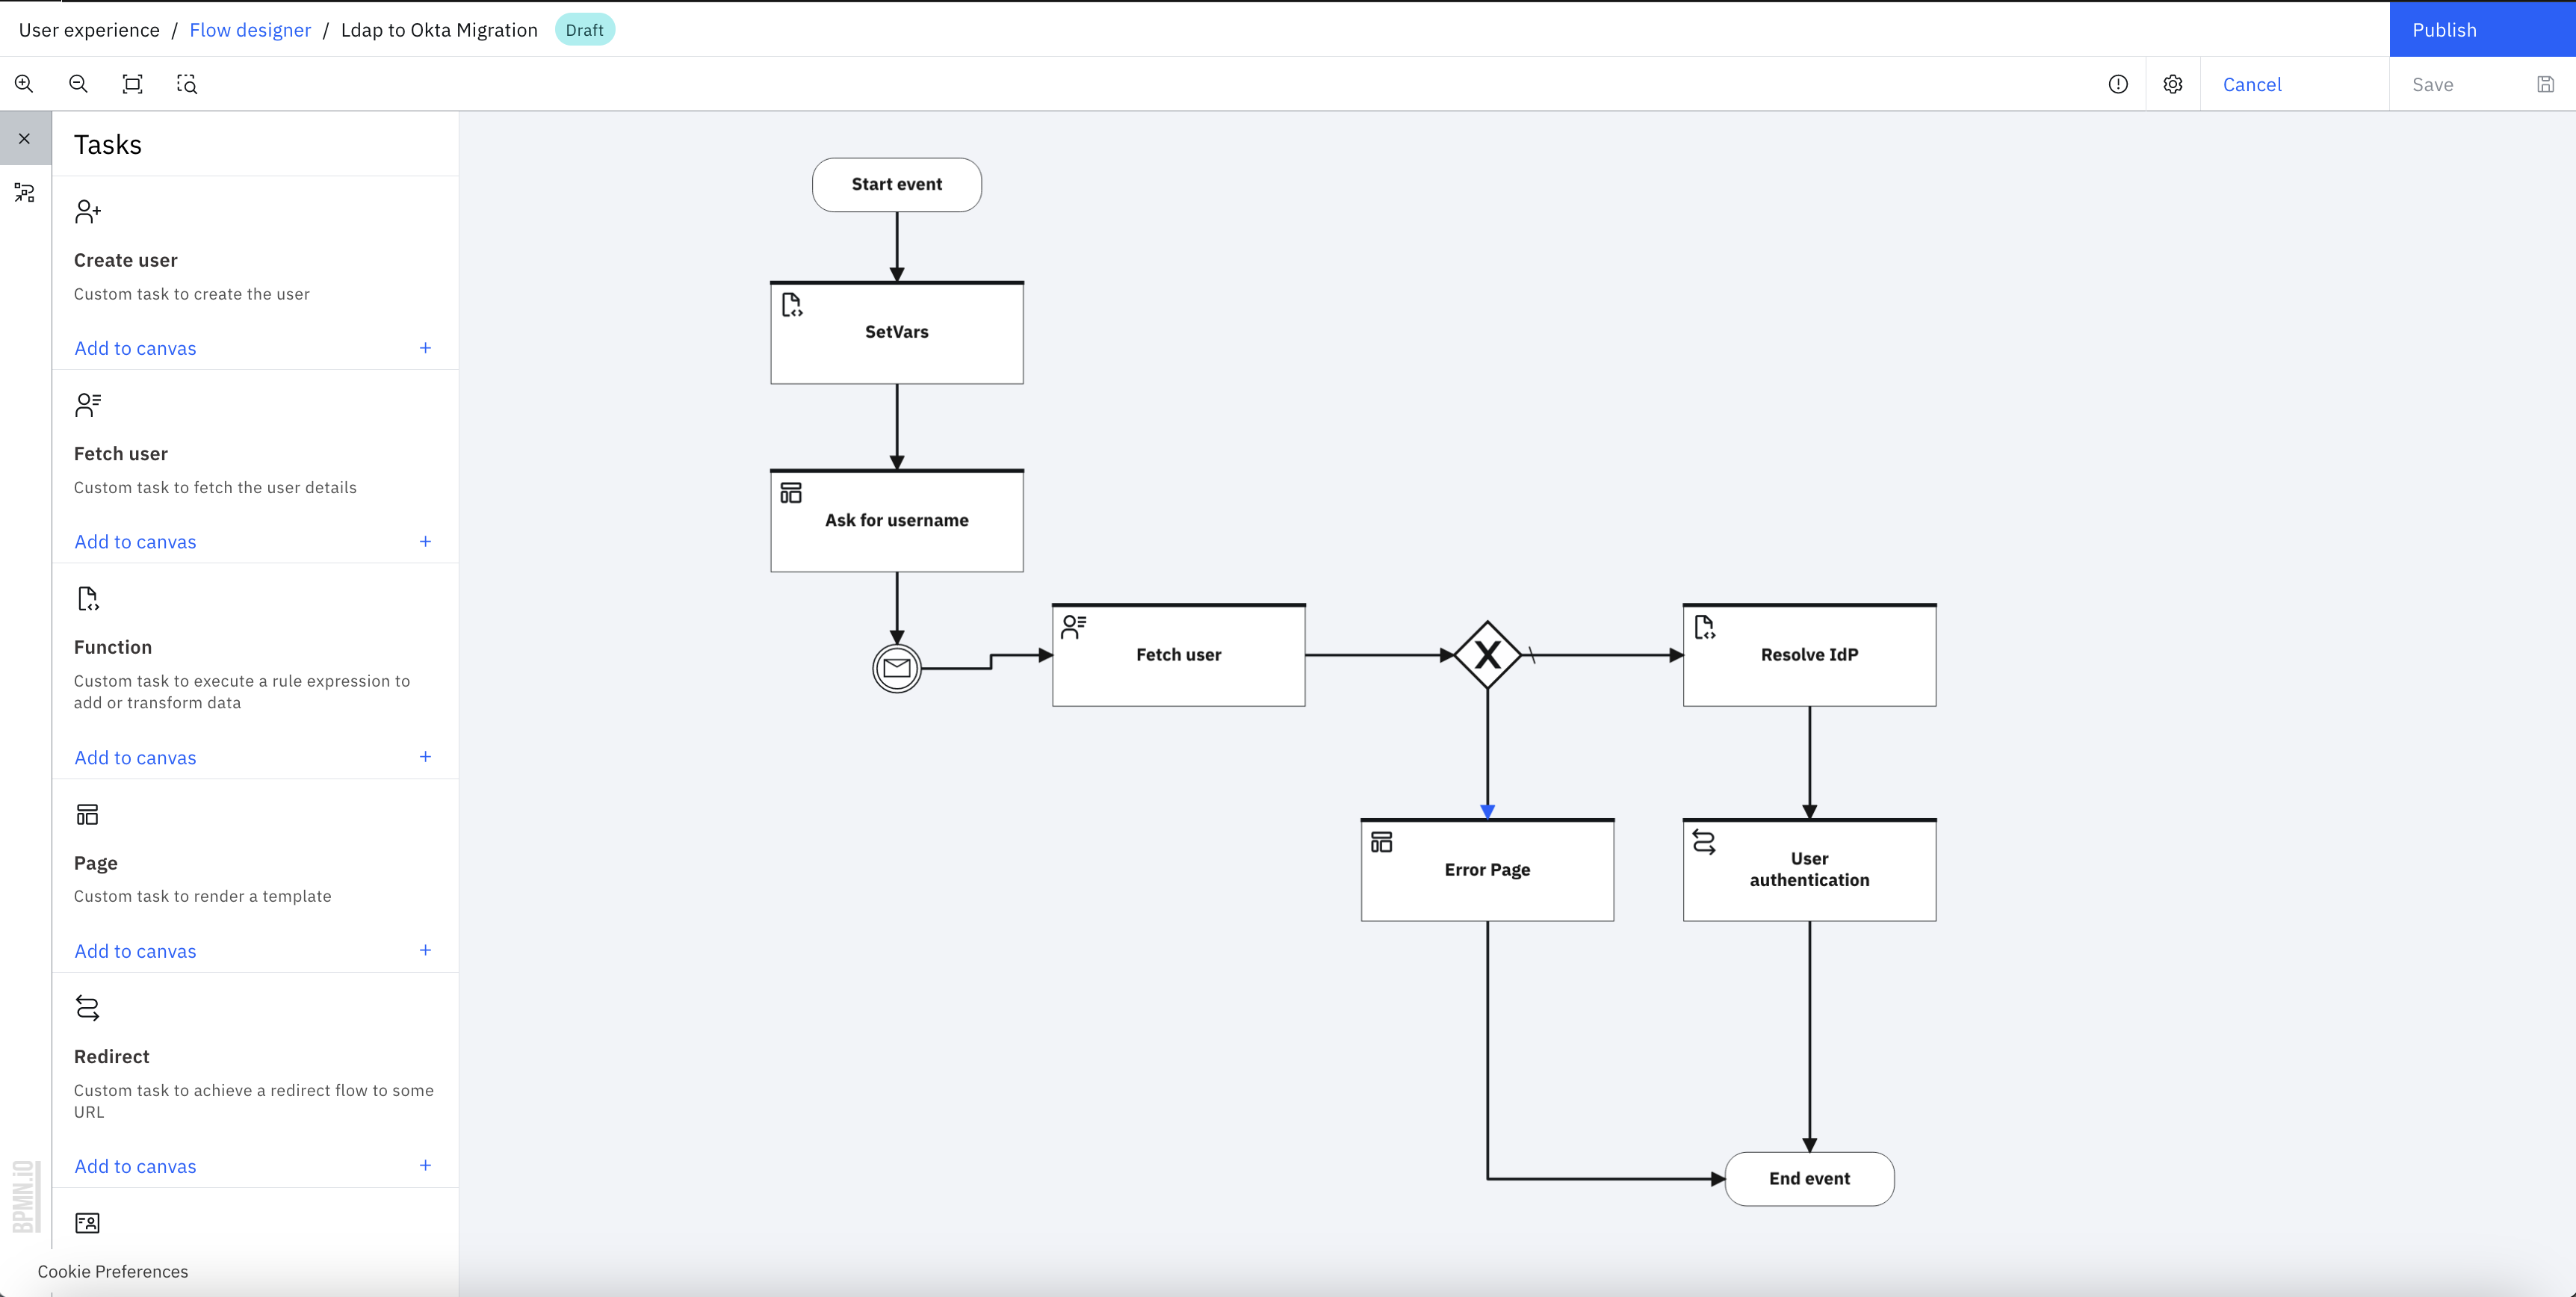
The designer screen gets opened.
-
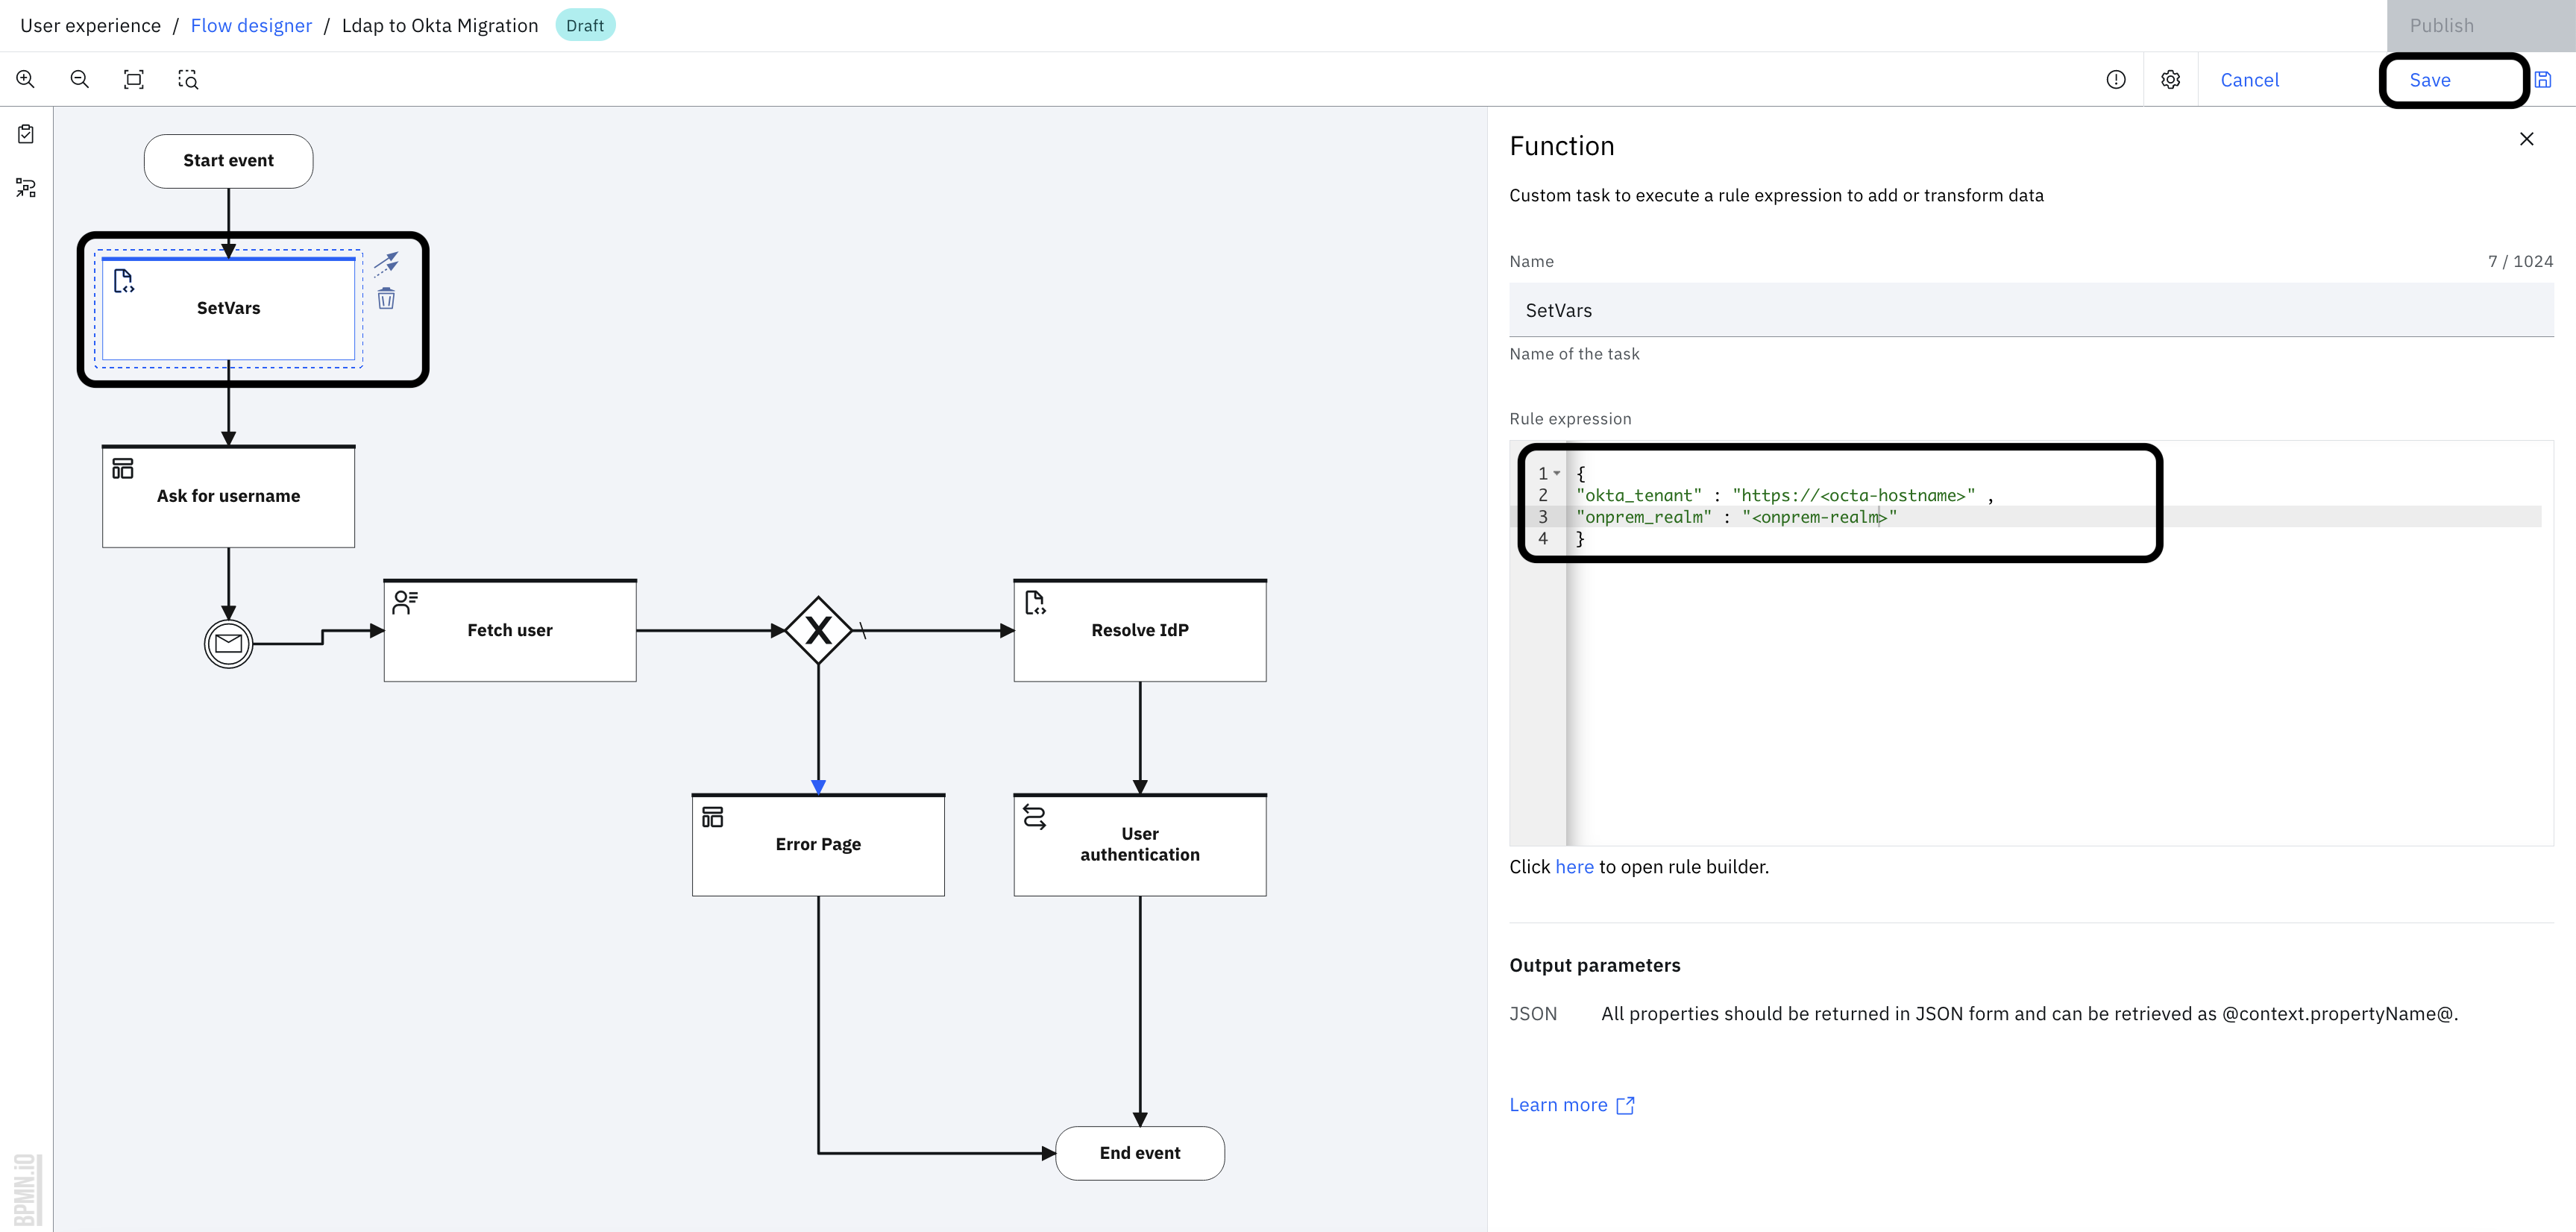
Select the "Set Vars" task and modify the "okta_tenant" and "onprem_realm" values, onprem_realm is realm name of your LDAP or AD identity source.
-
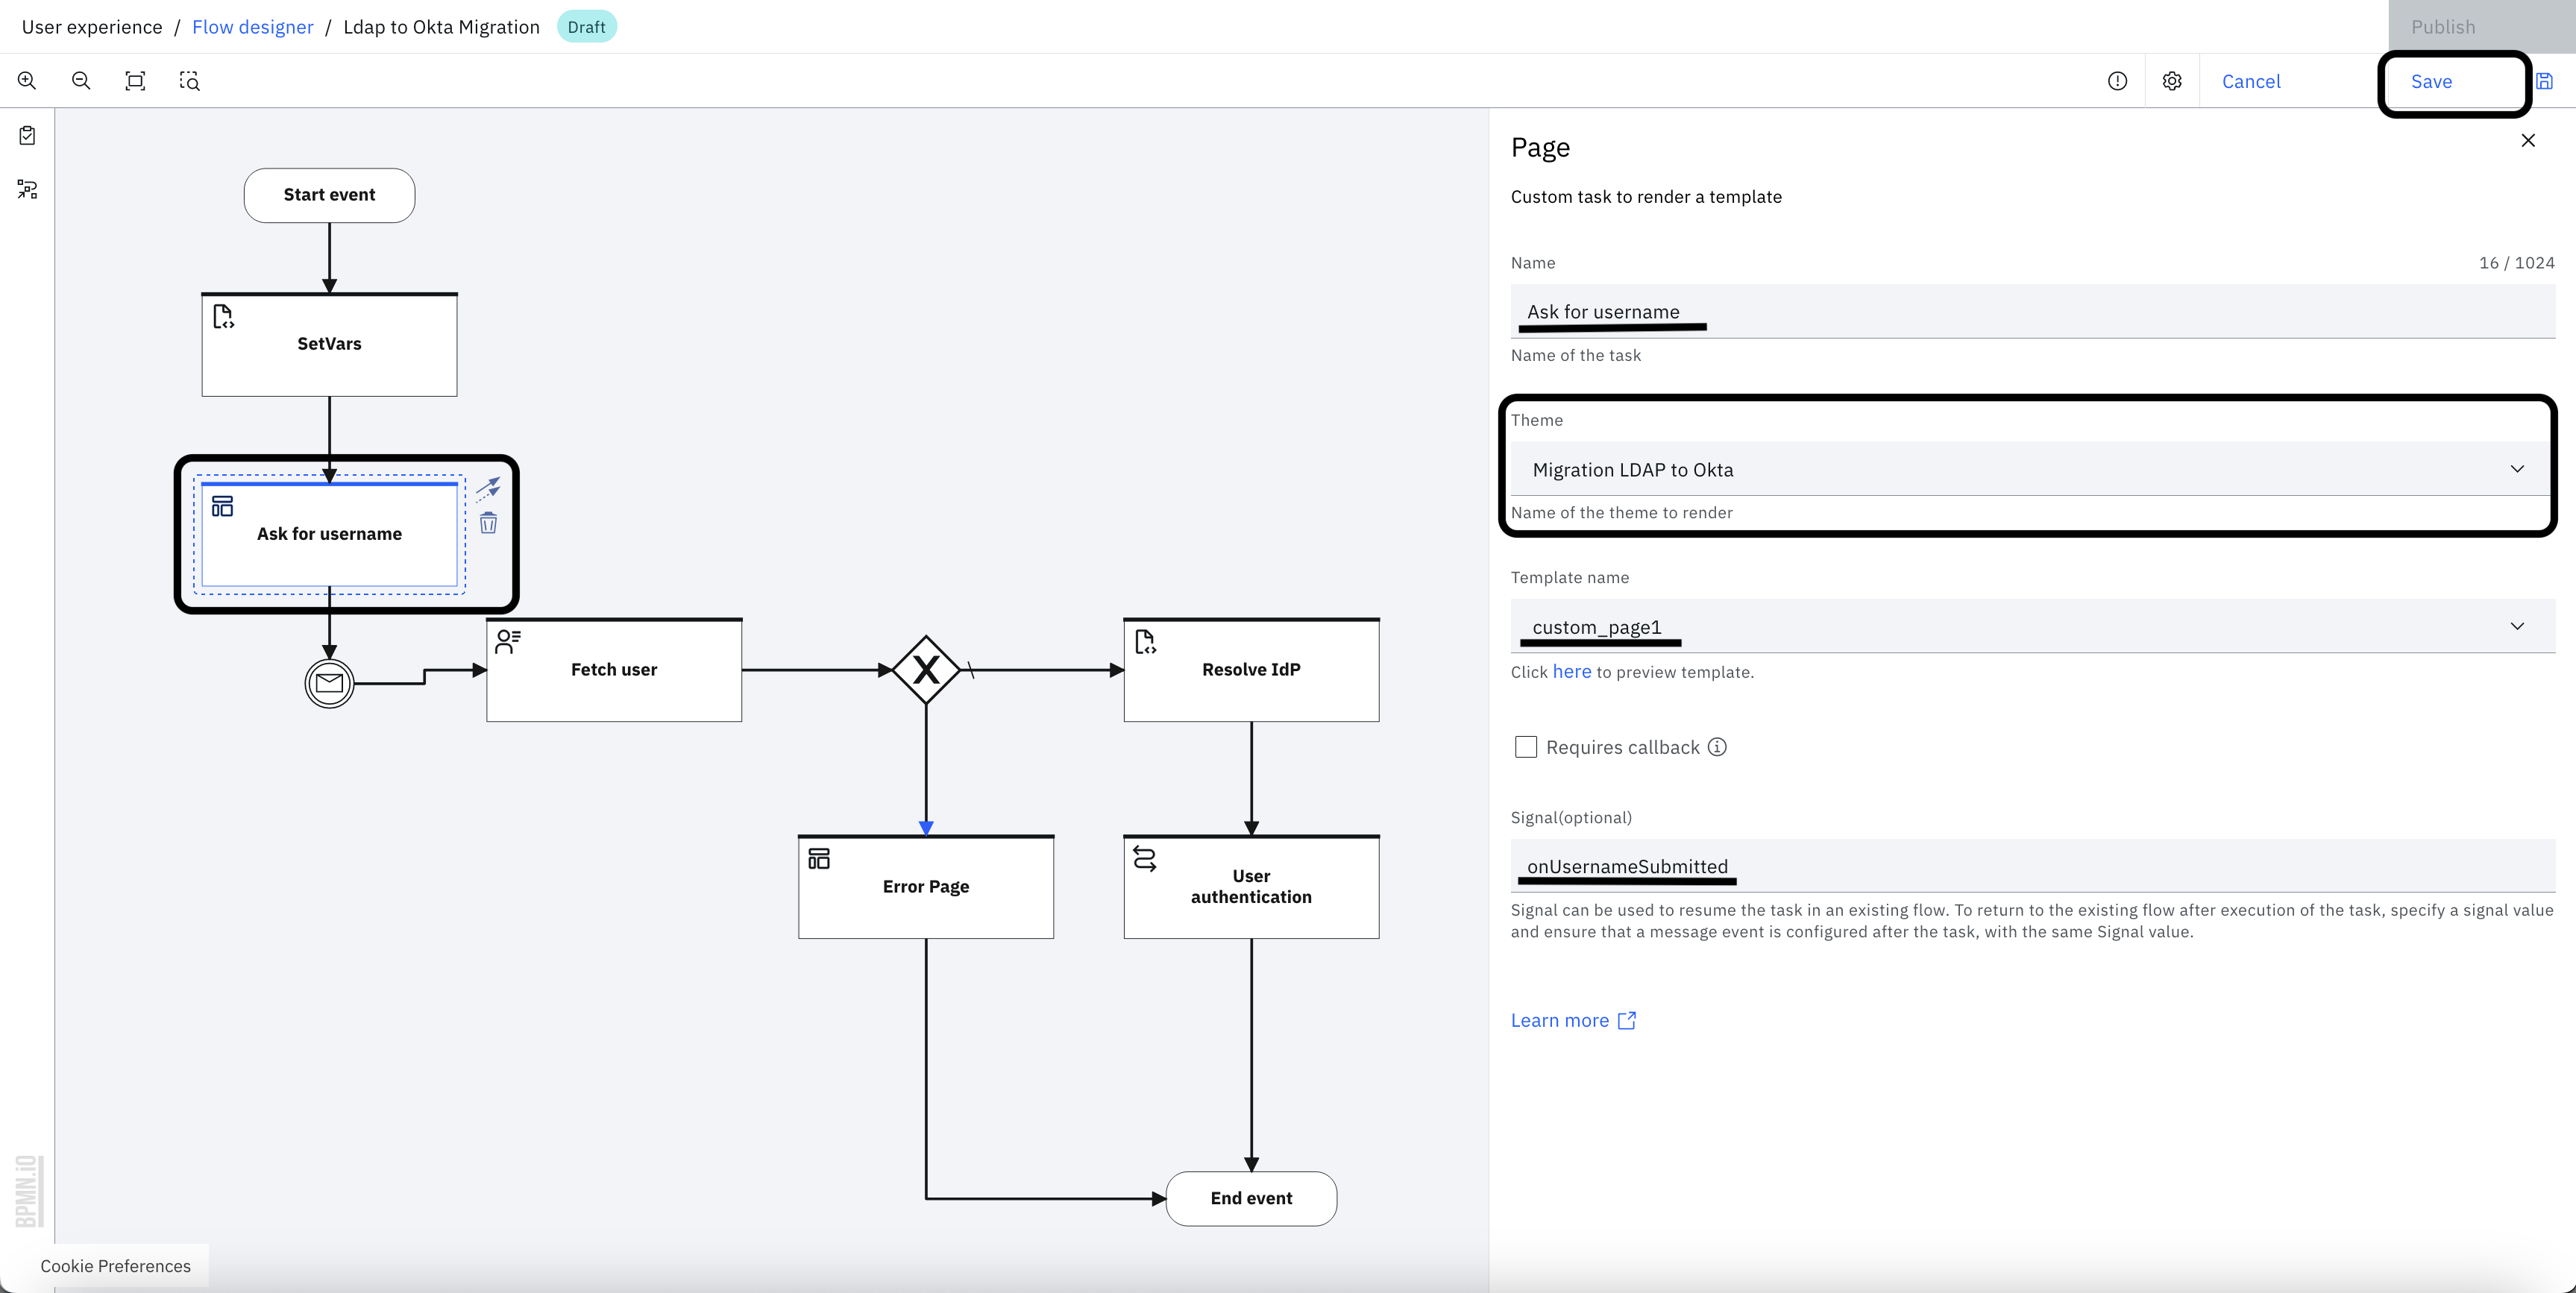
Select the "Ask for username" task and set the theme to the "Migration LDAP to Okta" theme.
-
Click on Save changes and Publish.
Running the flow
-
In the flow "Settings" tab, copy the "Execution URL".
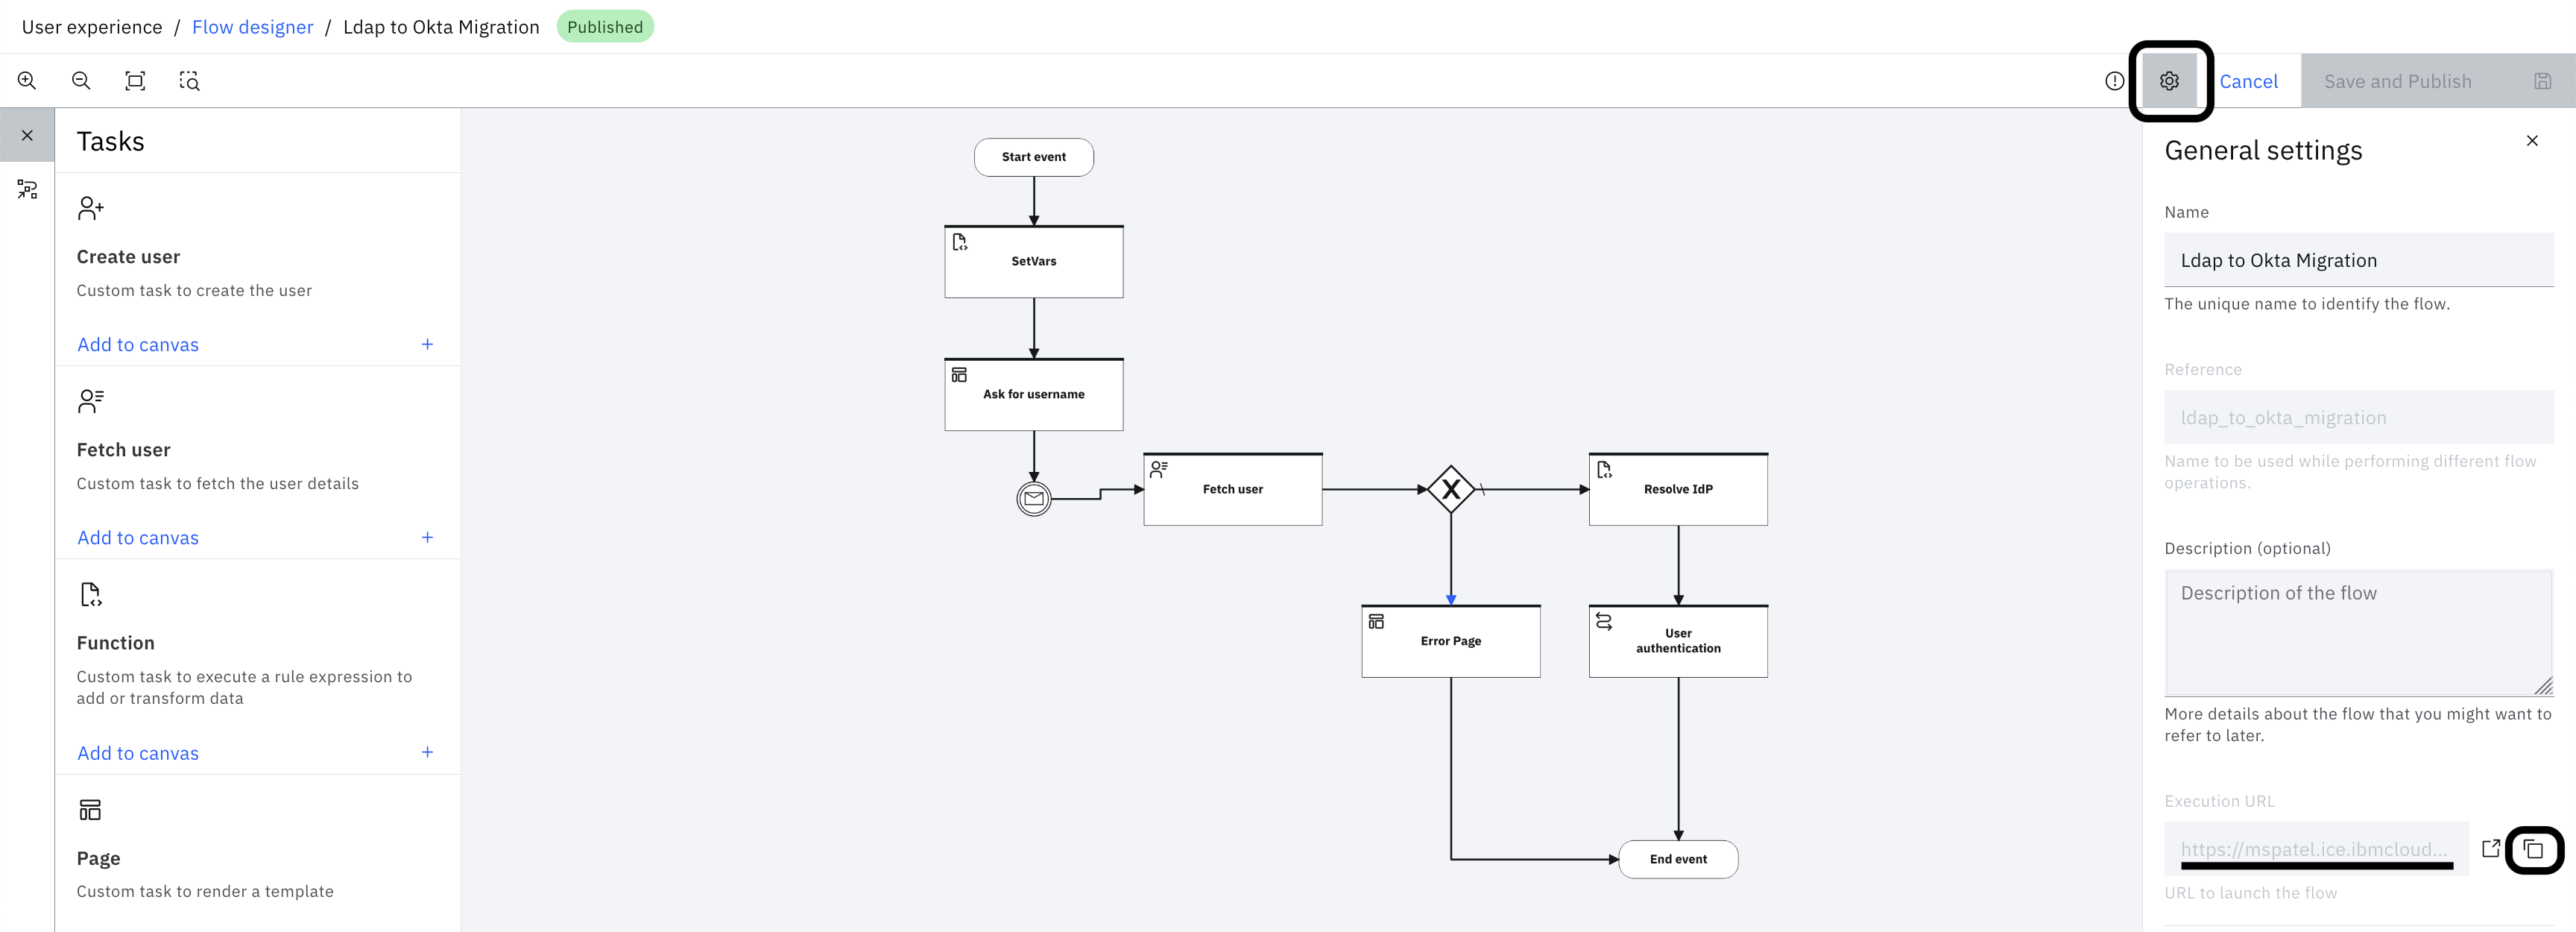
-
Open an incognito tab or a completely different browser and paste the URL.
-
Enter the username and click "Continue".
-
User gets redirected to On-prem LDAP identity source login.
-
Log out and again paste the URL. This time the user gets redirected to login using okta.
The wrap
These flows are combination of using several powerful capabilites provided by IBM Verify
- Use of the flow designer to orchestrate a complex migration flow
- Functions to write complex scripted logic
- Out-of-the-box support for OIDC Enterprise identity sources
- Out-of-the-box user and credential migration from LDAP to Cloud Directory
Vivek Jain, IBM Security
Updated 18 days ago
