Orchestrating user registration with risk evaluation
Orchestrating user registration with risk evaluation
IBM Verify enables users to self-register themselves, as typically seen in Consumer Identity and Access Management (CIAM) and Business-to-Business-to-Consumer (B2B2C) use cases.
Self-registration can be done by taking the user through a series of data collection and validation steps. Before a self-registered user is onboarded, it is imperative that the organisation wants to check for any risks associated in onboarding. One probable way to assess the risk is to evaluate the Risk Score associated with the user email. Email risk score reveals the probability of a fraudulent user and in such cases, the self-registration process can be auto-terminated.
The article illustrates the process of using the Email Risk Score evaluation to honour OR decline a user self-registration request.
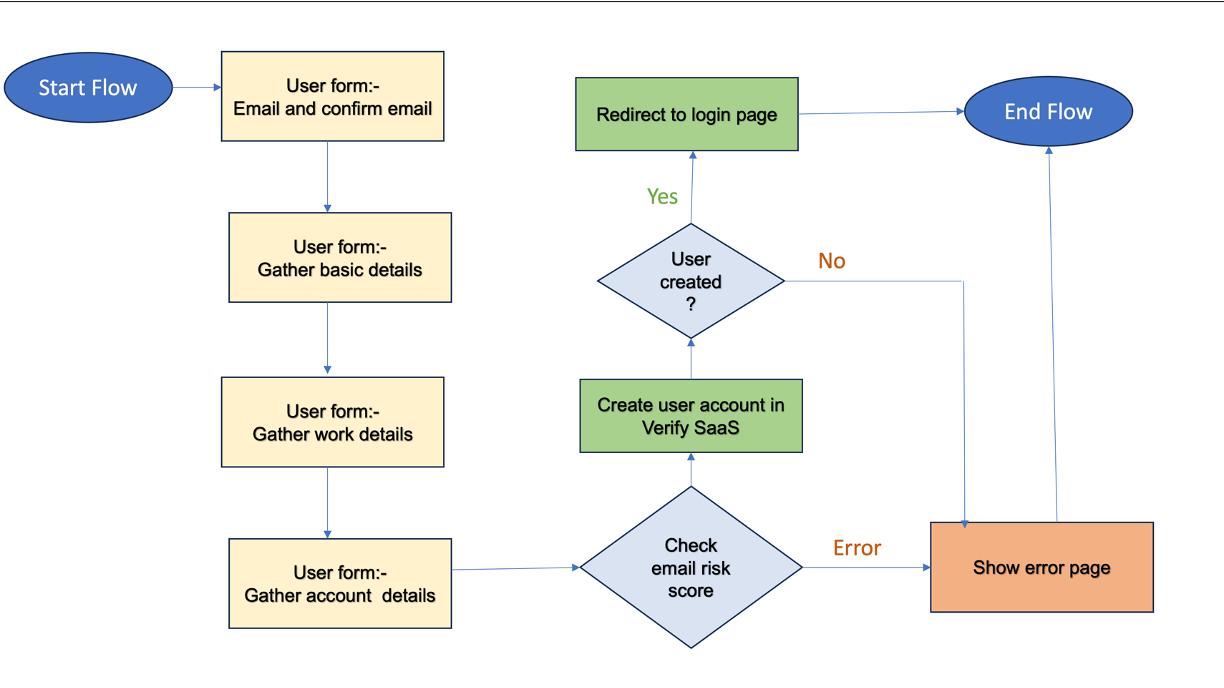
The succeeding details orchestrate a user registration flow with risk evaluation through a third-party risk provider.
Overview of the flow
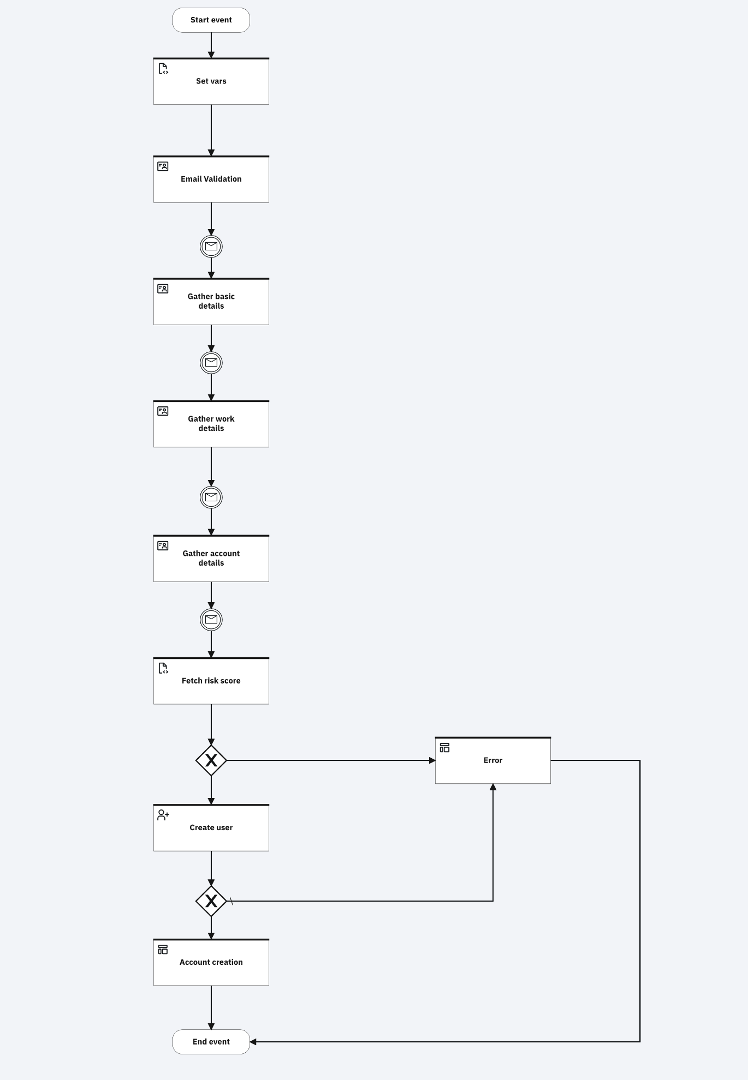
The flow includes the following steps:
- Ask the user to provide an email with an intent to use it as the username.
- Validate the email by using Email-OTP.
- Ask the user to provide basic details like name, family name.
- Ask the user to provide work details.
- Ask the user to provide a password.
- Use a "Risk scoring engine" to deduce the risk score of the submitted details.
- Allow the user registration based on the risk score.
- Create the user.
- Redirect to account creation confirmation page.
Resources
The article uses importable file resources that can be found in the user_registration flow with risk evaluation subdirectory of the verify-saas-resources GitHub repository.
For more information on the GitHub repository that contains supporting resources for example flows, see the Associated Assets section of the Flow Designer overview page.
Prerequisites
Review and understand the hello world example, including how to obtain flow and page asset resources for configuring the example flows. For more information, see parent page.
Installation and configuration
Custom branding theme
This flow presents custom pages. Therefore, a theme needs to be created to prevent affecting the flows that use the default theme. One customized file exists:
- custom_page1.html: This custom page renders a confirmation message that the account was successfully created.
Login to the IBM Verify admin console and follow these steps:
-
From the left side menu, select User experience and click Branding.
-
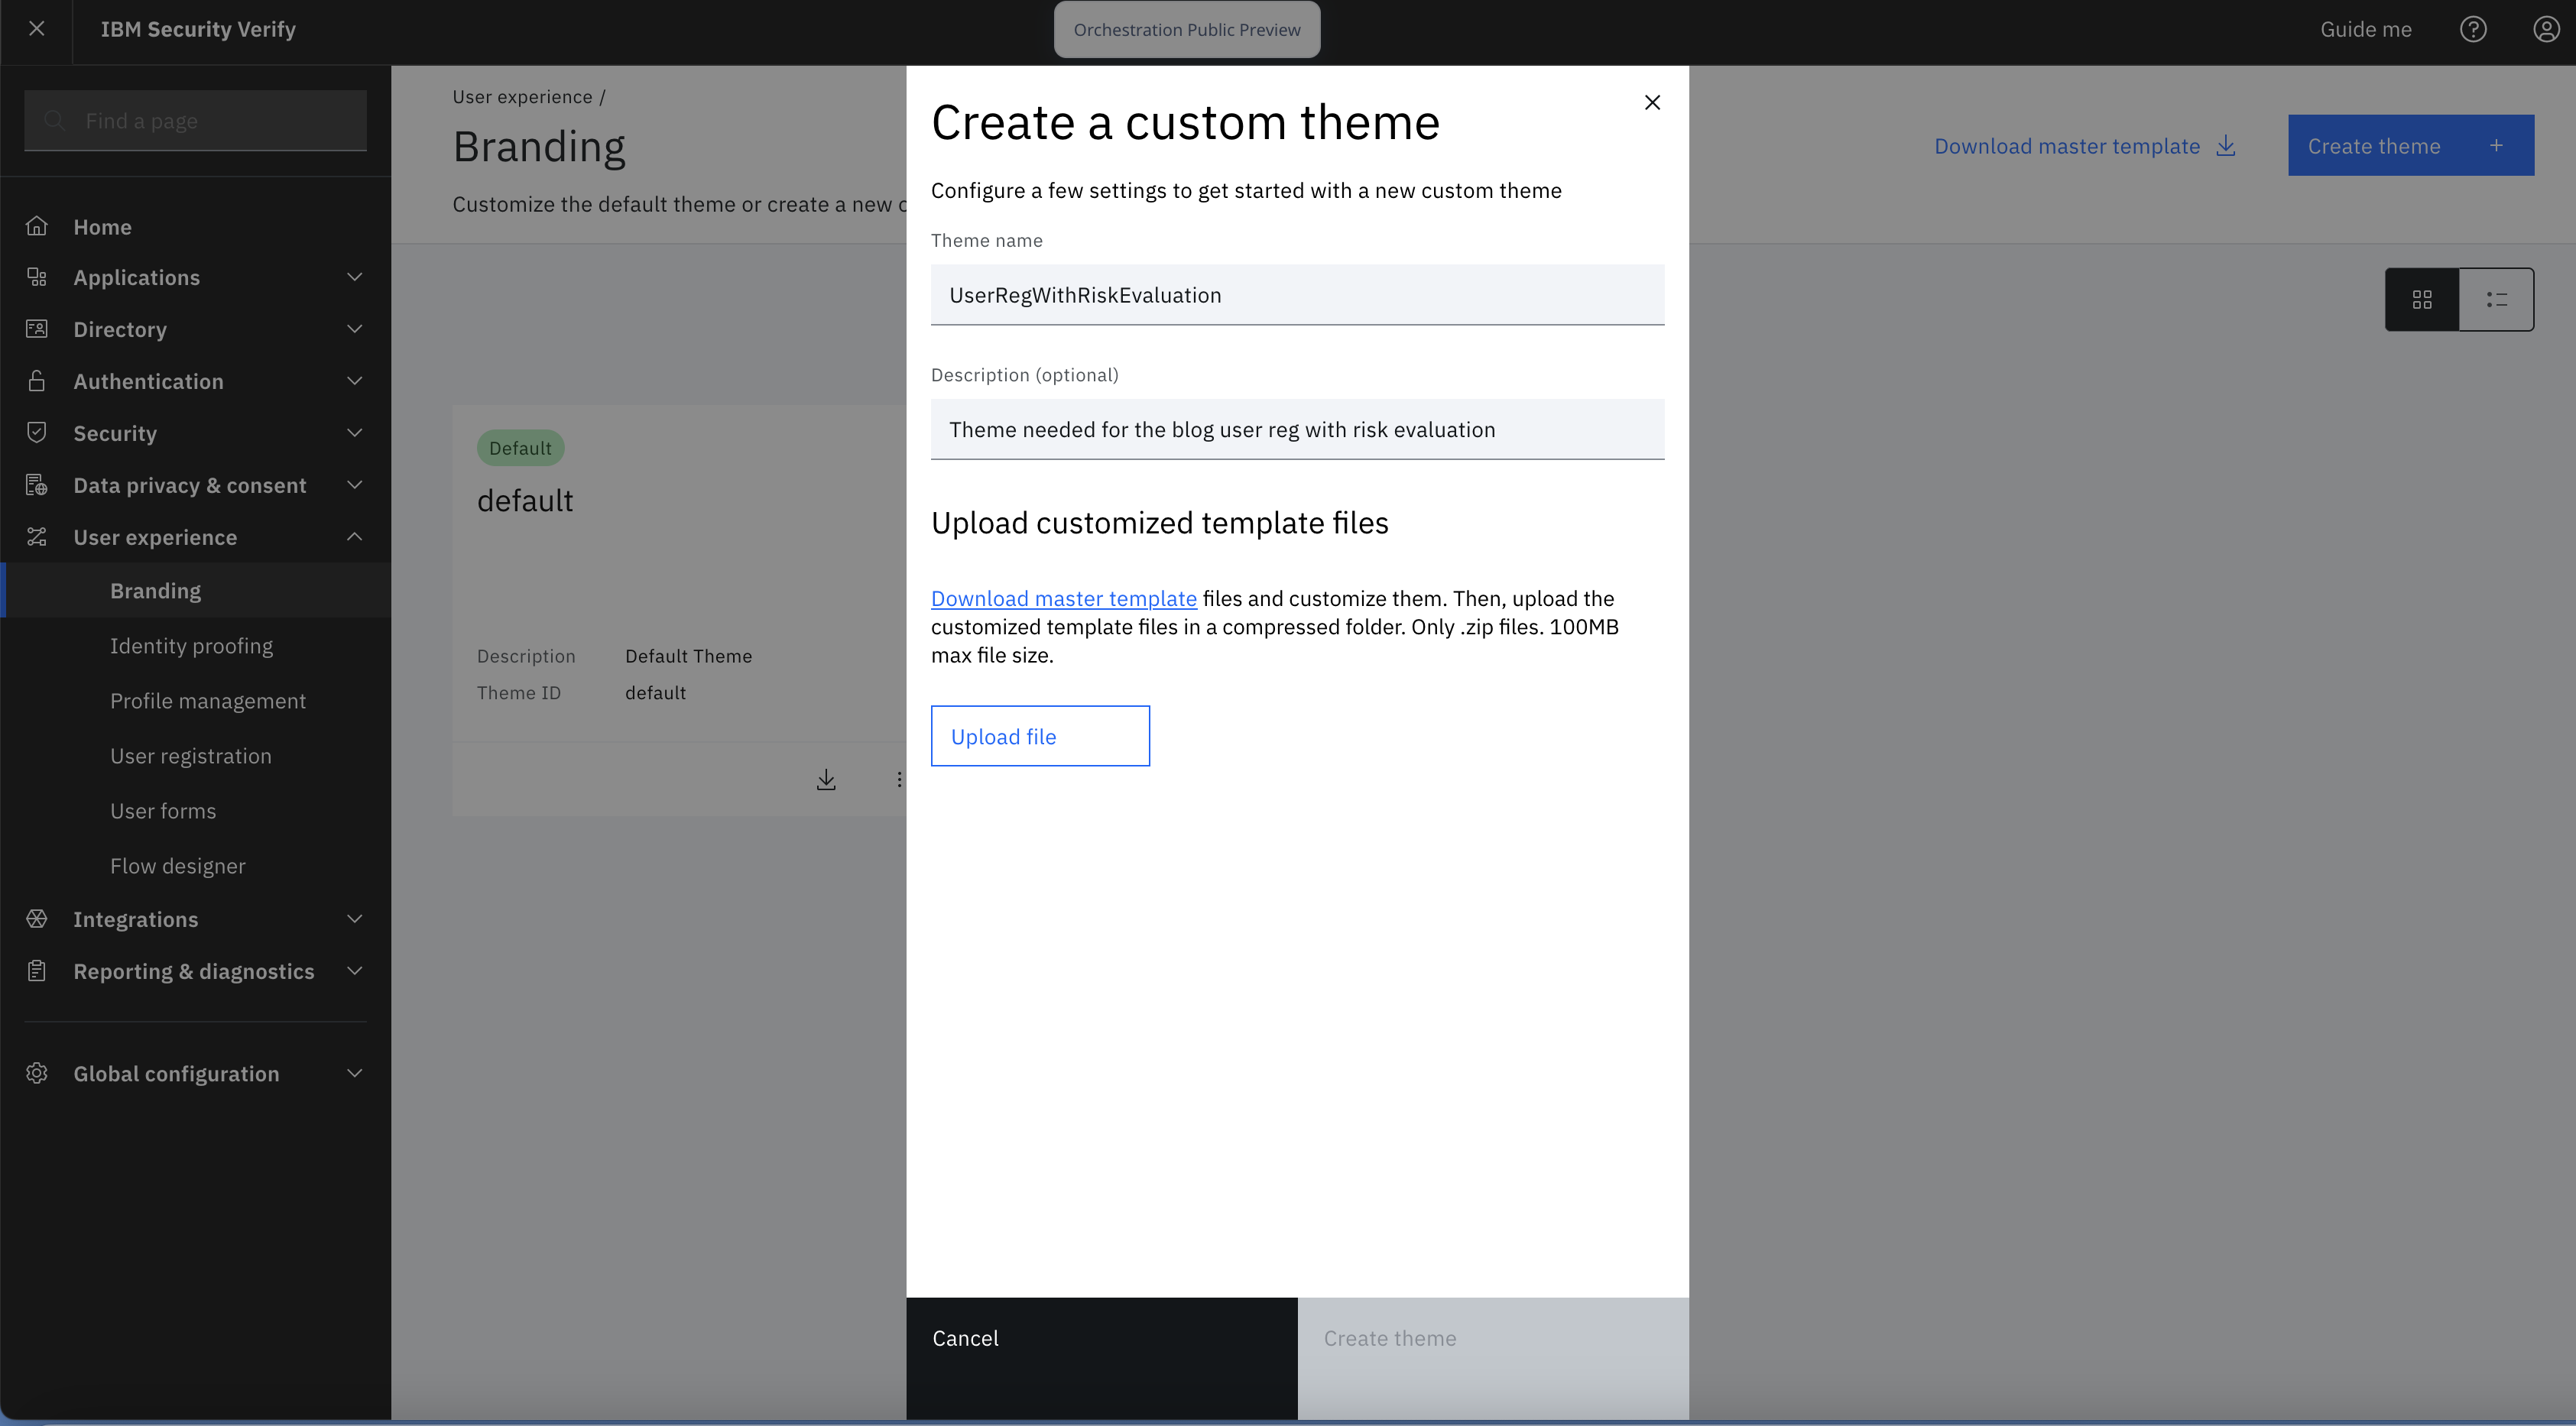
Create a branding theme called UserRegWithRiskEvaluation. Follow the steps mentioned here for the same.
-
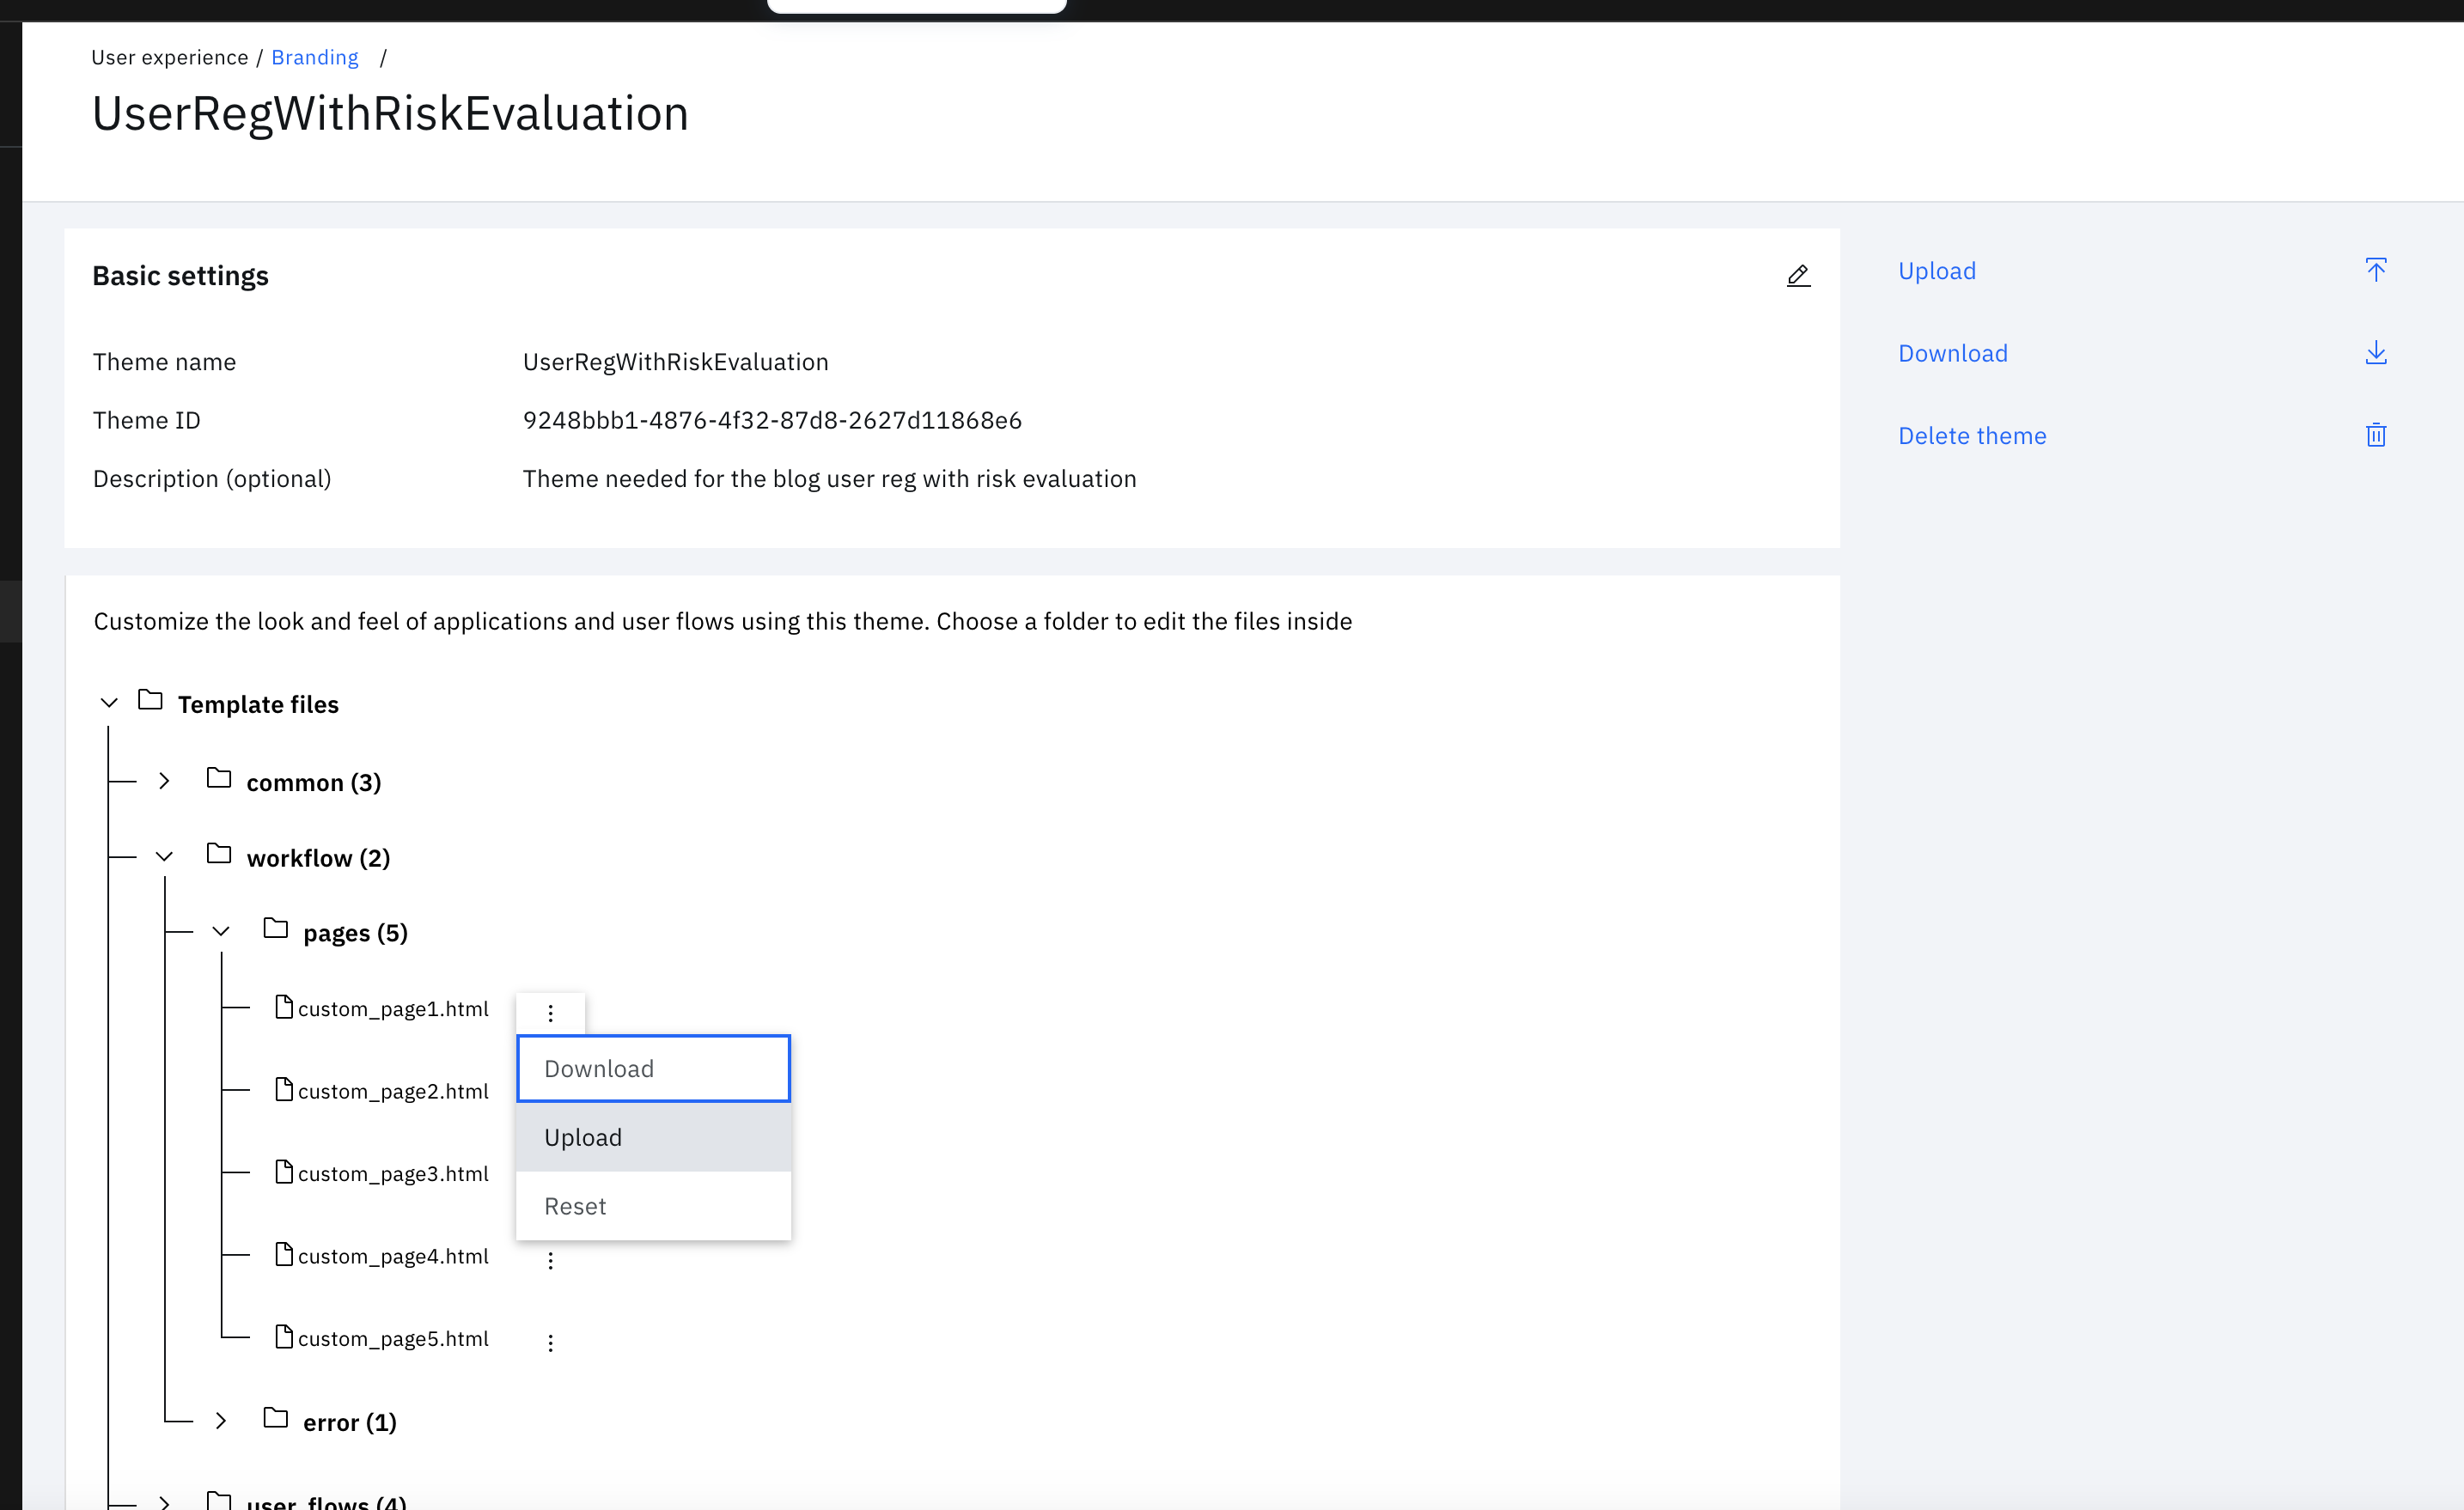
Click the theme tile to view the file tree.
-
Expand workflow > pages and click the three vertical dots next to custom_page1.html. Choose $GIT_REPO/flows/UserRegWithRiskEvaluation/pages/templates/workflow/default/custom_page1.html from the local folder. Then click Upload.
Configuring the flow forms
1. Create the appropriate user forms
The first step in orchestrating the end-to-end registration experience is to create the required user forms. In this case, four user forms must be created.
The current article provides the steps to create four forms with specific fields to demonstrate the basic registration flow. The flow can be expanded to include more attributes and forms, based on the individual needs of registration.
A. Email capture and verification form
- When logged in as an administrator in the IBM Verify, navigate to "User experience".
- Under "User experience", select "User forms" and "Create form".
- Enter a form name, for example "EmailValidation". Optionally you can modify other settings, such as Primary language, Attribute retention, Theme, and Human verification.
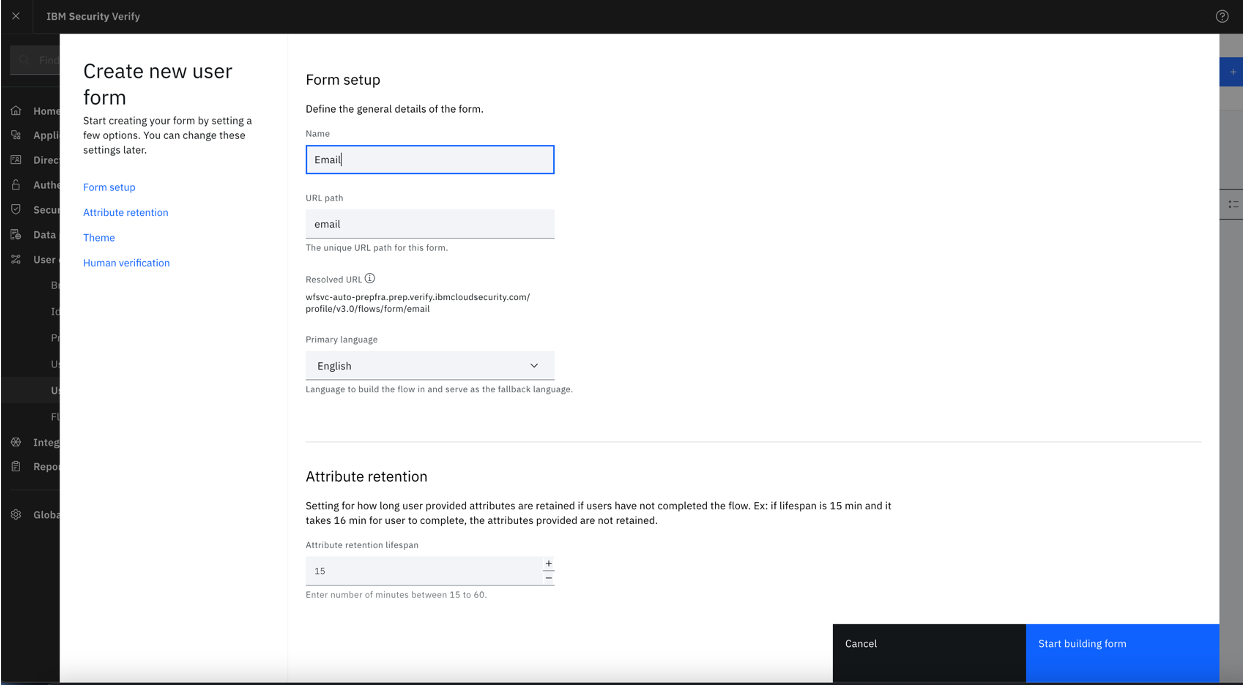
- Click "Start building form".
- Click the "Email address" element.
- SSwitch on the "Account username" and "Verify email" toggle buttons.
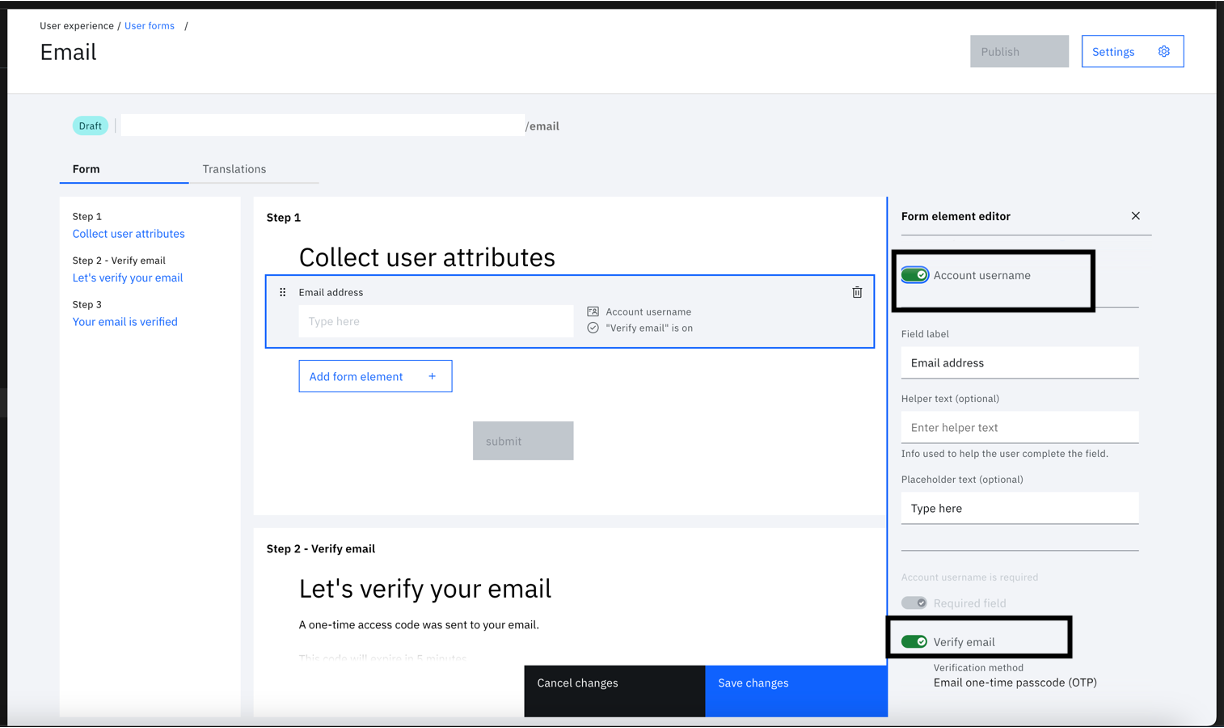
- Click "Save changes" and "Publish".
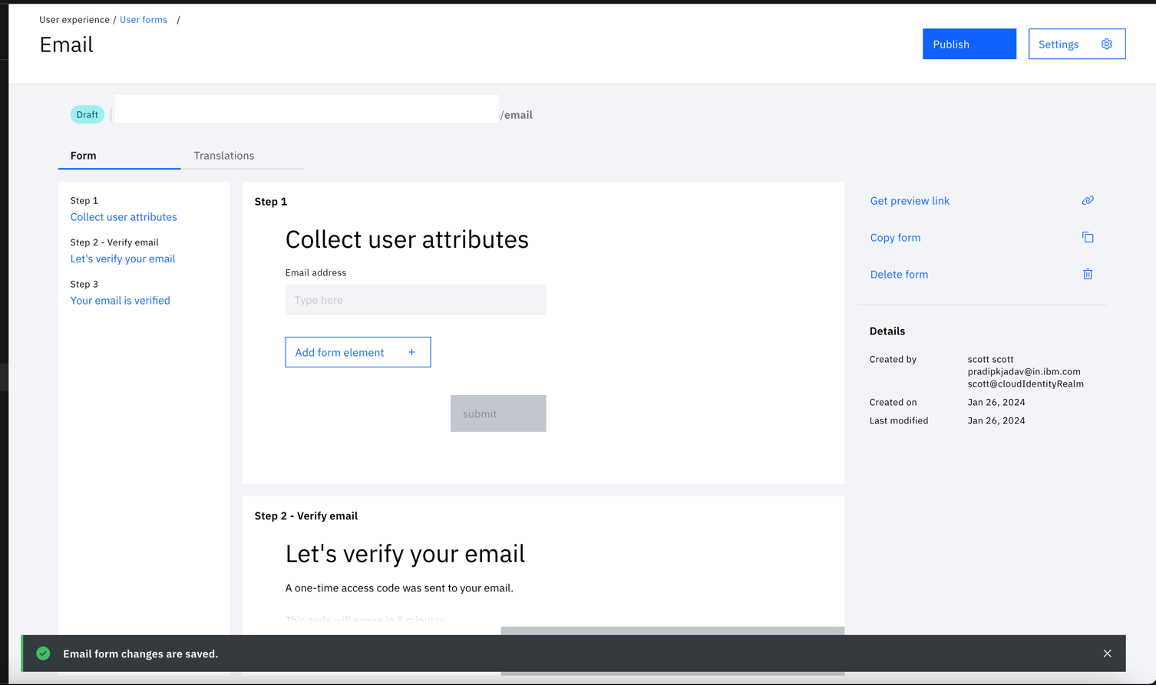
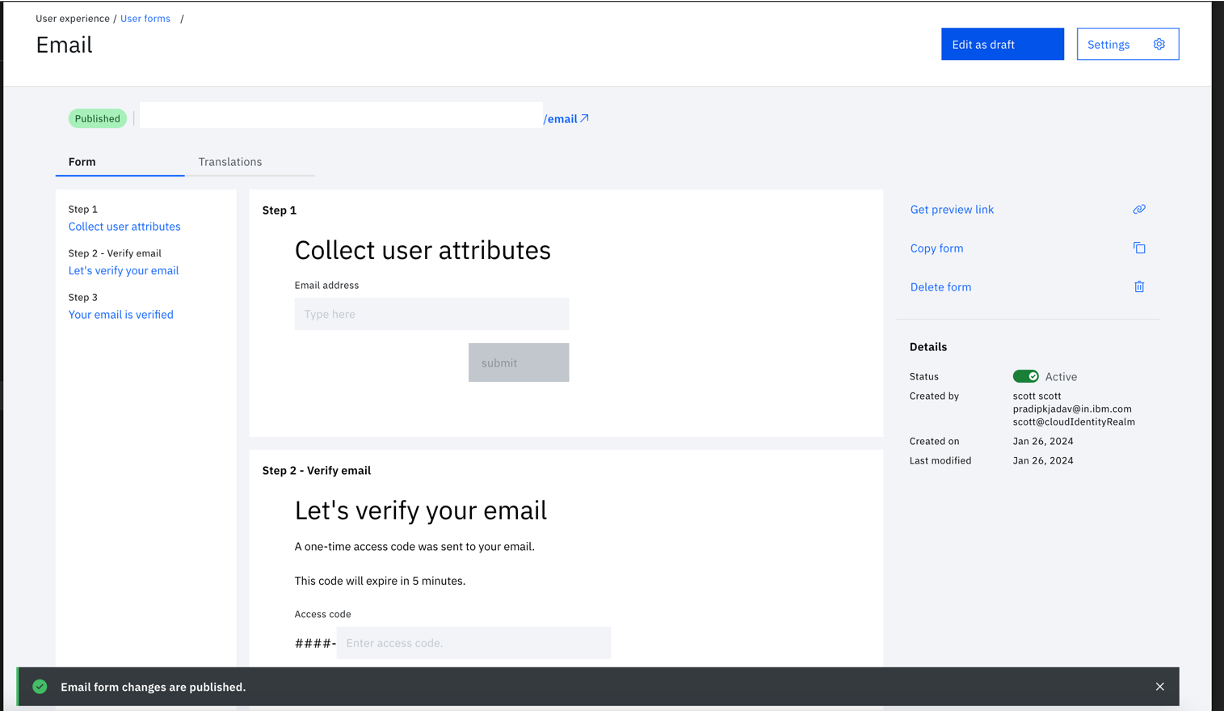
With this, the first of the four forms is created.
Note: The other settings such as branding, text that is displayed in Email OTP verification, attribute field text, and more can be customised in any user form.
B. Basic user registration form
- Navigate to "User experience" and select "User forms" > "Create form" to create a new form.
- Enter a form name, for example "form_basic". Optionally you can modify other settings, such as Primary language, Attribute retention, Theme, and Human verification.
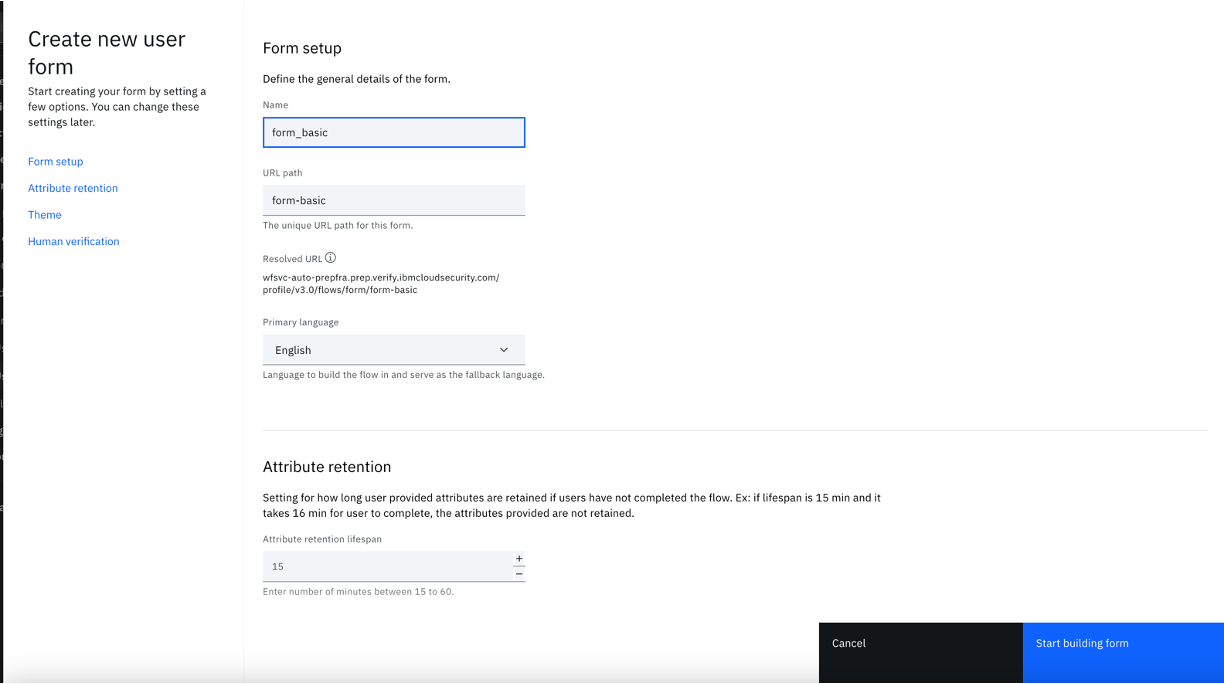
- Click "Start building form".
- Click the "Email address" element and then click the "Delete" icon.
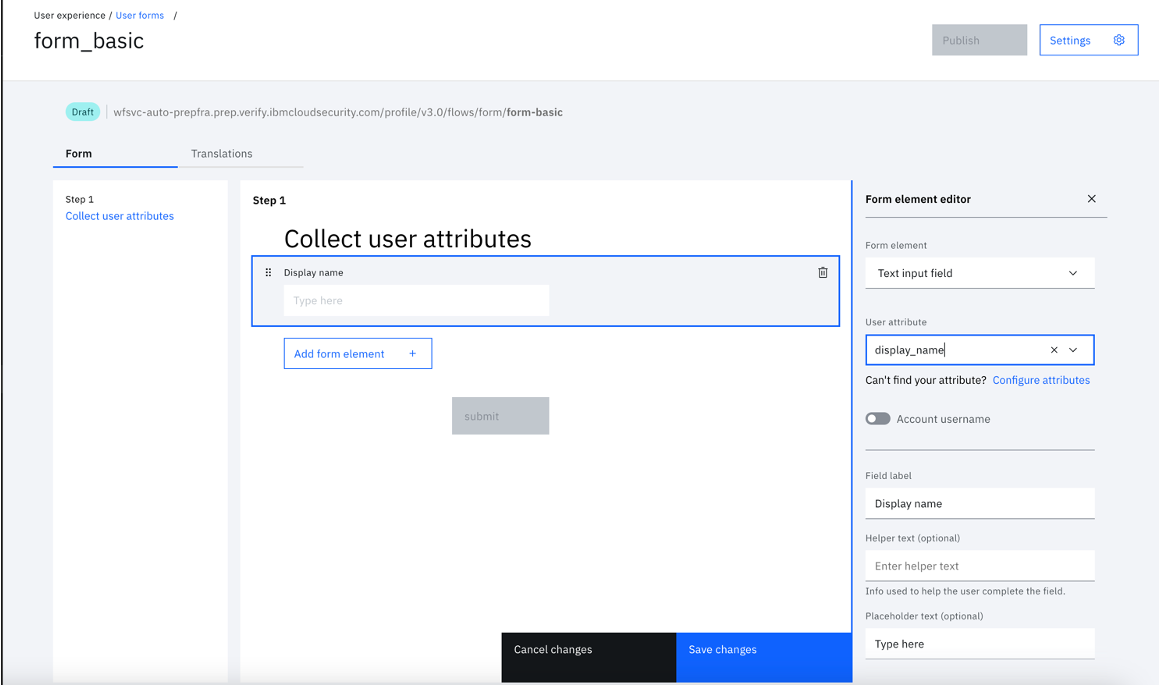
- Click the "Add form element" and select "Text input field" as “Form element”. Select "display_name" from "User attribute" drop down.
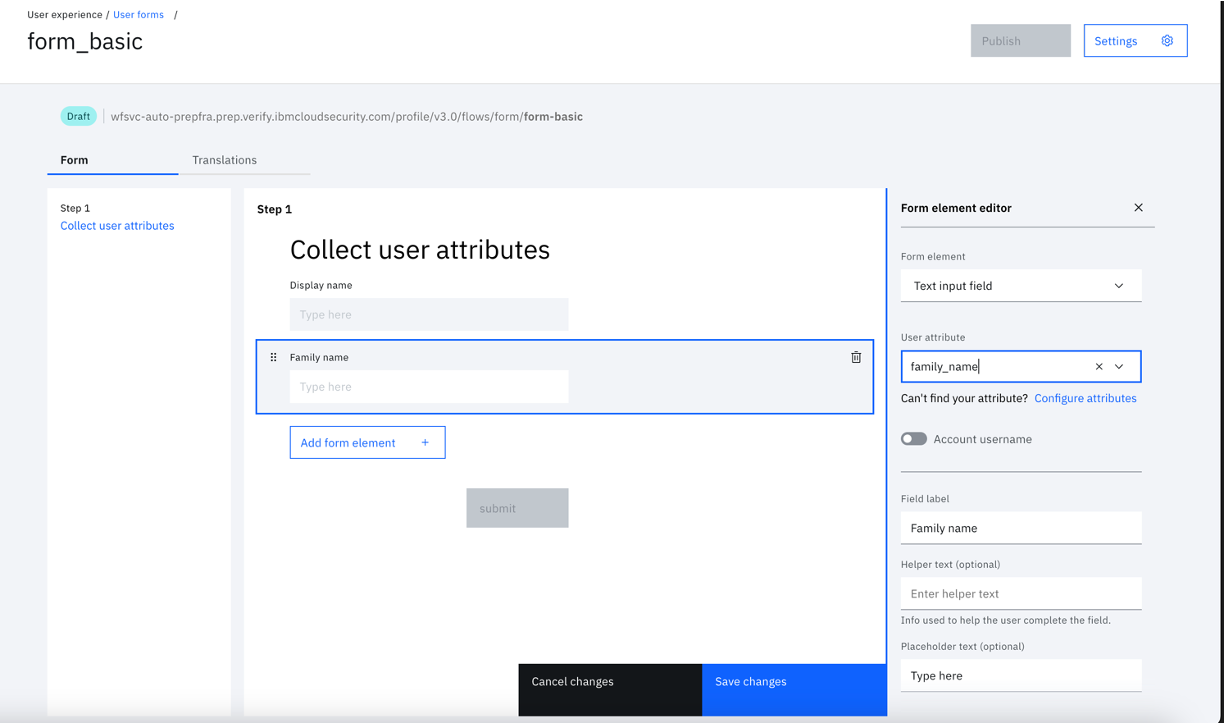
6.Click the "Add form element" and select "Text input field" as “Form element”. Select "family_name" from "User attribute" drop down.
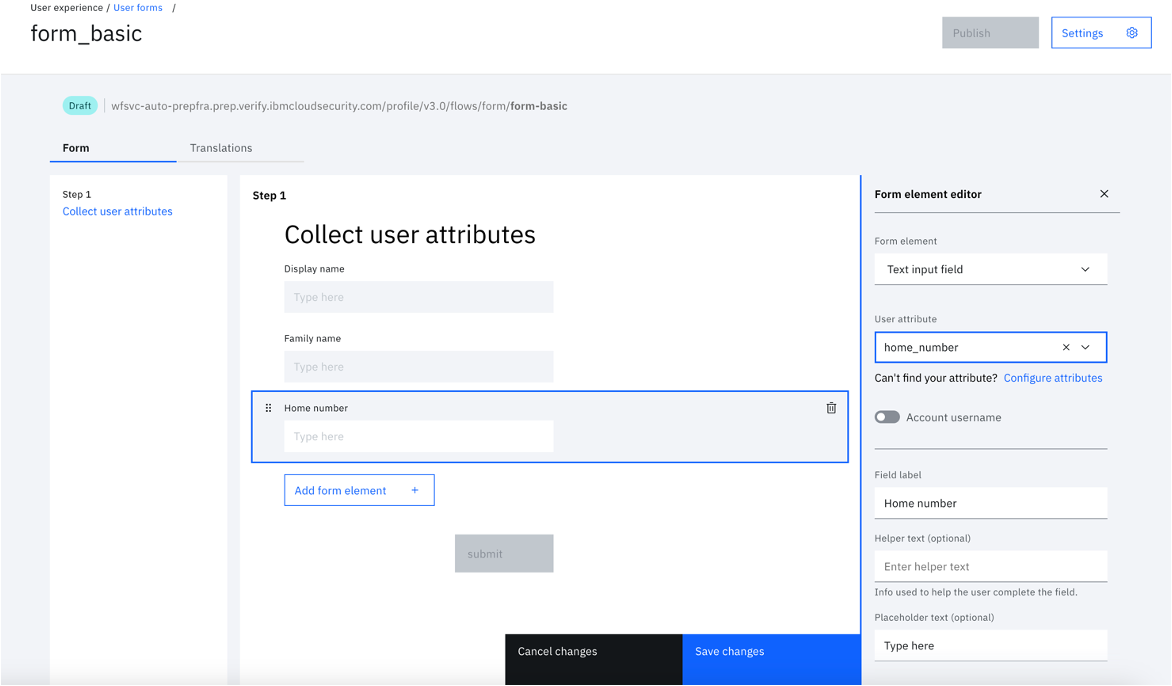
- Click the "Add form element" and select "Text input field" as “Form element”. Select "home_number" from "User attribute" drop down.
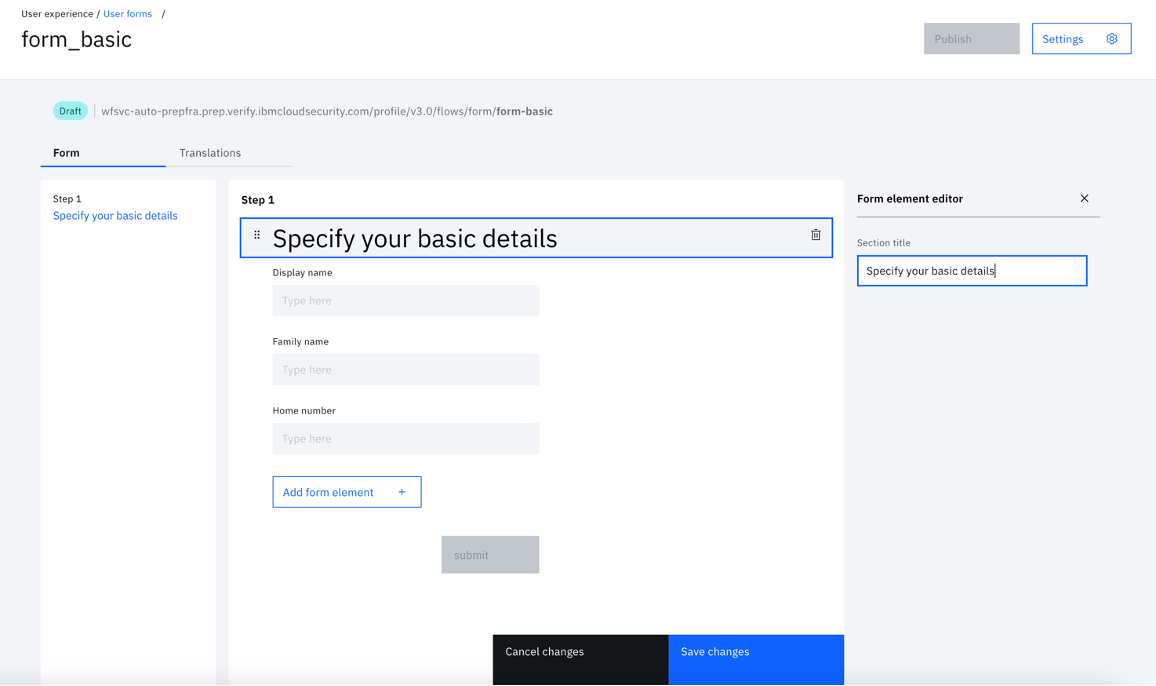
- Update the form "Section title".
- Click "Save changes" and "Publish".
With this, the second of the four forms is created.
Note: The other settings such as branding, text that is displayed in Email OTP verification, attribute field text, and more can be customised in any user form.
C. Work details form
- Navigate to "User experience" and select "User forms" > "Create form" to create a new form.
- Enter a form name, for example "form_work". Optionally you can modify other settings, such as Primary language, Attribute retention, Theme, and Human verification.
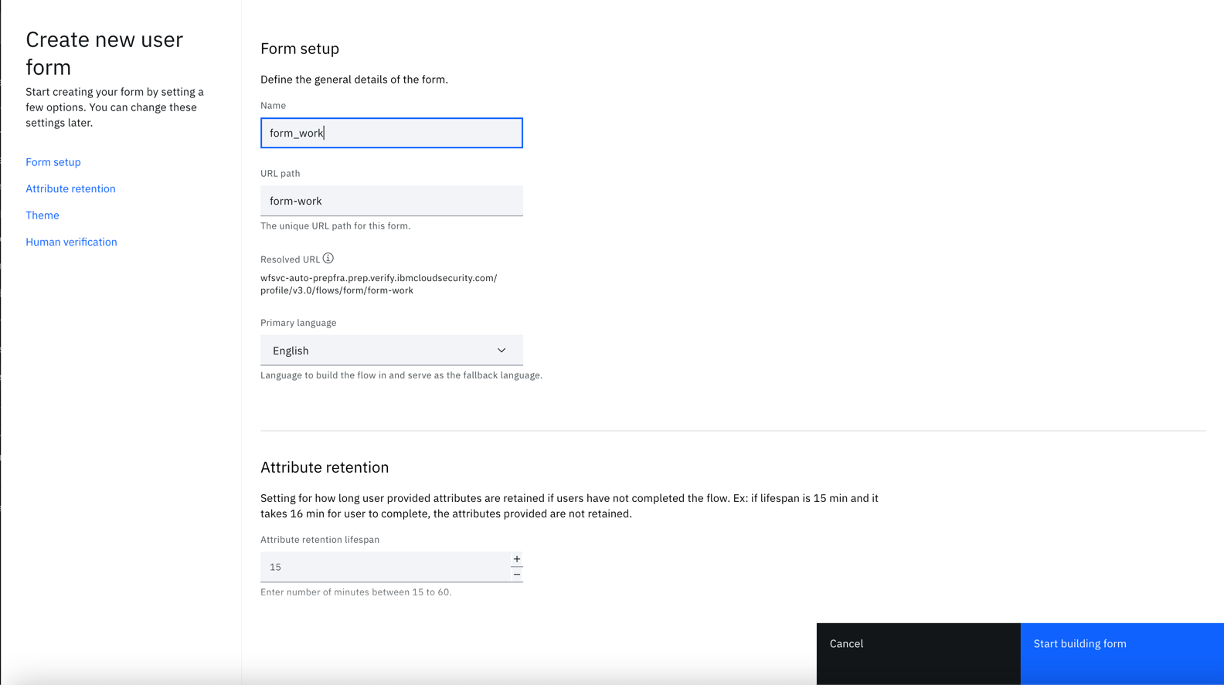
- Click "Start building form".
- Click the "Email address" element and then click the "Delete" icon.
- Click the "Add form element" and select "Text input field" as “Form element”. Select "department" from "User attribute" drop down.
- Click the "Add form element" and select "Text input field" as “Form element”. Select "work_address" from "User attribute" drop down.
- Click the "Add form element" and select "Text input field" as “Form element”. Select "work_number" from "User attribute" drop down.
- Update the form section title
- Click "Save changes" and "Publish".
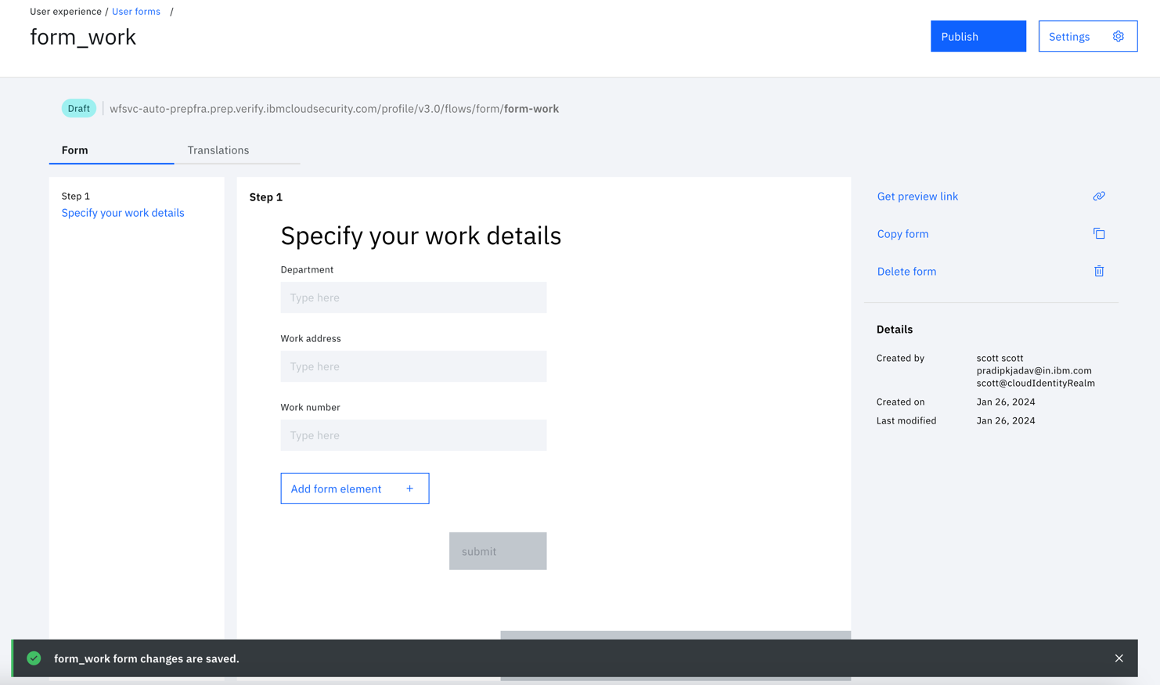
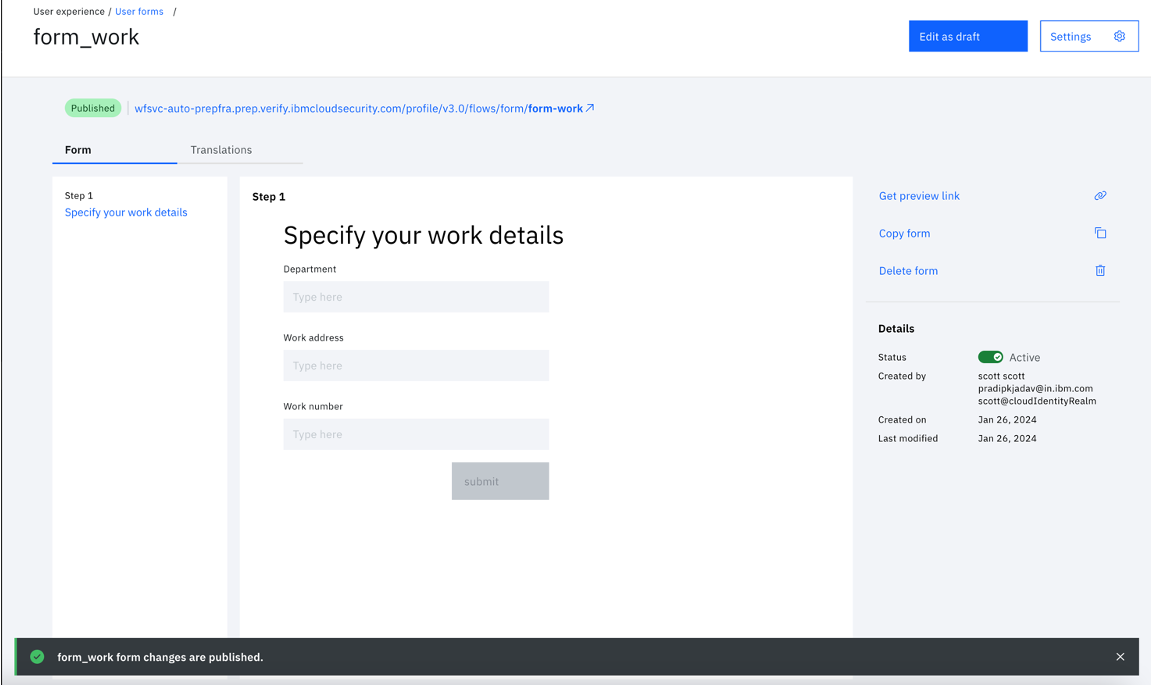
With this, the third of the four forms is created.
Note: The other settings such as branding, text that is displayed in Email OTP verification, attribute field text, and more can be customised in any user form.
D. Account details form
- Navigate to "User experience" and select "User forms" > "Create form" to create a new form.
- Enter a form name, for example "form_account". Optionally you can modify other settings, such as Primary language, Attribute retention, Theme, and Human verification.
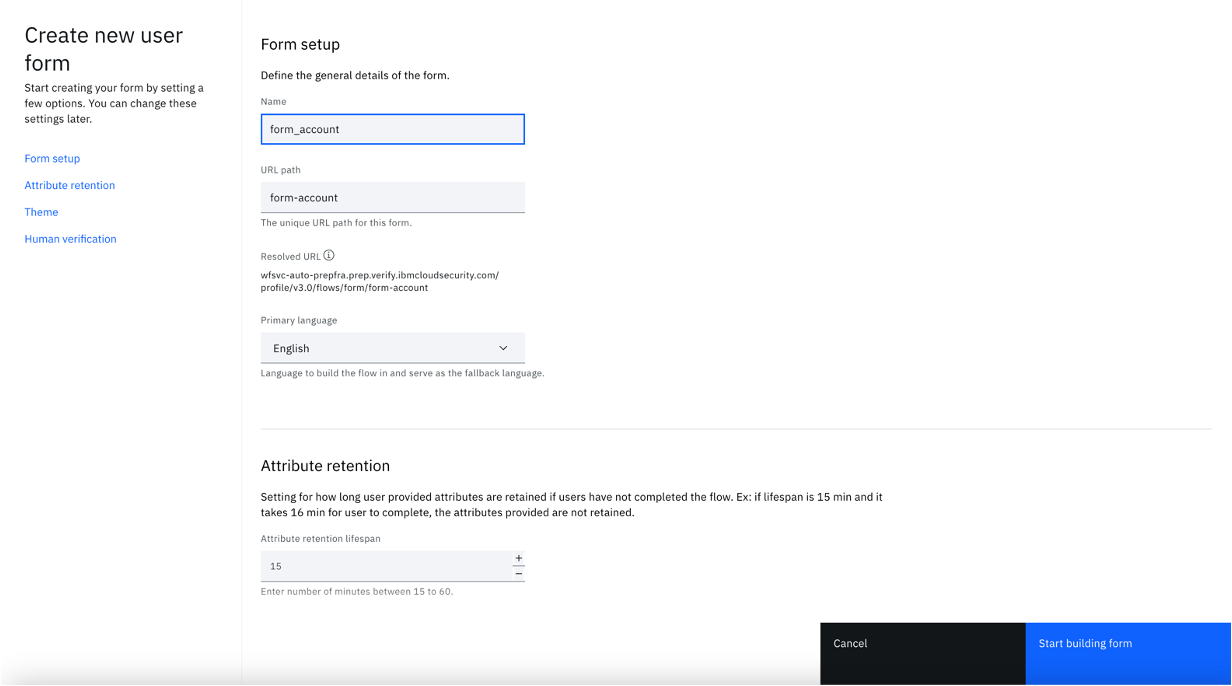
- Click "Start building form".
- Click the "Email address" element in the form to change the element to Password.
- In the "Form element editor" panel, select "Account password" from the "Form element" drop down.
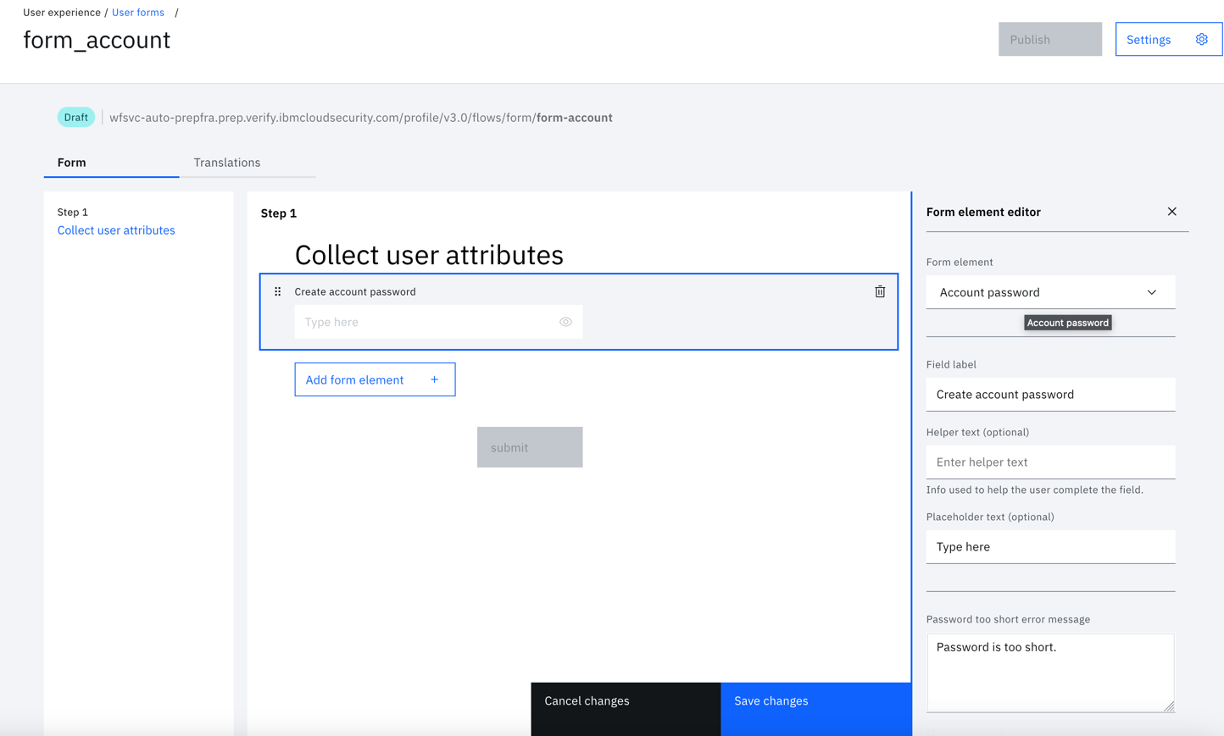
- Click "Save changes" and "Publish".
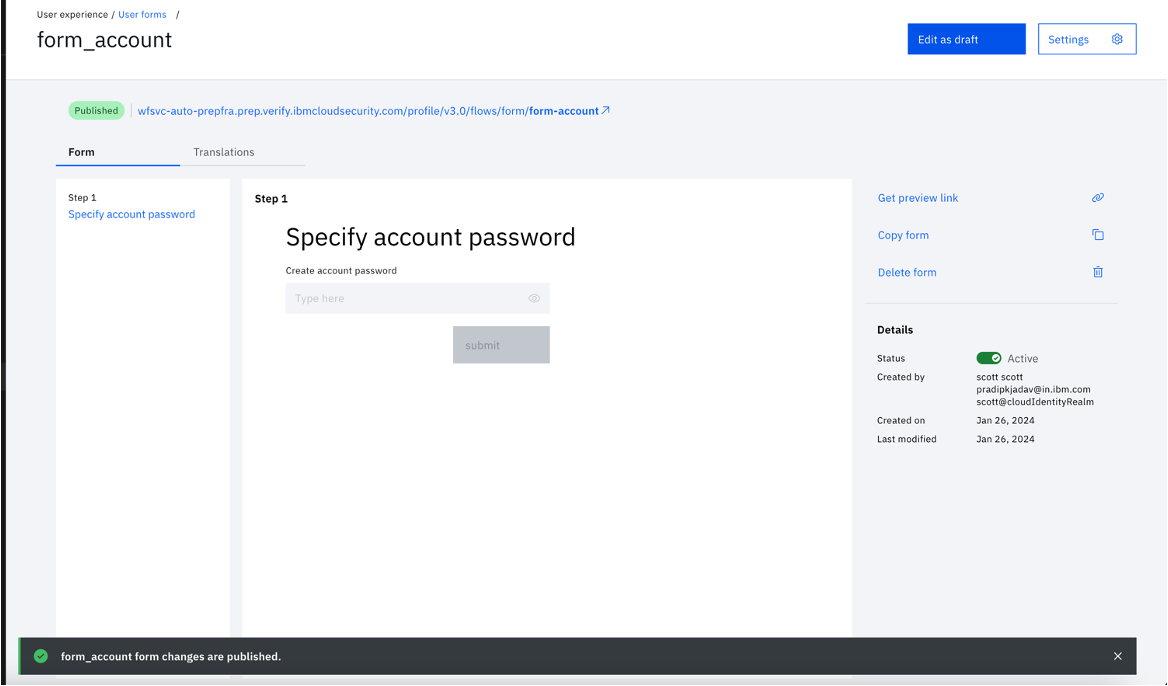
With this, all the four forms are created.
Note: The other settings such as branding, text that is displayed in Email OTP verification, attribute field text, and more can be customised in any user form.
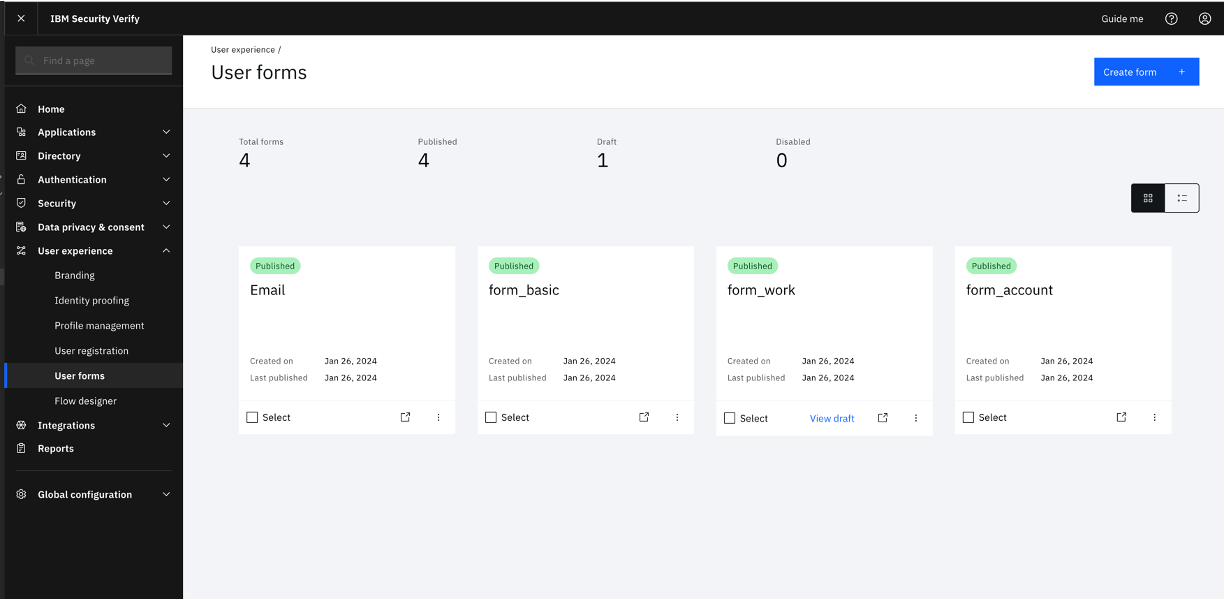
There are four Published forms in the "User forms" section within IBM Verify.
Orchestrating the flow
Import the workflow
After all the necessary forms are created, the next step is to orchestrate the forms together to create an end-to-end registration experience.
-
To import the model, login to your Verify Tenant as the administrator and switch to the admin interface.
-
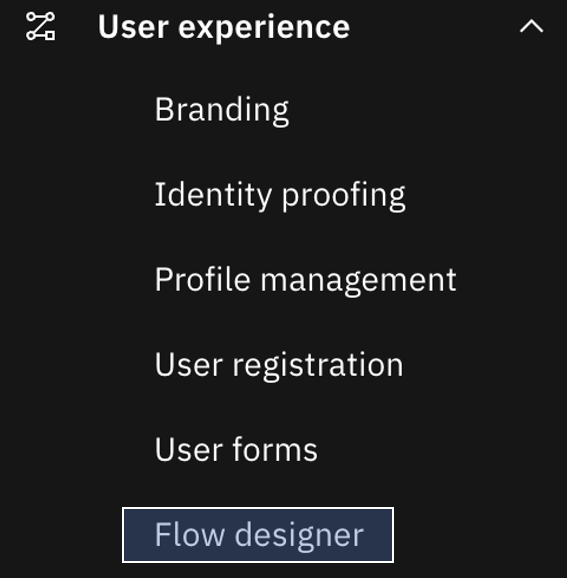
Navigate to the Flow designer:
-
Click the Import icon next to the Create flow button:

-
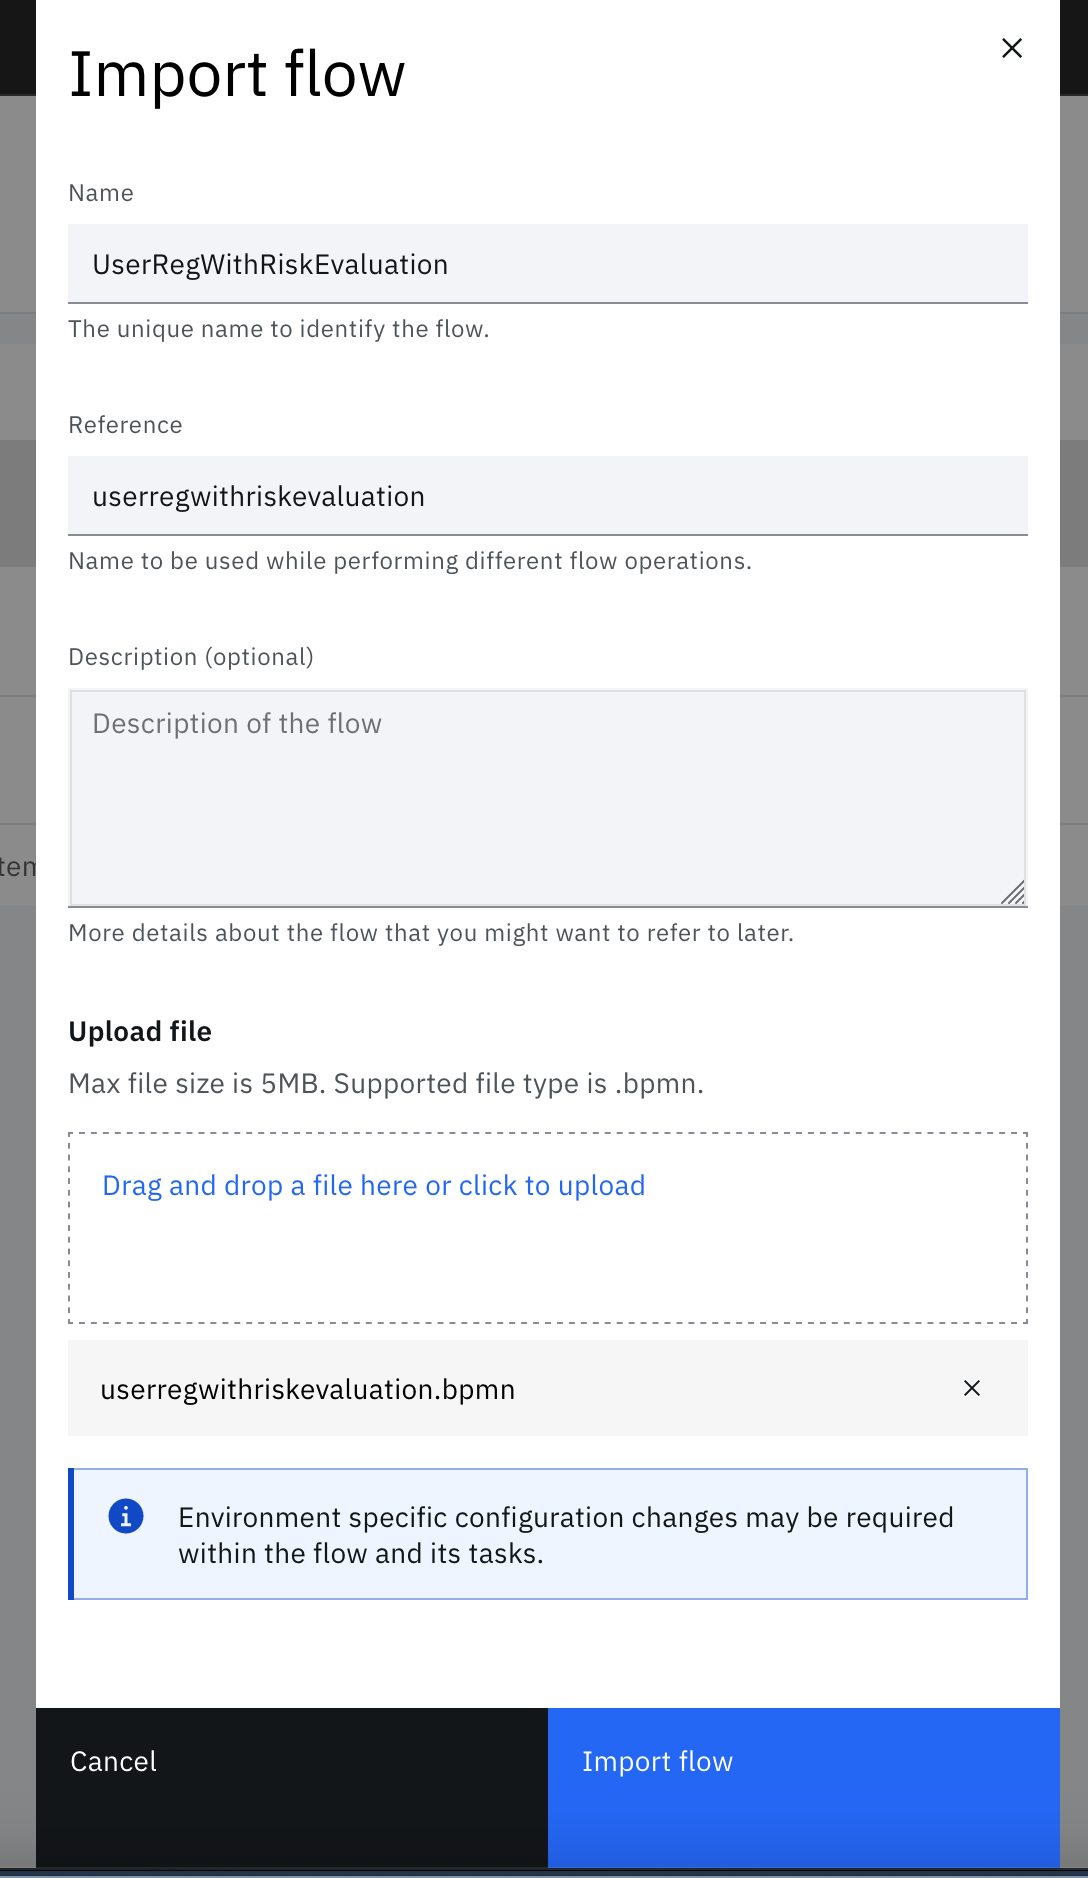
Enter the appropriate details and upload the .bpmn file. For example, $GIT_REPO/flows/user_registration_with_risk_evaluation/userregwithriskevaluation.bpmn
-
When the model is imported, the flow gets displayed as follows in the Flow designer:
-
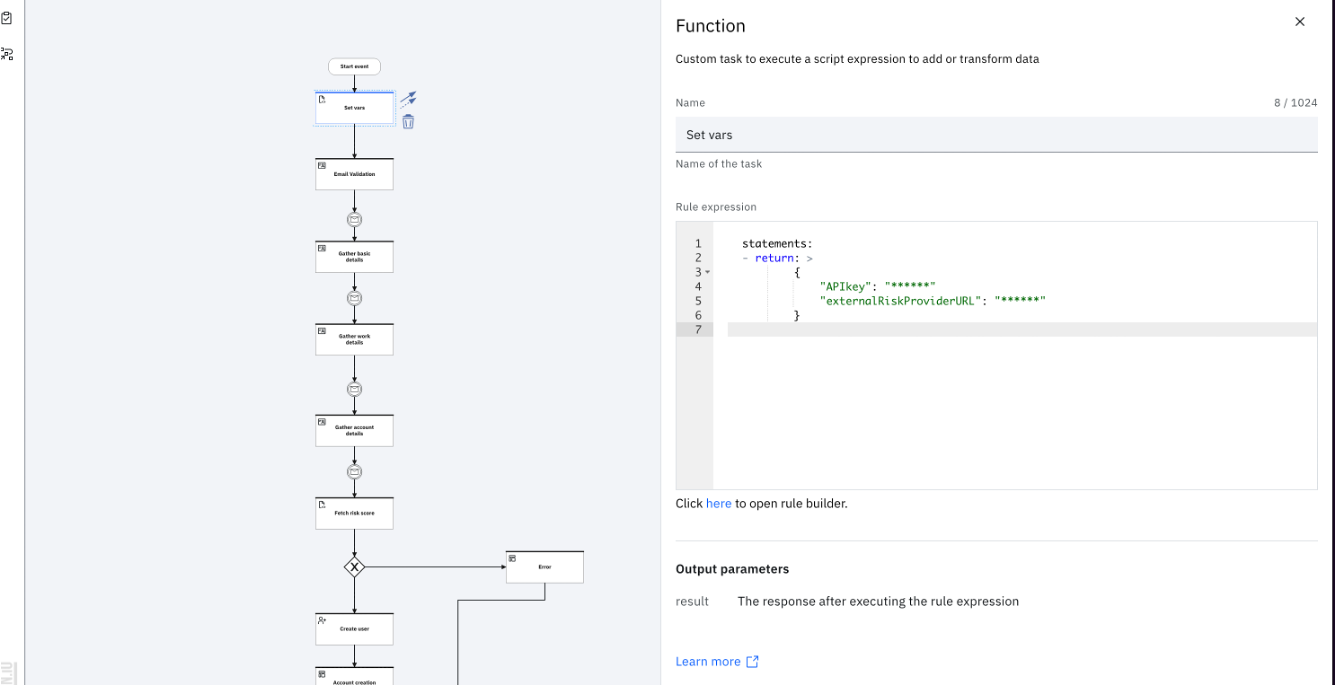
Select the Set Vars task to specify the connection details that are needed to connect to the third-party risk provider. Use this task to initialize any variables that are needed to establish a connection with the third-party, risk-scoring engine. The API key and URL are examples, but the variables entirely depend upon the credentials that are needed for the third party. Provide the API key and API URL of the third-party risk provider in this task.
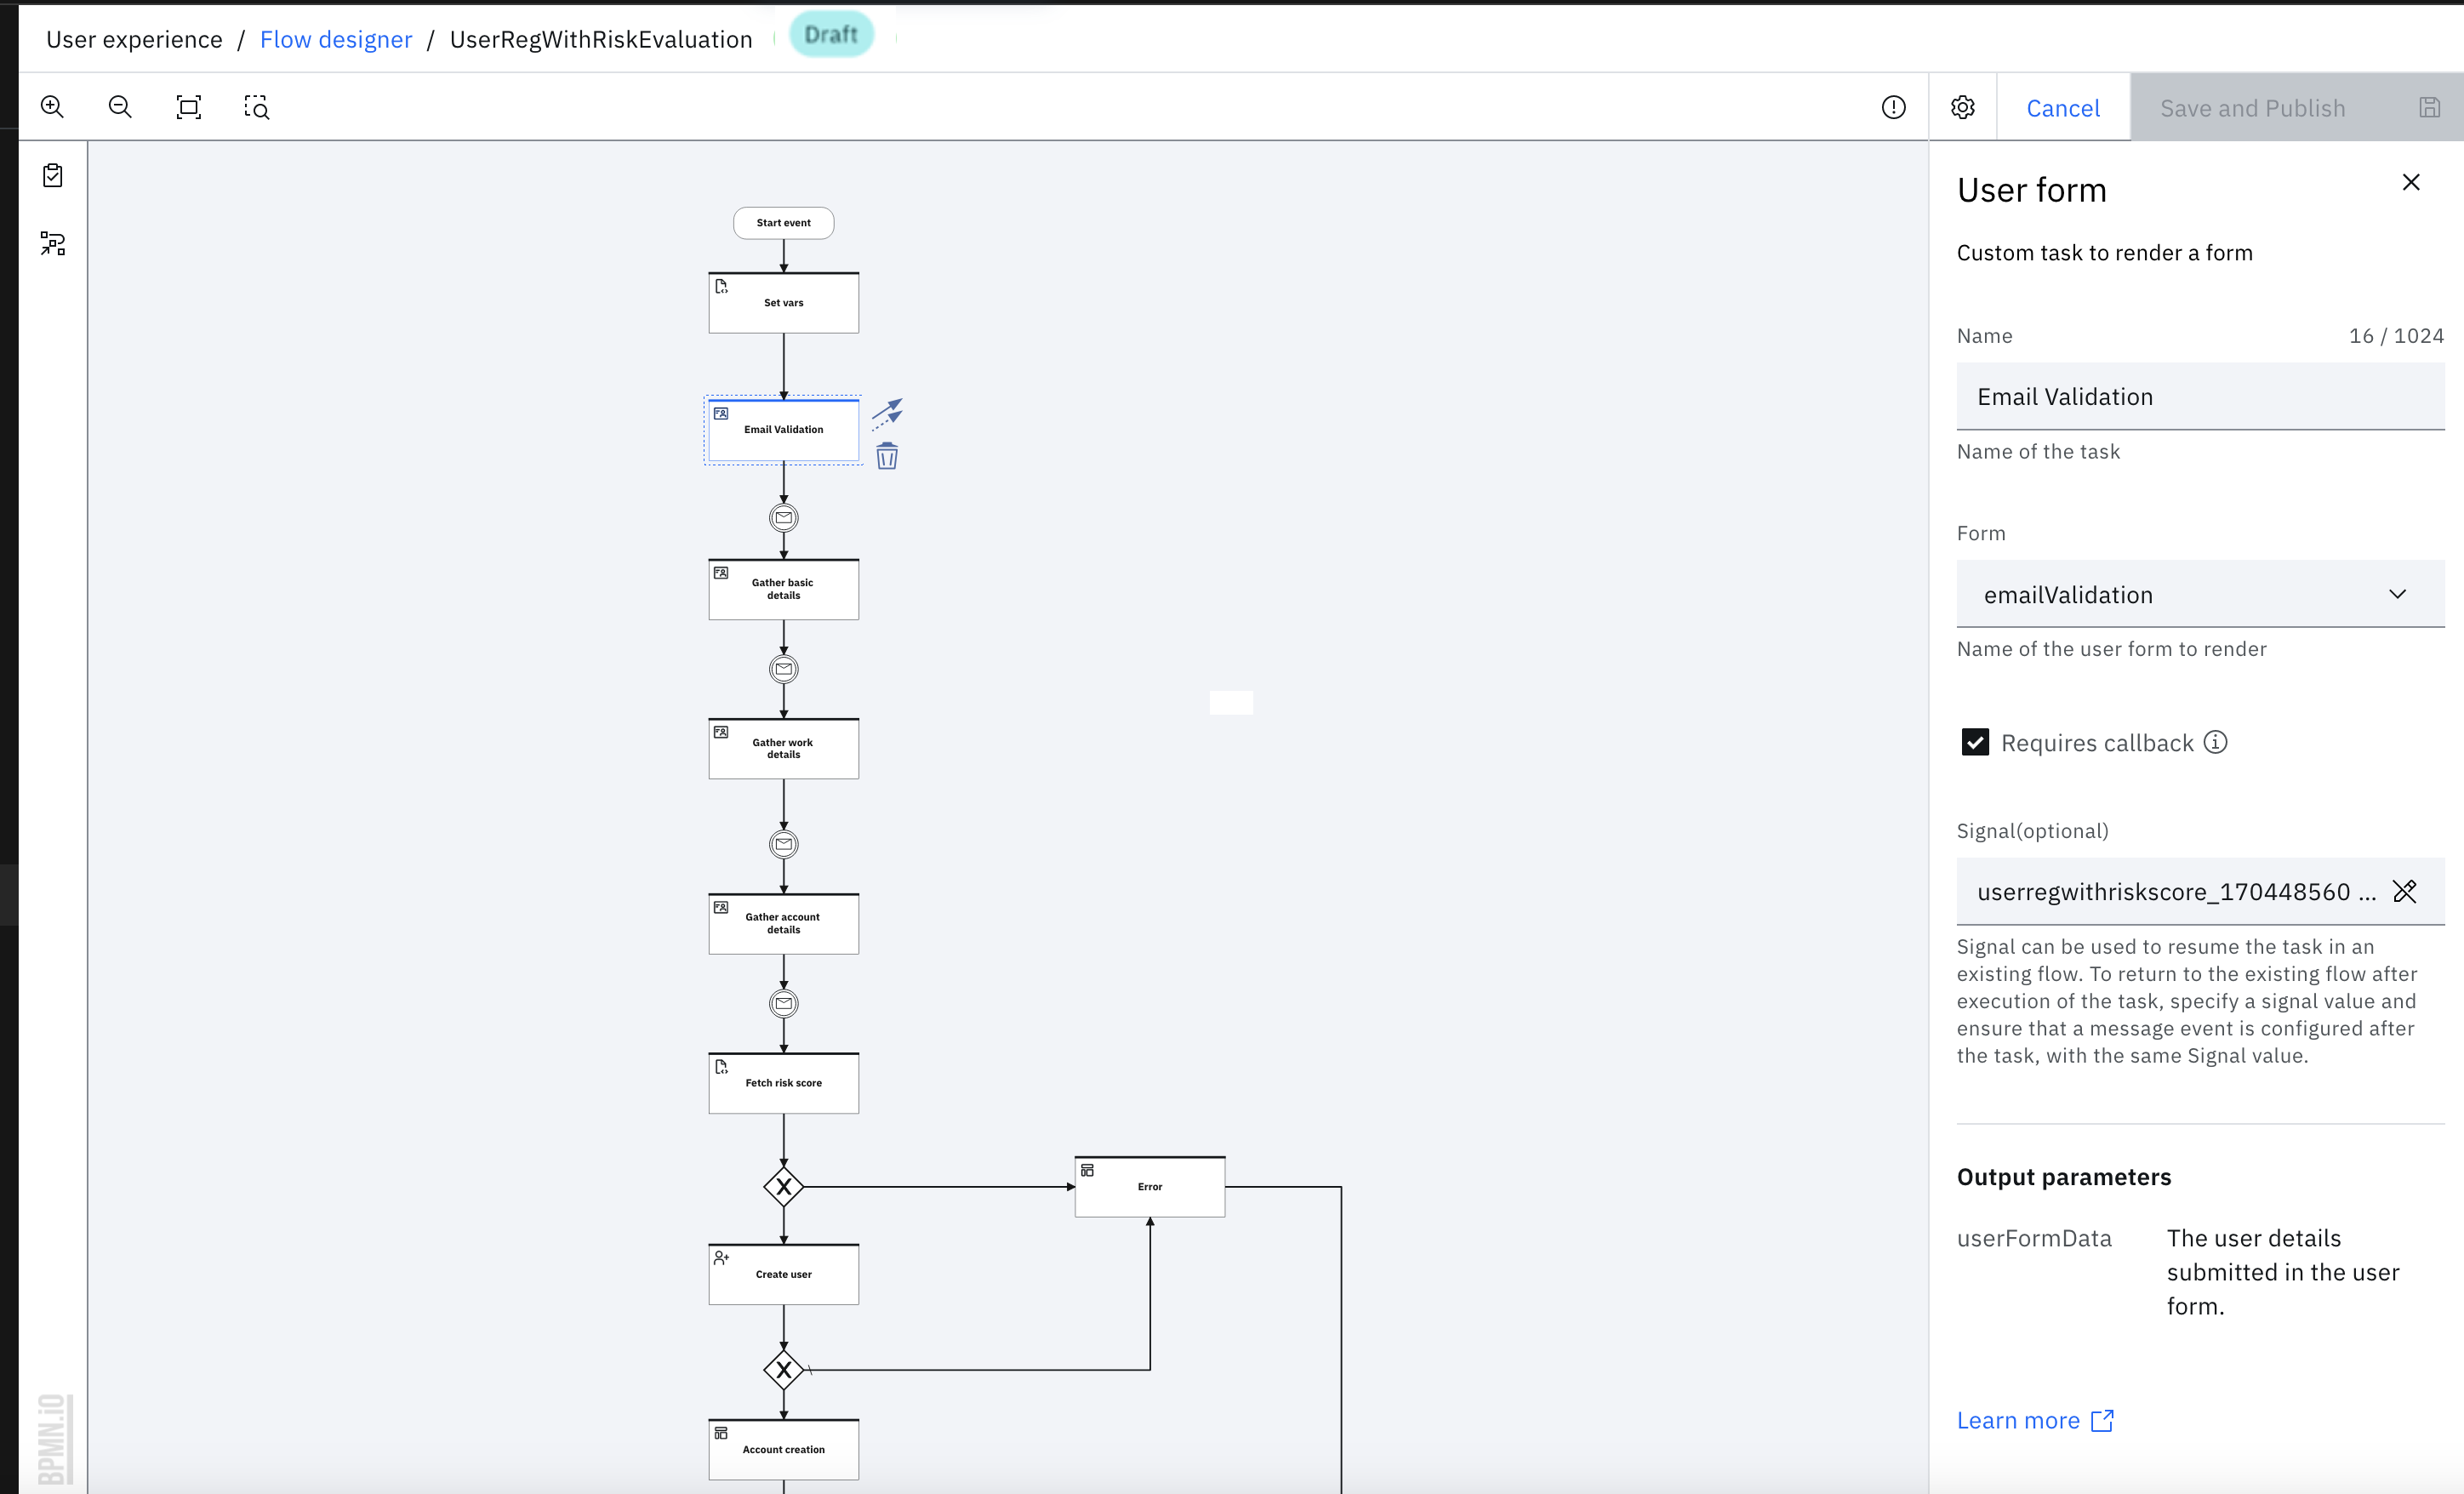
- Select the "Email validation" user form task and select the form name "email" from dropdown in the properties panel. Ensure that the "Requires callback" checkbox is selected. It creates a subsequent message event that connects the event of the form submission with the point where the workflow resumes.
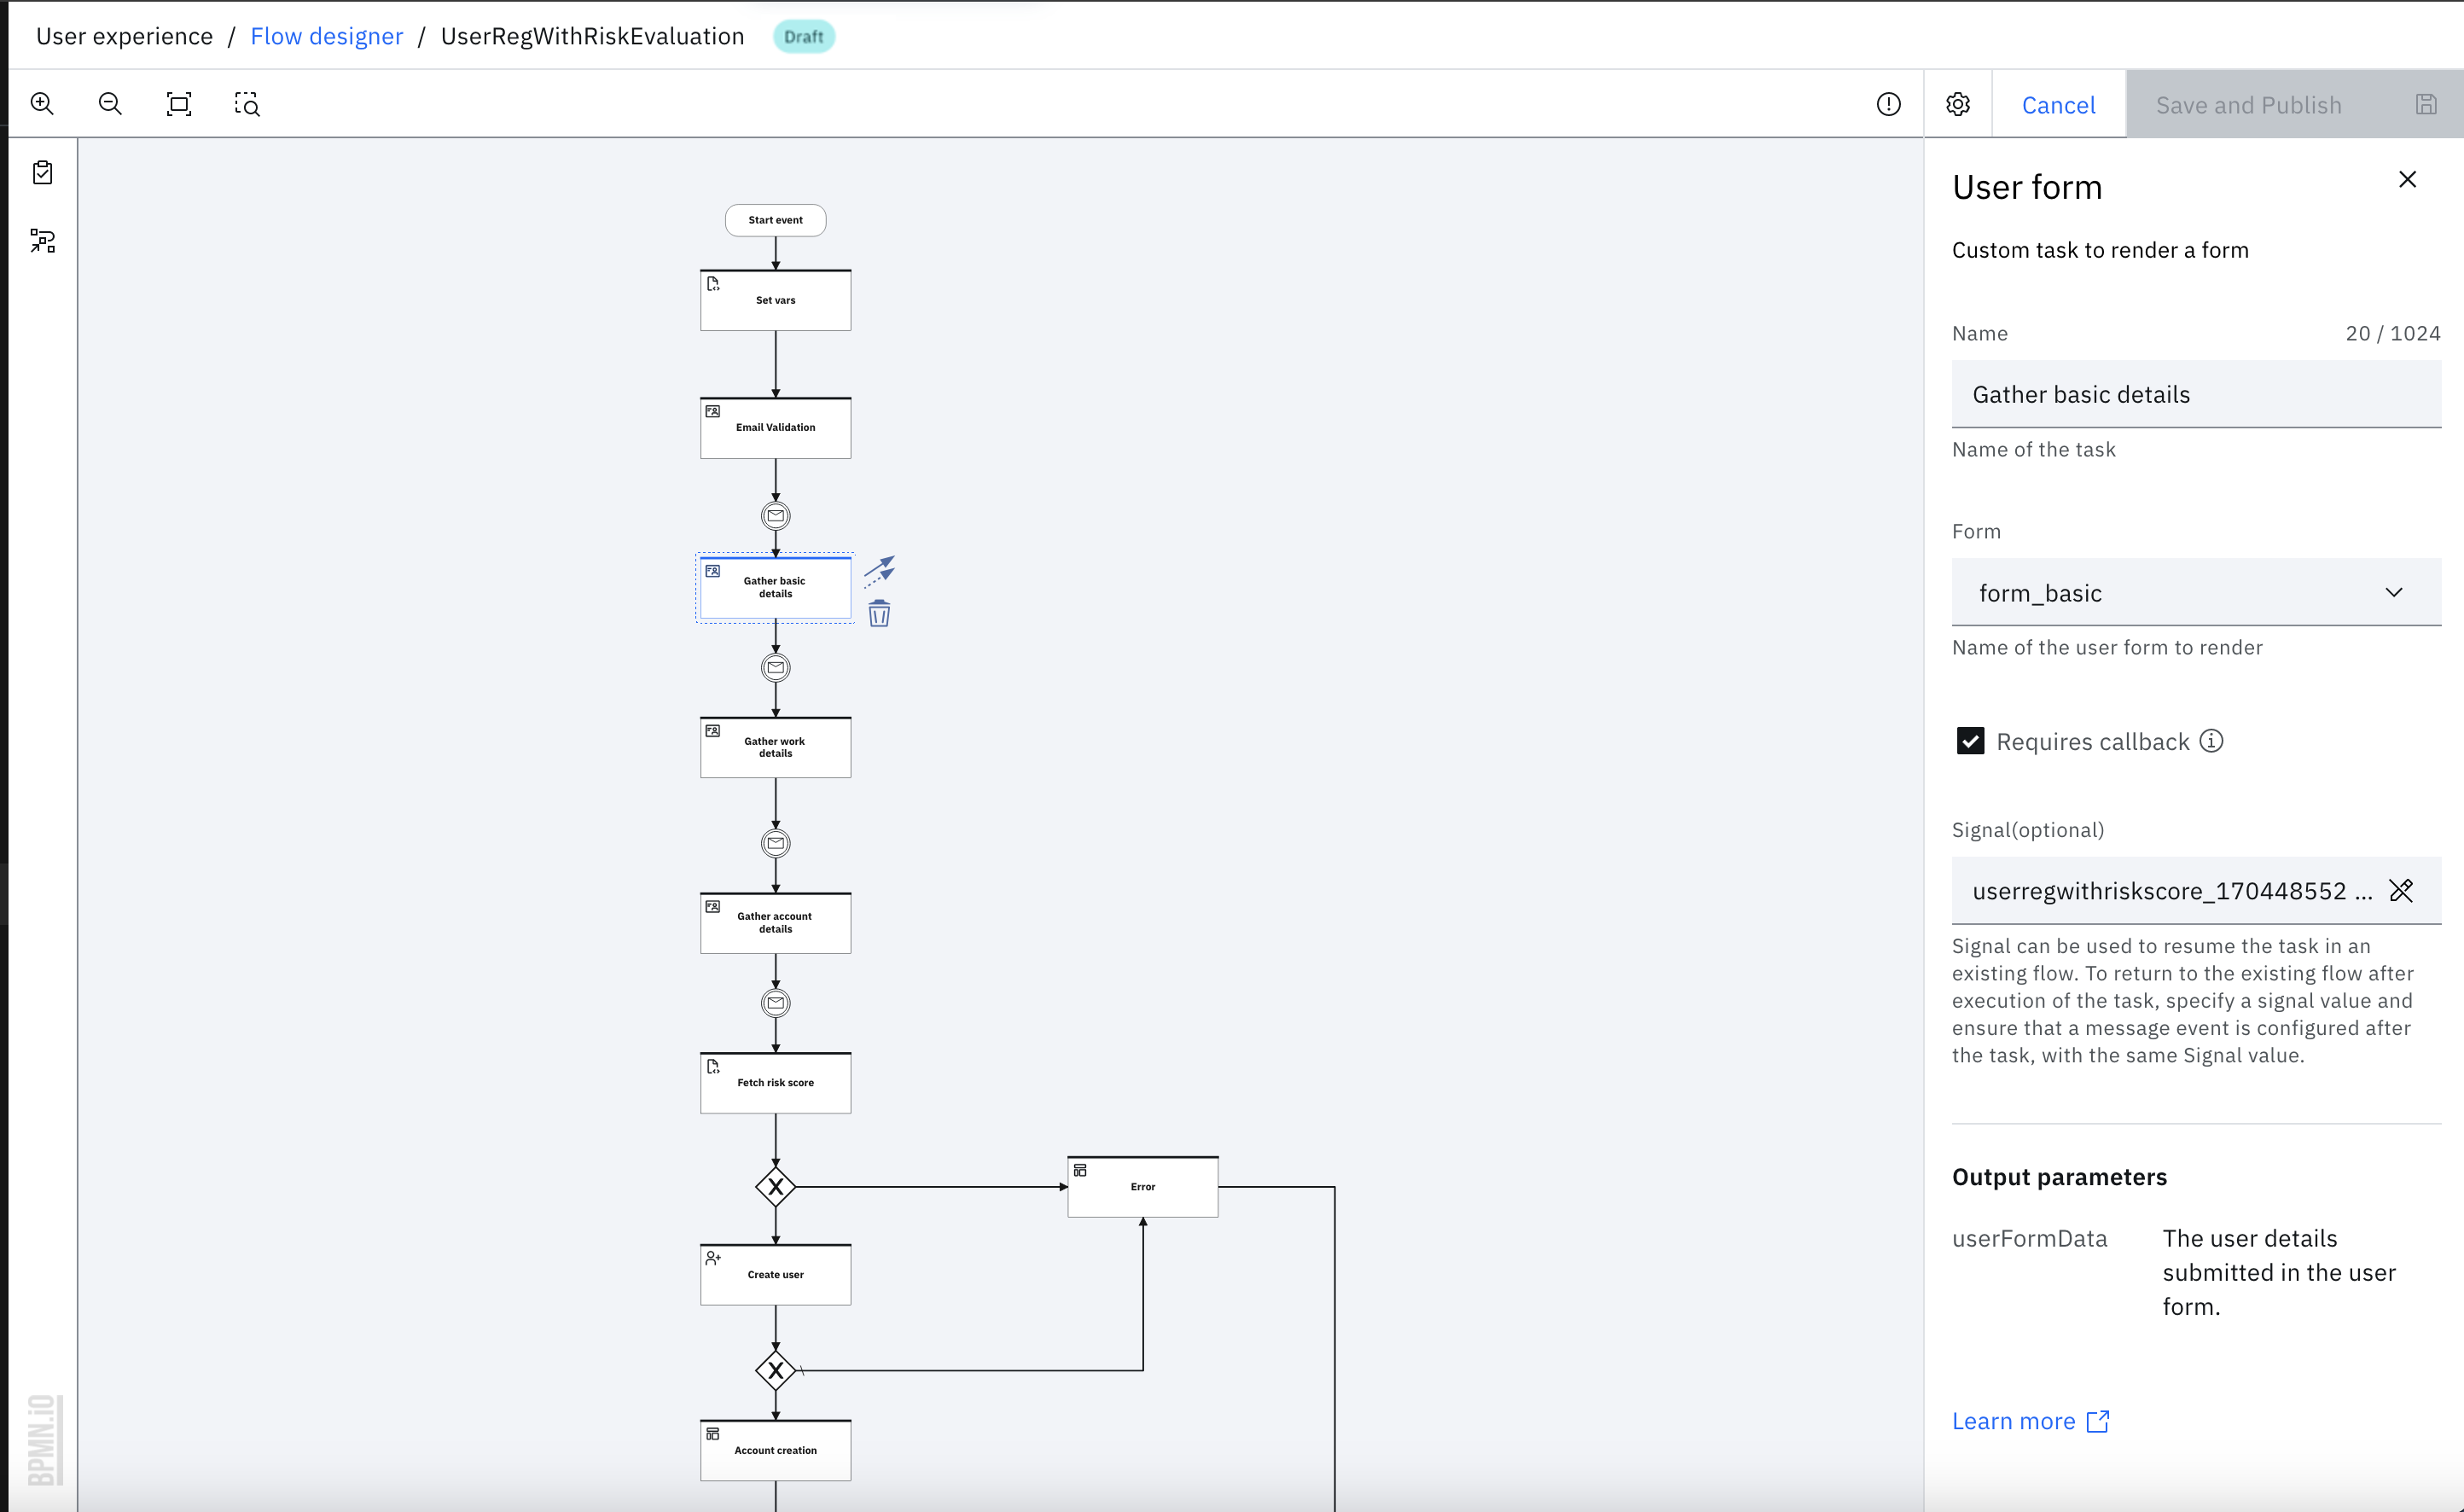
- Click the "Gather basic details" User form task and select the "form_basic" from "Form" dropdown in the properties panel. Make sure that the "Requires callback" checkbox is checked.
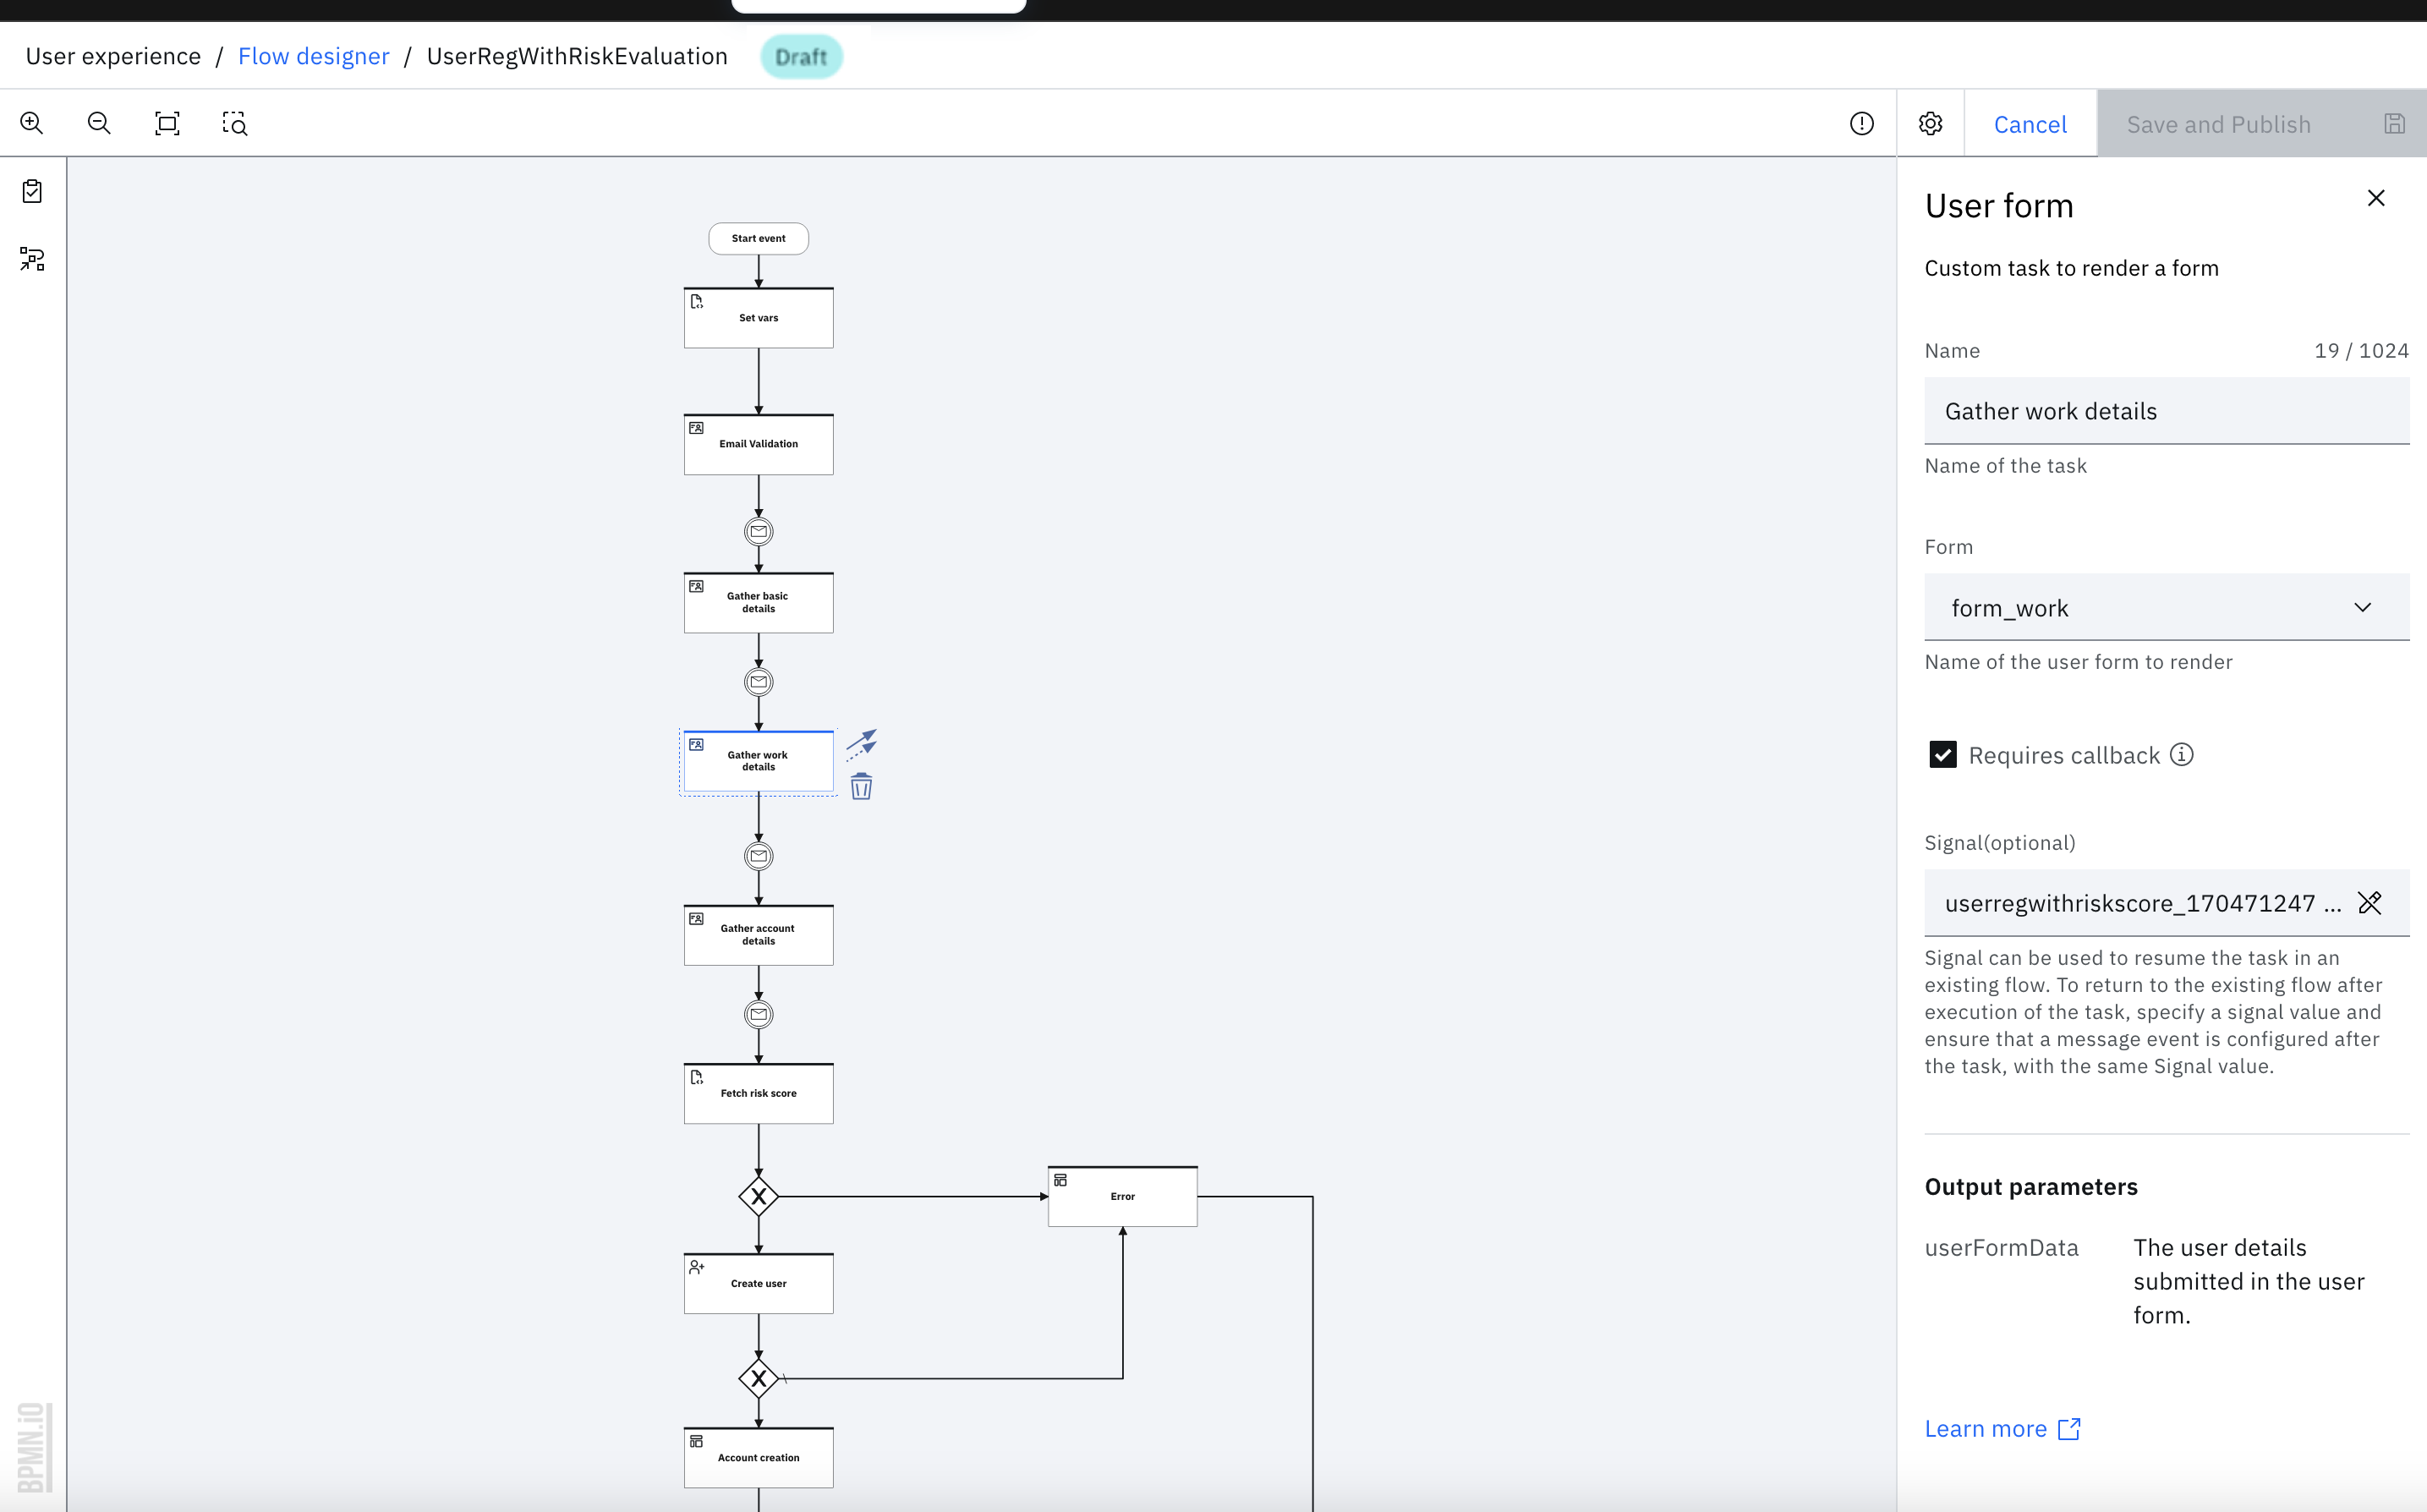
- Click the "Gather work details" User form task and select the "form_work" from "Form" dropdown in the properties panel. Make sure that the "Requires callback" checkbox is checked.
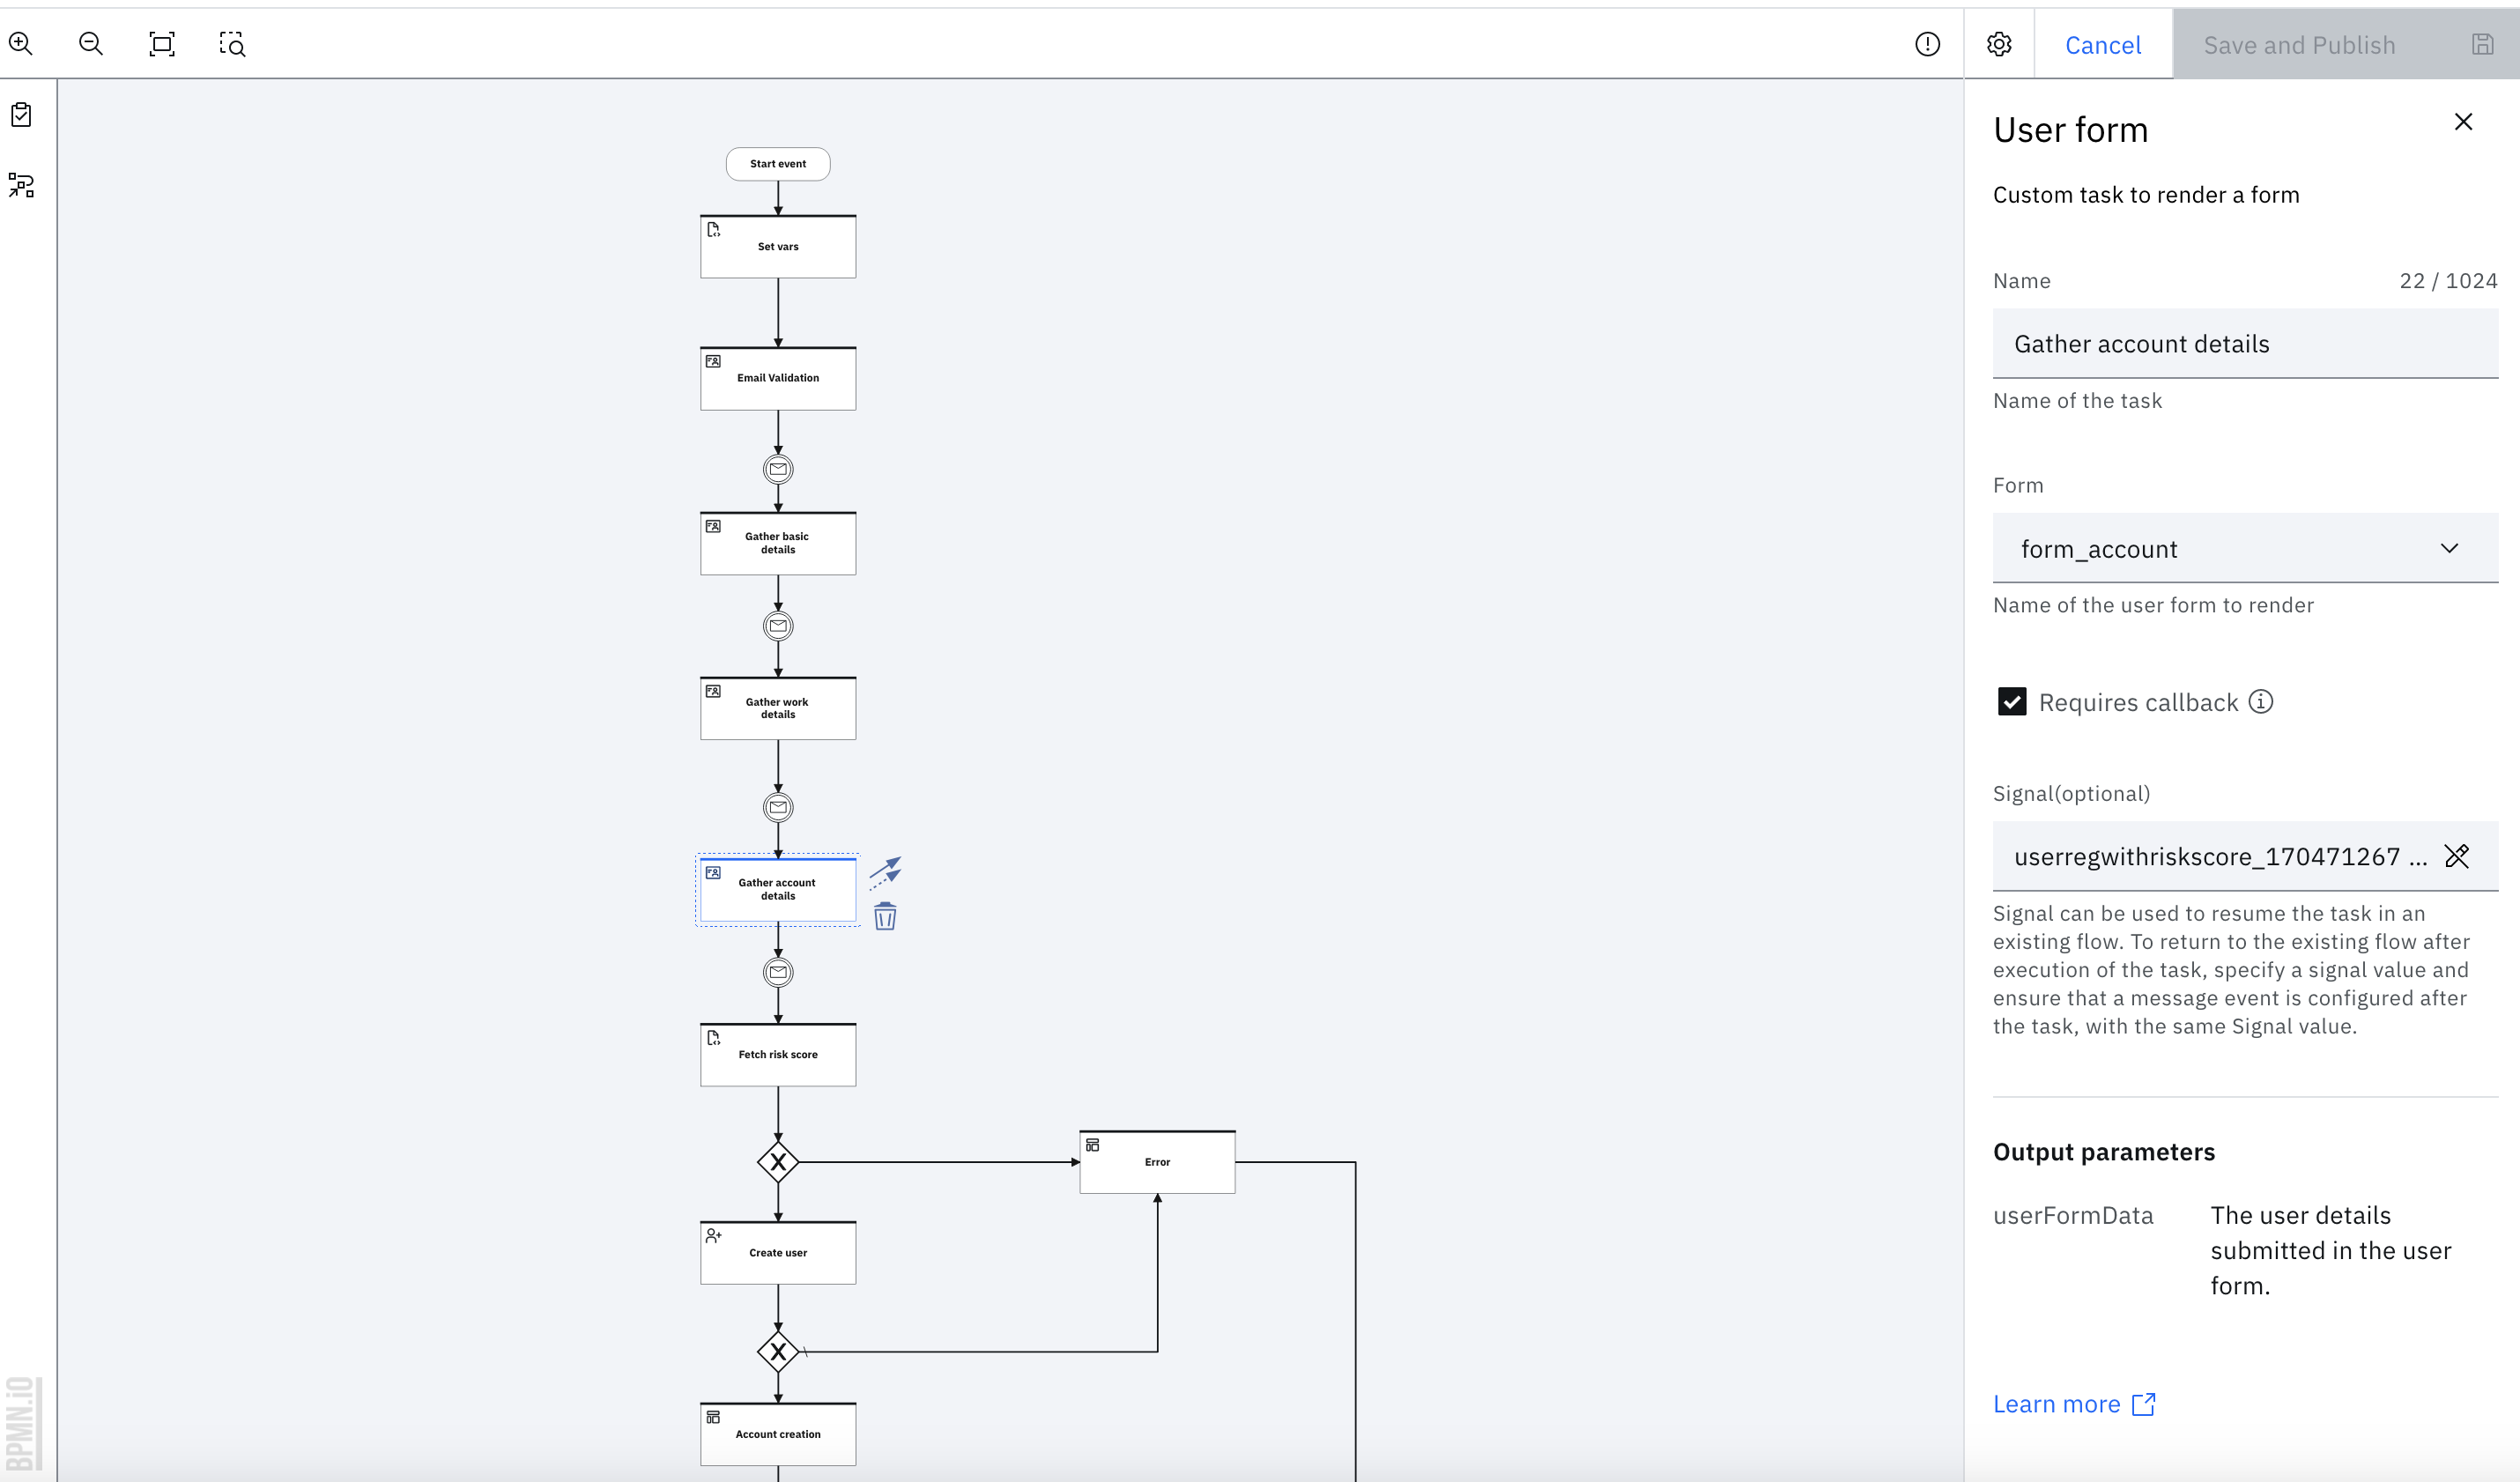
- Click the "Gather account details" user form task and select the "form_account" from "Form" dropdown in the properties panel. Ensure that the "Requires callback" checkbox is selected.
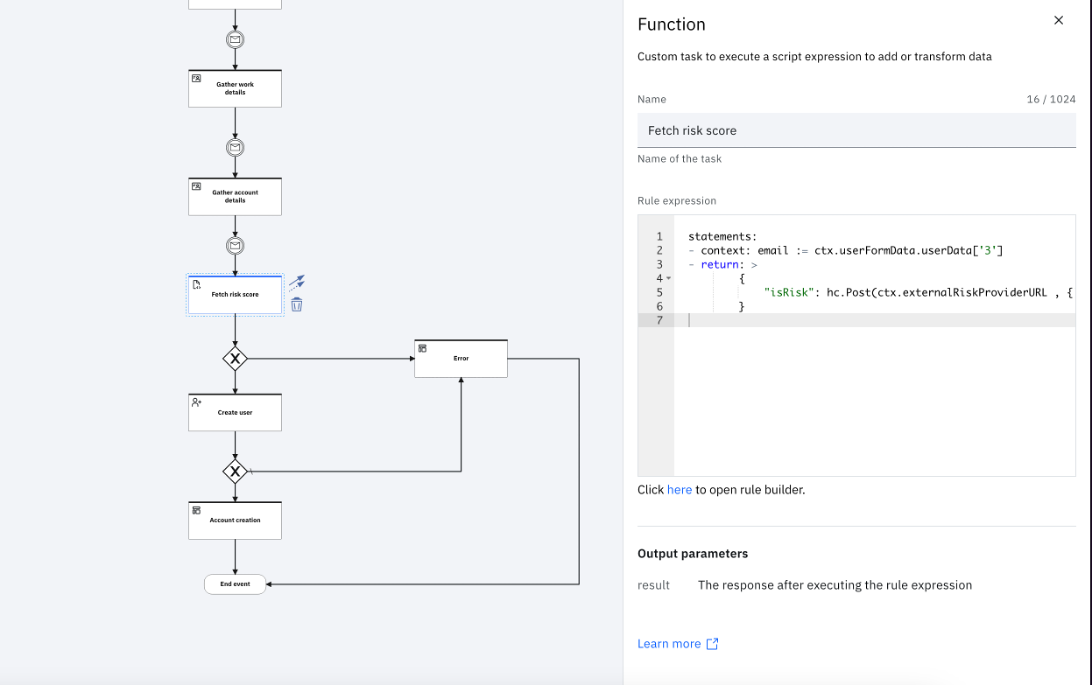
- Click the "Fetch Risk Score" Function task and map the attribute id for email address as "context: email := ctx.userFormData.userData['3']". This function task is used to invoke the third-party risk score API. The "isRisk" variable is set to "true" or "false" based on the decision value from the third-party risk score API .
- After all the changes are made, Publish the flow.
Running the flow
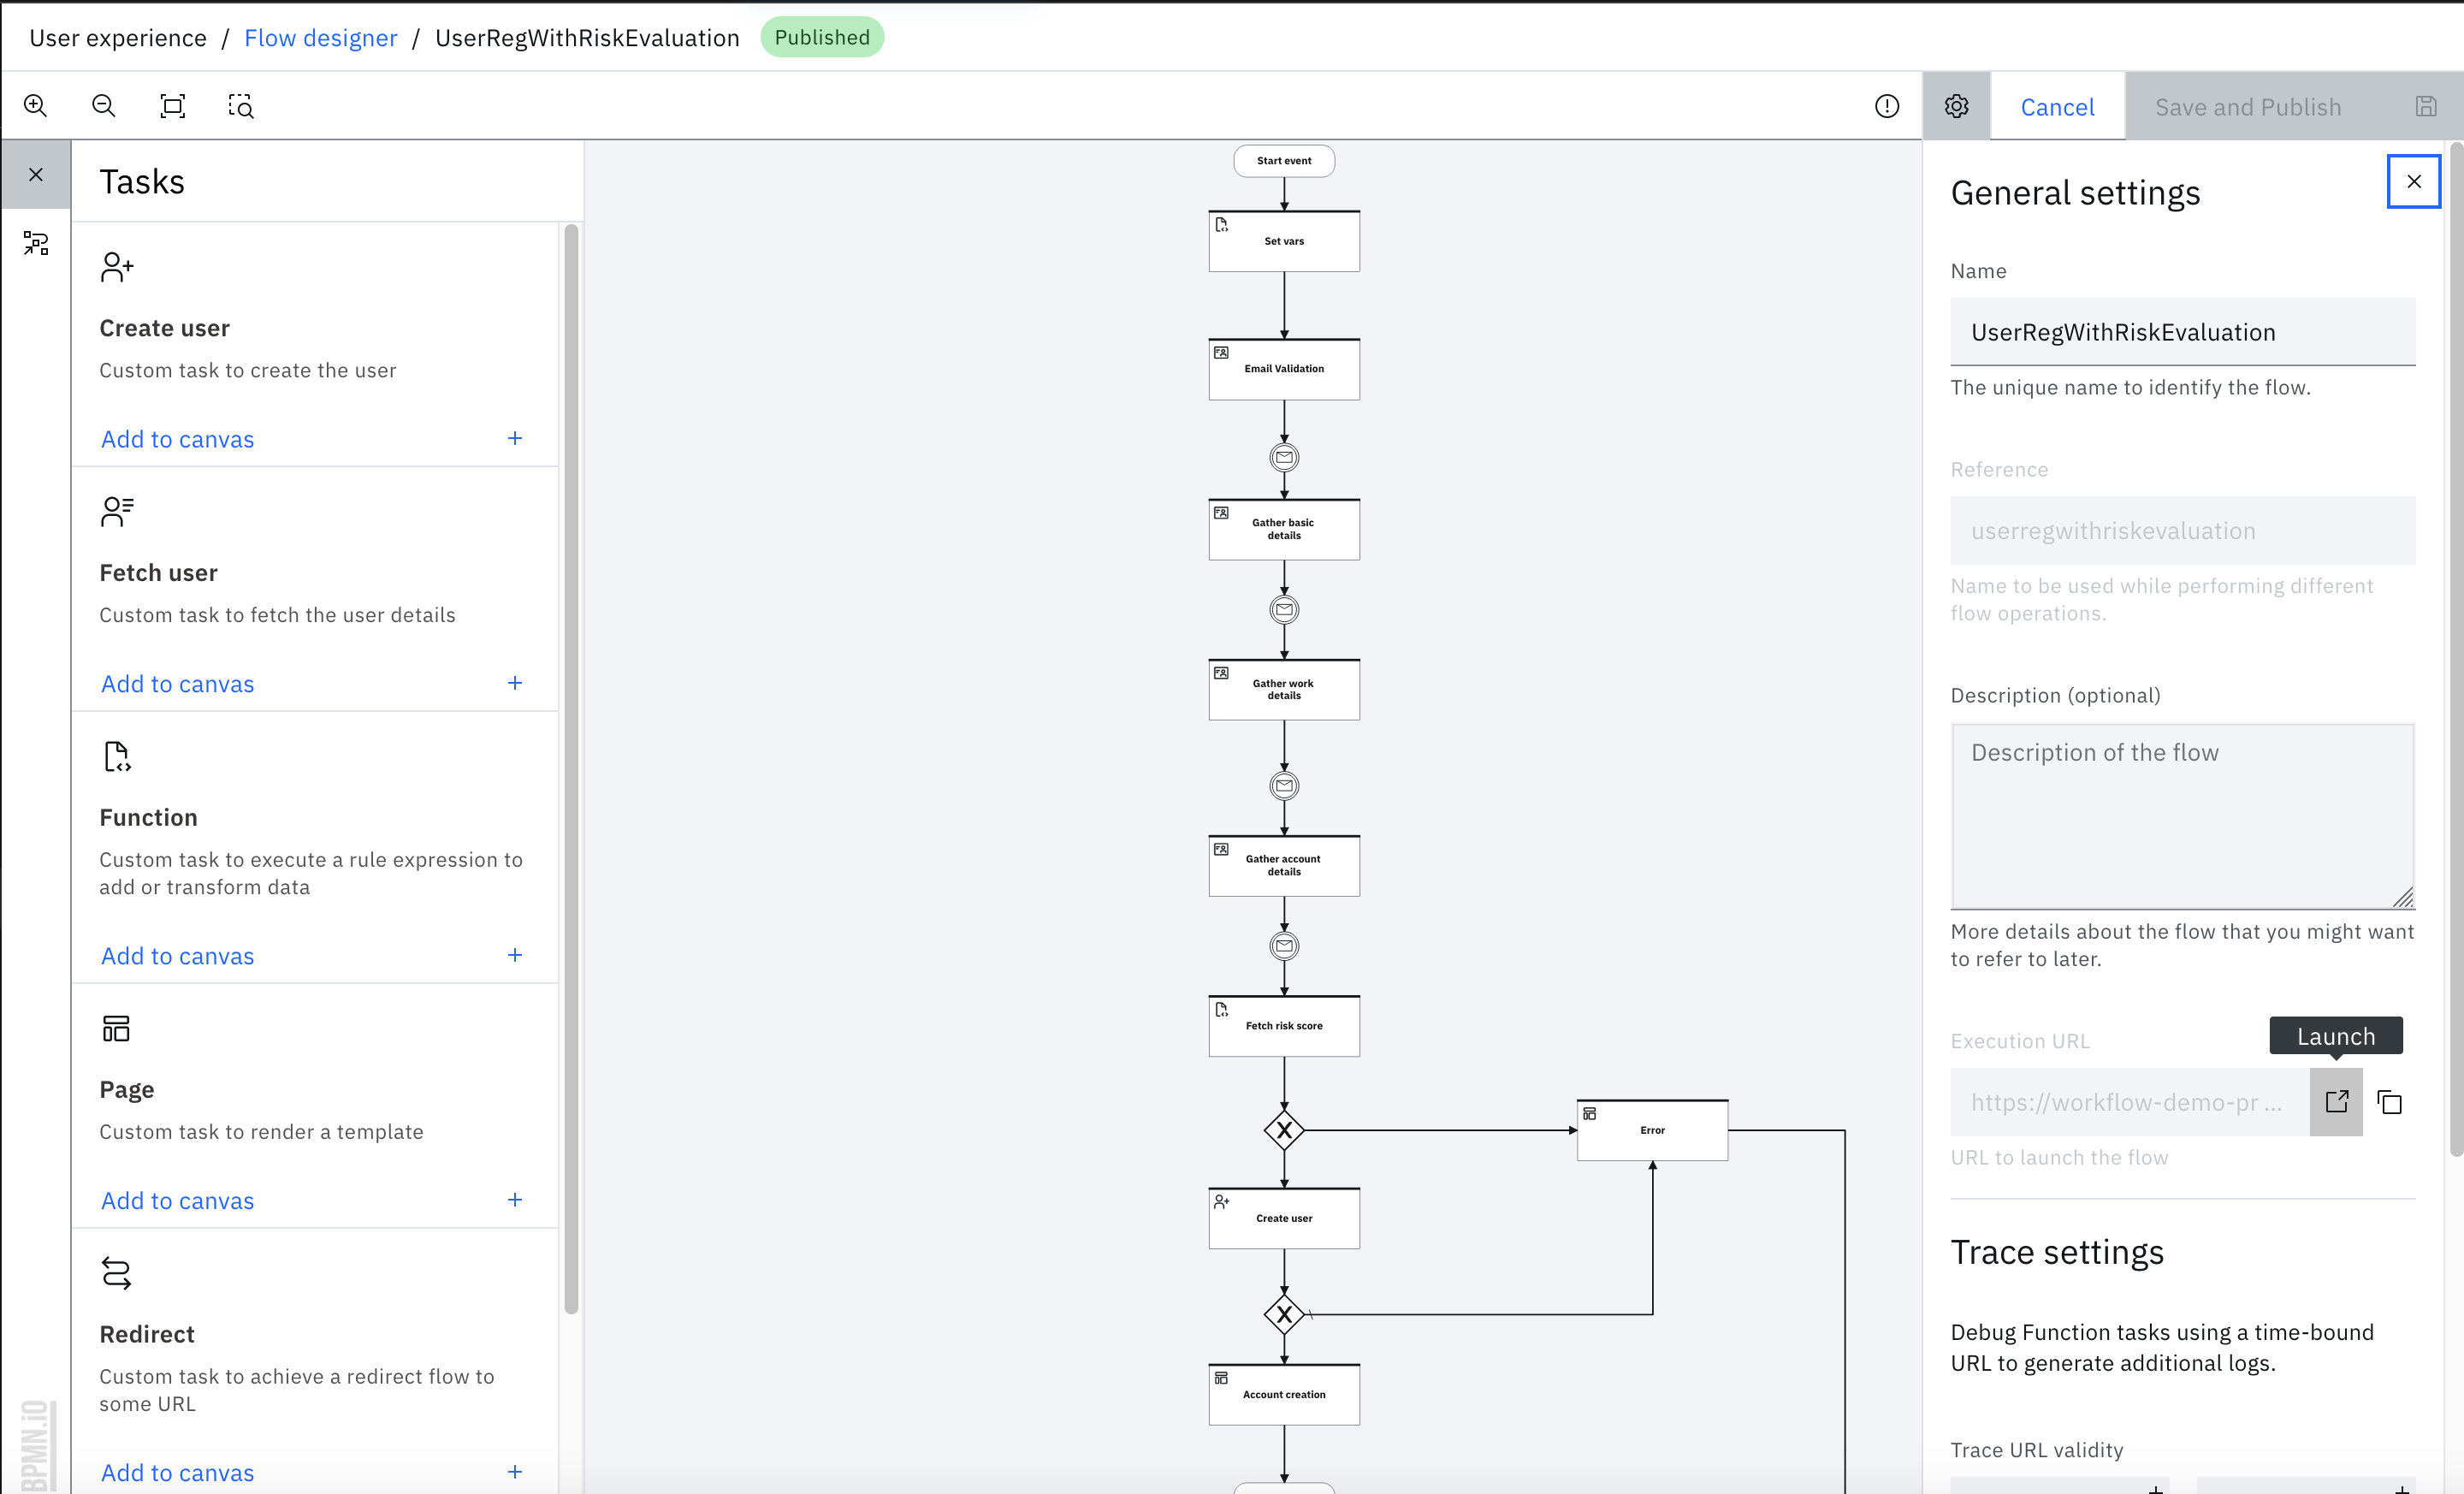
After it is published, launch the flow by using the Execution URL.
-
From the flow Settings tab, you can click the "Launch" icon to directly open the Execution URL in a browser.
-
Alternatively, click the "Copy" icon and open a browser window to paste the Execution URL and complete the flow.
Note
Typically, this flow is launched as the user registration flow. The user is asked to enter the form data and the user is registered in IBM Verify.
Unpacking the flow
This is an optional section and dives into the details of the workflow. This elaborates on the purpose of each step in the flow.
Fetch Risk score
Email risk score indicates the probable risk of fraud that is associated with the email that was provided by the user. IBM Verify invokes an external API to find the email risk score by using the Function task. A user registration flow can be configured based on the risk score values. The blog demonstrates the logic to compute whether an email is risky or not by invoking the third-party risk score API in a Function task. Based on the decision value returned by the third-party risk score API, the variable "isRisk" is set to "true" or "false". Th(e Function task is followed by a gateway to check whether the "isRisk" is set to true or false. If it’s true, then the user is created. Otherwise, an error page is rendered.
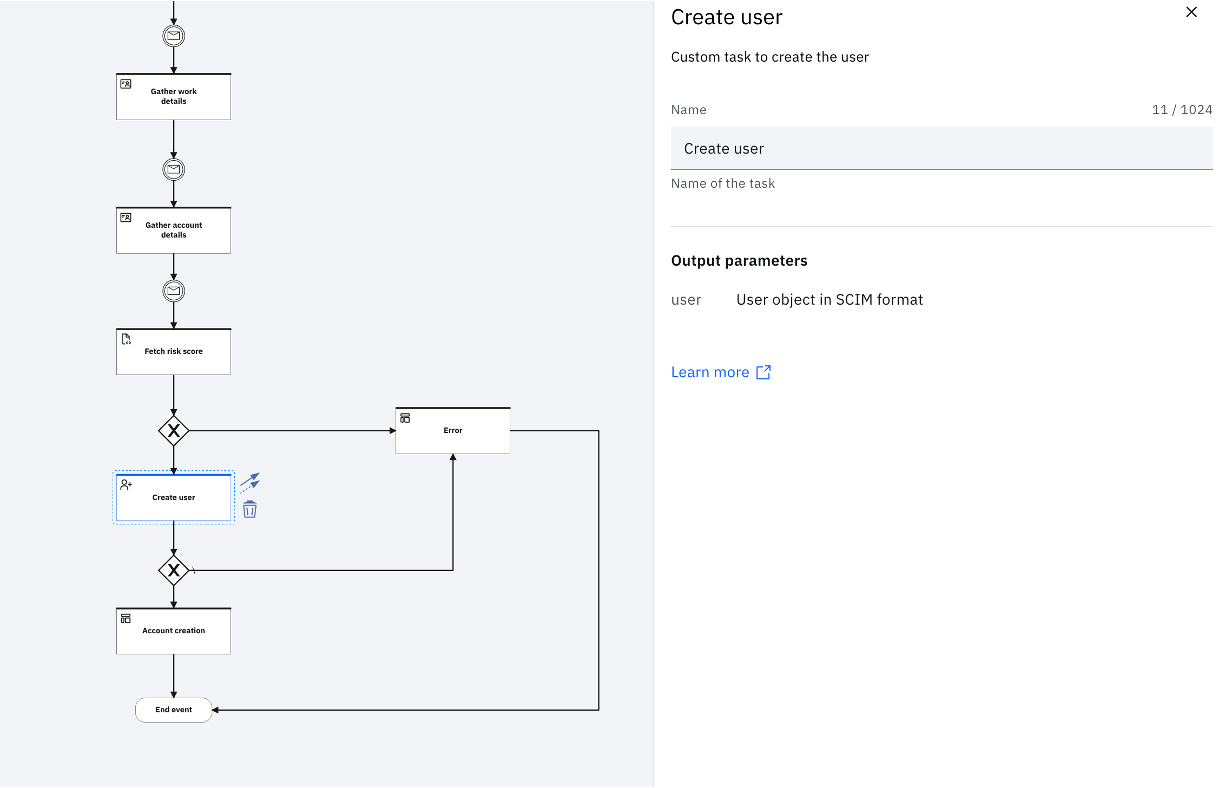
Create user
This task uses the data that is gathered from form and stored as userFormData.userData_ property under the _workflow context to register the user. If the registration is successful, the corresponding SCIM object is generated as a response and stored against the user object, in the workflow context.
Account creation confirmation
This task presents a custom page with a confirmation that the account was successfully created. The page contains a link to go to the Login page and login by using the credentials that are sent to the registered user over email.
Read more about the Page task here.
Error handling
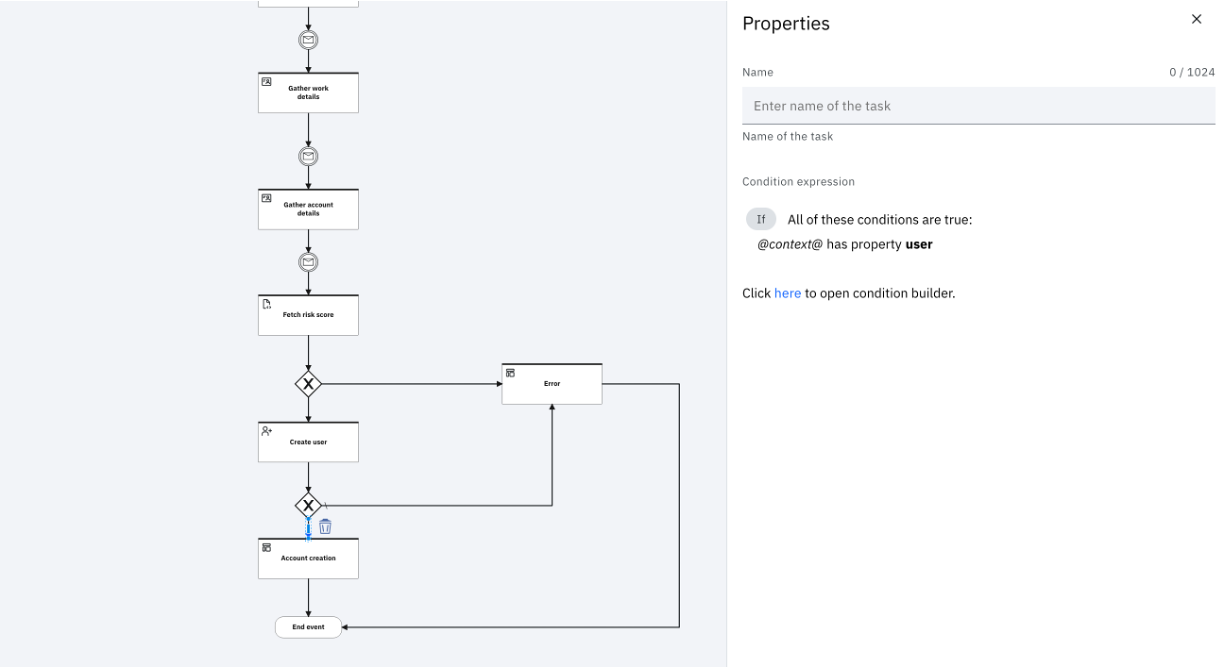
If the user create operation fails, the flow uses a conditional gateway to direct the user to a custom error page.
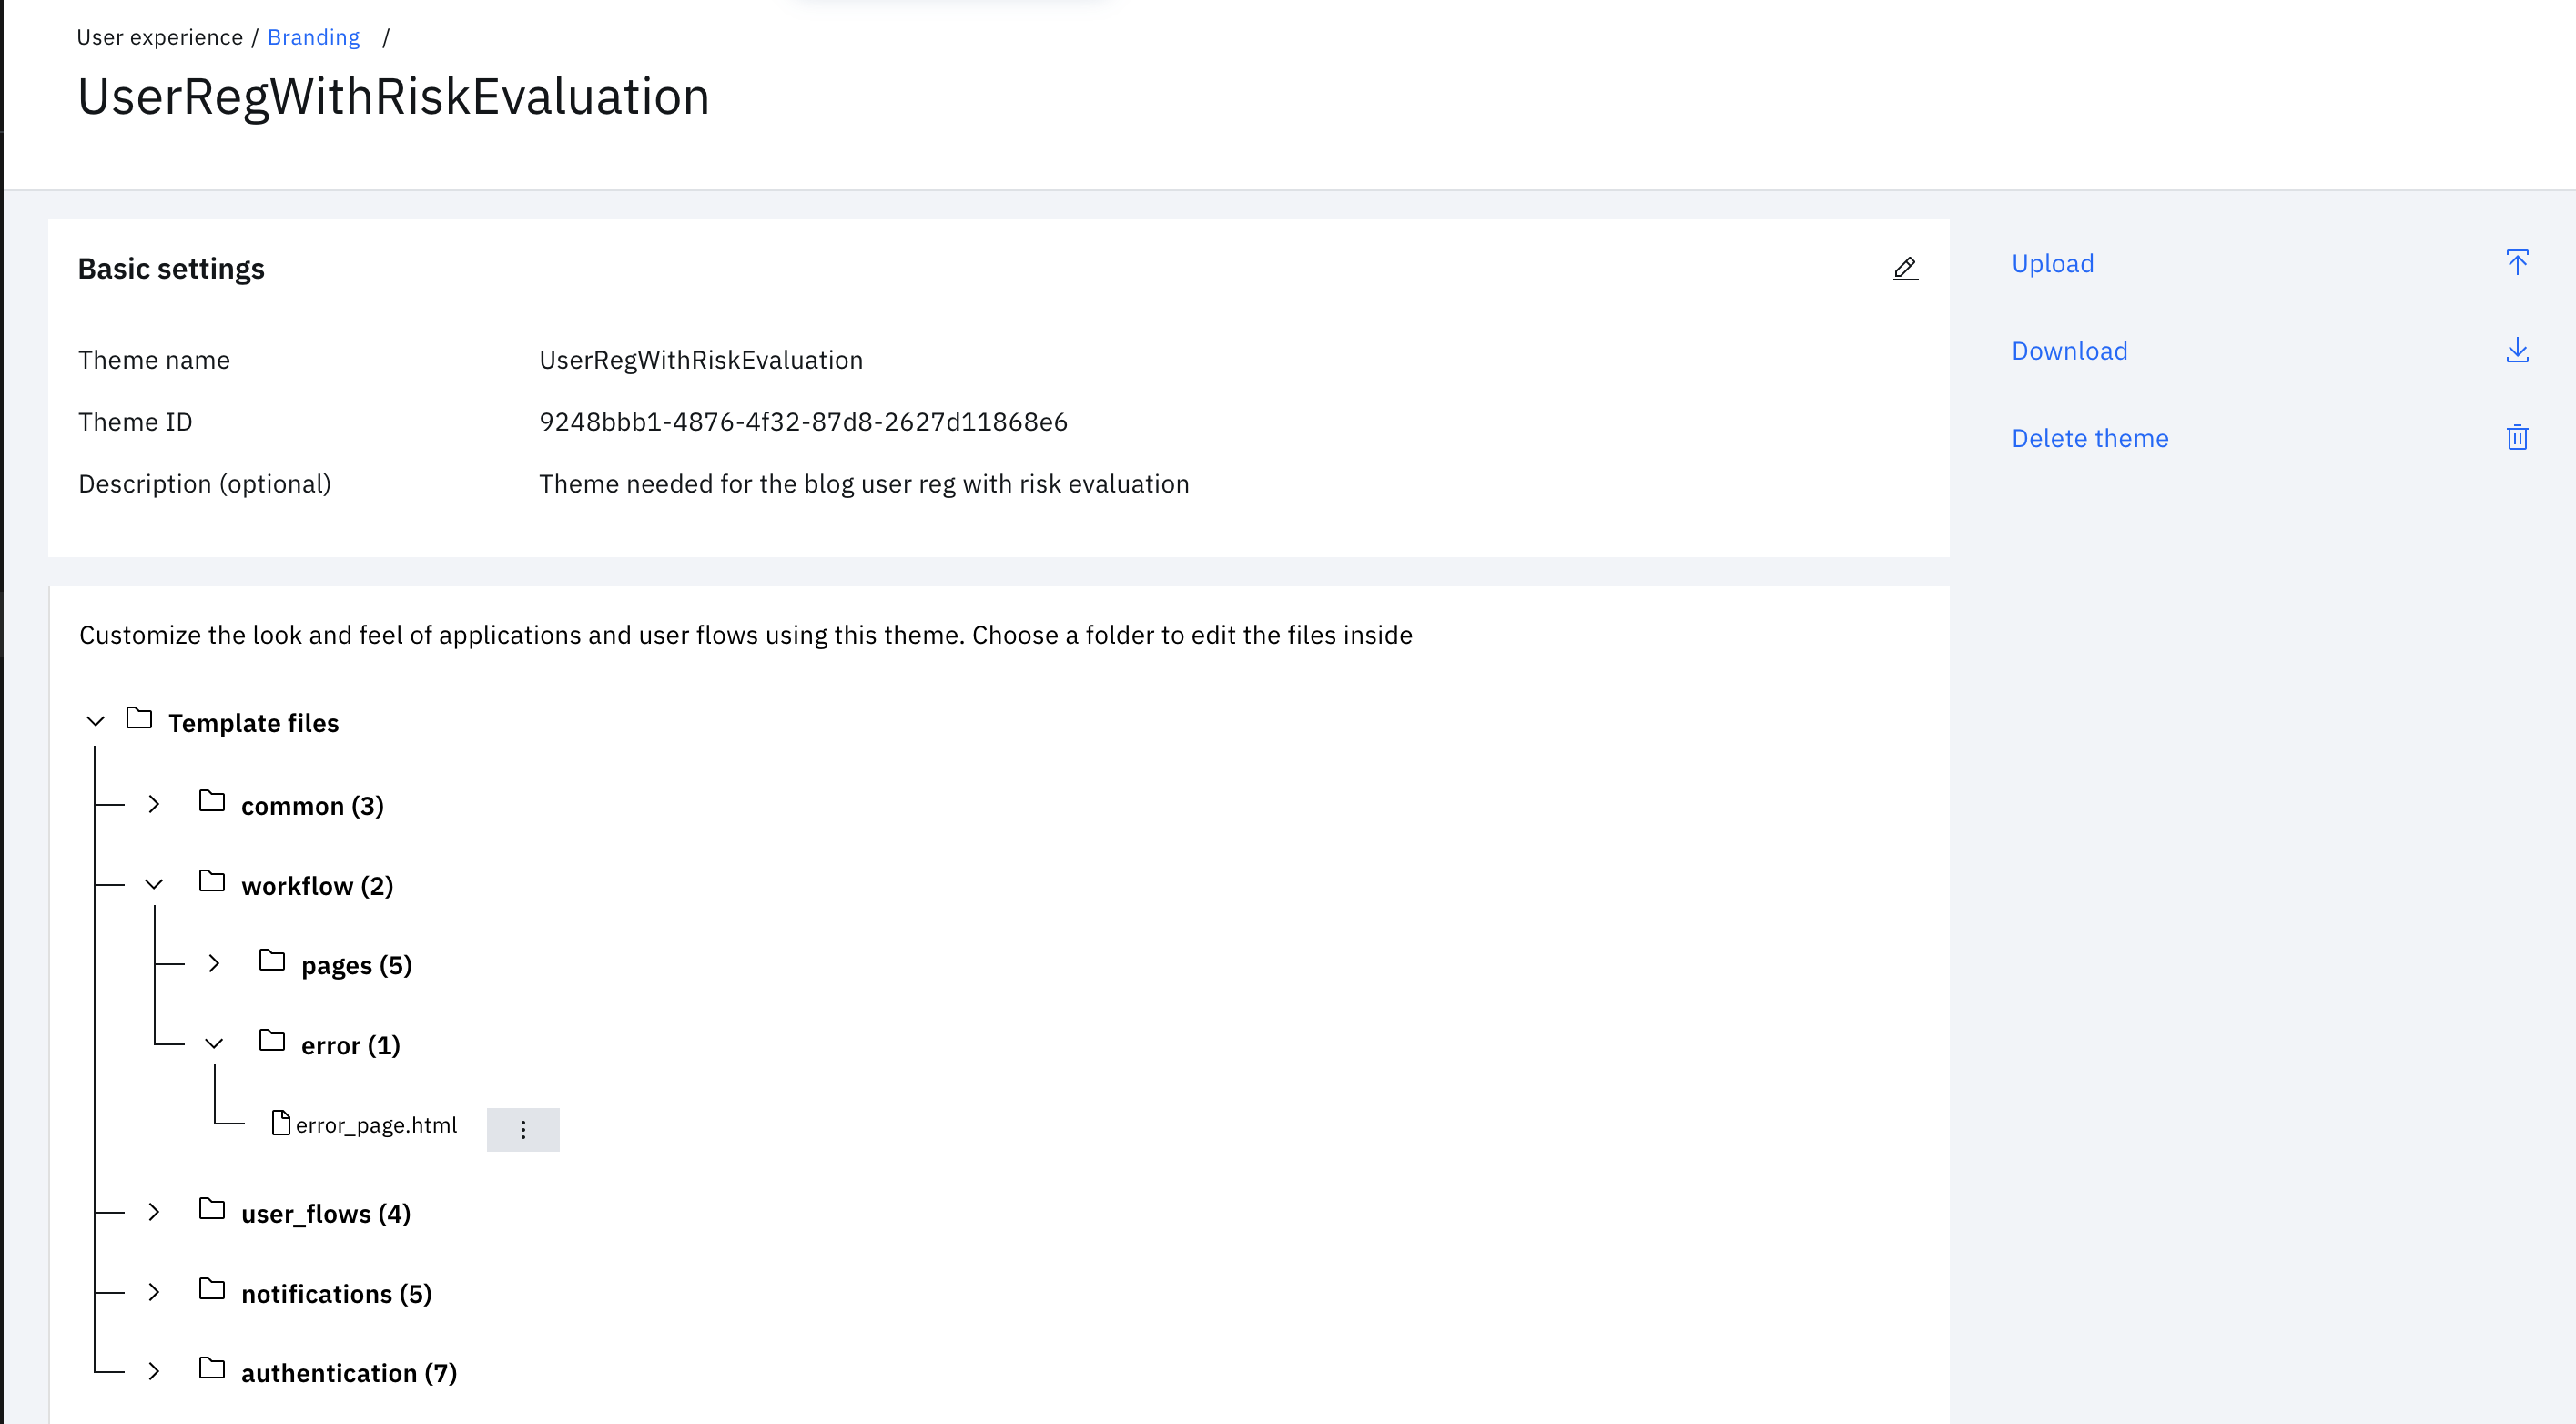
If a system error occurs, the flow is directed to the error page. This can be customized in the theme.
The wrap
This flow introduces a method to evaluate the risk before registering a user, based on the email risk score retrieved from a third-party. The integration with third-party demonstrated here can be customized to point to any given third-party that supports REST end-points.
The flow also talks about the specific user forms, which can be customized to suit individual needs.
Mansi Arora, IBM Security, Milan Patel and 💎Ramakrishna J Gorthi, IBM Security
Updated 7 months ago
