Passkey auto-complete with identifier-first authentication
Overview
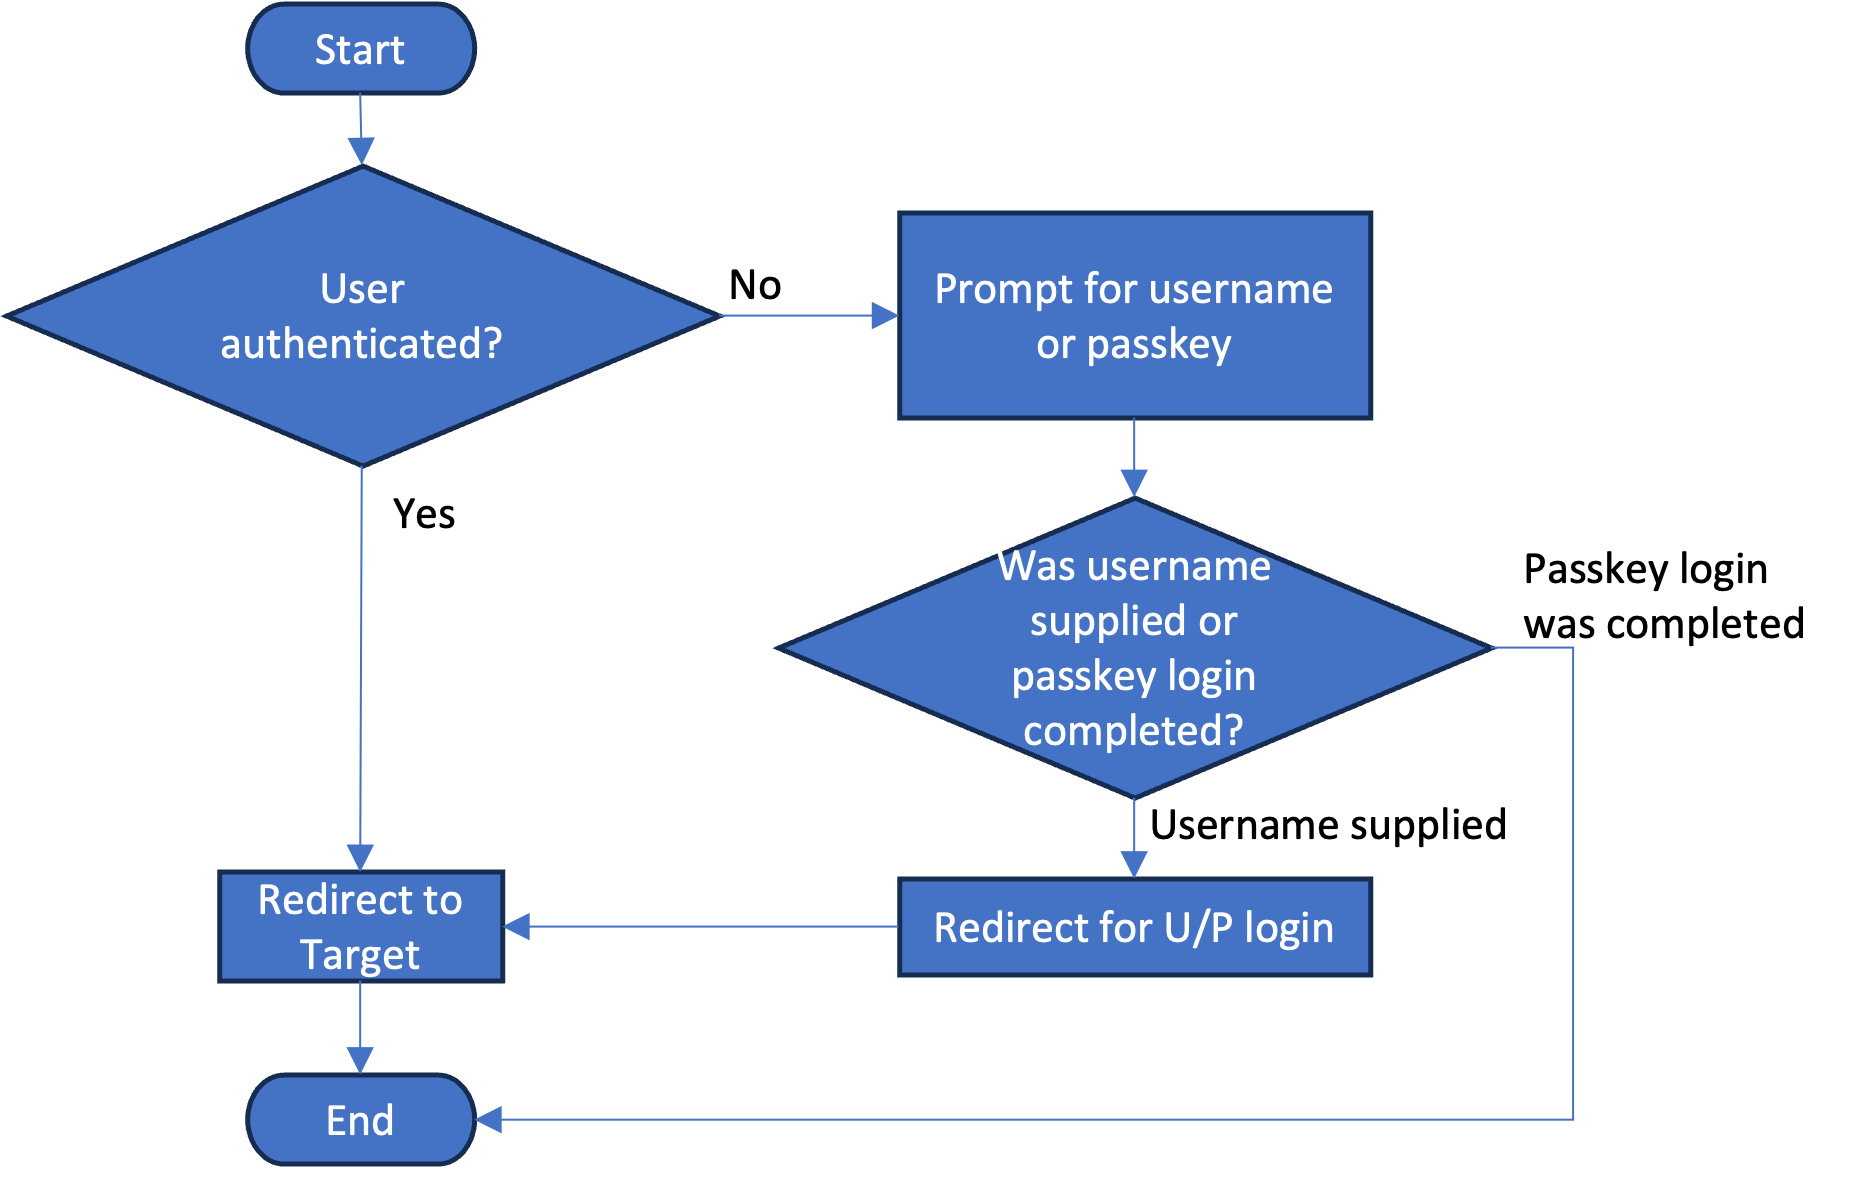
This IBM Verify flow is designed to prompt for a username first for login (identifier-first authentication), including passkey autofill authentication. Hereafter, we will refer to it as the passkey IFA flow.
If the user authenticates with a passkey, the flow authenticates the user and terminates.
If the user provides a username and presses "Next", then the flow continues. In this example flow at this point it just prompts for username/password login, but that could easily be modified to trigger federated single sign-on, or any other follow-up authentication capability that you wish. The real purpose of this flow is to demonstrate passkey autofill and the basics of an identifier-first login flow.
Logically, the flow behaves as shown in the following flowchart:
Resources
This article makes use of importable file resources that can be found in the ifa_passkey subdirectory of the verify-saas-resources GitHub repository.
For more information on the GitHub repository that contains supporting resources for example workflows, please see the Associated Assets section of the Flow Designer overview page.
Prerequisites
First, please review and understand the hello world example, including how to obtain flow and page asset resources for configuring the example flows.
In addition to the prerequisites listed in the hello world example, for this flow to operate correctly on your tenant, the following configuration is required:
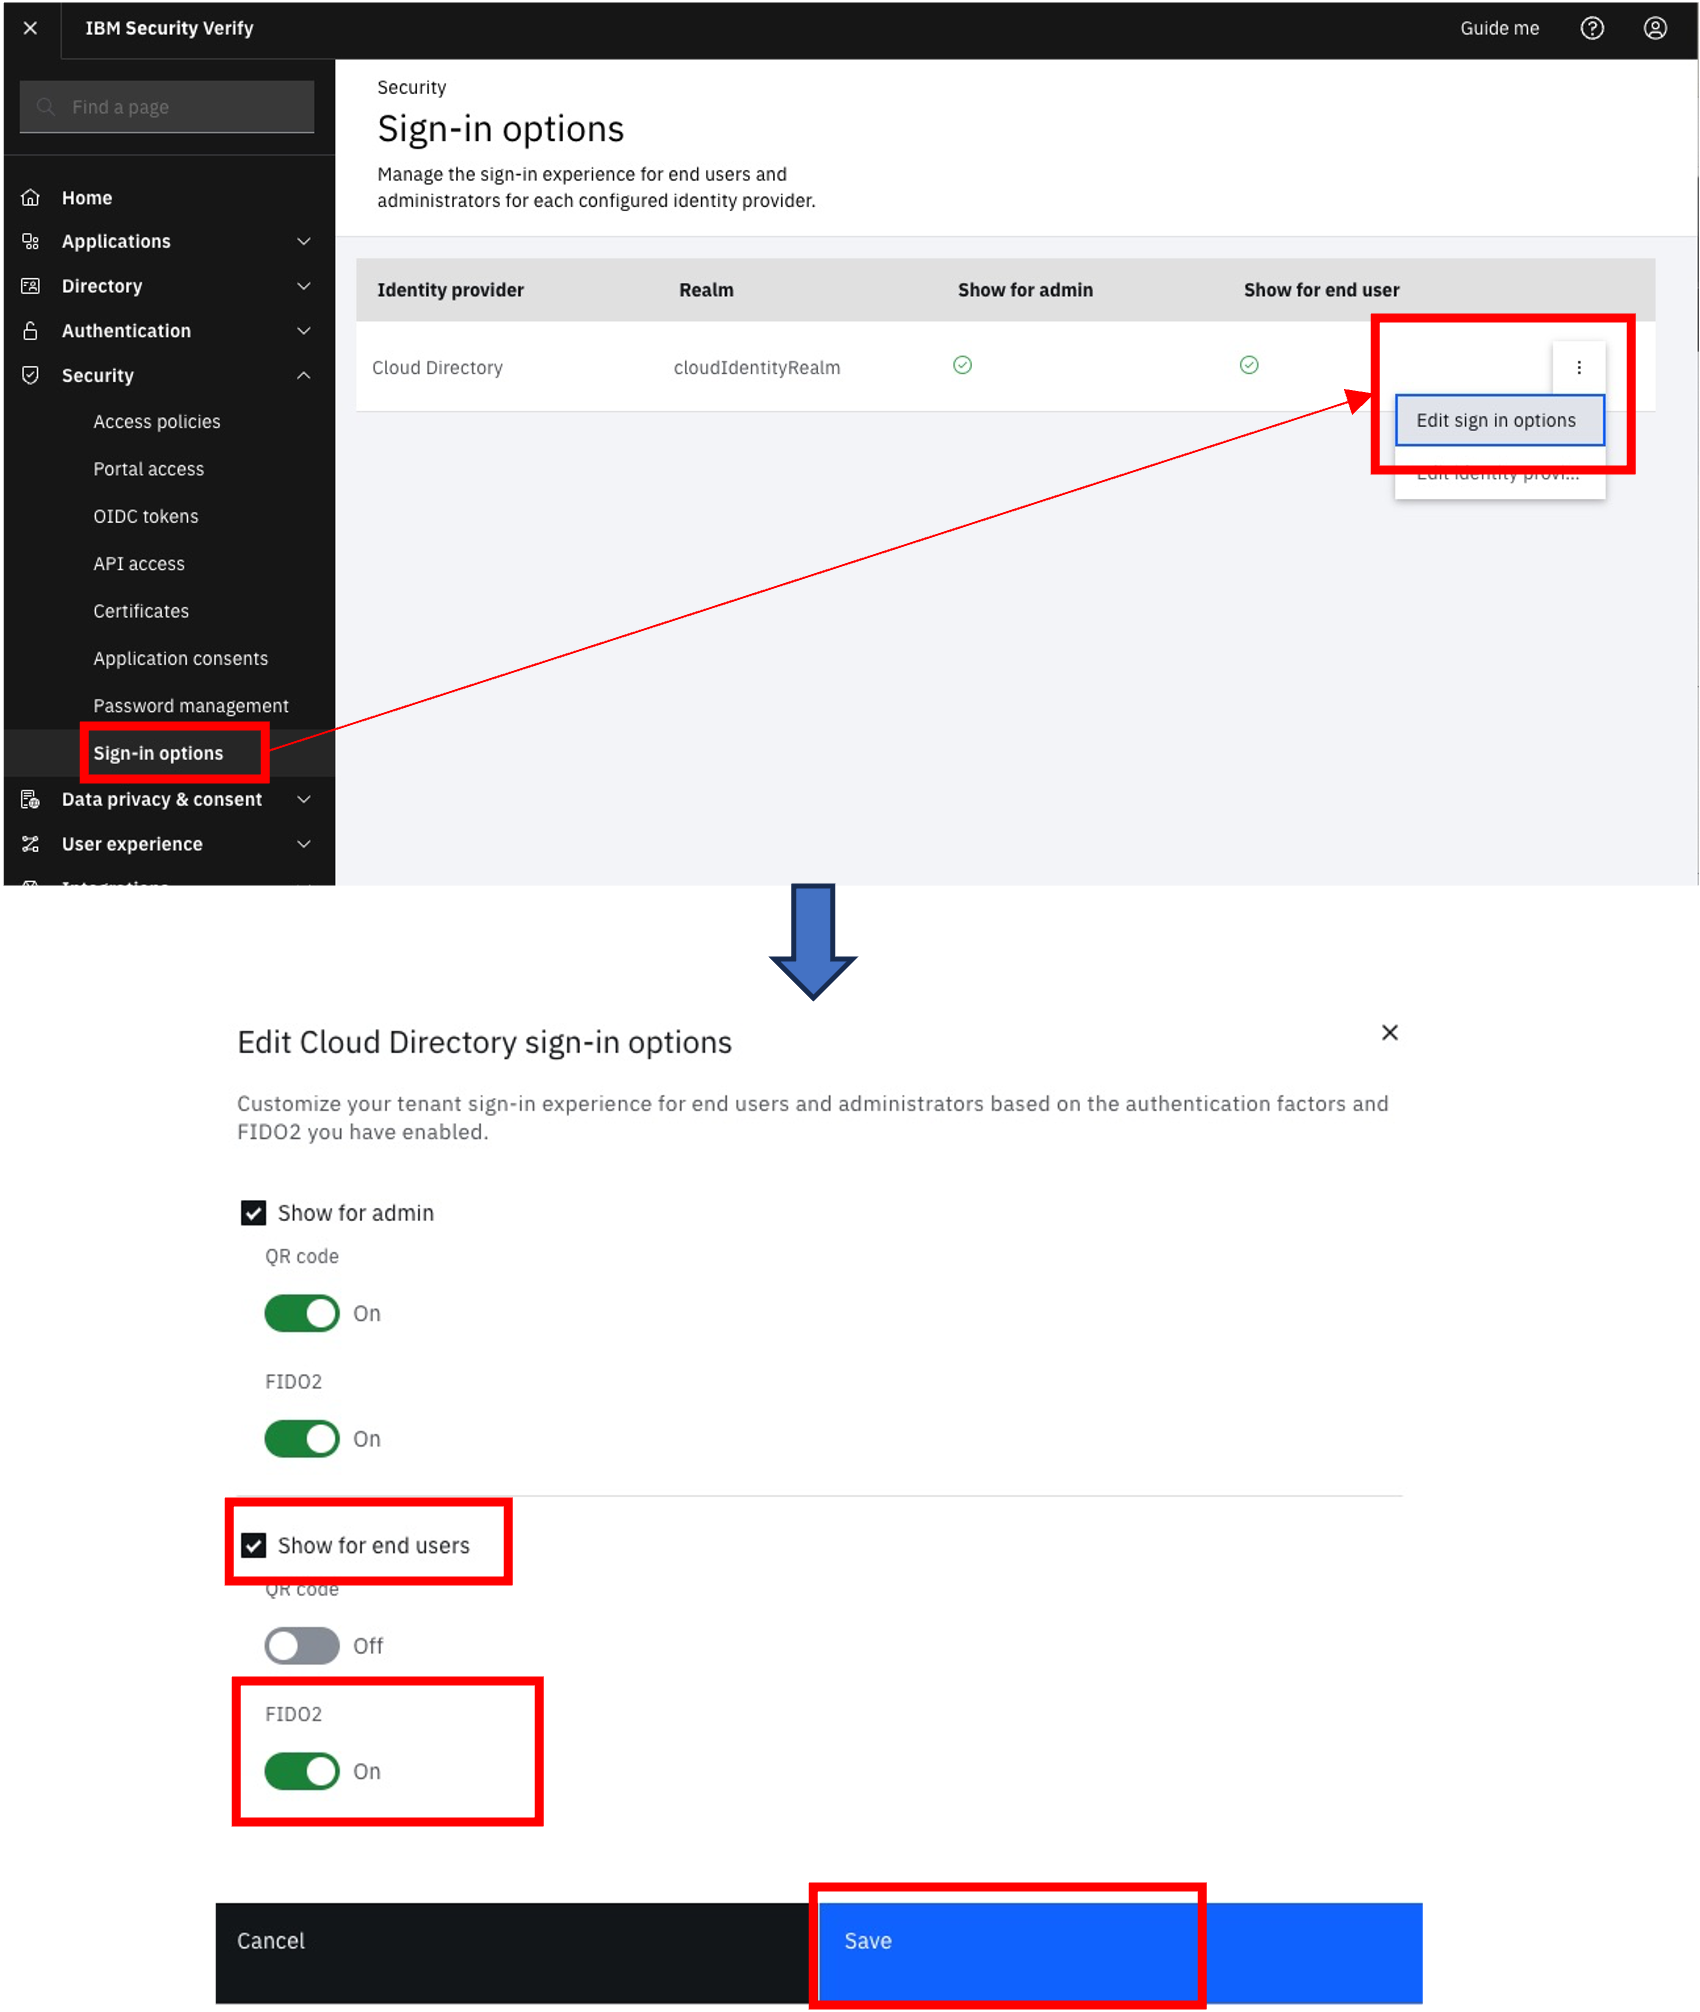
- Your tenant should have FIDO2 (passkey) authentication enabled for end users, as that is the primary feature of this flow. This should be configured for the for the
Cloud Directoryidentity provider as shown:
Installation and Configuration
Follow the steps below to create and configure assets used by the passkey IFA workflow.
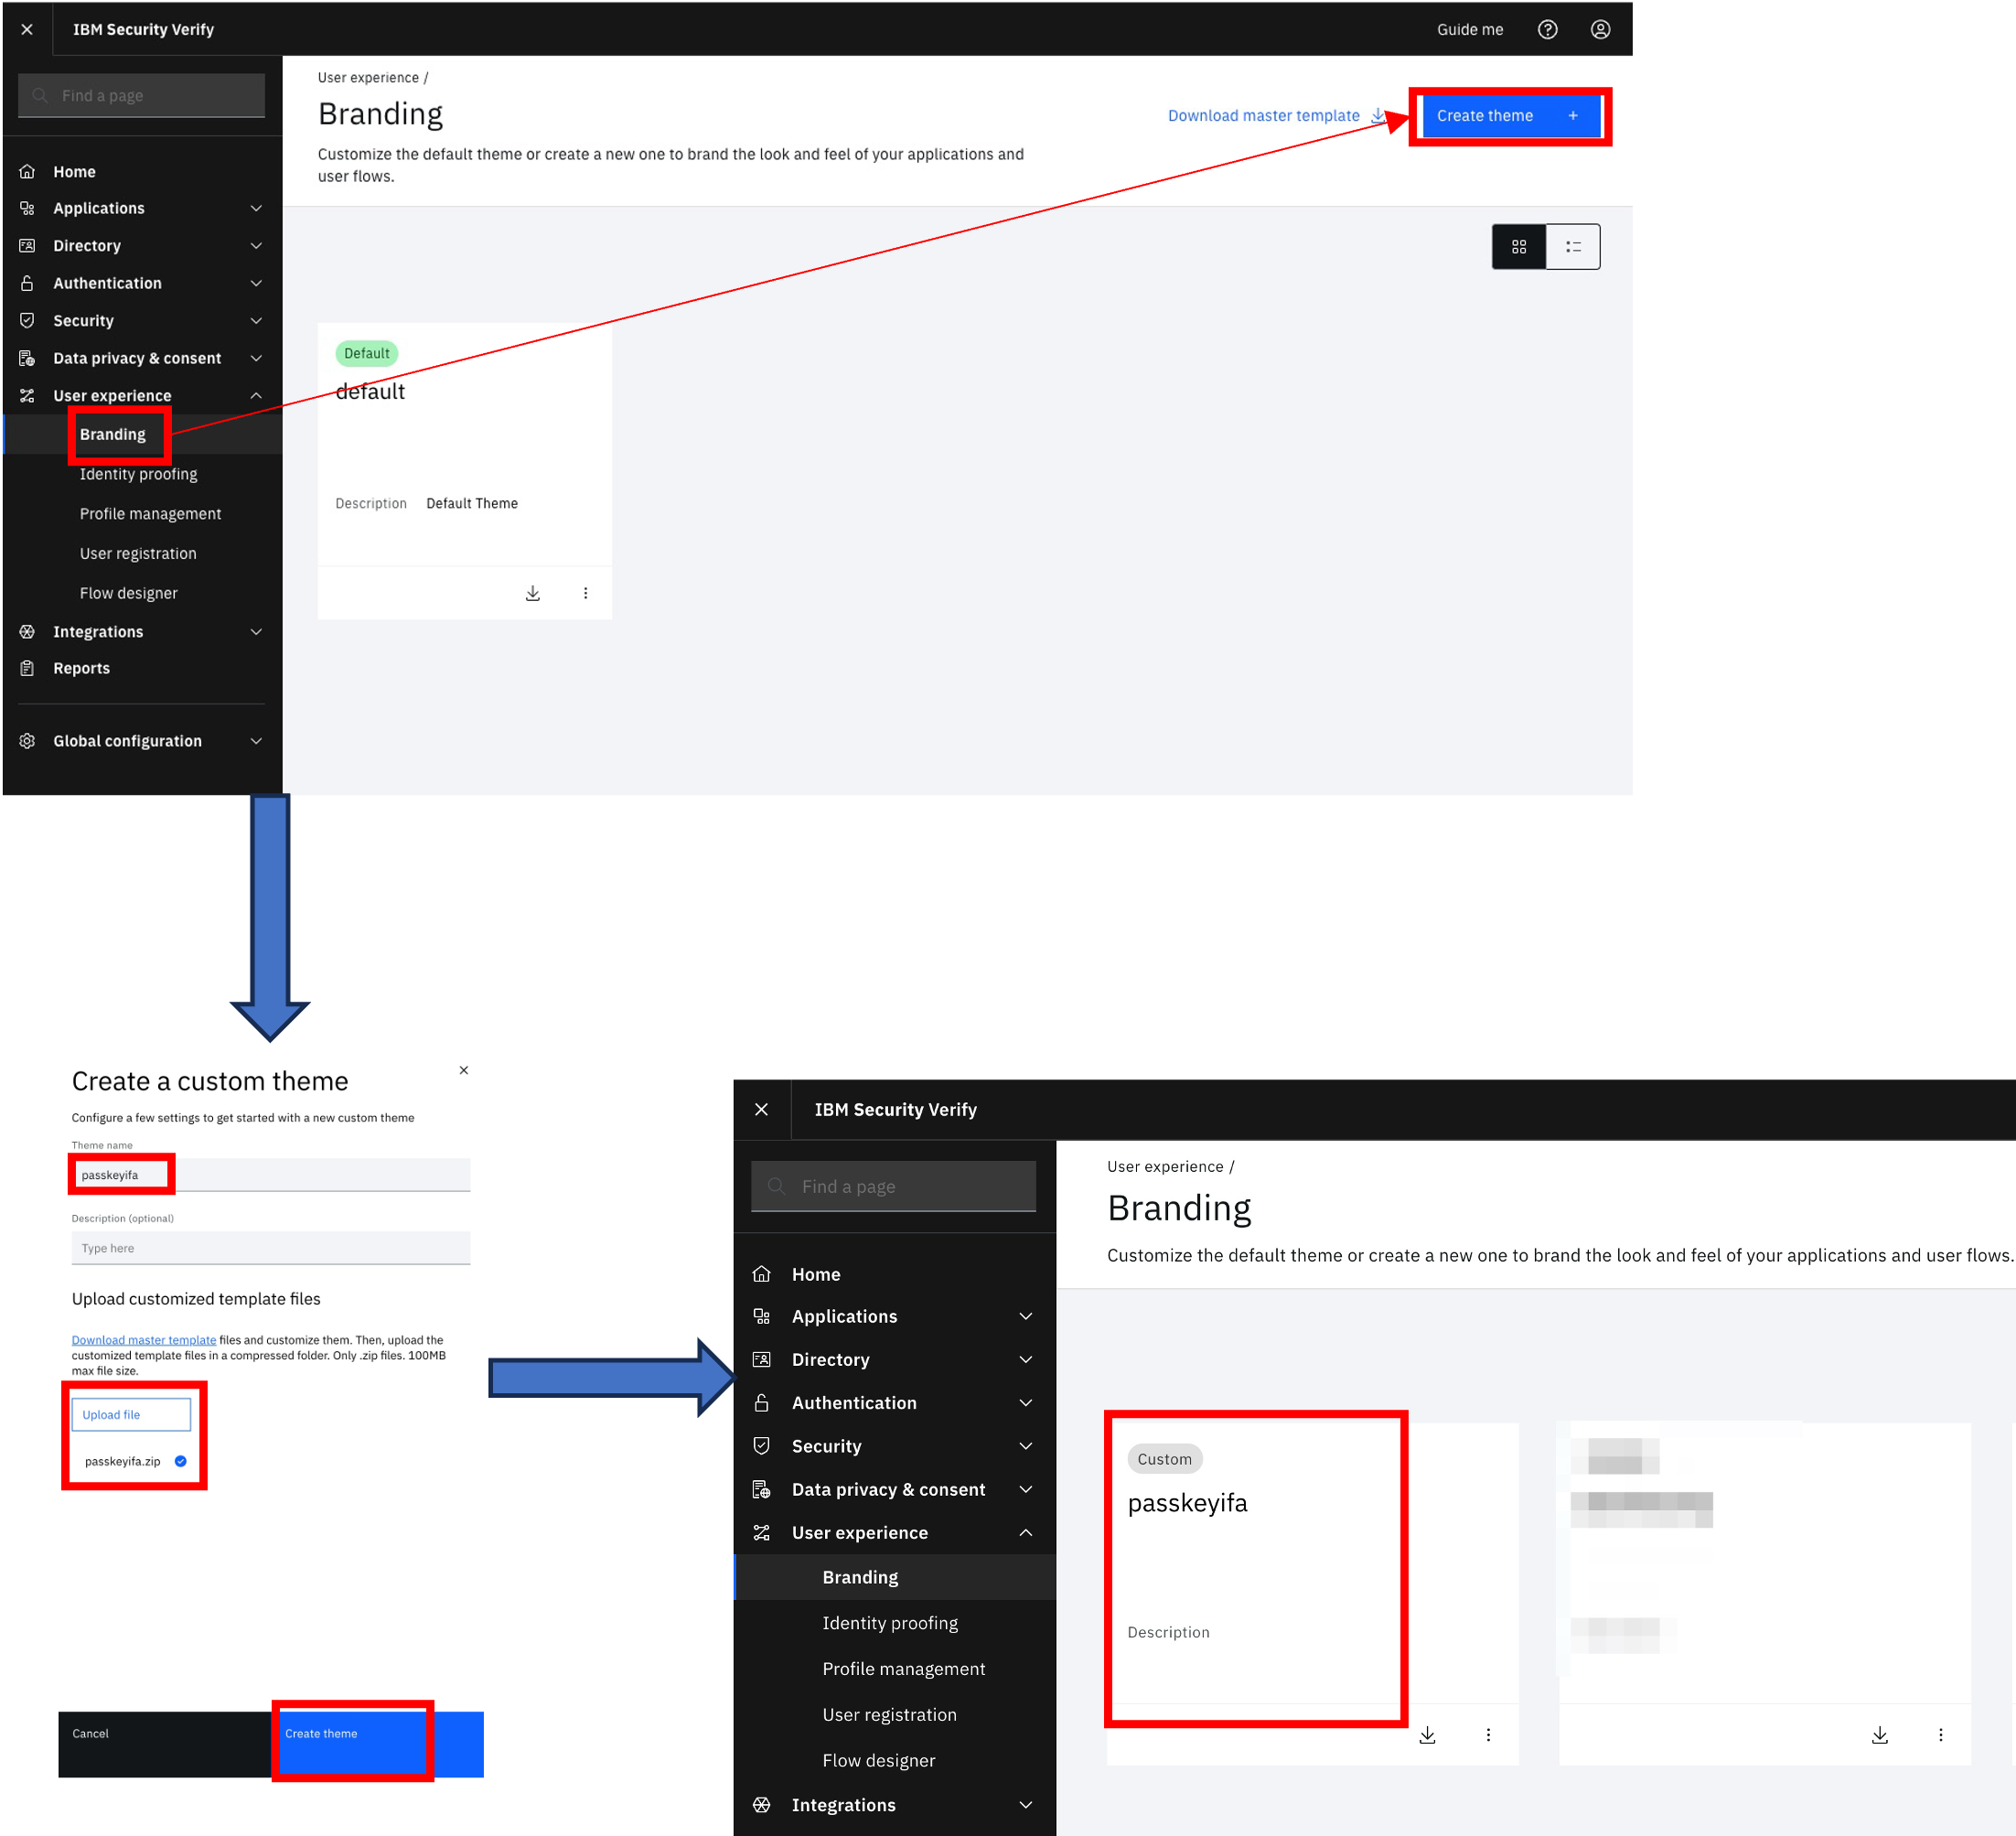
Custom branding theme
Create a new branding theme called passkeyifa, using the master template but replacing the following pages under the templates directory in "$GIT_REPO/flows/ifa_passkey/theme".
You can diff the pages against the master template to understand the changes. Each also includes HTML comments in the <head> tag with information on what was done for customization:
./workflow/pages/default/custom_page1.html
In addition to the required page above, there are other pages which might be optionally used for integrating the workflow into normal end-user interaction with your site. These optional pages are:
./authentication/login/identity_source/identity_source_selection/default/combined_login_selection.html
You can find more details about when to use the optional pages in the sections below on workflow launch.
The following subsections give an example of how to update the page templates.
Creating the template page zip file
In this step, download the master theme template, overwrite those pages with the customised versions of pages associated with this article, then prepare the new zip file for configuring the new theme.

Creating new branding theme
In this step, create a new branding theme using the passkeyifa.zip page templates created in the previous step:
Import and configure flow
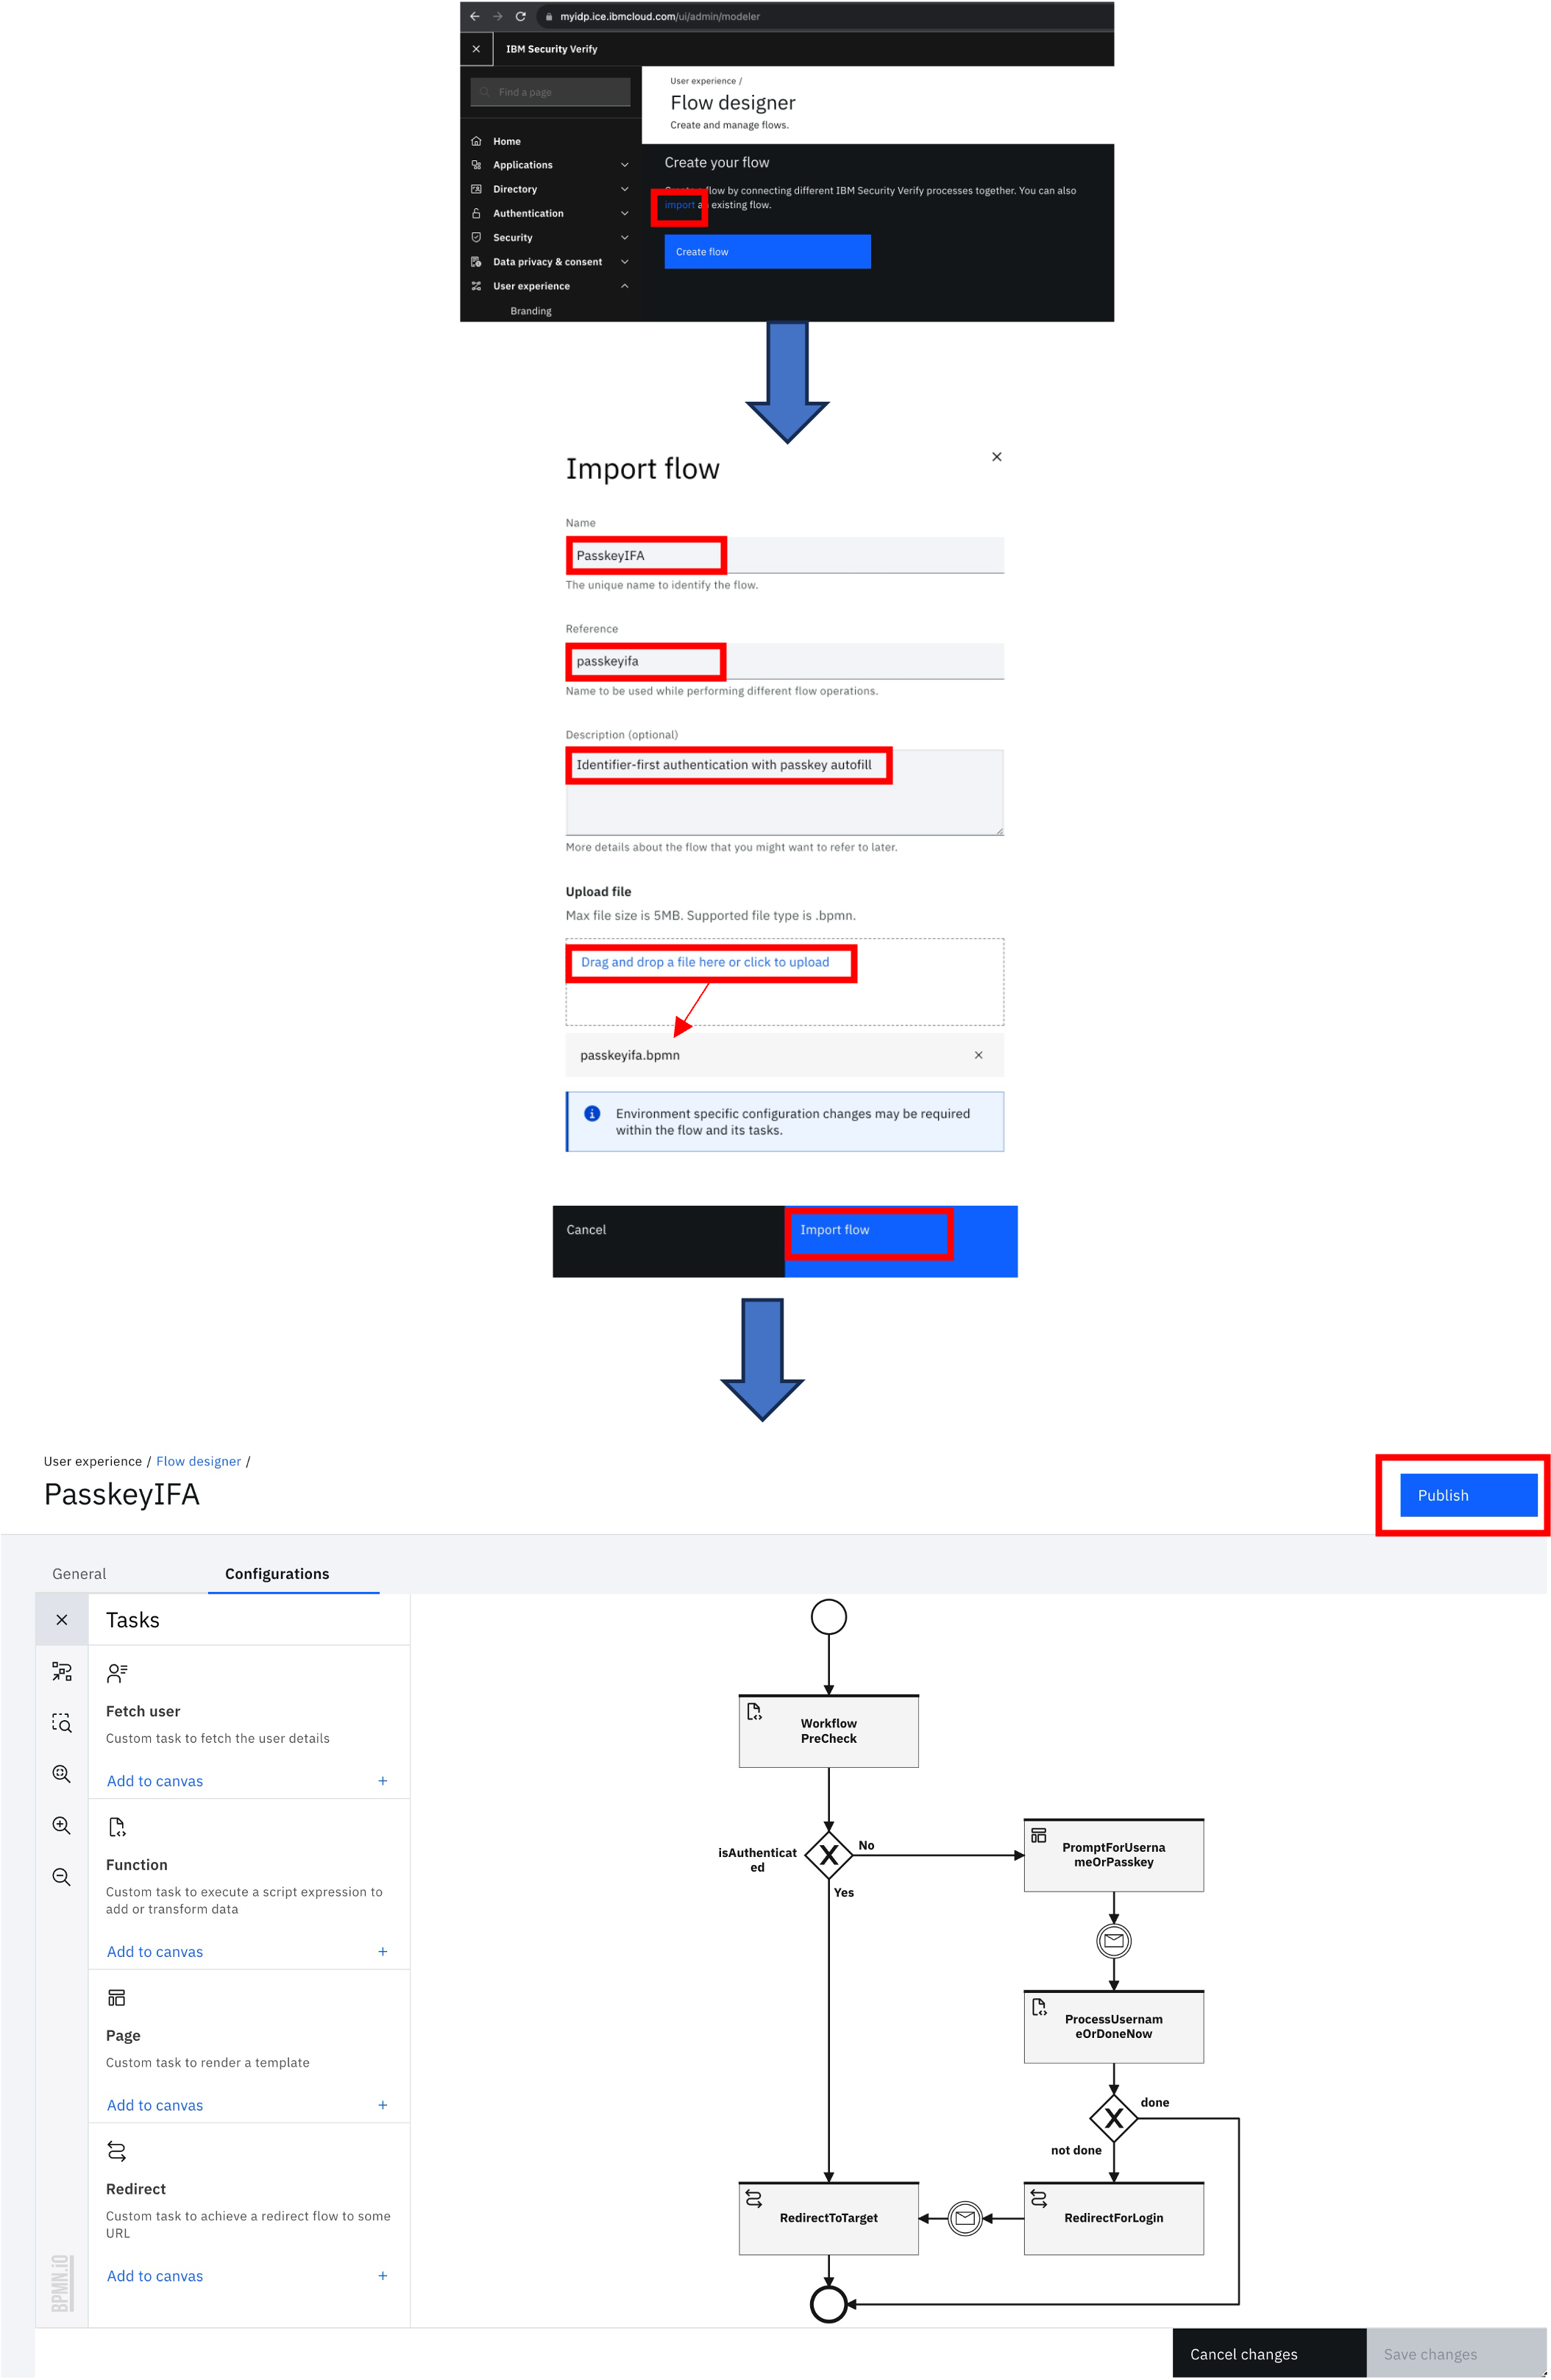
- Import the flow file
passkeyifa.bpmnfrom "$GIT_REPO/flows/ifa_passkey" in the Flow designer, following the instructions below:
- Themes for page tasks are not exported in flows. For each page task in the flow, edit the task and set the page theme to
passkeyifa:
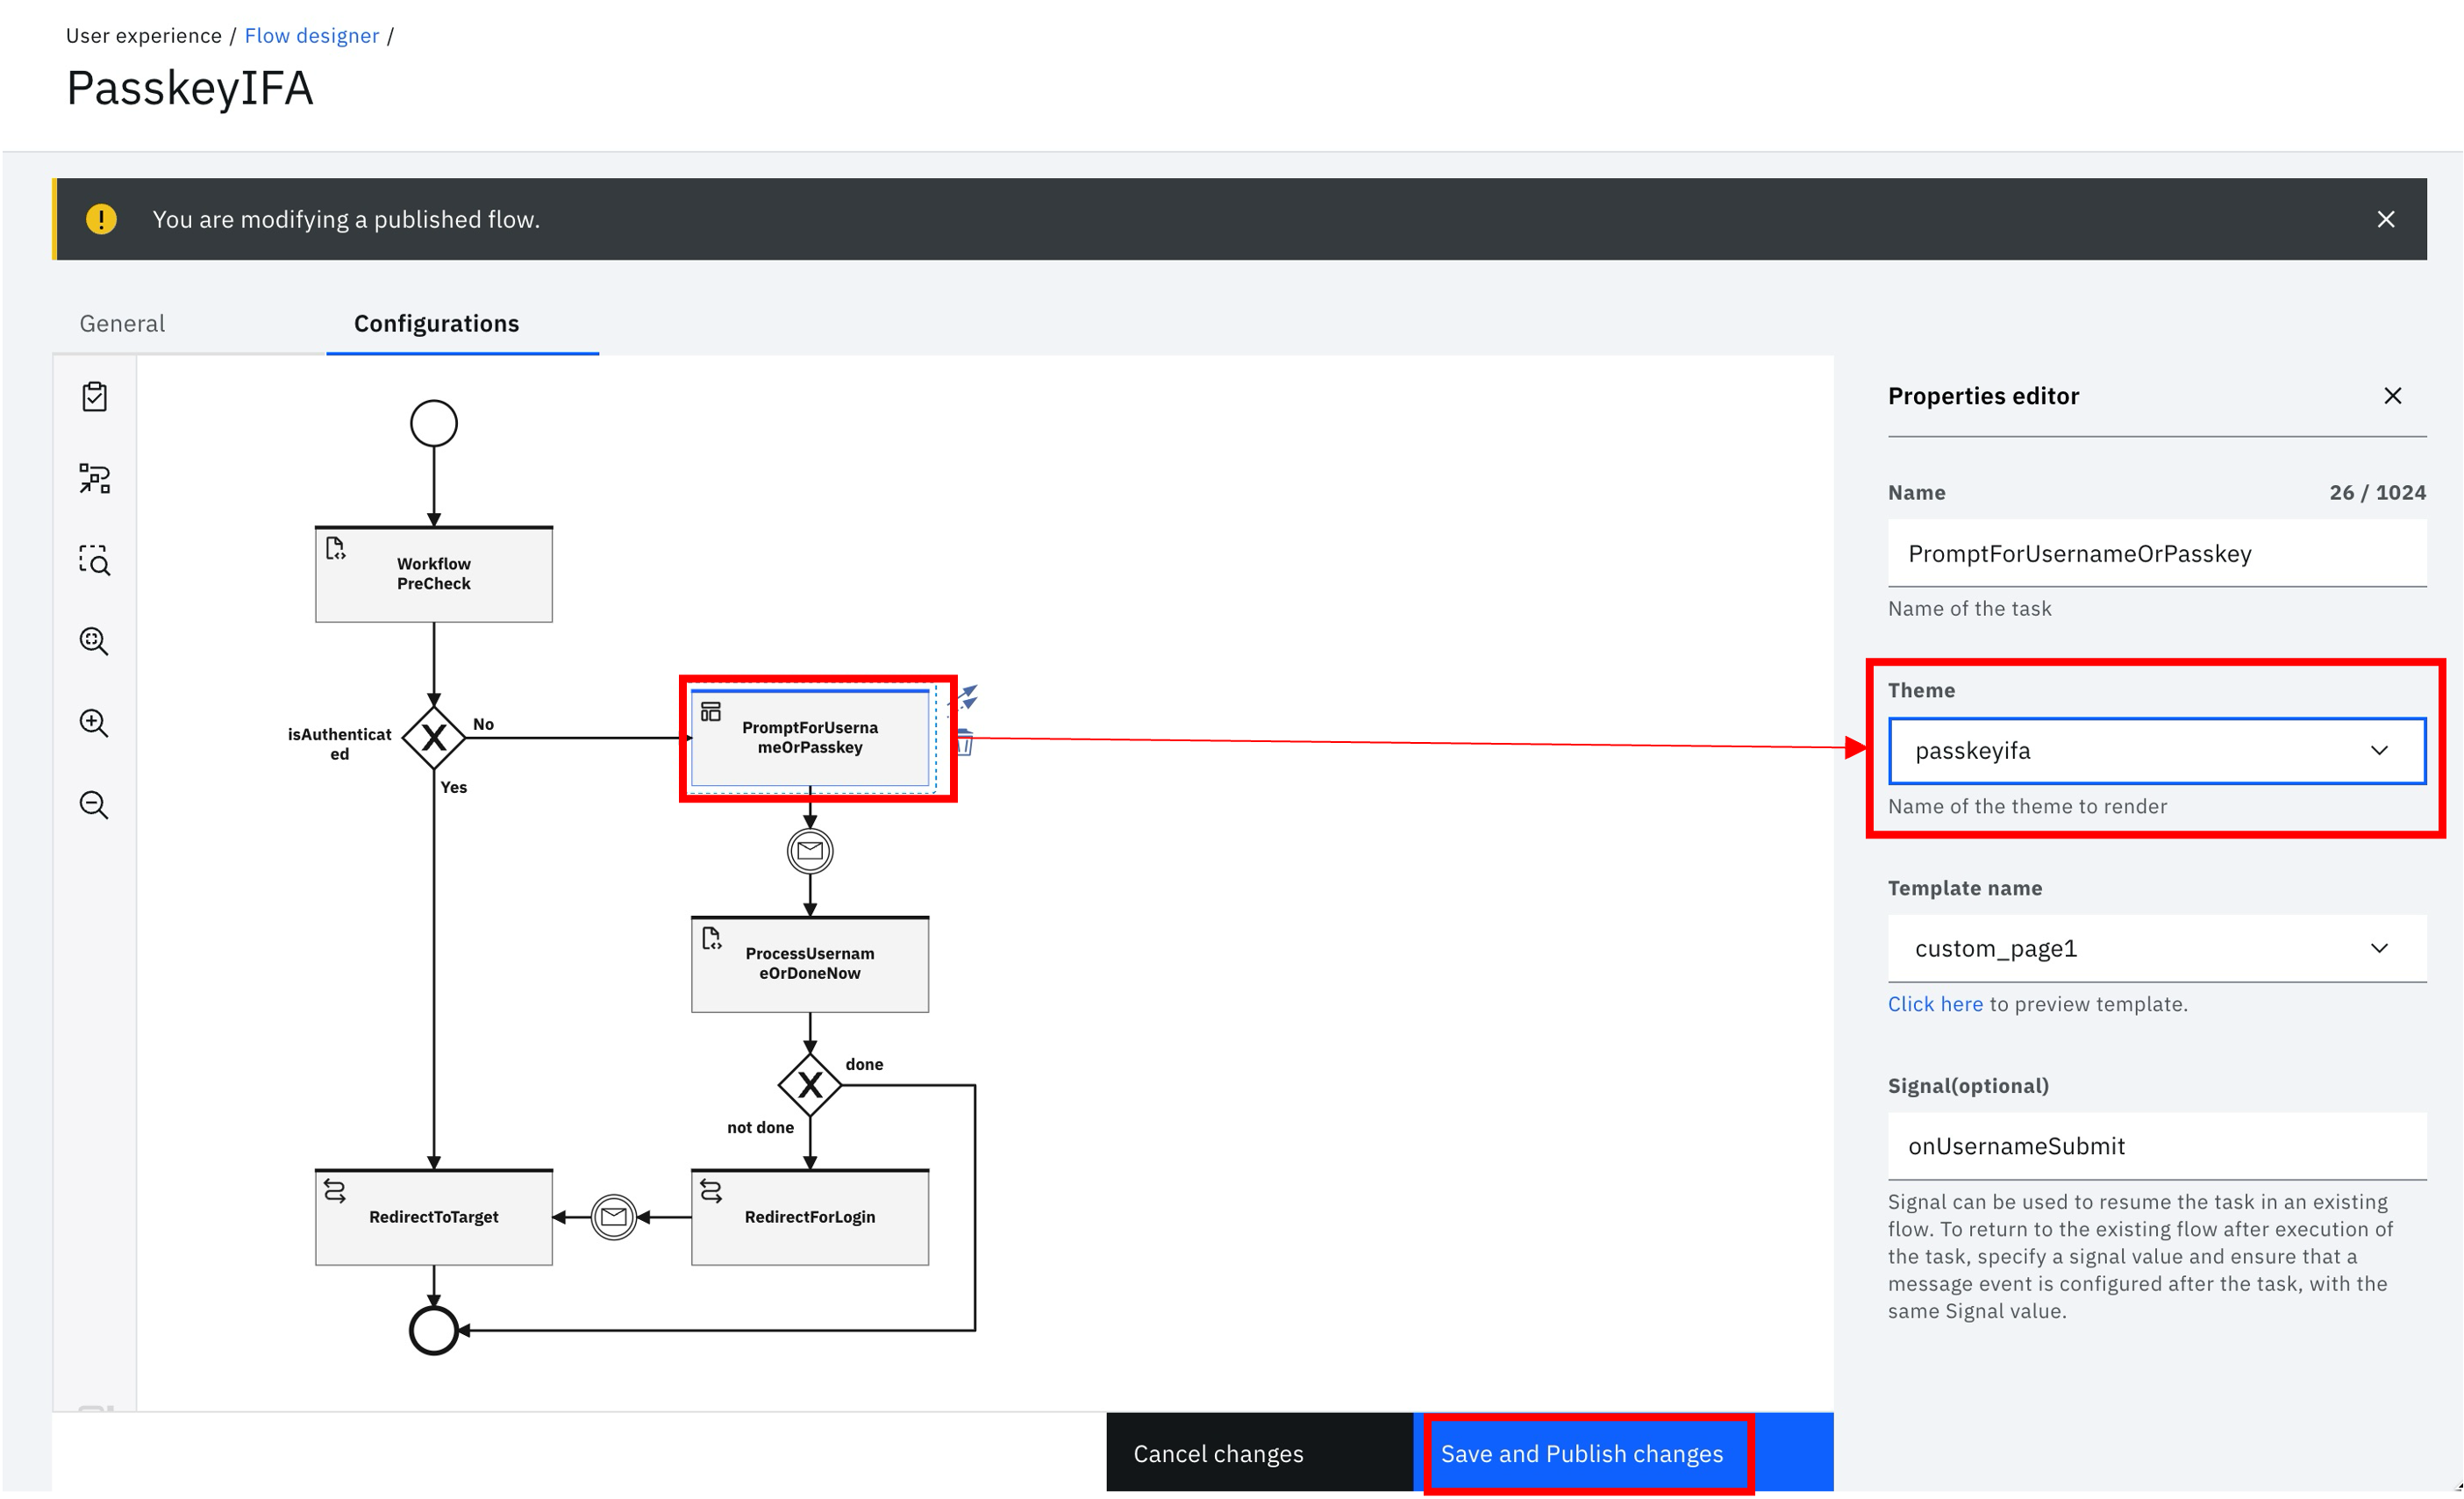
Save and publish changes to the flow after completing this task.
Note
Don't forget to publish the flow. This can (and probably should) be done after the steps here, however it must be published at some point before it will be accessible from a browser.
Launching the workflow
After the flow is published, it can be invoked and tested by using the launch link provided in the General tab of the flow designer:
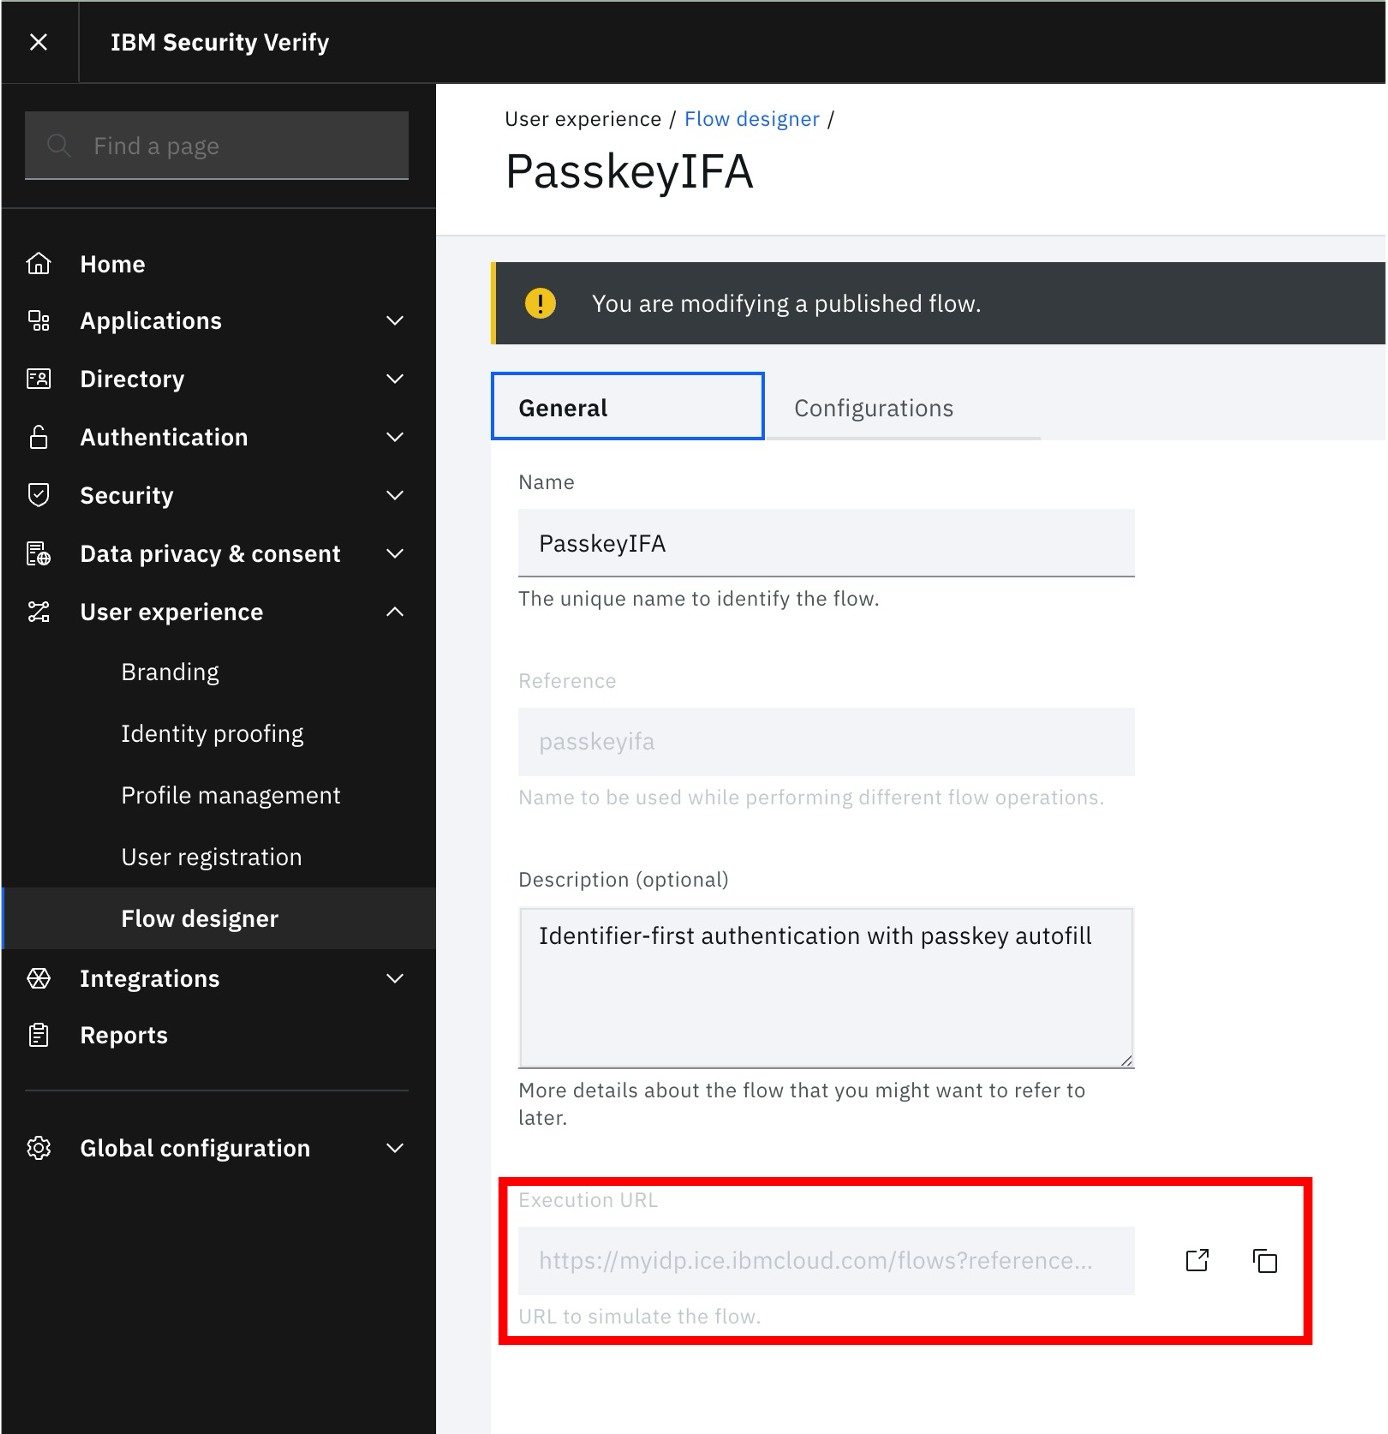
Given real users will not access the flow through the execution URL, this needs to be hooked up to the login process that a user would encounter in the course of normal end-user interaction with the site.
The suggestion here is to update the login page in the default template, so that all end-user logins would use the workflow as the preferred way to login.
To do this, update the combined_login_selection.html page in the default template, using the provided file:
./authentication/login/identity_source/identity_source_selection/default/combined_login_selection.html
If you take a close look at the contents of this file, you will see that we have enabled an escape route in case your workflow doesn't work properly. If you pass a magic query string parameter (normalLogin=true) to the login URL, the standard login page will be displayed. To do this, you would access the URL:
https://<your_tenant>/idaas/mtfim/sps/idaas/login?runtime=true&normalLogin=true
Again, you shouldn't need to do this, but its a stop-gap in case something goes wrong.
Runtime example
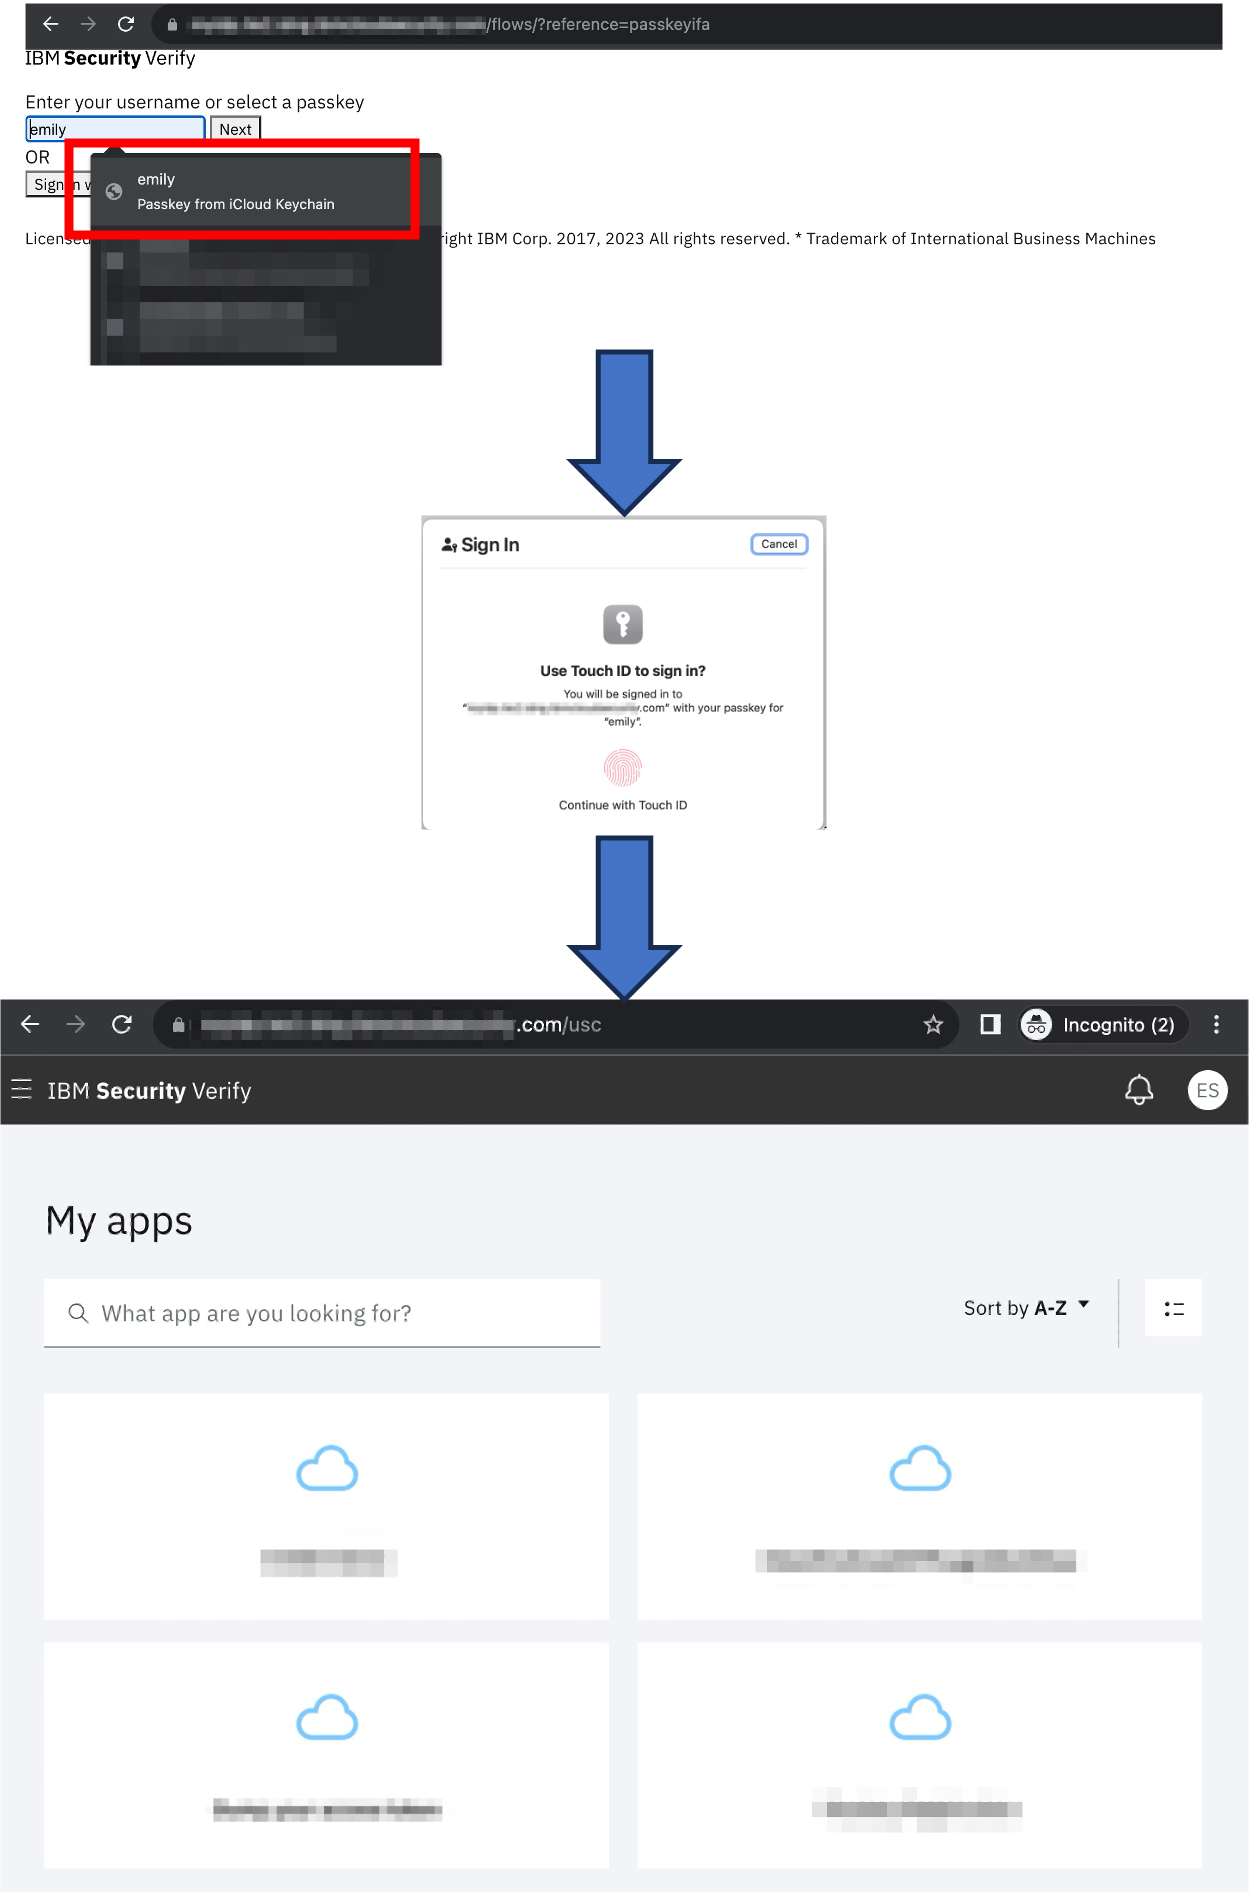
The screenshots below are taken from a runtime example where the flow has been integrated into the login page as suggested above.
After accessing your tenant, the browser is redirected to the flow, and a prompt for username is shown. In the example here, I login with a previously registered passkey.
Shane Weeden, IBM Security
Updated 7 months ago
