Authorization code with PKCE sample
Introduction
A simple way to integrate a web application with IBM Verify is to use the OpenID Connect Authorization grant type with PKCE (Proof Key for Code Exchange). To help you with this, a sample application is provided that uses the openid-connect library, so you can see how it works.
In this guide you'll learn how to configure a sample application from the developer portal.
Prerequisites
You need to have registered an application using the Developer Portal in your IBM Verify tenant. See Using the Developer Portal for details. During registration, pick Authorization Code as the grant type. Enable the "Require a proof key for code exchange (PKCE) verification" checkbox in the "Additional options" section.
You need to have Node.js installed on the system where the sample application is to be run. Download node.js.
You need to have a browser installed on the system where the sample application is to be run.
Download the sample application
-
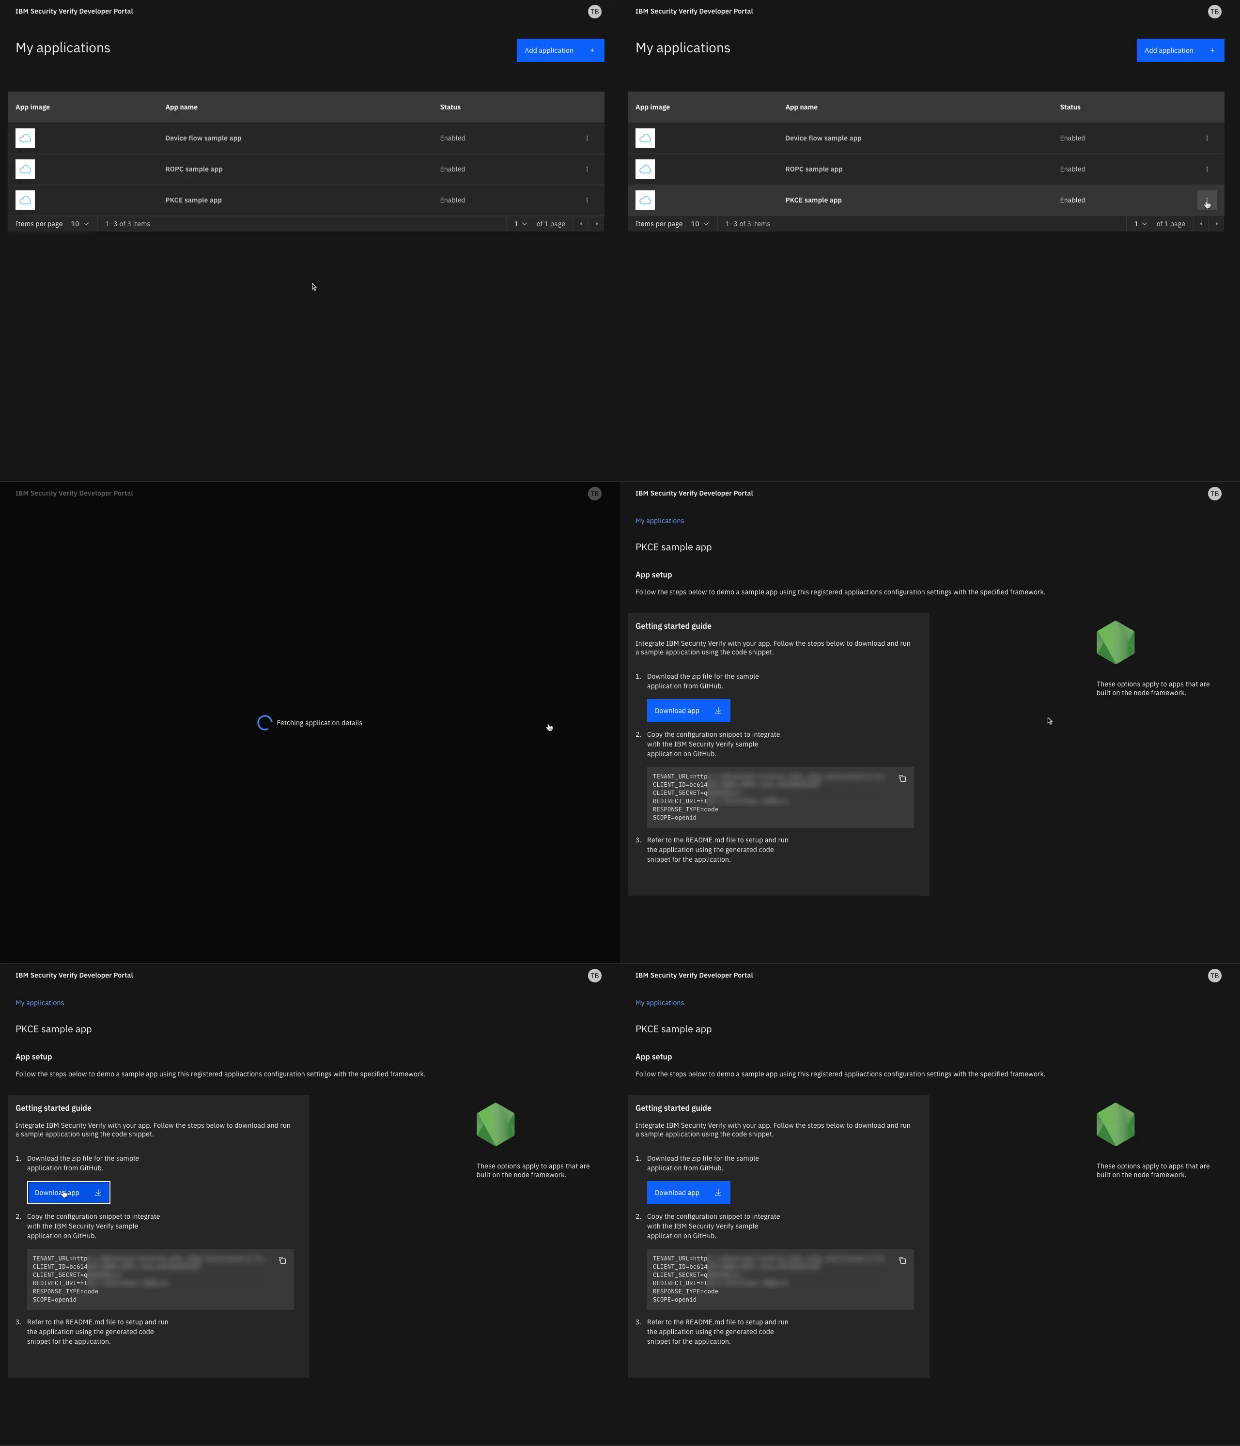
Access the Developer Portal from your IBM Security tenant. Usually, you can find the portal as a tile in the end-user launchpad.
-
From the My applications page, select your application and then click the App setup link that appears at the top of the details sidebar.
-
Select the node.js tile.
-
Select the Download app button. This downloads a ZIP file that contains the sample application.

- Extract the ZIP file to the location where the sample application is to be run.
- Copy the generated snippet from the developer portal UI.
- Create a .env file in the root of your project, paste the snippet provided and click "Save".
Install modules
In the directory that was created when you extracted the ZIP file, run the following command to install the node modules required by the sample application:
npm install
added 61 packages, and audited 62 packages in 2s

found 0 vulnerabilities
Start the sample application
In the directory that was created when you extracted the ZIP file, run the following command to start the sample application:
npm run dev
> [email protected] dev
> next dev

...
- ready started server on [::]:3000, url: http://localhost:3000
...
The application is now running on IP address 127.0.0.1 (localhost) on port 3000.
Test single sign-on
Using a browser on the same system where you have started the sample application, connect to:
http://localhost:3000.
After successful connection, you should be immediately redirected to the login page of your IBM Verify tenant.
Login to your IBM Verify tenant. You can use any authentication method available.
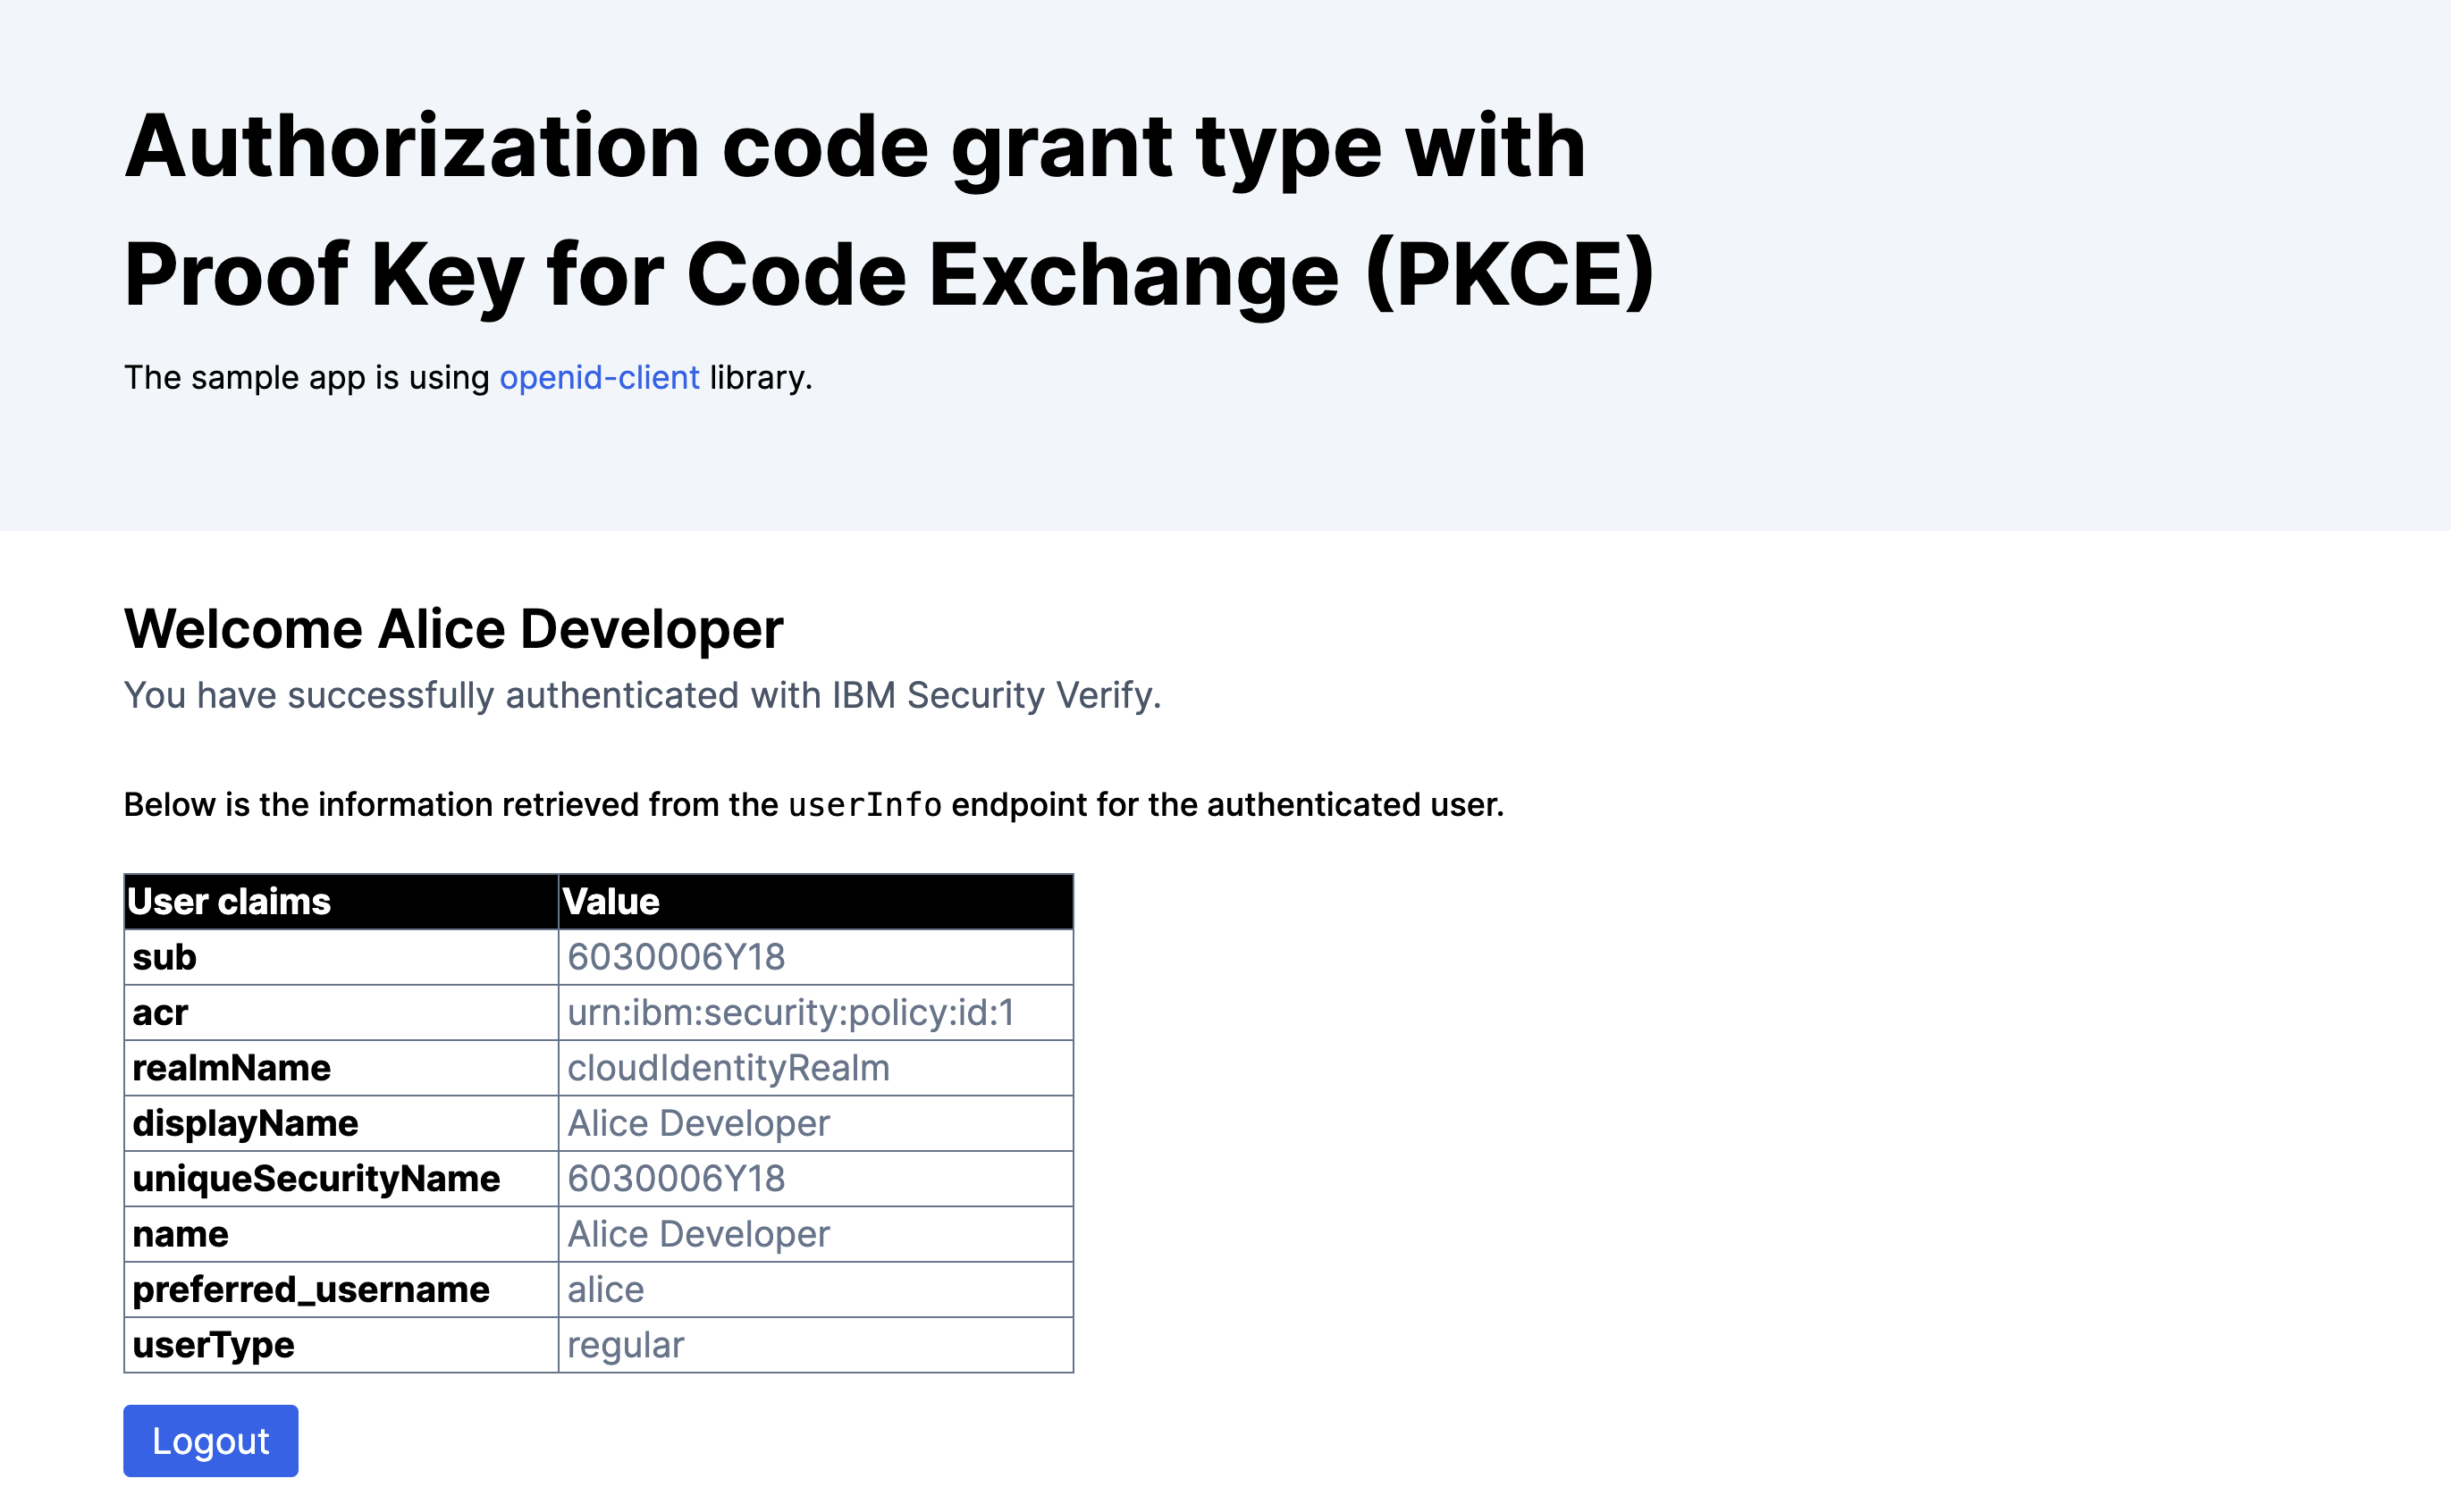
Once authentication is complete, you are re-directed back to your sample application. The single sign-on flow is completed to get access to identity information for the user that authenticated. The information received is displayed in the browser:

Available attributes
The attributes that are shared from your IBM Verify tenant to the application are controlled by the requested OpenID Connect scopes and by the configuration of the Developer Portal (which is set by your tenant administrator).
If you want to receive additional information, try adding additional scopes to the .env file of the sample application:
SCOPE=openid profile email phone
Updated 7 months ago
